Condor – From Starting to Racing: A Brief Guide for Beginners

I’ve previously written about why Condor is a great practice tool for soaring pilots and recently I followed up with a tutorial for Condor pilots interested in joining multiplayer racing. Both assumed some basic level of familiarly with Condor.  This article is for anyone who would like some more basic help to get started.

Flying a Discus 2a during a multiplayer race at the border between Slovenia and Austria

What do you need?

Here’s what you need to get started:

  • A computer with a reasonable graphic card. (You do not need a high end gaming machine.)  Condor only runs on Windows but you can use it with a Mac under Bootcamp.  (That’s what I have).  You find the specific requirements here.
  • A decent joystick.  In my opinion, the best one for Condor by far is the Microsoft Sidewinder Force Feedback 2.  Other joysticks work but this one is the best.  It is long out of production but you can get one on eBay.
  • The Condor 2 software.  You can buy and download it directly from the source, or, if you’re in the US and would like to benefit from Paul Remde’s excellent support, you can buy it from Cumulus Soaring.  The standard version is perfectly fine but if you already know that you will want to fly a lot of different gliders, you can go straight to the Pro version.

In addition, although not necessary, I highly recommend that you get:

  • Rudder pedals.  This is particularly important if you fly (or intend to fly) gliders in real life because you will want to build the right muscle memory.  If you are not a real-life pilot you can use a twist joystick to control the rudder.  The ones I use are no longer available but any brand should do.
  • Infrared Head-tracking. This is huge because you control what you see on the screen by slightly moving your head.  Without it, you have to use the head switch on the joystick or your mouse to control what you see on the screen.  Neither of these options is intuitive and either increases your workload when flying. The head-tracker is expensive but hugely improves the experience. Before you buy it, check that there is no direct sunlight coming in from behind where you will be sitting when you use Condor.  Sunlight confuses the tracker and it will not work.
  • An external hard-drive to store additional sceneries.  There are dozens of Condor sceneries (landscapes) freely (!) available for most soaring areas around the world so you can fly in lots of great places!  These are very detailed and get larger and larger.  The biggest one is >200 GB.  And that is just one landscape.  I have a 3TB external hard drive where I store all my sceneries and I keep the software itself on the main drive of the computer.

If you want to go all-in on an immersive experience consider a VR headset.  Some people absolutely love them as everything is truly in 3D and you might forget that you are not in a real cockpit.  However, they are not for everyone. I have tried a headset and I much prefer the head tracking option and a regular computer screen instead.  (I find the headset heavy and uncomfortable, I do not like to have a screen directly in front of my eyes, and I like to be able to look at a print out of the task on a map while I’m flying.)  If you go for a headset, you will obviously not need an infrared head tracker.  Sunlight will be no issue for the headset.  Before you buy one, I recommend that you try one first.

OK, I have everything.  How do I set it up?

Setting up Condor has become fairly straightforward.  Just follow the installation instructions in the manual.

Ridge running in Slovenia during a multiplayer race. You can see two gliders ahead and two just behind on the screen of the flight computer.

Condor comes standard with a scenery for Slovenia (that’s where the company is based).

If you want to install additional sceneries (aka landscapes) go to the website of the European Condor Club, then go to the Landscapes  tab, and click on the link to install Condor Updater.  This is an excellent tool that will automatically install landscapes for you.  (This used to be a complicated process and is now totally intuitive.) You can see that there are many dozens of landscapes available already and additional ones are being added all the time.  (These are created by volunteers and are offered free or charge.  It takes a huge amount of effort to build one. Consider donating a little bit of money to the scenery creator if you find a scenery that you like a lot.) Also, do consider subscribing to the club.  This will give you more bandwidth on the server and reduce the time it takes to download sceneries.

You do not need to install additional landscapes before your first flights but once you’re hooked you will want to try other top soaring locations such as New Zealand, the Alps, the American West, South Africa, or the Andes, just no name a few.

After installing the software, and before you can fly, follow the instructions in the manual for “Setting Up Condor”.  The Graphics option allows you to tailor the detail to the power of your computer.  The better your graphics card and processor, the higher level of detail you can pick.  You may have to experiment a little bit.  If the software runs sluggishly, come back to this screen and reduce the level of detail.  If it runs perfectly fine, you can try to increase the level of detail.

This is the Setup Graphics Screen. You can see that my 2016 iMac (running Windows under Bootcamp) is perfectly capable of handling a high level or detail.

Work your way through each of the tabs.  I suggest you leave the default settings in most cases until you find that you really want to alter anything.

The main exception to that recommendation is the Input Tab (see below).  There you will want to make sure that you click “Assign Controls” (on the right side under “Options”) and program the buttons on your joystick.

The following screenshot shows the “Assign Controls” dialog.

Before you start to change things around, think about what functions you really want to have on the joystick vs. which ones you want to keep on the keyboard.  This depends in part on your joystick and how many buttons it has.

I recommend that you prioritize the buttons based on how often you expect to change things during a flight.  E.g., retracting/extending the gear, releasing water ballast, or using the wheel brake are all things that I typically only do once during a flight and which I have kept on the keyboard.  On the other hand, things that I do most often during a flight I have moved to the joystick, this includes: moving the flaps up or down, centering the trim, moving between screens on the flight computer,  zooming in and out on the flight computer, toggling the vario between lift/and cruise mode, and operating the spoilers (I use a lever for that on the joystick).

If you’re just starting out with Condor and are beginning with School or Club Class gliders (e.g. no flaps) your list of things that you do most often may be a bit different from mine.

Some things can be a little confusing.  E.g., some gliders have stick trim while others have a trim handle.  (The same is true in real life!)  There are different commands based on what trim the ship has.  If something does not work quite as you would expect it to, chances are good that you find the answer on the FAQ page.

When you’re done with the setup, I recommend that you make a list of the keyboard commands on a sheet of paper.  Appendix 1 in the manual provides a list of the default commands.  Be sure to note which ones you have reprogrammed!  There are so many commands that you may find this daunting.  In practice you won’t use all of them and you will soon have memorized the ones you need.

I’m done with the setup.  How can I get in the air?

Well, it is important to know how gliders work.  If you’re a real pilot this part will be fairly easy but there are still things you may find challenging at the beginning.  (E.g., I find aerotowing and landing to be harder in Condor than in real life.)

If you already know how to fly a glider you can jump right in.  On the main menu you find a button for Free Flight.   This will take you to the Flight Planner and the following window will pop up.

In the flight planner (look at the tabs on top) you set up a task (the route you plan to fly), determine key weather parameters, and pick a plane from the hangar (and set ballast and CG position).  Look at the “Free Flight” section in the Condor manual to learn to use the flight planner.

Under Notam you can pick other options related to your flight.  E.g., you can select between aerotow, winch launch, or airborne start (if you want to fly right away and not spend your time with launching).  Also take a look at the Realism settings.  If you’re only starting out you may want to enable thermal helpers for your first few flights.  These will miraculously show you where the thermals are.  There are also some other useful miracles for beginners such as plane recovery, height recovery, and mid-air collision recovery.  (In online races miracles are usually not allowed or their use is so heavily penalized that you cannot compete if you use them.)  You may not think you need a magic wand.  By all means try without one first.  However, you may soon find out that it can be quite handy when you’re just starting out!

If you are not a real glider pilot, your learning curve will be longer but you should be able to learn everything you need to fly Condor by working your way through Flight School.  You can find a link for Flight School on the main menu.  Start with Basic and work your way through all the lessons.  Flying is not easy but Condor makes the learning process as accessible as possible.

Even if you master Condor you will of course still need real life flight lessons before you can fly a real glider, but the chances are good that you will need fewer of them and your training will be less expensive.  Especially if you take the Condor lessons seriously and avoid  taking any shortcuts.  (E.g., if you’re starting in Condor with an eye towards learning to fly in real life, please use rudder pedals from the beginning.  Coordinating the control inputs from your arms and legs correctly is absolutely critical and you would have to unlearn muscle memory later and this could make your real flight lessons longer and more frustrating.)

I think I have mastered the basic flying skills in Condor. What should I do next?

Once you have worked your way through Flight School (or have otherwise mastered all the skills that are covered there) you should be ready to fly cross country.

Pre-start gaggle before a multiplayer race from Omarama, New Zealand.

Just like in real life, a great way to test your skills is to earn your soaring badges.  The Condor Club website makes this easy to do.  Go to Badges and Diplomas and fly the suggested tasks that are listed there.  Work your way through to earn your Silver, Gold, and Diamond Badges.

(Tip from a recent Silver Badge pilot: not all planes are allowed for all badges. Read the fine print to avoid disappointment.  E.g., for the Silver Badge you must fly a School Class glider without PDA (i.e., you must navigate by compass and ground features although turn point helpers are allowed – press “J” to see them) and you have to press S to take turn point pictures over your wing when you are in the turn sector just like it was done in the olden days (before GPS). )

Once you have done that (or you are at least confident that you can do it), congratulations!  You are ready for the pinnacle of Condor fun: multiplayer online racing!

There are a lot of online contests on offer.  The best way to check what’s available and suitable for your time zone is on the Competitions tab of the Condor Club.  Some races are more geared towards beginners while others are more suitable for experts.  Read the descriptions of the race series you’re interested in – they usually provide some clues as to who they are seeking to attract.

The Condor community is very friendly and welcoming to newcomers.  You can join a race even if at first you don’t want to fly the task.  It’s cool to learn some gaggle skills while flying with so many other pilots in the start area.  There’s no need to feel intimidated.  However, if you are, a totally “private” way of flying against other pilots exists as well: you can download a particular task from any of the race series and fly that task by yourself.  And you can even download the flight traces of others who have flown that task and set them up as “ghosts”.  This way you can see them on your screen while you are flying the task.  This is also a great way to practice getting faster.  Download the traces of a few good pilots and try to follow them around the course.

But sooner rather than later you will want to start to join your first live multiplayer races.  Whenever you’re ready, read this tutorial to shorten your learning curve.

Have fun!  I look forward to seeing you on the Condor race circuit!


PS: Here are some additional resources to find more information about Condor:

Condor Racing Tutorial for Newbies

As most of our gliders are grounded due to the Coronavirus pandemic, lots of pilots are flocking to Condor to spread their virtual wings and get their fix of soaring.  You can have a good time flying by yourself but the real fun starts when you fly with others.  And the pinnacle of fun is multiplayer online racing.  The racing environment is very welcoming and friendly but the learning curve can be steep – especially at the beginning.

Big gaggle before the start of a Condor multiplayer race during the “US Nightly Soaring” contest on March 27.  Not only can you fly with top pilots including National Champions and World Championship attendees, you can also enjoy the latest racing machines. Pretty cool!

Helping you to shorten the learning curve is the purpose of this article.  It assumes that you are already a proficient glider pilot (whether in Condor, in the real world, or both), that you are acquainted with the concepts of cross-country flying,  but that you have no or only limited racing experience.  You should also be familiar with the controls in Condor and make sure you have a suitable computer setup.  (Read this article to learn more about Condor – at the end you will find my recommendations for hard- and software.) Hopefully the following tips will help and encourage you join the fun of multi-player online contests.

The Basics

The purpose of racing is obviously to go fast.  In Condor, most races are “racing tasks”, i.e. the pilot who can get around a set course the fastest, wins.  Most of the scoring is based on the familiar 1000 pt model used in real world FAI gliding contests.  (There are exceptions such as “Grand Prix” style races and Assigned Area Tasks but both are rare.  This article focuses primarily on FAI racing tasks and what you can do to try to minimize the time you need to fly around the course.)

First, remember what you learned in your real life training about finding lift because Condor tries to simulate the real world (and does so quite well).

Ridge lift obviously forms on the wind-ward side of ridges and the strength of the lift depends on the strength of the wind (stronger is better), the angle between the wind direction and the ridge (perpendicular is best), the shape of the ridge (steeper is generally better), and your position relative to the ridge (all else being equal, the best lift will be near the top of the ridge). (Here is more information about ridge soaring in general).

Thermal lift is stronger in the mountains than over the flats. The best lift will be near the top of sun-exposed slopes, especially if the wind direction is the same as the direction of the sun.  If you look for lift under clouds, the best lift will be on the windward side of the cloud, especially if that is also the sunny side.  Conversely, be careful looking for lift under clouds in the lee of mountains, especially if you’re also in the shade.  Such clouds rarely work and if they do, the lift may only be close to cloud base.  Always, always pay very close attention to the wind and the sun.  Also bear in mind that clouds with a higher cloud base tend to indicate stronger lift than clouds with lower cloud bases.  And newly forming clouds tend to provide better lift than aging clouds.  (Did I say it was just like real life? It is.)

Wave lift forms in the lee of mountains under certain conditions.  A detailed explanation would go beyond the scope of this tutorial but again, remember what you learned.  (Here is more information about wave flying in general.) Most of the Condor races tend to be primarily a mix of ridge and thermal flying.  It is not very often that wave is a big factor.

Condor does not (yet) model convergence lift so this is one complexity less than in real life.

To race effectively, you have to first internalize these basics because only then will you have sufficient mental band-width to concentrate on all the other decisions you have to make.

Preliminary Route Planning

Just as in real-life you should plan your flight ahead of time.

First of all, you should read the briefing that is automatically emailed to you when you sign up for a race.  If you have a printer, I highly recommend that you print out the map of the task that comes as part of the briefing.  (Depending on the contest, the full briefing including the map may be available right away, or it might only become available 15 minutes before the server starts. In either case, print the map.)

The first thing you should do after printing the map is to draw a wind arrow on the map and take note of the wind strength. You cannot plan your flight route without that.  You should also take note of the maximum start height and any unusual turn-point properties.  (E.g., sometimes a minimum or maximum height is stipulated for a particular turn point, and sometimes a minimum height is stipulated for the finish.  You will get mad at yourself if you overlook one of those things. Ask me how I know.)

The next thing you should do is plan your intended course line.  Just like in real-life the biggest factor determining your speed is how effectively you take advantage of “energy lines”.  E.g., you want to fly in ridge lift wherever possible.  Even if the wind is so weak that you can’t climb, flying along ridge lines will help you sustain altitude and you will need to make fewer stops to climb.  And even if there is no wind at all, remember that the air will move up along sun-facing slopes.  So fly along such slopes if you can, not in the middle of the valley!  Remember that there will only be sink in the lee of any slope, so avoid those areas as much as possible.  If your route must take you through the lee to reach a turnpoint, anticipate that you will lose a lot of altitude while crossing those areas.

As you plan your route, pay very close attention to transitions between different parts of the task.

Your first transition typically comes right after the start because the start altitude is often well below cloud base.  Think about how you get going efficiently.  E.g., can you glide straight to a ridge or will you have to take a thermal first?

When you transition from the flats into the mountains, think ahead where the most likely spots are going to be that will allow you to gain the altitude you need to get close to the ridge tops.  (You do not want to find yourself near the bottom of a steep valley – you will lose a lot of time to dig yourself out from there – it you’re even able to do it.)

It is crucial that you identify any upwind transitions across mountain ridges.  I usually mark the altitude of the ridges (or passes) that I have to cross on my map and I estimate how high I want to be at the most logical point to climb before the transition so that I have enough height to get across.   There is nothing more frustrating than to approach a ridge from the lee and then have to turn around at the last moment.  You can easily lose 20-30 minutes with one such mistake.  (Or you might even crash.) If you’re having trouble judging how much altitude you need to make it over a ridge, this is a skill you can practice.  Daniel Sazhin suggests some specific Condor exercises for this.  You can find them here.

You should also think about transitions from areas with stronger lift (i.e. mountainous terrain) into areas with weaker lift (i.e. flats).  If you have been driving hard because the conditions were so strong it is very tempting to keep pushing as conditions deteriorate only to find that you get stuck and have to take a slow climb.  Thinking ahead pays off.

If there is significant wind, you should also consider the impact of the wind on the altitude at each of the turn points, especially on thermaling tasks.  Since you will drift with the wind when you’re circling you want most of your circling to happen when you are on a downwind leg and minimize any circling on upwind legs.  That means, all else being equal, you should round downwind turn points high, and upwind turn points low.  I usually write “Hi” or “Lo” next to each of the turn points on my map.

Finally, pay attention to the final glide.  This is just another special transition.  Think ahead as to where the final glide is likely to start.  E.g., if the finish is somewhere in the flats where the lift is weak you will want to start the final glide in an area where the climb rates are likely to be better.  Carefully look for terrain obstacles on final glide or the likelihood of sink if you have to fly in the lee of mountains.

Not all of the things mentioned above are equally important for every race.  Below is the map I marked up in preparation for the race on March 26.  With a bit of practice it only takes a few minutes to prepare.

You can see the start and finish is at the right edge of the map. The start sector is shown in green. I noted “14” in the start sector because the maximum start height for this task was 1,400 m. (I fly with my instruments set to metric but you can use Imperial measures as well.) My wind arrow is at the bottom. “19” denotes the average wind speed in kph. The black line is my intended course line. You can see that I planned to exit the start sector at the southern-most corner so I would be able to get right onto some of the low-lying ridges. (I wasn’t sure how well they would work, but at least they would help sustain my flight.) You can see how my intended course line follows the ridges along the entire first and second leg of the flight. Early on the second leg I marked “Hi” because there was going to be a transition to higher terrain ahead and I did not want to get too low in that area. (This may have been a bit too conservative as the winners seemed to gain on me in this area.) Just before the second turn point I marked “FG!” for Final Glide. This means, I intended to get enough altitude in this area to glide from there all the way to the finish. (The reason is that the area ahead was in the flats with weaker conditions. Also, the third leg was into a headwind and it is never a good idea to thermal on an upwind leg if it can be avoided.) The final leg is once again drawn to take advantage of small ridges to increase the average speed to the finish line.  (At the top left of the map, I marked SW: 20 min to indicate that there would be a 20 minute start window. I did not write down the settings for thermals and wind but I had looked at them carefully before the start.  If you’re just starting out it may help you to write those down. More about this in the next section below.)

Other Pre-Flight Decisions

As soon as the “join time” begins, you should connect to the server.  This will start Condor and load the task.  However, don’t jump into the flight right away!  Instead, take a close look at the Flight Planner where you find additional information about the day’s conditions.  Reading this is critical to finalize your route planning and to make decisions about the glider you intend to fly (what glider, how much ballast, and CG position).

In particular, pay close attention to the “Weather” tab and each of the four sub tabs: wind, thermals, wave, and high clouds.  E.g., in addition to wind strength and wind direction, you will learn how much variability there will be for each of those factors.

Take a close look at each of the 4 tabs in the Flight Planner under “Weather”. The wind is obviously one of the most critical factors affecting the flight.  If there is a significant variation in wind speed, assume that the wind will be stronger at altitude and weaker near the ground. In general, the wind in Condor is more consistent than in real life, which makes ridge running more predictable.

On the “Thermals” tab you can find crucial information about the presence of cumulus clouds, the height of the cloud base, the strength and width of the thermals, the overall thermal activity, how much activity you can expect in the flats, and if there will be thermal streets.  Also note the variability of each of these parameters.

This screenshot shows the “Thermals” tab. In multi-player contests you obviously must not change any of the settings but it is critical that you read them carefully.

E.g., if there is high flats activity, if the thermals are wide and well-marked, and if streeting is high, you can expect that you will be able to do a good amount of dolphin flying, especially on task legs that are well aligned with the wind direction.  Your risk of having to land out will be very low.  On the other hand, if you’re dealing with blue thermals, the flats activity is low, and the thermals are narrow you can anticipate that any section over flat terrain will be very challenging.  In this case make sure to gain as much height as you need before you enter any flat section and fly more conservatively. Take a look at the wave tab to see if you should expect wave activity in the lee of mountains.  This is important to note even if you don’t plan to use wave lift during the flight because the presence of wave may cause some unexpected sink, especially if the wave is not marked by lenticular clouds.

The “High clouds” tab shows how much cirrus cover you should anticipate on the flight.  (In the real world, cirrus will cause thermal generation to be suppressed although I am not 100% sure to what degree this is true in Condor as well.)

Once you have taken note of these parameters and determined how they affect your route plans it is time to go to the “Hangar” tab and pick your plane.

If there are no handicap rules, pick the highest performing plane that is permissible by the race.  You can compare the performance of different gliders by looking at the polar graphs under “Settings” on the “Hangar” tab.  You can also look at prior contests that were held for the same plane class and see what gliders the winners used.   If there is a handicap in place the decision gets more difficult and depends heavily on the task.  E.g., if maneuverability is critical such as when having to thermal close to rock faces in high mountains you will want a different glider than when there are vast stretches of weak lift where you want maximum glide performance.

Ballast or no ballast?  Almost all Condor races that I have ever flown were won by pilots who flew with full water ballast.  I would say, definitely start the race with full ballast and only drop ballast if you can’t average more than 2-3 kts in climbs and there isn’t much ridge flying involved. If you drop ballast, it’s best to do it early in the race, ideally at the end of your first cruise / the beginning of your first climb.  If you hang on to full ballast for most of the race, it makes no sense to drop it towards the end because you will miss it on your final glide.

With respect to setting the CG there are many different opinions.  In my view, the overall performance difference of different CG positions is probably fairly minor.  In general, gliders tend to circle better with the CG aft and run better with the cg forward but I doubt that this is a big factor for the overall race outcome.  Experiment with different CG positions and find out what you like.  I tend to fly with a medium aft CG unless the task involves mostly ridge running and/or significant turbulence (you can see this upfront in the flight planner) in which case I put the CG forward.

On the “Hangar” tab you can pick your preferred glider. Then go to the “Settings” sub-tab and move the slider for water ballast. As you do so, you can see the effect this has on the glide polar. In most cases you will want to fly with full ballast. Then use the horizontal slider to adjust the CG position backwards or forwards.

The Start

Once you’ve finished the route planning and picked your glider, ballast, and CG it’s time to join the flight.  Most Condor races start “airborne”, i.e. you won’t have to aero-tow or winch to get up.  This is to safe all participants a lot of waiting time before the race gets underway.

At the left top of the screen a count down will tell you how much time is left for others to join the game.  Once the count down reaches zero there is a short delay until the start gate opens.  The delay is usually a few minutes and the duration is specified in the briefing email.  This is then followed by the start window time, i.e., the length of time that the start gate remains open.  This is also specified in the briefing email.  It could  be as long as an hour or as short as one minute.  If there is a “Regatta” start, the clock starts ticking for everyone as soon as the window opens.

Use the time between joining the game and the start of your race to get a feel for the day as you would in real life.  Sample a few thermals to get a sense of the thermal strength so you can set your MC to what you expect to achieve at the first thermal out on course.  If you have the time you may even fly out on task for a little while to check the conditions ahead, or, if the start is also the finish, you can take a closer look at the terrain on final glide.  The briefing may have specified a particular turn direction in the start area – it is usually left turns only. (Out on course you can turn in any direction unless you join someone else in a thermal – in that case you must circle in the same direction as those who were there before.)

Also, remember the maximum start height from the briefing.  The start sector on your Condor flight computer (typically a half-cylinder) is marked in red before the task opens.  Once the start is open and you are in the sector, the sector will turn green as soon as you descend below the maximum start height. Your race time will start running as soon as you exit the sector (except for Regatta starts).

Before the start you should decide where you want to cross the start line.  You should have already considered this in your route planning (based on wind direction and terrain) but other factors may come into play (such as the look of the thermals out on course).

Another tactical decision is to pick the right start time.  If you are the first to start you have no-one ahead of you to mark any thermals for you.  Instead, you will be marking thermals for everyone else.  On the other hand, if you start last and can’t catch up to anyone else you will have a lonely flight and can’t take advantage of other gliders at all.  So if you’re a relative newbie it may be a good idea to start early (although not first).  This way you have someone ahead of you and you will be able to take advantage of the fastest pilots as they catch and pass.  It’s a good idea to know who the fastest pilots typically are as this gives you a better idea who you may want to try and follow for a while. The fastest racers will often start at the back because this means they can use others ahead of them as thermal markers.

When it’s time to start, you will want to cross the line with maximum energy.  This means, the ideal start is at Vne and just below the maximum start height (obviously with flaps fully negative).  Doing so takes some practice. Condor is not very forgiving when you fly too fast.  You will flutter and your ship may break apart.  So be careful!  There is a good reason this type of start is no longer used in real glider contests! I usually approach the start line from a few miles back, close to VnE and I control my height with the spoilers.  (In real life you do not want to open your spoilers at VnE, so in this respect Condor is a little more forgiving.)  As soon as you cross the start line, ease the speed back to your intended speed to fly.  A common mistake is to fly too fast for the first few miles and unnecessarily destroy energy.

On the flight computer you can see that the start sector just turned green as I descended below 1500 meters (the maximum start altitude for this particular task). I am just about to cross the start line. You can see I’m a little slower than I should be. The ideal start is at VnE and just below the maximum start height.

If you didn’t like your start you can go back and restart as long as the start window remains open.   The last start counts.

Out On Course

Once across the start line you constantly have to make tactical decisions – just as you would in real flying.   How fast do you fly?  What climb rates will you accept?  What route do you pick above the terrain?  Do you divert from course to get to an attractive cloud or do you go straight?  What is the right altitude to leave a particular climb?  Your speed over the duration of the race is ultimately a function of all these decisions.

Some specific things you want to consider: not all climbs are created equal.  You only want to stop for the best ones unless you are so low that you have no choice.  How can you tell which ones will be best?  Again, consider the terrain, the angle of the sun, and the wind:  the best climbs will come off wind-ward, sun-facing slopes.  Clouds with high bases are better than clouds with lower bases.  New clouds are better than aging clouds.  Decaying clouds often only have sink under them. Watch the development of the clouds and get a feel for the cycle time.  If a cloud off in the distance looks great, it may be in decay by the time you get there.  Look for newly forming clouds as they often work best.

Centering lift takes time.  You don’t want to do it too often.  Beginners often try to take every climb to stay high.  This is inefficient, not only because you’re taking climbs that are weaker than average, but also because you have to center more often and each time you center you’re wasting time.  If you can anticipate where the best lift under clouds can be found, you will become more efficient because you will approach slightly to the side of where you expect the core to be and decisively turn the correct way.  Even better is the situation when other gliders are already centered in a thermal ahead and you can see them go up quickly.  If that’s the case, approach on one side of the circle and then turn so that you are directly underneath them.   (Make sure to observe their direction of turn as you approach – you must turn the same way for safety reasons.)

While taking too many climbs is inefficient, getting too low is inefficient as well.   First, you may be forced to take a below-average climb because that is all you can find within your remaining glide range, and second, thermals tend to be weaker, broken, and narrow as you get closer to the ground. (Once again, this is no different than in the real world!)  Furthermore, as clouds age, they may still indicate lift up high, but there may no longer be any lift coming from the ground.  So the lower you get, the less you can trust the clouds.  For all these reasons, almost all soaring literature will advise you to stay within the “working band” – this is the altitude band in which the average climb rates tend to be best.  Contest soaring – especially thermal contest soaring – is a game of chance and you have to constantly assess uncertainties and probabilities as you examine the sky ahead.  Which clouds look good?  How many of them are likely to work? What are the odds that they still work when I get there? What are the odds of new clouds forming or finding lift in the blue? If you’re interested to learn more about this fascinating topic, I recommend Daniel Sazhin’s articles “Soaring is Risky Business” and “Modeling Gear Shifting“.

If you are on a cross-wind leg and you anticipate the need to thermal stay on the upwind side of the direct course line for any wind drift will make you move to the downwind side.  Your total flight route will be shorter if you account for this in anticipation.

To determine the best speed to fly take advantage of the built-in flight computer and set MC to the value of the anticipated average rate of climb in the next climb ahead.  Don’t pick the best (20 second) avg. climb rate that you expect to see in the next thermal but the total average that you anticipate to achieve from the moment you enter to the moment you exit, including any inefficiencies while centering.  I tend to use about 75% of the anticipated best climb rate in the next thermal. You can obviously get much more scientific than that.  I recommend this article by John Cochrane if you’re interested. (It’s about real life soaring but applies perfectly to Condor as well.)

Use the flight computer to find out at what speed you should fly given your MC setting but do not try to constantly “chase the needle”.  Constant speed changes are inefficient.  You want to fly with minimal control inputs when you’re cruising to minimize drag.  You can also use Condor’s auto-pilot functionality to let the computer fly the plane between thermals (pressing “P” during a race will turn the auto-pilot on and off).  You just need to make sure that it is trimmed to the right speed. (This only makes sense when there is no advantage to be gained by following obvious energy lines – either cloud streets or terrain features.)  Also make sure that you fly well coordinated and are not inadvertently slipping.

When you are flying in ridge lift, MC theory is of little relevance.  What matters most along the ridge is that you fly in the best area of lift.  Generally you want to be near the top of the ridge.  If you fall below it is important to slow down to get back up quickly so you can take advantage of the best air.  When you are well above the ridge you should speed up because you can fly faster if you stay near the top.  However, there are exceptions.  E.g., if you have to transition to higher terrain ahead, or if you prepare to cross an area of weak lift, you may want to slow down and climb well above the ridge as high as you need to.  Try to do that along sections where you anticipate the strongest lift.

Navigation is also crucially important.  Complex mountainous terrain can be confusing.  If you’re not careful you may find yourself in a different spot than you thought you would be at.  You may even suddenly find yourself in the lee of a ridge when you thought you were on the windward side.  One such mistake can easily be the end of your chances and it might even result in a land-out, or even a crash.  I always use the map view on the flight computer when I fly in the mountains and I compare what I see on screen to the map that I printed out before the flight.

Should you divert from course or go straight?  As with anything else, it depends 🙂  The factors that matter are how much better you expect the lift or the energy line to be along the course deviation, and how big the deviation is (in terms of angle from the direct course line).  The cost of a 10 or 15 degree course deviation is very minor and almost always pays off if you’re reasonably confident that you will gain even just a little bit of height (or lose less height) relative to going straight. Even larger deviations of 30 degrees or more often pay off.  On the other hand, if you’re moving 90 degrees off course you are no longer moving forward so this will only make sense if you are either desperately low of you just spotted an extraordinary opportunity (or both).  Personally, I probably tend to deviate a bit too much but most newcomers fall into the other category, i.e. they deviate too little.  Remember, what matters is the angle of the deviation from the course line, not the absolute distance from the course line!  Soaring champ and math guru, John Cochrane, demonstrated scientifically when deviations make sense.  Check here if you’re keen to dive deeper into this subject.

Always think ahead and be prepared to “switch gears” if the conditions ahead on course are likely to change.  It is easy to keep speeding along when you have been doing it for 15 minutes non stop even though the conditions ahead are likely to drastically soften.  Conversely, it is easy to remain too conservative when you have struggled to stay aloft and are entering an area where you should be ripping along at high speed.  Always fly based on what’s ahead of you, not based on what you are currently experiencing or what you recently experienced.  This is easier said than done as we all tend to be biased towards our most recent experience.

Also, do not blindly follow the herd.  Just as you are subject to recency bias, everyone else is as well.  It takes a lot of discipline to slow down and gain altitude ahead of a soft area when the folks you have been racing with for the last 15 minutes continue to press ahead.  It is much better to fly your own race than to blindly follow someone else.   The best learning takes place when you make a different decision than someone else and then compare the flight tracks after the race.  Did your decision pay off?  If the answer is yes, you clearly made a better decision than the the other pilot.  If the answer is no, what did the other pilot see that you had overlooked?

Final Glide

If you want to be fast you have to race until the end.  This means, don’t take a weak climb up to cloud base if stronger climbs are likely ahead.  Your last climb should be at least as strong as those that are likely to come.  How high should you climb? Use your flight computer!  Set MC to the actual rate of climb in the thermal that you are in and keep climbing until you are on final glide.  You may want to take one extra turn because you are going to lose a few hundred feet just to accelerate to cruising speed.  Exit the climb as efficiently as possible and get going.

Unlike real races that usually end at a safety altitude (e.g. 1000 ft AGL), the finish line in most Condor races is at the ground level of the airport where the race ends.  Normally you cross the finish line at high speed, pull up, drop your water, fly an abbreviated pattern, put the gear down, and land.

Since your life is not at stake, there should not be a mental hurdle to trust the flight computer.  There tends to be less unexpected sink in Condor than in the real world and it is very rare that someone ends up coming short. (Just be a bit more careful when the final glide is in the lee of ridges, especially if your MC setting is low.)

Once I am on final glide, I go to the final glide screen and make any fine adjustments to the MC setting such that my arrival altitude is exactly zero.  Once I have done that, I simply adjust my speed just to keep it that way.

Here the flight computer shows the final glide calculator. To race to the finish as fast as possible you can move your MC setting up and down until the red dot is right in the center of the target grid. In this case you can see that this is the case at a MC setting of 5.0. The arrival altitude is shown as -6m, i.e. basically at field elevation.  If your arrival altitude drops below zero, slow down a bit, and if your arrival altitude increases above zero, it’s time to speed up.  You want to arrive just at field elevation.

Even on final glide it is still very important to closely watch the terrain ahead, taking account of the sun and wind.  Small route deviations that keep you in good air will pay off nicely because they allow you to increase your speed.

A special case exists when portions of your final glide are likely to be in lift, e.g., when you are able to follow a windward ridge.  In this case, there is no need to take your last climb all the way to final glide altitude.  You can often get going with a significant negative value and make up the difference en route to the finish line.  Unfortunately there is no hard and fast rule for how soon you can get going because it all depends on the strength of the lift you anticipate to find along the way.  With practice and experience you will become better at estimating this.

Post Flight Analysis

The fastest pilots are likely to have a lot of experience and you are unlikely to get near the top of the score sheet until you have built some experience yourself.  The good news is that Condor-Club gives you easy-to-use tools to compare your flight to those of others.  It is very interesting to find out where you lost time against the winners.   If you want to take it to the next level, you can even download the flight traces in .igc format and compare them using See You or other flight analysis software.

Condor Club lets you compare your flight trace against those of others. It is very interesting to compare your choices against those that others made during the race and find out where you gained and lost ground against your competitors. It is often surprising to see how big the route deviations are between pilots who finish within seconds or minutes from one another.

Condor also allows you to use a downloaded trace from a competitor and set it up as a “ghost” that you can fly against.  You can even refly a task against your own “ghost” and see how much you can beat your previous time.

Conclusion

I hope this little tutorial has been helpful and inspires you to join the Condor racing circuit!  There is no doubt in my mind than many of the skills learned here will make you a better cross-country pilot in the real world (whether you’re racing or not).  However, please always keep in mind that this is just a simulator!  Condor encourages you to take risks that you should never assume in reality.  Make sure that stays front and center in your mind.

Now, come and join the fun!

My Soaring Goals for 2020

The purpose of this short post is to review my progress as a soaring pilot in 2019 and to lay out some objectives and aspirational goals for 2020.

Flying SSB’s DG505 with Gregg Davis above Mount Nebo near Nephi, Utah.

My Progress in 2019

Basic Stats

  • 39 glider flights (12 in DG 505, 27 in Discus CS)
  • 120 glider hours (my new total is 319 hours)
  • My average flight duration was just over three hours.  My longest flight was 7 hours and 14 minutes. 9 of my flights were longer than 5 hours.
  • Soaring sites: KBDU (Boulder) and U14 (Nephi)

Badges and Certificates

  • I got one step closer to attaining my Diamond Badge by completing Diamond Distance (a pre-declared 500km flight) on my 6th attempt (the only component missing is Diamond Altitude, i.e. a 5,000 meter altitude gain upon release from tow).
  • Upgraded from private pilot to commercial pilot by obtaining my commercial pilot certificate.

OLC Results

  • I flew on 8 out of 19 OLC Speed League weekends and finished six times among the top three pilots flying for the Soaring Society of Boulder. These six scores were (beginning with the most recent): 1/9 (first out of nine contenders); 3/9; 2/8; 3/8; 2/5; and 3/4.
  • Speed League Championship: worldwide I finished the year among the top 1000 pilots for the OLC Speed League (rank #942 out of 10,830 participating pilots). In the United States I came in at rank #122 out of 756 participating pilots and in Boulder I ranked #11 out of 37 participating pilots.
  • OLC Plus Championship: worldwide I achieved rank #1,357 out of 14,087 participating pilots. In the United States I came in at rank #71 out of 1,043 participating pilots and in Boulder I ranked #6 out of 46 participating pilots.

Contest Preparation

  • To prepare for future soaring contests I attended the OLC camp in Nephi in June/July of 2019.
  • I conducted extensive research into understanding terrain, weather, and land-out areas at the locations where I will be flying my first contests (Montague, Nephi).
  • Before the soaring season I participated in a few soaring contests on Condor, which I find to be an excellent practice tool.

Safety and Risk Management

My Soaring Goals for 2020

  1. Stay safe by always heeding my own advice.
  2. Move up to flapped gliders, fly with water ballast, and learn to responsibly use an engine.
  3. Have fun flying my first soaring contests (I’m signed up for the 2-seater Nationals in Montague, CA; and the Region 9 Sports Class in Nephi, UT). My goal is to complete all tasks provided that I can do so without taking any safety risks. (My position on the score sheet is secondary given that these are my first contests.)
  4. Contribute to my club’s OLC Speed League results by scoring among the top three Boulder pilots on 10 or more Speed League weekends. My stretch goal for the OLC Speed League is to score among the top 5 Boulder pilots and among the top 50 US pilots overall.
  5. Complete a flight of more than 750km. My stretch goal is 1000km.
  6. See goal #1.

Competing and Survival: Managing Risks in Soaring Contests

Glider racing above unlandable terrain in Utah, United States

As I am preparing for my first soaring contests in 2020 I have been thinking a lot about managing risks in soaring competitions.  Will I be tempted into taking risks that could threaten my safety?  How can I recognize risks in advance?  Are all risks bad and must be avoided? Won’t I have to take risks in order to compete? Are the winners typically those who take the greatest risks? Is it even possible to compete and stay safe?

It took me a while to sort through these questions and I may not have all the answers.  But here’s an attempt at addressing them and I am satisfied that it leads to a good place.

When we talk about risks and soaring we usually refer to Safety Risks, i.e. the likelihood that a person will be harmed (injured or killed) by participating in a hazardous activity.  I recently published two articles on this subject entitled “The Risk of Dying Doing What We Love” and “Does Soaring Have to Be So Dangerous?“.  For obvious reasons we want to keep our safety risks as low as possible.

But, like most sports, soaring also involves another kind of risk that is best referred to as Sporting Risk.  Sporting Risks should be understood as a player’s gamble in a competitive game:  if the bet is successful, the player stands to gain in competition; if the bet is unsuccessful, he or she stands to lose. E.g., a tennis player who places his shots close to the lines takes the gamble that his balls will land inside the court and be difficult to return.  If the gamble is successful he stands to gain the point, if the gamble is unsuccessful, he loses the point.  A slalom skier who takes tight turns around the gates takes the gamble that she will ski the most direct line and round each gate correctly. If the gamble is successful she stands to win by scoring the fastest time, if her gamble is unsuccessful (i.e., if she misses only one single gate) she fails to complete the course and loses the race.

While we must keep our Safety Risks as low as possible, this is not the case for Sporting Risks:  a tennis player who plays only safe shots makes himself vulnerable to attacks from his opponent, and a slalom skier who gives each gate a wide berth will be too slow to win a race.  Conversely, a very high risk strategy might pay off now and then but it is unlikely to succeed in the long run: a tennis player who places every single shot close to the line will accumulate too many unforced errors, and a slalom skier who tries to round each gate within fractions of an inch will not complete enough runs.  Sporting Risks must be optimized instead of minimized.  The player has to find the right balance between offense and defense.  A “Goldilocks” approach wins.  (Watch Mikaela Shiffrin, already one of the greatest slalom skiers of all time, getting this balance perfectly right.)

Sporting Risks in Soaring

If you practice soaring as a sport, i.e. as soon as you venture beyond a safe gliding distance to your home airfield (you don’t even have to fly in a contest), you are confronted with sporting decisions and Sporting Risks.  John Bird and Daniel Sazhin recently published a scientific paper that specifically proposes a (sporting) risk strategy for Thermal Soaring.  A simplified version appeared in two parts in the March and April 2019 editions of Soaring Magazine.

My summarized interpretation of their work is this: when we leave a source of lift and glide out on course of a cross-country task we can never know with certainty whether we will find another thermal. If we don’t, we have to land out.  Our likelihood of having to land out is a function of our sporting decisions: the course line we choose (e.g. how many clouds we sample through course deviations), our inter-thermal cruising speed, and how selective we are with respect to accepting lift.  The more aggressive we fly, the greater our potential task speed, and the higher our odds (our Sporting Risk) of having to land (and failing to complete the task).  John Bird and Daniel Sazhin show that our land-out risk compounds the more glides we need to complete the task because each glide is an independent event, i.e. we will be forced to land even if we fail only once to find another climb.  If we fly in a multi-day contest where even one land-out can destroy our chances of performing well, our Sporting Risk compounds across all the glides needed to complete all contest tasks. To succeed, we must find the right balance:  if we are too cautious we will leave points on the table; if we are too aggressive we will end in a field and blow the contest result.  When conditions are strong with multiple reliable lift sources ahead we can fly fast and direct; when conditions weaken we must quickly “shift gears” and switch our focus on staying aloft.  In short: we must always strive to optimize our Sporting Risks and get the risk balance just right. The Golidlocks approach wins in soaring as well.

This is also illustrated by the following chart, which shows the attainable task speed on a XC flight as a function of a pilot’s sporting risk and his or her skill level.

Here is how to read this: the chart assumes a task where the maximum attainable task speed for a top pilot is 70kt. You can see that the pilot has to find the optimal sporting risk balance to achieve that speed. If she is more or less aggressive, her speed will remain shy of the 70kt. The chart also assumes that the minimum average speed to complete the task is 40kt. Pilots who are unable to reach 40kt will run out of lift at the end of the day and not be able to finish. Pilots with medium skill can only get to 60kt even if they get their own risk balance perfectly right. (Setting realistic expectations based on one’s skill set is therefore important, and inexperienced contest pilots should not be disappointed with themselves if they can’t get close to the performance of the top pilots even if they perceive that they have done everything right.)

John Bird and Daniel Sazhin have taken the question of how to optimize the Sporting Risks in soaring one step further and proposed that we should adopt one of two different mind frames or “gears” depending on the situation we are in: if the conditions ahead look promising, we should focus on “racing”, i.e. progressing forward on task as directly as prudently possible while flying at MC speeds; if things look bleak, we should shift down and focus primarily on avoiding a land-out while still trying to move forward on task if possible.  Their thinking is supported by thousands of computer simulations, which show that this approach is likely to yield a winning strategy.  I like the approach also for its practical simplicity: two gears are a lot easier to operate than many.  Look up their work as it explains this in a lot more detail.

Risk Management in Soaring is More Complex Than It Is In Other Sports

One aspect that makes soaring different and particularly challenging is the unusually complex interplay of Sporting Risks and Safety Risks.  Various sports tend to fall into one of the following categories:

(a) Sporting Risks can be Independent of Safety Risks.  In many sports the safety risks are completely unrelated to an athlete’s decision making during a competition.  E.g., while tennis players have an elevated risk of getting injured, that risk is not a function of how aggressively they place their shots.  When they decide to play, they accept the Safety Risk (which isn’t very high to begin with) as a given and can focus entirely on managing the Sporting Risks.  (The same is true for sports where the Safety Risks are negligibly small.)

(b) Sporting Risks and Safety Risks can be Aligned.  In many high-risk sports the Safety Risks are a direct function of the Sporting Risk.  E.g., a race car driver must manage his Sporting Risk by driving right up to the edge of where the car remains on the track (but not beyond).  When his Sporting Risk increases, his Safety Risk increases as well.  The two types of risks are perfectly aligned, which means the driver can keep his entire focus on going as fast as possible, just not any faster.

(c) Unfortunately, in some sports, the Sporting Risks and Safety Risks are Misaligned.  Soaring falls into this category: in our sport, the relationship between these two types of risks is highly complex. This is problematic because the pilot must constantly manage (i.e. minimize) their Safety Risks, while also trying to manage (i.e. optimize) their Sporting Risks.  This challenge can be confusing and at times even overwhelming.

The Complex Relationship of Sporting Risks and Safety Risks in Soaring

The following characteristics make soaring risk management particularly challenging:

(1) Not every Sporting Risk involves a Safety Risk

A pilot who rips through the air at 90-100 kts and skips all but the strongest thermals will certainly take a high Sporting Risk.  However, if she always keeps a landable field in safe glide and readily switches from thermaling to landing mode when she’s down at 1000 ft AGL she is not taking a Safety Risk at all.

(2) Life-threatening Safety Risks exist even in the absence of Sporting Risks

A very conservative pilot who flies at MC 0 with a safe arrival altitude of 1,500 ft programmed into his computer might run into a 2-3 minute stretch of 500 fpm sink on final glide, lack the energy to reach the airport, try a low thermal safe two miles shy of the runway, stall and spin in.

It’s critical to notice that the “conservative” MC 0 setting actually contributed to the accident. From a safety standpoint, MC 0 is the riskiest setting to calculate a final glide because it presumes a still airmass and that we are able to fly perfectly at best L/D.  A more “sporty” setting of MC 3 or 4 would have been a much safer choice because it would have given the pilot an additional built-in margin. If you’re not sure why that is, I recommend you read John Cochrane’s article “Safer Finishes“.

(3) Sporting Risks can quickly become life-threatening Safety Risks

Consider the following example (from “Perspective: One Contest Pilot’s View…” by Dave Nadler, Soaring Magazine May 1987).  “First day of the contest. … I leave the ridge near the turn point, seeing a gaggle. Everyone in the gaggle knows that this thermal will make the difference between a completion and a land-out, on day 1. Pressure’s really on. But the gaggle is not going up. I leave, hoping the others will call it quits and final glide out to the beautiful fields in the central valley, while they can still get past the low obscuring front ridge. I coast down to the turn, click my photo and coast up the valley, picking fields. Pattern altitude, and a nice landing on a lovely golf course fairway. As I taxi off, the panicky radio calls start. Somebody tried to hang on too long in that gaggle, refusing to admit that the day was over until too late. The violent crash was seen from the air. Nobody dares land to offer assistance, the ‘field’ is way too dangerous. Which one of our friends is dead now? Just one day, 3.5 hours of flying, already one dead and two crashes.”

If your mind is focused on the task and making choices to optimize the sporting risks, it can be easy to overlook that a particular choice is no longer just a sporting bet but also a potentially life-threatening safety risk. In the example above, Dave Nadler himself clearly recognized the safety risk in time and switched from Sporting Risk Optimization to Safety Risk Avoidance.

However, it is quite possible that the fateful pilot who tragically lost his life was entirely focused on flying the task and decided to join the gaggle as a sporting move (his priority set to “staying up”) without even noticing that he was too low to “get past the low obscuring front ridge” and “glide out to the beautiful fields in the central valley”.  By the time he realized it, he may have already been trapped in an unlandable area.  And so he kept trying to dig himself out until it was too late!  Up to a certain point in time he could have saved himself by deciding to execute a controlled crash landing in an ill-suited field, or by jumping out with the parachute.  But who can really be certain that they would make such a choice under extreme stress and while being entirely focused on trying to climb?

How Can We Manage both Sporting Risks and Safety Risks?

If we consider this complexity and the stress that can arise in the cockpit we can understand why even highly experienced pilots routinely maneuver themselves into situations from where there is no escape.

But understanding alone isn’t enough.  We need a recipe, a decision making model, that we can apply in the cockpit to help ensure that we think the right thoughts and do the right things!

As I began working on this I got good input and feedback from Daniel Sazhin who helped me realize that our observations, our judgements, our decisions, and ultimately our actions are all guided by our priorities.  If our priorities are wrong or even just unclear, we might not even see what we need to see; we might not form judgments about the things that need to be judged; we won’t decide the things we need to decide; and our actions will not get us to where we really need to go.

Even if our priorities are right, there is plenty of opportunity for us to make mistakes at each of these subsequent steps (observing, judging, deciding, and acting), but if we have our priorities wrong, we might already be doomed from the start.

The following schematic illustrates how all our decisions and actions flow from our priorities:

Let’s go back to Dave Nadler’s example.  If the fateful competitor had his top priority set to “I have to prevent a land-out”, he would have scanned the sky for clues that might help him achieve this objective.  When he saw the gaggle, he might have made a snap judgement that there must be a workable thermal allowing him to realize his objective. So he quickly decided to join the other circling gliders.  Only after he got there did he realize that the air actually was not going up and that a ridge obstructed his glide out to the land-able fields.  (This is of course speculation since we can’t ask the deceased pilot.  But it’s easy to see how it could have happened exactly like this.)

What could have prevented this outcome? It’s actually quite simple: he would have needed a different priority!  Had his top priority been “I must be safe if things go wrong” he would have scanned the sky and the terrain differently.  He surely would have looked for land-able areas and noticed the ridge that ended up blocking his glide to the fields.  He would have formed judgments about how high he would need to be when joining the gaggle in order to keep a field in safe glide.  As a consequence, his decisions and actions would likely have been very different.  (Btw – if you’re certain that you would have noticed the ridge even if your focus was squarely on preventing a land-out, remember this experiment.)

We always say that safety is our number one priority.  But this is just an abstract statement unless we make it actionable. How can we do that?

I would like to propose a simple and practical way to do this by stack-ranking our priorities like in Maslow’s hierarchy of needs.  Our first priority, which must guide every single decision, must always be to stay safe.  Only if and as long as this need is satisfied can we concentrate on our Sporting Risks.  Our second priority is staying up, i.e. preventing a land out. And only if we are high enough that we don’t have to worry about having to land out can we concentrate on racing, i.e. going fast. Our pyramid looks like this:

Aside from being very simple and easy to remember in the cockpit this basic model has a number of key benefits:

(1) It ensures that we think ahead and consider potential Safety Risks whenever we consider a particular plan of action (and not only once we find ourselves in trouble!).

(2) It clearly delineates “Being Safe” and “Staying Up”.  These two priorities are easily confused but they are absolutely not the same.  Trying to stay up when it is no longer safe to do so is the single most frequent cause of fatal accidents (as I’ve demonstrated before).  We must only focus on Staying Up as long as it is safe to do so!

(3) It gives us a blue-print to prioritize our Safety Risks and our Sporting Risks and it is aligned with the “gear-shifting” model as proposed by John Bird and Daniel Sazhin.  If the conditions on course ahead are poor we should focus on staying up while continuing to progress forward on course, but only if and as long as it is safe to do so.  And if the conditions ahead are strong and we are high enough that we don’t have to worry about staying up, we can concentrate on racing, but also only if and as long as it is safe to do so.

The following flow chart illustrates how we can apply these priorities to formulate, assess, and constantly revise our plan of action as we learn new information. (The colors are aligned with those used in the pyramid chart above.)

When we’re in the cockpit we are repeatedly assessing our situation and are making plans for what to do and where to go.  This is shown by the blue box in the upper center.  Thereby we must always test our plan of action against our priorities.

(1) We must always test the plan for safety first and ask “Will I be safe if things go wrong?” If the answer is no or even if we’re not sure, we must try to adjust our plan to eliminate the safety risk, or incorporate a contingency plan, i.e., an alternative Plan B or Plan C if Plan A does’t work out as we hope it will.  If we can’t think of any way to do either of these things, we are already in a precarious situation: we have no choice but to execute a plan that could endanger our safety.   If that is the case, we should also make an emergency plan to safe ourselves in case our only plan does not work out.  (E.g.: the pilot in Dave Nadler’s example could have saved himself by bailing out in time or by executing a controlled crash landing. Check with your parachute rigger at what altitude you can still deploy your chute.  You might be surprised how low it will work!)

(2) If our plan passes the safety check, we’re ready to test it against your Sporting Risk tolerance.  If we’re concerned about having to land out we should be flying in our low gear and focus on staying up while trying to progress on task only as far and as fast as our Sporting Risk tolerance allows.

(3) If we are satisfied that our land-out risk is below our Sporting Risk tolerance threshold, we can focus on racing, i.e. we can fly at McCready speeds and follow the best energy lines.

As we execute the plan, we must watch out for new information that could change our assessment.  Our next step will be to test our plan for Safety again so we know we have to look out for information that could impact our safety assessment.

The model is a continuous loop and requires us to cycle through this thought process on an ongoing basis.  We tend to get in trouble when we are so wrapped up in execution that we fail to take in new information, especially new information that would change the results of our safety test.  E.g., it is possible that the pilot in Dave Nadler’s example joined the gaggle at a time when he was still high enough to glide to safety and that he then got so focused on thermaling in unworkable lift that he did not notice that he had dropped below an altitude at which he was no longer able to cross the ridge and reach a field. Had he reassessed the situation at the time of joining the gaggle and tested  his plan for safety he would have surely noticed the ridge and the importance of leaving the gaggle when a safe glide out was still feasible.

We must also remember that we are always testing our plans and not just our current situation!  This is an important distinction because it requires us to “stay ahead of our aircraft”.  If we do this consistently we can avoid getting into a situation where a dangerous Plan A is our only option.

The practical application of the model works best if you have considered your Personal Safety Minimums and your tolerance of Sporting Risks before you get into the cockpit.  This is shown by the two boxes at the upper left of the flow chart.

Your Personal Safety Minimums should be appropriate for your skill level, your experience, your equipment, the terrain you’re flying in, the weather conditions, etc.  They might include criteria such as “I will never thermal below x feet AGL”, “I will never fly closer than x wingspans from terrain”, “I will never blindly follow another glider”, “I will always keep a landable field in a glide assuming MC 3 or higher and an arrival altitude of x feet AGL.”  Having these minima in place will make it easier to answer the question “Will I be safe if things go wrong?”  If you’re confident that you’ll stay within your personal minima you should be pretty safe.

Your Personal Sporting Risk Tolerance is primarily about your willingness to accept a higher or lower land-out risk.  E.g. if you are attempting to set a new speed record, you will need to have a high risk tolerance and it may take you several attempts until you succeed (the other times you will land out).  If you want to win a multi-day competition with long daily tasks all of which you have to complete, your risk tolerance will have to be much lower. Your experience and skills might play a role as well; however, you should be comfortable with the possibility of a land-out before you go on any cross-country flight. Your Sporting Risk Tolerance helps you answer the question, “Is my land-out risk acceptable?

If you consider the flow chart too complex to use in the cockpit then try to remember at least the simple hierarchy of needs as shown in the pyramid chart.  The most important thing is to always ask “Will I be safe if things go wrong?” before you get into a situation where this is no longer the case.

Do We Have To Take Safety Risks To Win A Soaring Contest?  In Other Words: Do Reckless Pilots Have a Competitive Advantage?

The history of soaring is full of stories of bravery (or lunacy, depending on your perspective), where soaring pilots “polished the rocks”, “dug themselves out from the height of a barn”, “scraped across the ridge”, or “pulled up over the trees with no energy to spare” to glide to victory.

It is easy to see why pilots may have benefitted competitively by taking such safety risks.  Such behavior must have helped pilots prevent land-outs, or cross the finish line minutes earlier than they would have been able to do had they stopped for another climb.  They scored higher points and may have even garnered the win on a contest day by flying recklessly.

But does this also mean that pilots who are willing to take such great risks are gaining a competitive advantage in the long run (provided they survive)?  If so, we should find that the winningest pilots are also the ones who take the greatest risks.

Last I checked, pilots didn’t wear badges that show how how many life threatening gambles they have already survived. Accident statistics are also not a good source because a single accident is often enough to end a particular contest pilot’s career (or life).

Unfortunately, I don’t think real life provides the data that would allow us to answer this question conclusively.  But there is a next best thing to study: Condor.  More specifically: the accident rates of pilots participating in the highest level of multi-player Condor racing.

Insights from Condor Racing

Wanting to find an answer to this nagging question, I analyzed the results of the last three years of a race called “Condor World Cup”.  It is hosted by the European Condor Club and has been the most competitive race series over the past three years with almost 300 participating pilots who completed a total of 3,683 race flights.  122 of these pilots finished at least 10 individual races in this particular competition.  These are the ones I decided to study.  In particular, I wanted to know if those who consistently achieve the highest average point scores are also the ones who have the highest crash rates.

The results are very clear but they show exactly the opposite!  Pilots who consistently achieve the best scores actually have the lowest crash rate: pilots who scored more than 900 points on average per race only had a crash rate of 4%; those who scored less than 600 points on average per race had a crash rate of 30%. The following chart shows the crash rate of pilots based on the average point scores that they achieved in the races that they completed successfully.

The chart shows the average crash rate for competitors that achieved average point scores within the indicated ranges. Only completed races count for the calculation of the average score per race. I.e., if a player crashed during a race, their (zero or even negative) score for that particular race is not included in the calculation of the average. This ensures that the calculation does not penalize a pilot for crashing, and it makes the results even more astonishing: even if there is absolutely no penalty for crashing, those who win most often are those who crash least often.

This is great news for us because it shows that we do not have to take great risks to win a soaring contest! In fact, the opposite is true: those who take the greatest risks tend to end up at the bottom of the score sheet, and those who fly the safest are also the ones who tend to score the highest.

As expected there are some cases where pilots with high crash rates occasionally won a single race.  But those cases are a rare exception and these pilots will typically score very poorly on average!

There are of course limitations to using Condor as a proxy for the real world. By far the most important one is the fact that there are actually no Safety Risks in Condor at all.  Even crashing is just a Sporting Risk because those who crash will get a zero point score or may be assessed a point penalty. But they can fly again the next day even though in the real world they would have destroyed their plane or even killed themselves.  But does this mean the results are not relevant for the real world? I don’t think so: if there were an advantage to be gained from flying recklessly, surely it would be greatest in an environment where the penalty for recklessness is tiny when compared to a real soaring contest.  And yet we see that even in an environment that is completely free of Safety Risks, recklessness does not pay off at all!

But WHY Is There No Sporting Advantage To Flying Recklessly?

The data from the Condor study are as clear as they could possibly be, yet they may still feel counterintuitive.  What about the pilots who dug themselves out from the weeds or who scraped above the tree-tops to a low energy finish?  Why aren’t those the pilots who typically win contests?

I believe the answer can be found in the model that I introduced earlier.  Take another look at it, and this time, focus on the green racing box.

The only time when we can focus on racing is (1) when we don’t have to worry about survival, and (2) when we also don’t have to worry about landing out.

In other words: to race we must be flying safe and high enough that we can give our undivided attention to following the best energy lines and maintaining racing speeds.   Once we drop down low, we must accept detours and fly at slower speeds.  And once we recognize that our safety is at risk, every other consideration goes out the door completely.  When we find ourselves in these situations we will most likely not be moving fast towards the finish line!

This does not mean that pilots can never get a benefit from a reckless maneuver.  The Condor study does show that pilots with a significant crash history will occasionally win a contest day. But more often than not, reckless flying gets us into situations that will slow us down or even grind us to a halt.  To win contests we must avoid these situations!

While we can thus surmise that staying safe is necessary to win contests, it is of course not sufficient. The winningest competitors are those who not only stay safe, but who also manage to find the right balance with respect to their Sporting Risks, and who furthermore have the necessary piloting and racing skills.  (The latter are not a subject of this article).

Conclusion

In this article I propose a simple yet holistic model for managing our Safety Risks and our Sporting Risks in soaring contests. One that helps us stay safe and compete.

The model is informed by the basic insight that our observations, judgments, decisions, and actions are framed by our priorities.  If our priorities are wrong, chances are that what we see, judge, decide and do will be wrong as well.

Our core priorities in a soaring contest are actually quite simple:  in order to go fast we must stay safe first, and stay up second.  I call this the hierarchy of soaring priorities: stay safe; stay up; go fast. It means that we can only race when the two more basic/vital needs are satisfied.

To manage these priorities during our flight, we must continuously formulate plans and test them against our priorities, always starting with “stay safe” at the bottom of the pyramid.   Our Safety Risk Tolerance should be informed by our Minimum Safety Standards, and our Sporting Risk Tolerance should be specific to our sporting objectives and the length of the task/competition.

We must remember that in soaring, Sporting Risks and Safety Risks are not directly related. Safety Risks exist even in the absence of Sporting Risks, and Sporting Risks can become Safety Risks.

Safety Risks must be avoided (principled approach).  A good question to ask ourselves is,”Will I Be Safe if Things Go Wrong?”

Sporting Risks must be balanced (Goldilocks approach).  A good question to ask ourselves is, “Is My Land-Out Risk Acceptable?”

Taking Safety Risks can provide a short-term benefit in competition (provided we don’t crash), but it does not convey a competitive advantage in the long run; not even over the course of a multi-day contest. In fact, the opposite is the case:  reckless competitors tend to find themselves at the bottom of the score sheet.  We must stay safe before we can even focus on staying up.  And we must stay up before we can even focus on racing. To be fast, we must maximize the time when we’re racing, and minimize the time when we are looking for lift down low or even trying to survive.

Staying safe is necessary but not sufficient to win races.  The winners will be those who fly safe, who appropriately balance their Sporting Risks, and who have excellent piloting and racing skills.

The great news is that we not only CAN stay safe and win.  The fact is that we MUST focus on staying safe if we want to have a chance at winning at all!

And that makes me feel better about flying my first contests.


Post Scriptum

I’d like to give special credit to Daniel Sazhin.  Daniel kindly critiqued my article “The Risk of Dying Doing What We Love” and encouraged me to think more about how we as glider pilots can reduce our safety risks.  When I responded with “Does Soaring Have To Be So Dangerous?“, he once again gave me something to think about when he pointed me to John Boyd’s OODA loop decision model, to which he added the critical insight that our observations, judgments, decisions, and actions flow from our priorities.  He also challenged me to explore if our frequent “failure at situational awareness” as discussed in “Does Soaring Have to Be So Dangerous?” isn’t just a consequence of us having the wrong priorities to begin with.  This was very instrumental in pushing myself towards developing the integrated risk management model presented here.  And this model could not have been coherent without heavily borrowing from the scientific paper “Bounded Rationality and Risk Management in Soaring” which Daniel Sazhin and John Bird published together earlier this year.  This work is referenced frequently throughout.

As I mentioned before I do not pertain to have all the answers.  But I am convinced that we can make our sport safer by giving more thought to the questions discussed. I welcome further critique and inspiration as it will help me and hopefully others to become better and safer soaring pilots. Have fun and stay safe!

Does Soaring Have To Be So Dangerous?

My last post titled “The Risk of Dying Doing What We Love” presented the results of a statistical analysis where I compared the risk of flying sailplanes to other things we love to do such as cycling, horse back riding, paragliding, etc.

I showed that the risk of dying in a soaring accident is approx. 1 per 50,000 flight hours, which makes soaring per activity hour about 2x as dangerous as riding a motorcycle, 25x as dangerous as cycling, 40x as dangerous as driving a car, and almost 200x as dangerous as traveling on a commercial airline flight.

The post struck a core. Within just a few days, it was read tens of thousands of times and many of you have shared your thoughts and asked really important questions. Perhaps the most important ones were:

Does soaring have to be so dangerous?

How can each of us make it safer for ourselves?


To answer these question I read, interpreted, and analyzed about 250 glider accident reports.  My main sources were Germany’s Bundesstelle für Flugunfalluntersuchung (154 reports since 1998) and the United States’ National Transportation and Safety Board (93 reports for the past five years).  I chose the US because that’s where I do most of my soaring and also because it’s a very large country with varied soaring conditions including flatland, ridge, mountain, desert, and wave soaring. Germany was a logical choice because it accounts for about one third of all soaring activities worldwide, and also because the quality of its accident reports is particularly high. In addition, I also reviewed the equally detailed soaring accident reports for Austria since 2010 (25 reports) and read the 2019 EASA Safety Report.

Classifications in the EASA Safety Report

The European Union Aviation Safety Agency (EASA) provides a statistical analysis of aviation accidents between 2008-17 in its 2019 Annual Safety Report (gliders are covered starting on page 108) that classifies glider accidents as follows:

a) By phase of flight.  21% of European soaring accidents happened during takeoff, 50% during landing, 12% on the landing approach, and only 17% en route.

b) By type of operation.  6% of accidents occur during competition, 22% during flight training, and 72% during pleasure flights.

c) By Safety Risk. The EASA report breaks fatal accidents between 2014 and 2018 down by what happened: 26% of accidents were the result of a “Stall/Spin”, 17% were a “Collision with Hill”, 10% were due to an “Incomplete Winch Launch”, 8% were due to “Loss of Control”, another 8% happened in “Other Flying”, 7% were “Mid-Airs”, 7% “Technical”, 5% “Misuse of Controls”, 4% “Aerotow”, 4% “Medical”, and 4% “Other”.

Each of these classifications conveys some useful information. E.g., we need to be particularly careful during takeoff and landing. Most accidents occur during normal pleasure flights. Flight training needs to ensure that student pilots learn to fly coordinated and at the appropriate speed. We have to be particularly careful near hills and mountains, etc.

However, none of these classifications actually tell us why accidents really happened. What was it that caused the pilot to fly so slowly that she stalled and spun in? What made him collide with the hill? What caused her winch launch to be incomplete?  Could he or she have avoided these outcomes? How?  To answer these questions, we have to dig one or two layers deeper and get to the root causes.

(Btw – the soaring accident reports of the National Transportation Safety Board in the US frequently mention “Loss of Lift” as the defining event of accidents.  Don’t we experience loss of lift all the time when we go soaring?  This really should not be viewed as a reason for an accident!)

What causes soaring accidents really?

My analysis shows that approx. 90% of soaring accidents were caused by pilot mistakes. (10% were not and we will get to those also.) Four fundamentally different types of pilot mistakes accounted for the vast majority of accidents:

a) Accidents where – through improper decision making – the pilot had maneuvered him- or herself into a situation where proper handling of the aircraft was either impossible and/or no longer sufficient to avert a bad outcome. That’s why I’m calling them “Fateful Decisions.” In most instances the pilot didn’t even actively decide to take on a great risk, he or she simply failed to make a decision that could have prevented the accident.  In other words, he or she allowed the safety margins to erode until it was too late. Examples include delaying the decision to land (at an airport or in a field); relying on an engine, flying too close to mountainous terrain; failing to stay within gliding distance to a save landing area; failing to interrupt a final glide when the altitude was not sufficient to reach the airport; failing to descend from a wave flight before the cloud layer closes; etc.

b) Accidents that were caused by improper handling of the aircraft and could have been avoided in the moment by good Basic Piloting Technique alone.  E.g., failing to maintain sufficient airspeed during a winch launch; flying uncoordinated through a turn; cycling the gear instead of extending the airbrakes; not knowing how to stop a spin at altitude; getting out of position behind the towplane; etc.

c) Accidents where the pilot’s Pre-Flight Negligence resulted in a situation where good piloting technique alone was of no help to prevent a bad outcome. E.g., assembly mistakes such as failure to connect the controls and/or conduct a Positive Control Check (PCC); failure to go through the pre-flight checklist; failure to communicate the presence of water ballast to the tow pilot, etc.  A very important special case of pre-flight negligence is the failure to have a specific pre-takeoff emergency plan.  Many premature release accidents were caused by the pilot waisting precious time and altitude before deciding what to do and where to land.

d) Accidents that were caused by Insufficient Situational Awareness of the people involved.  Most but not all of these were mid-air collisions that could have been avoided.  Insufficient situational awareness might mean inadequate radio communications, insufficient look-out, or simply the failure to observe warnings that are there in plain sight.

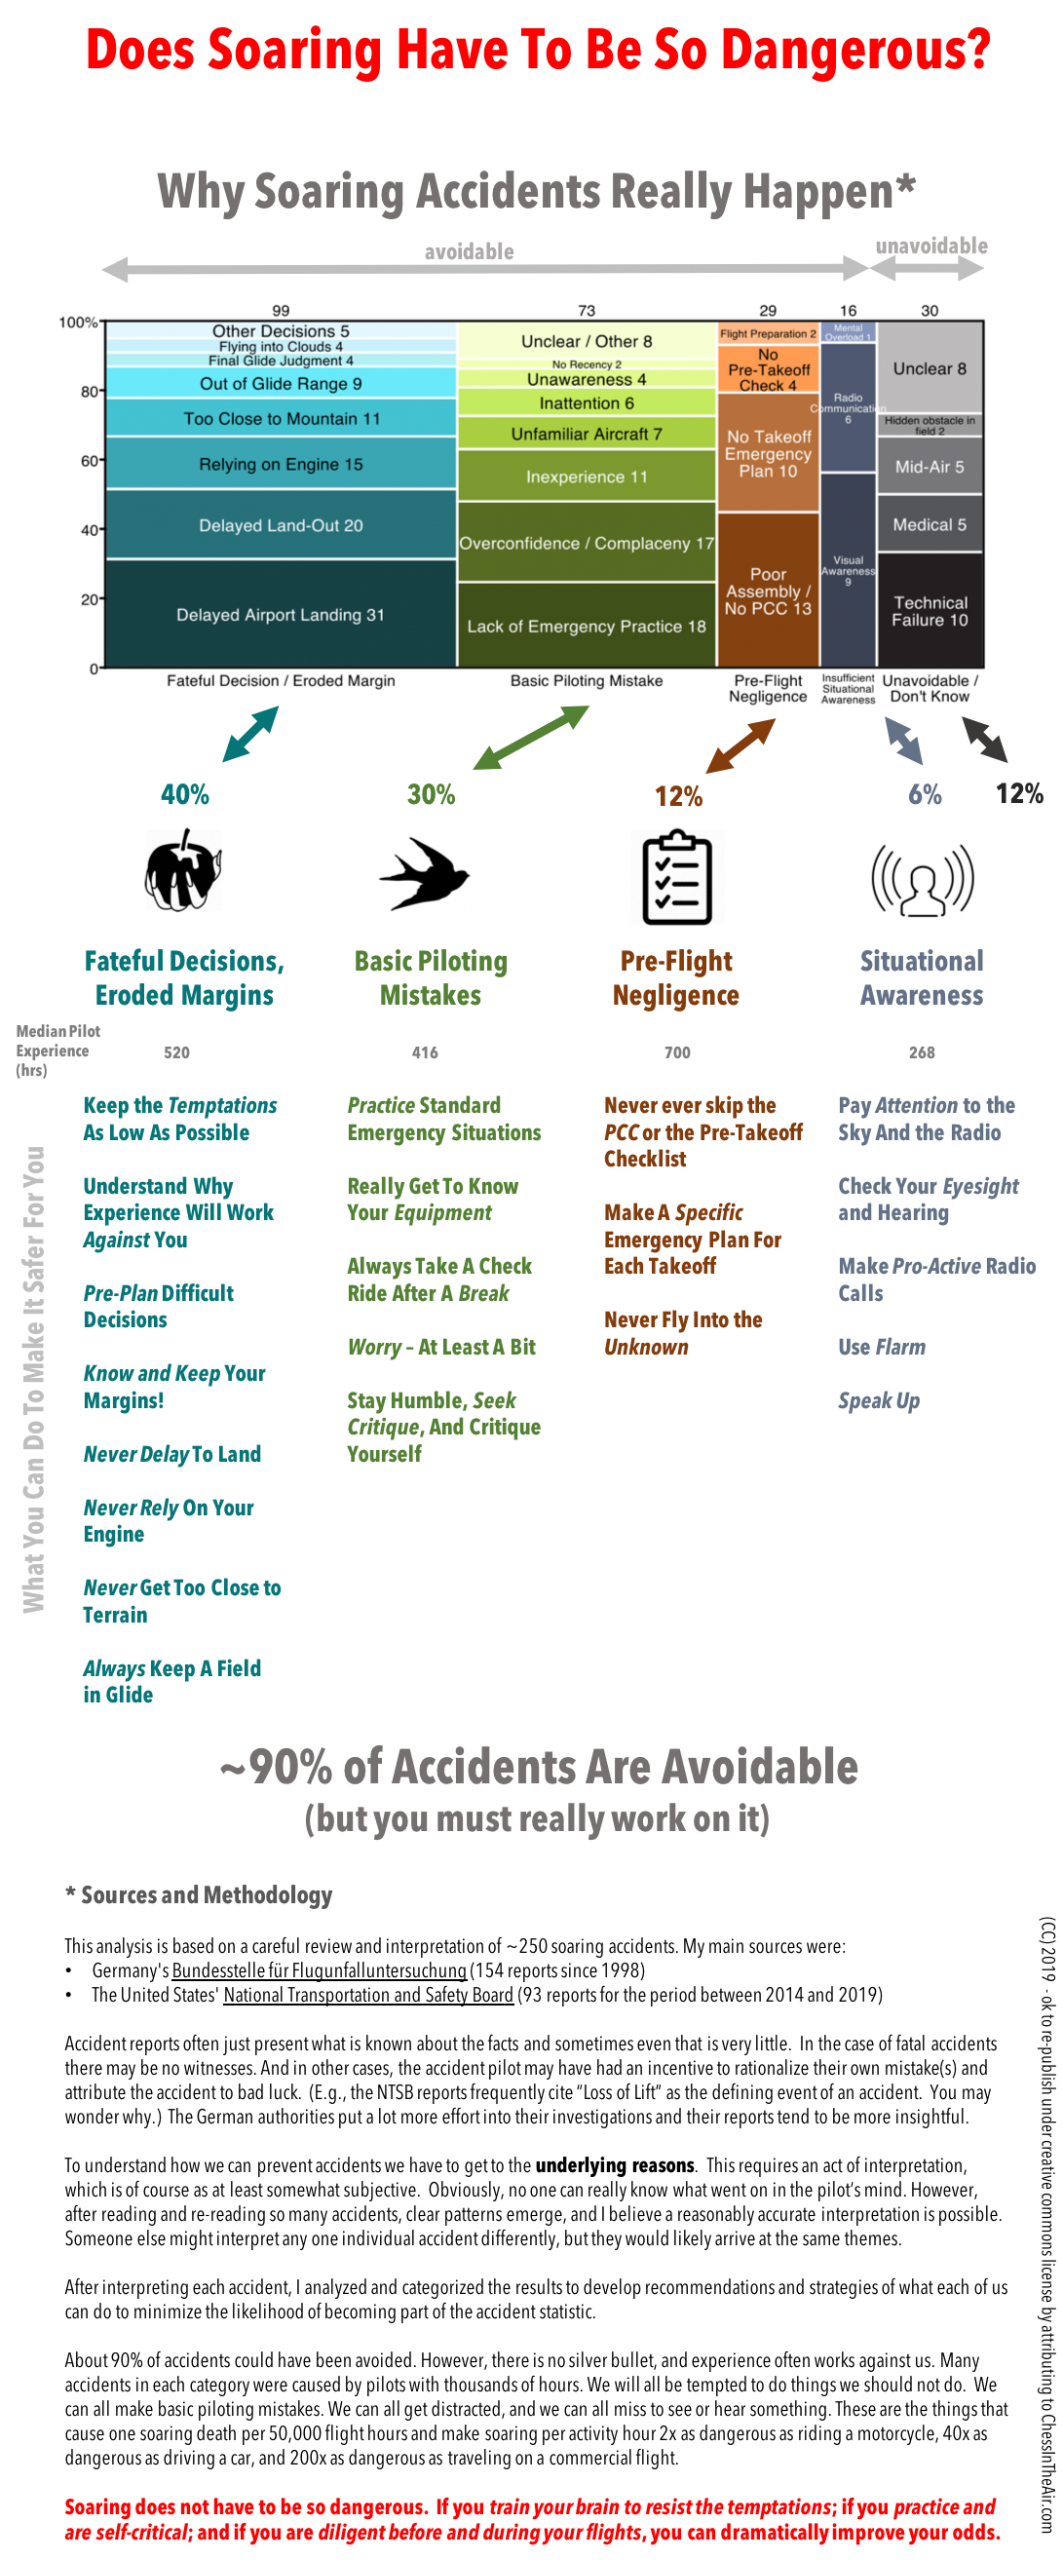
If you look at past accidents through this particular lens, the following picture emerges:

Approx. 88% of accidents can be explained by the three types of pilot mistakes outlined above.

Fateful Decisions / Eroded Margins account for ~40% of accidents and are the single biggest factor.

Basic Piloting Mistakes accounts for ~30% of accidents.

Pre-Flight Negligence is the main cause of ~12% of all soaring accidents.

Insufficient Situational Awareness accounts for ~6% of soaring accidents, most of them mid-air collisions.

The remaining 12% of accidents are either unclear (e.g. the cause of the accident could not be identified) or they were truly unavoidable.

The following chart summarizes my findings.  A more detailed analysis and discussion follows below.

Let’s examine each of these types of accidents in more detail and discuss what we can do to avoid them.

1) “Fateful Decisions / Eroded Margins” or: the Failure to Resist Temptations

Soaring requires constant decision making and decisions have consequences.  It is not surprising that the largest group of accidents (40% overall for the data I looked at, in the US the share is even greater at 44%) are the unavoidable consequence of a decision that the pilot had previously made or failed to make during the flight. In other words: by making a wrong decision they had gotten themselves into a situation where good piloting technique alone was not enough prevent a bad outcome.

There is logically no limit to the kinds of decisions that could get us into trouble.  However, a close look at accident reports reveals that most of these “fateful decision accidents” can be traced back to just a few types of mistakes.  Let’s look at each of these in more detail, approx. in the order of frequency in which they occurred, starting with the most common ones first.

Delayed Airport Landing – Failure to make a timely decision to land and stick to it

It may seem surprising but many fateful decision accidents happen right next to the home airfield when the pilot is trying to extend their flight beyond the time when they should have made the decision to land. Here are some examples:

There are many more accidents that follow this same pattern.  About two thirds end with a “stall and spin” and most of the other ones end with the glider colliding with a tree, power line, or another obstacle.

To avoid “stalls and spins”, student pilots are usually taught to fly coordinated and at a proper airspeed. This is of course good advice but it is not sufficient.  These accidents were typically not caused by pilots who did not know that they had to fly faster and coordinated.  The problem was that they had already maneuvered themselves into a situation where they were no longer able do that.  E.g., a pilot who finds themselves within feet of the tree tops on their turn to final is already in an impossible situation.  They could either keep the speed up and crash into a tree or they could attempt to get over the trees by pulling the nose up and using the rudder to keep the wings level.  They will of course try the latter but it is also the best recipe for a stall and spin.

These accidents continue to happen even though they should be quite easy to avoid.  All the pilot has to do is to enter the landing pattern at a safe altitude where the temptation to fly too slowly and/or too uncoordinated doesn’t occur to begin with, and where they have enough altitude/energy reserves to deal with unexpected sink or headwind on final.

What is a safe pattern entry altitude?  In my experience there is no standard rule of thumb that fits all situations.  In normal soaring weather and light winds a pattern entry at 800 ft AGL will be adequate most of the time.  However, I have personally experienced that even 1000ft can be too low for comfort.  And under extreme circumstances, you may want to be even much higher than that.

Delayed Land-Out – Failure to make a timely decision to land-out and stick to it

All of the accidents mentioned above happened right next to an airport.  Similar accidents also occur frequently during XC flights when the pilot delays a decision to land in a field.

In some ways, these accidents are just special cases of failing to make a timely decision to land. All of the considerations above – especially the need to make the decision at an appropriate pattern entry altitude – apply here is well.

However, land-outs must be given special attention because the decision to land in a field is much more difficult to make than the decision to enter the landing pattern at the home airfield.  Landing out is inconvenient. Selecting a field is stressful.  There is a higher risk that the glider gets damaged. The prospect of having to deal with the land owner may be off-putting. The pilot may feel embarrassed that they did not make it back home.  In gliding contests, there is an even greater impetus to stay aloft.  In short, most pilots view the prospect of a land-out as a big negative. To avoid it they are tempted to keep searching for lift well beyond the time when they should have made a decision to land.

Daniel Sazhin, a PhD student of cognitive psychology, and one of the best contest pilots in the United States, explained in this excellent article that this is exactly the kind of situation in which pilots are likely to gamble and take the greatest risks.

The only reason that these accidents aren’t even more frequent is the fact that only the minority of pilots ventures beyond gliding distance of their home airport.

If you decide to fly cross-country, anticipate – in John Cochrane’s words, that “you will be tempted”.  I.e., the only way to avoid these accidents is to resist the temptation(s).   But how do we do that?  I’ll get back to this question at the end of this chapter on fateful decisions.

Out of Glide Range – Failure to stay within glide range of an airport or a landable field

Making a timely decision to land obviously pre-supposes that the pilot stayed within glide-range of an airport or a landable field to begin with.  Doing so is one of the most fundamental lessons all glider pilots are taught.

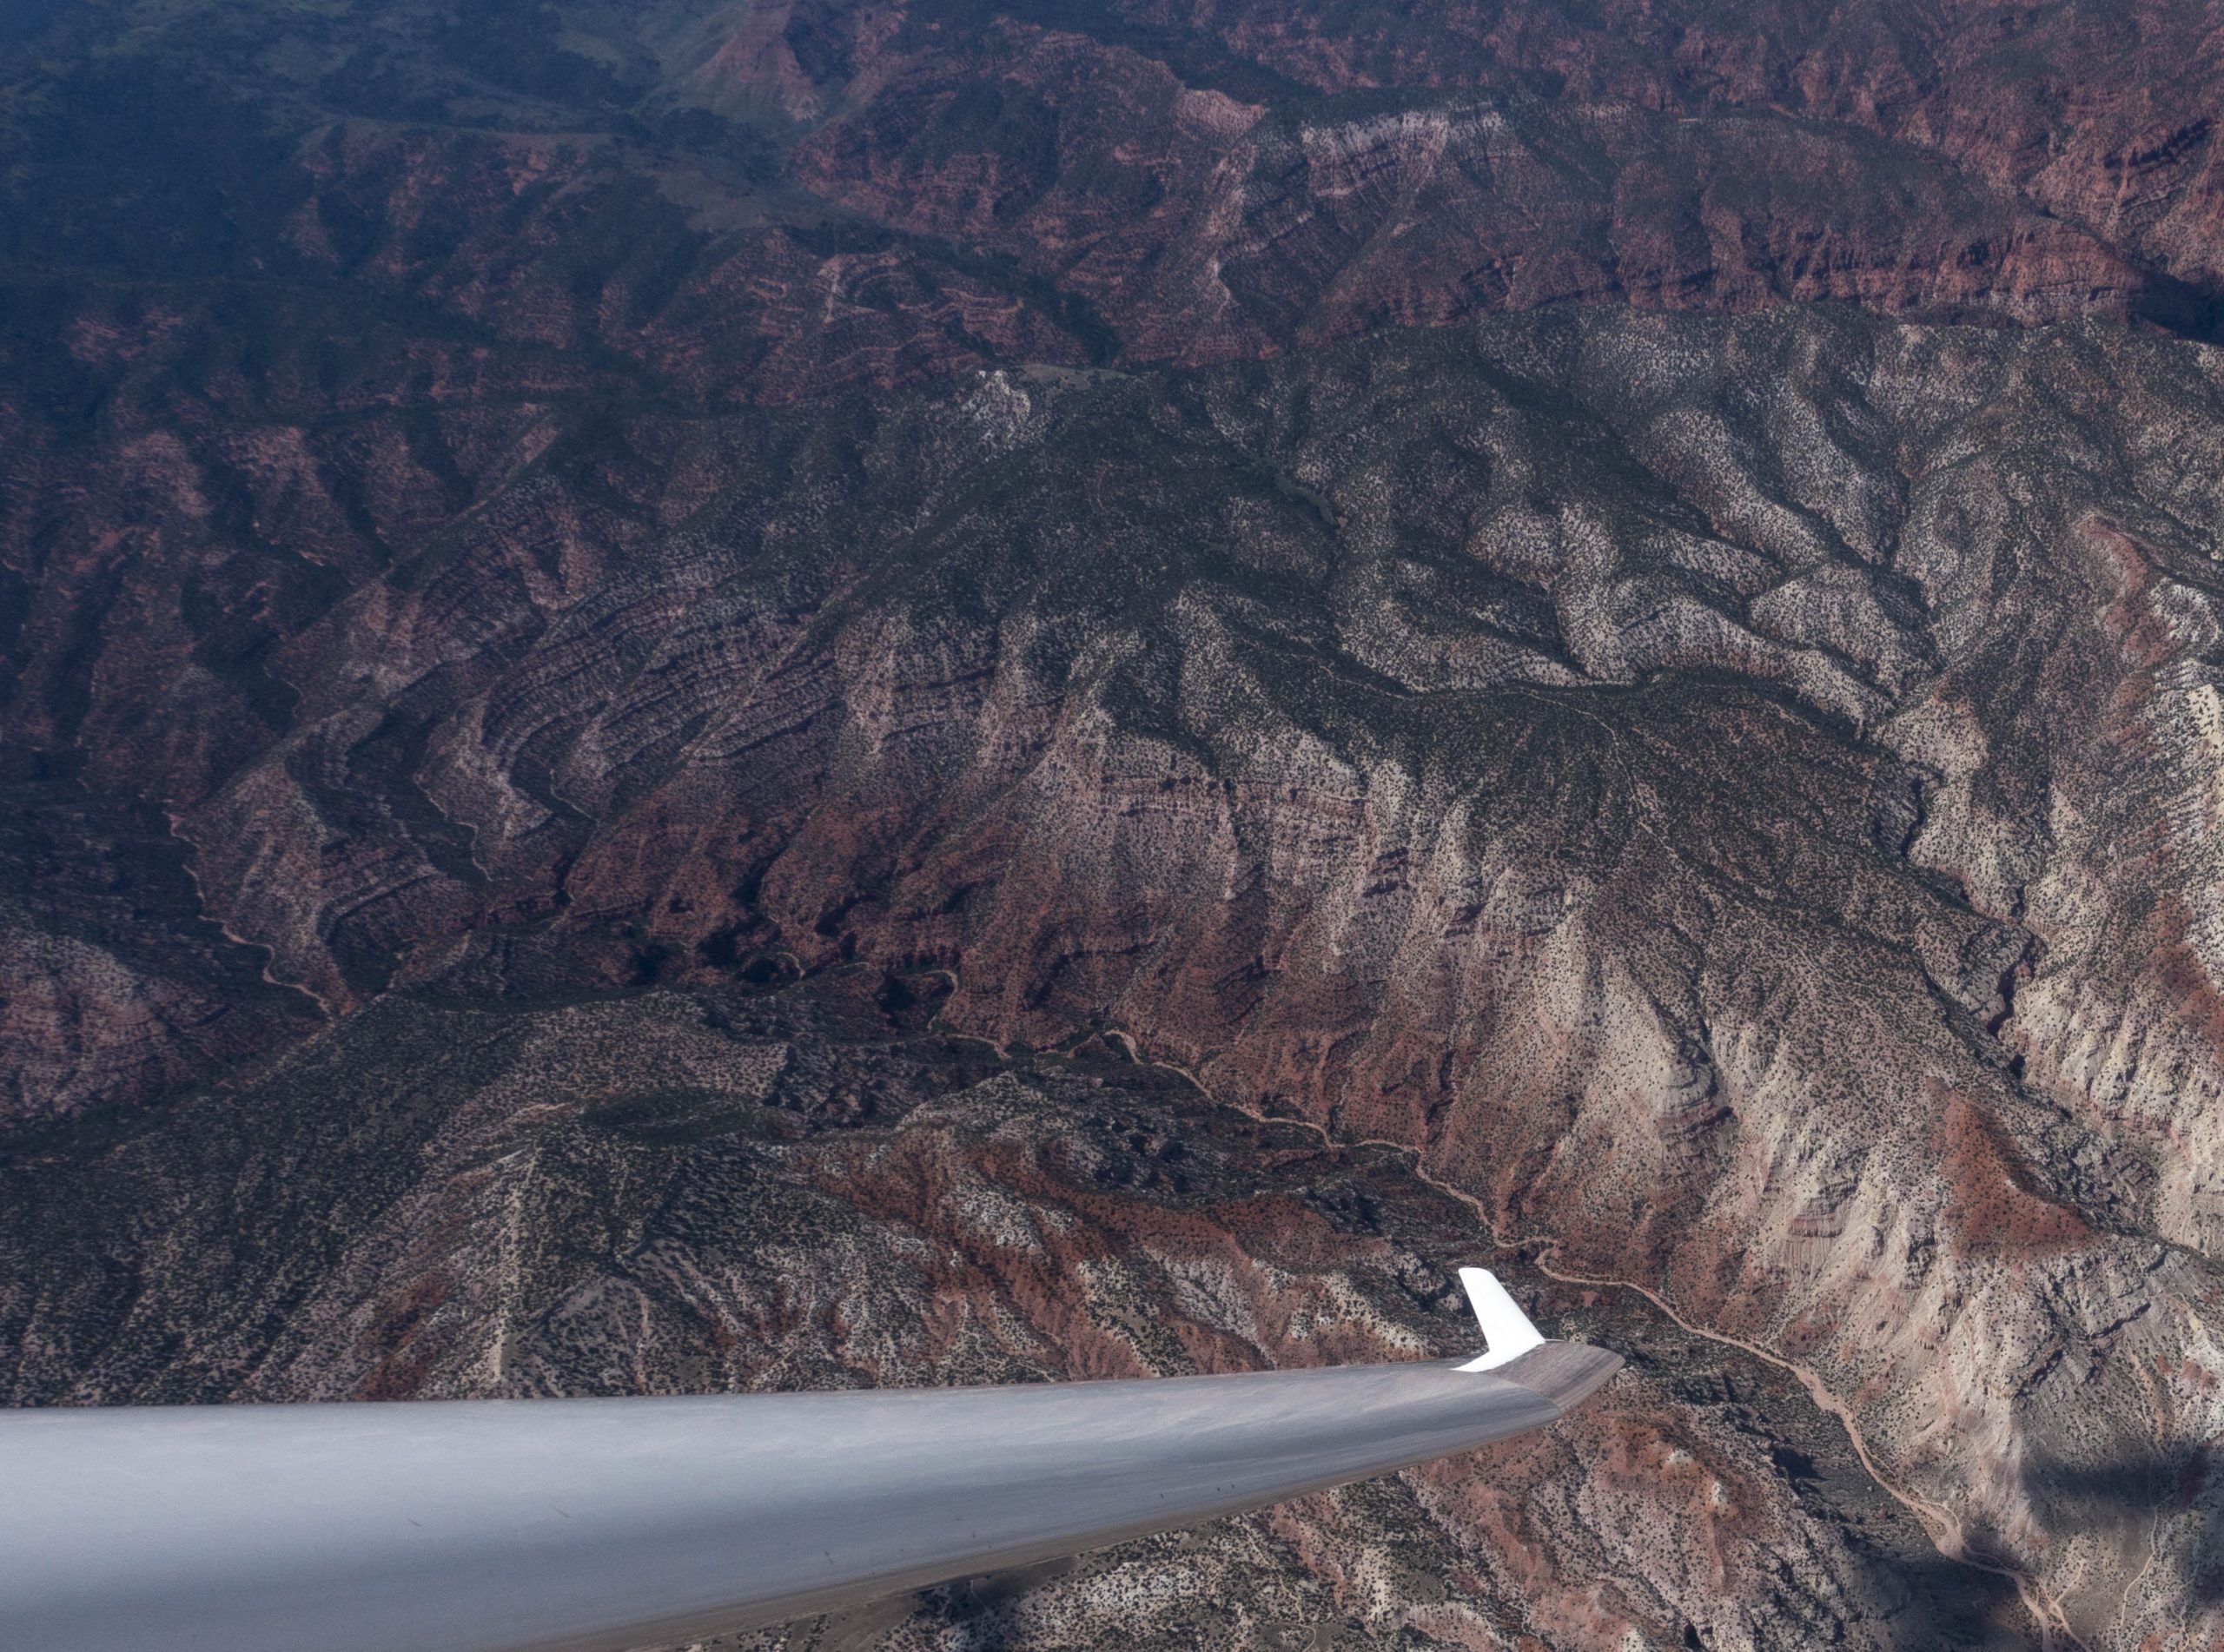
When flying above flat terrain and cultivated farmland, staying within glide range of a land-able field can be quite easy – land-able fields might be found every few miles in all directions.  But in different circumstances it can be very challenging: e.g. the mountainous areas and deserts of the Western United States are often completely unlandable, and airports may be 50 miles or more apart. High terrain may be in the way between your position and the nearest landable area even though your flight computer shows it to be within glide. Severe sink may degrade the attainable glide ratio of a 40:1 glider to 10:1 or even less.  Bad weather may move in and make your only landable area inaccessible, etc.  Considering these challenges, I found it surprising that not more accidents can be traced back to this root cause.

Relying on an engine

Glider operating handbooks typically state that a glider’s self-launch or sustainer engine must only be regarded as a convenience and not as something that the pilot can rely upon.  Pilots are advised to only attempt an in-flight engine start when they are within glide range of a suitable land-out field that can be easily reached even with the engine mast extended (which degrades the glide ratio to varying degrees based on the specific glider). The accident reports reveal that many pilots failed to heed that advice. The temptation to keep going because the glider has an engine is often too great.

These accidents are just special cases of the pilot’s failure to keep an airport or a land-able field within glide.

Misjudging the Final Glide

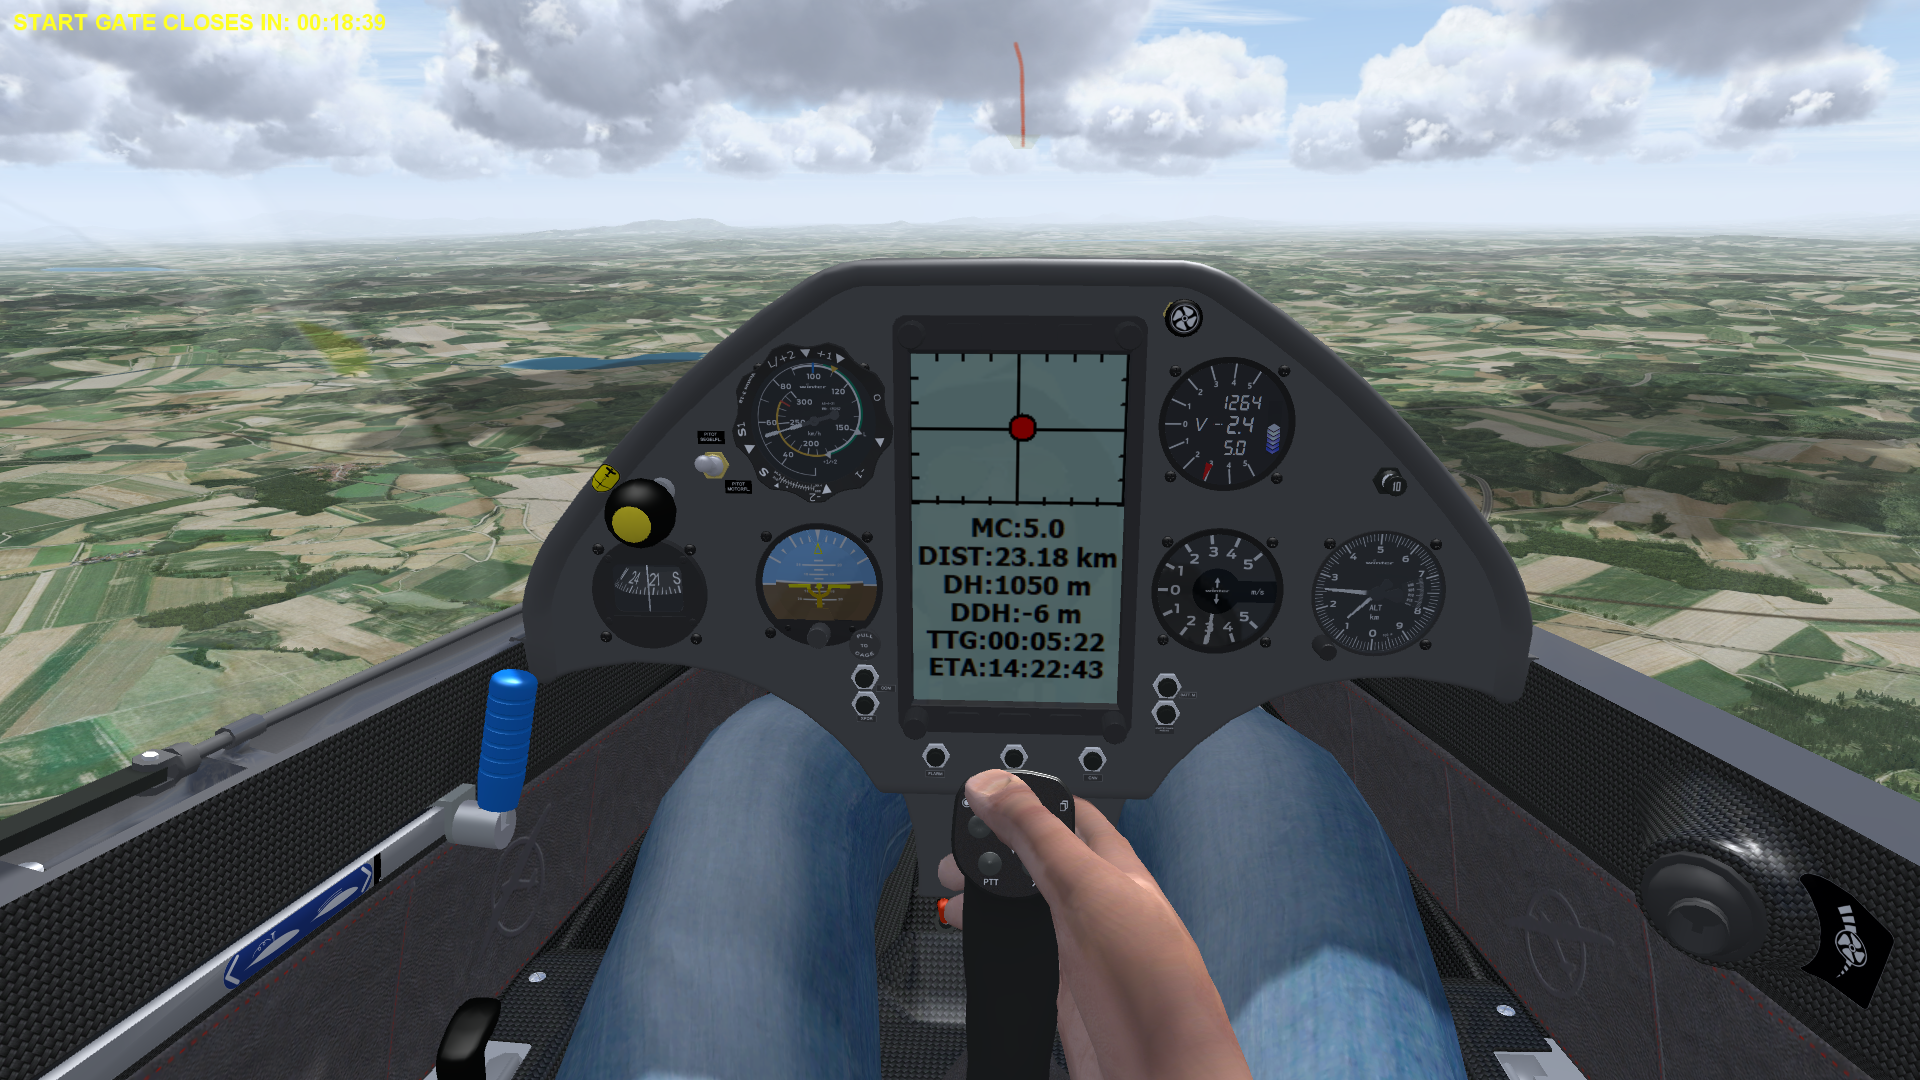
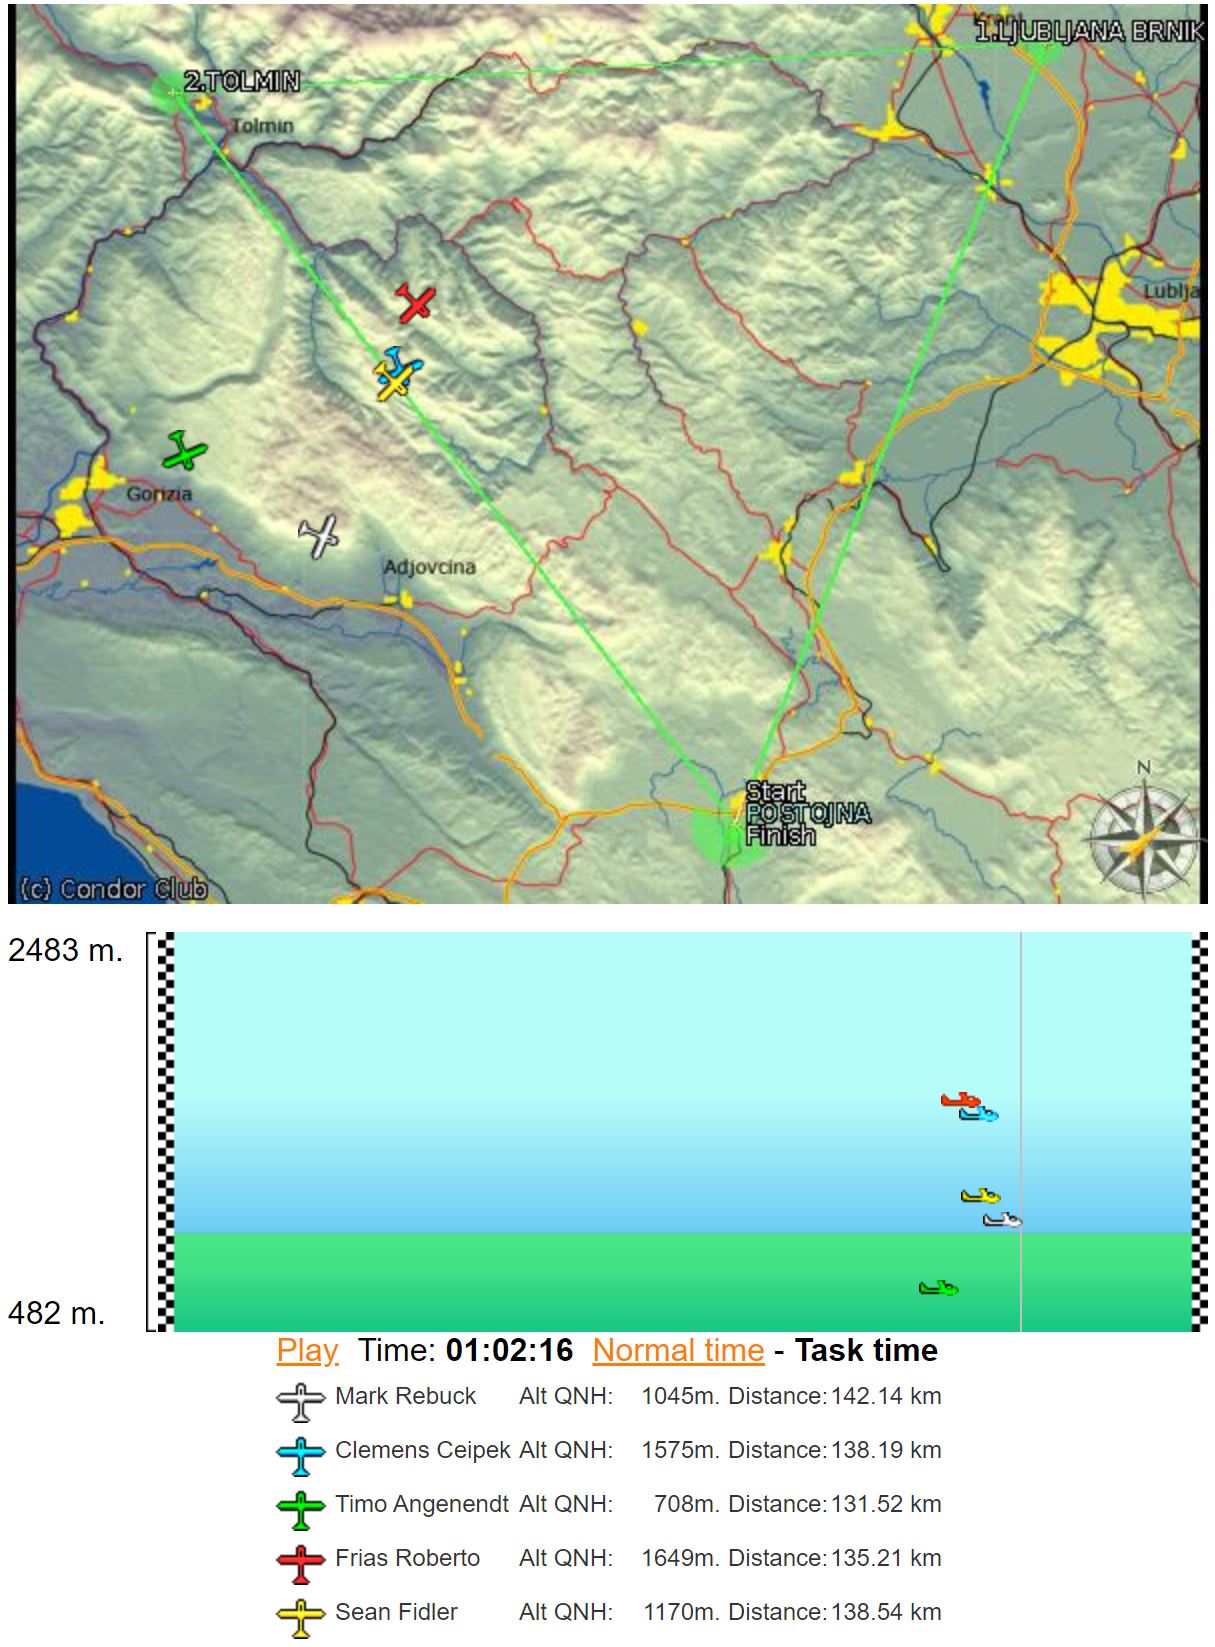
Misjudging the final glide and coming short is also a special case of failing to stay within glide range of an airport or a landable field and in some cases it can also be viewed as a special case of delaying the decision to land-out (provided that adequate fields were available along the final glide route). These cases tend to occur more frequently in a racing context, especially when there is no minimum altitude to finish the race. (If you also fly Condor multi-player races you will be very familiar with this).

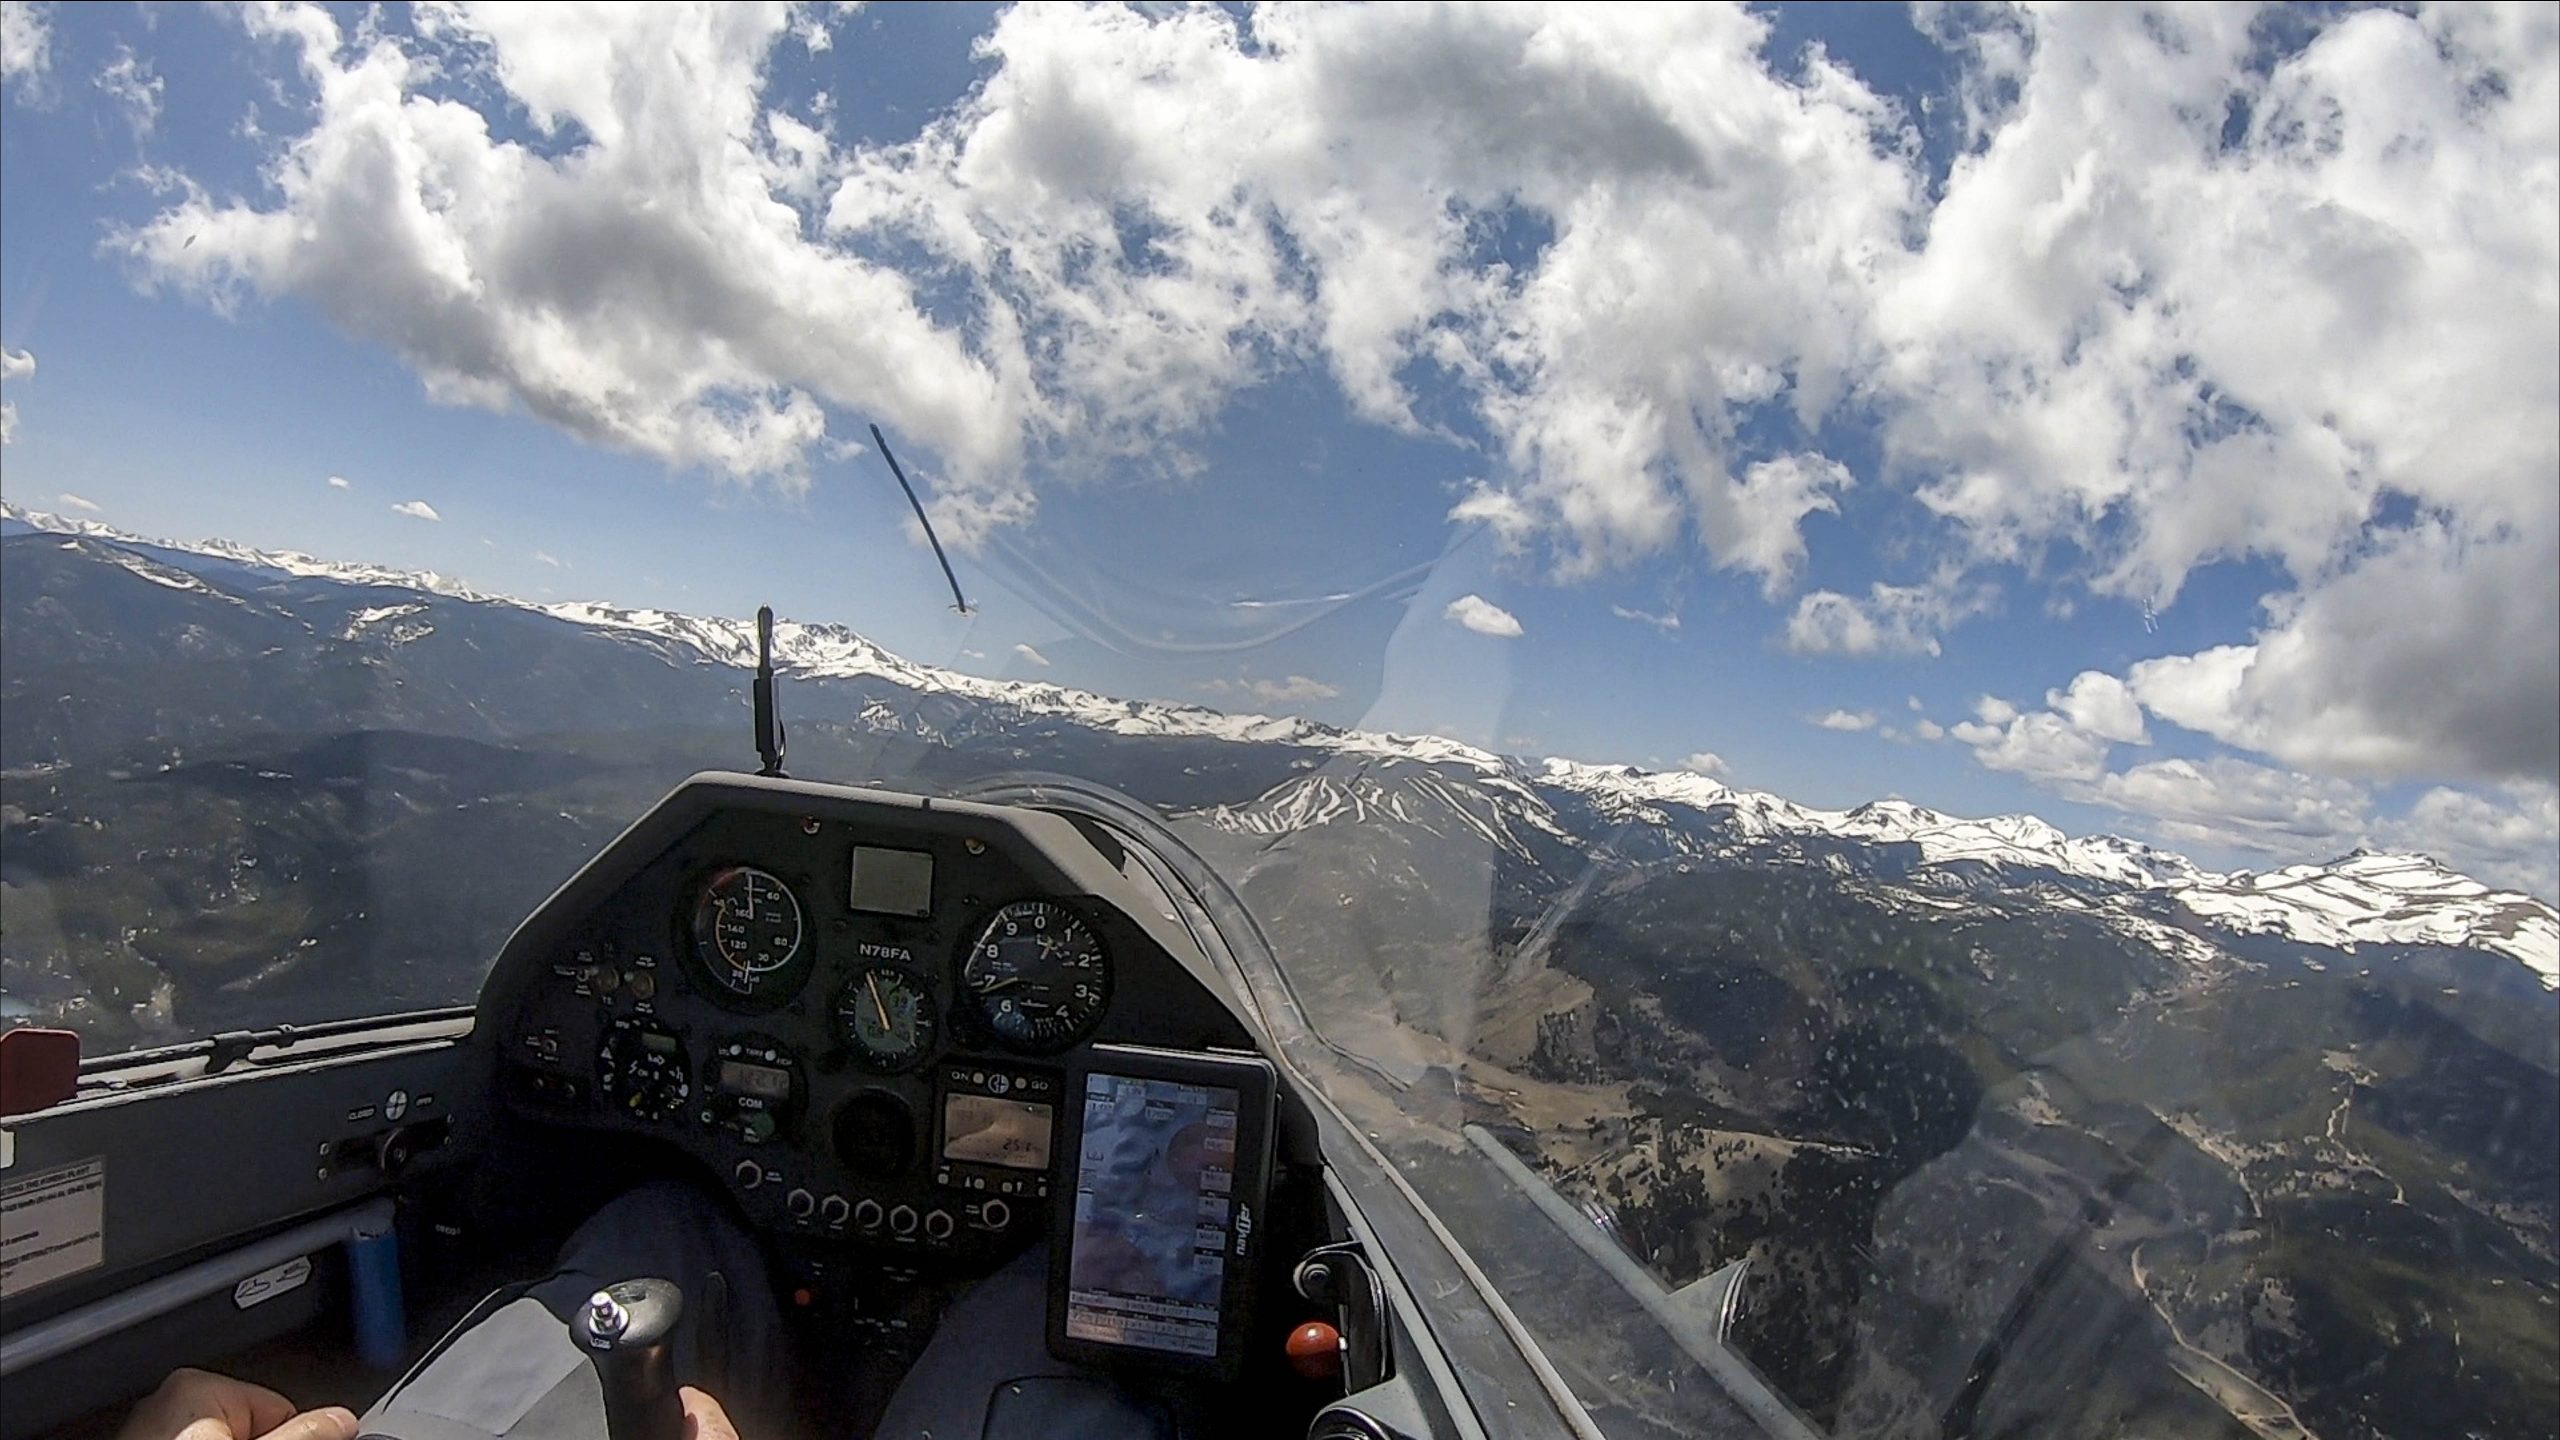
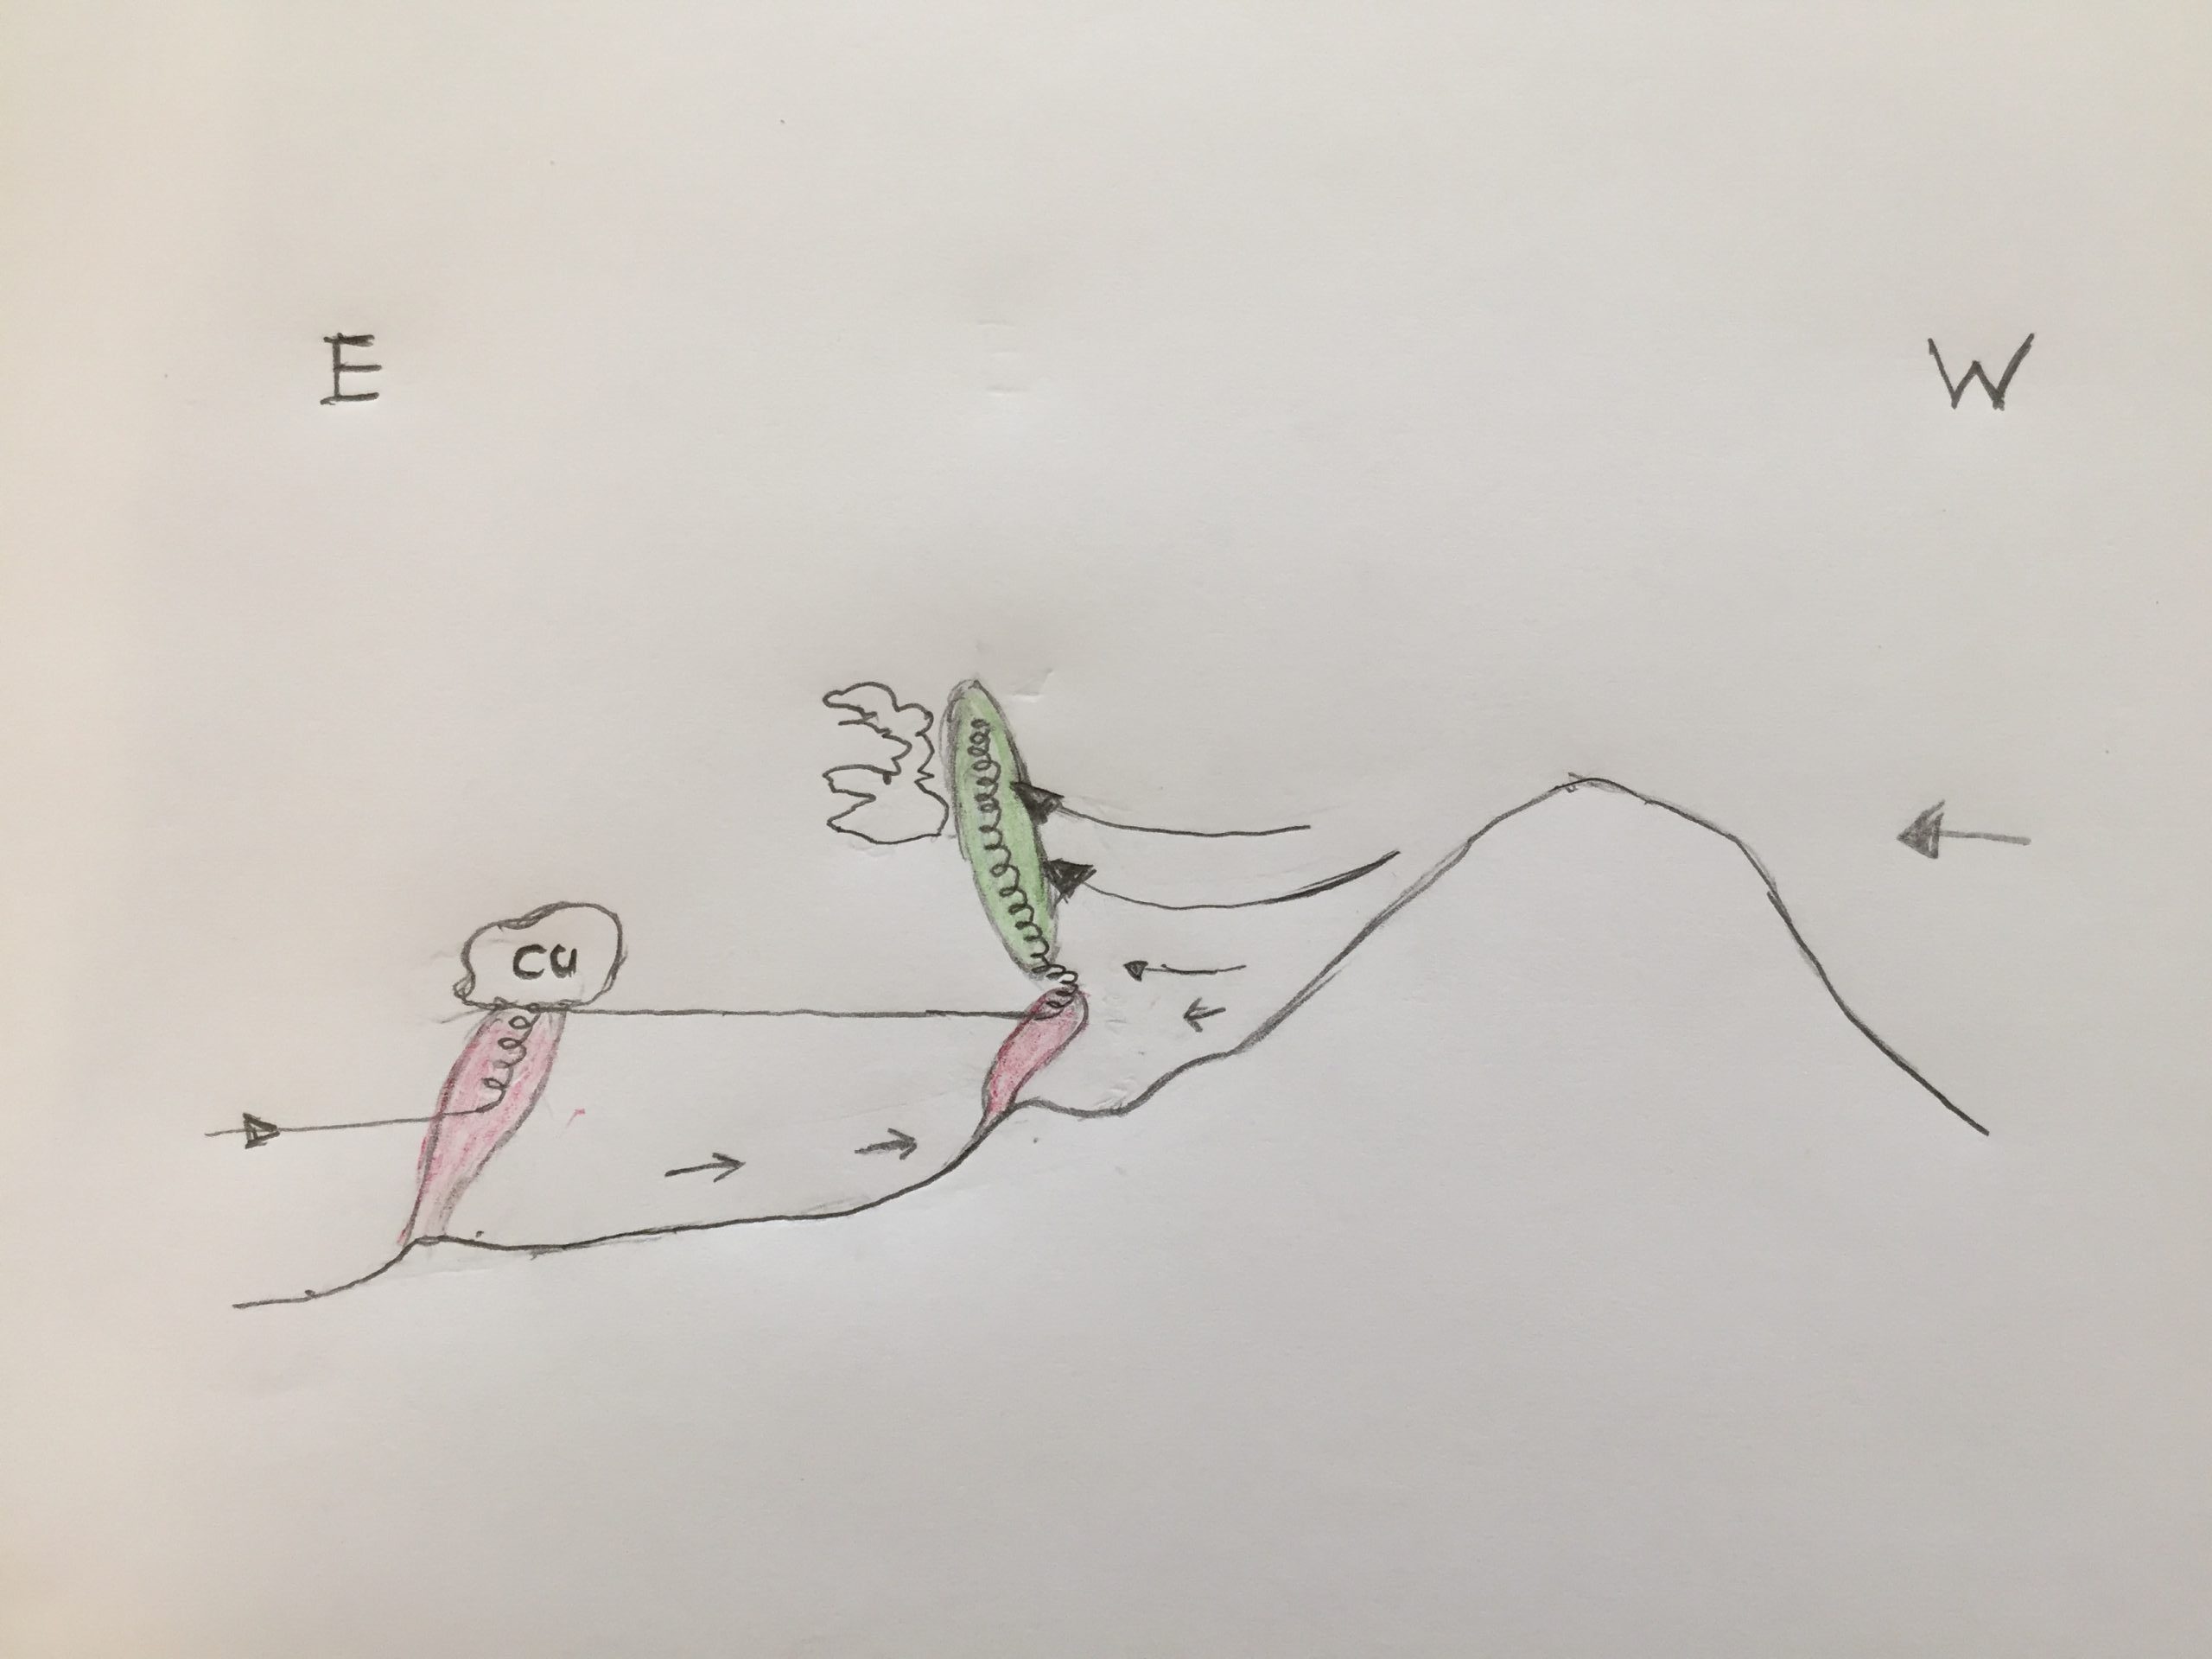
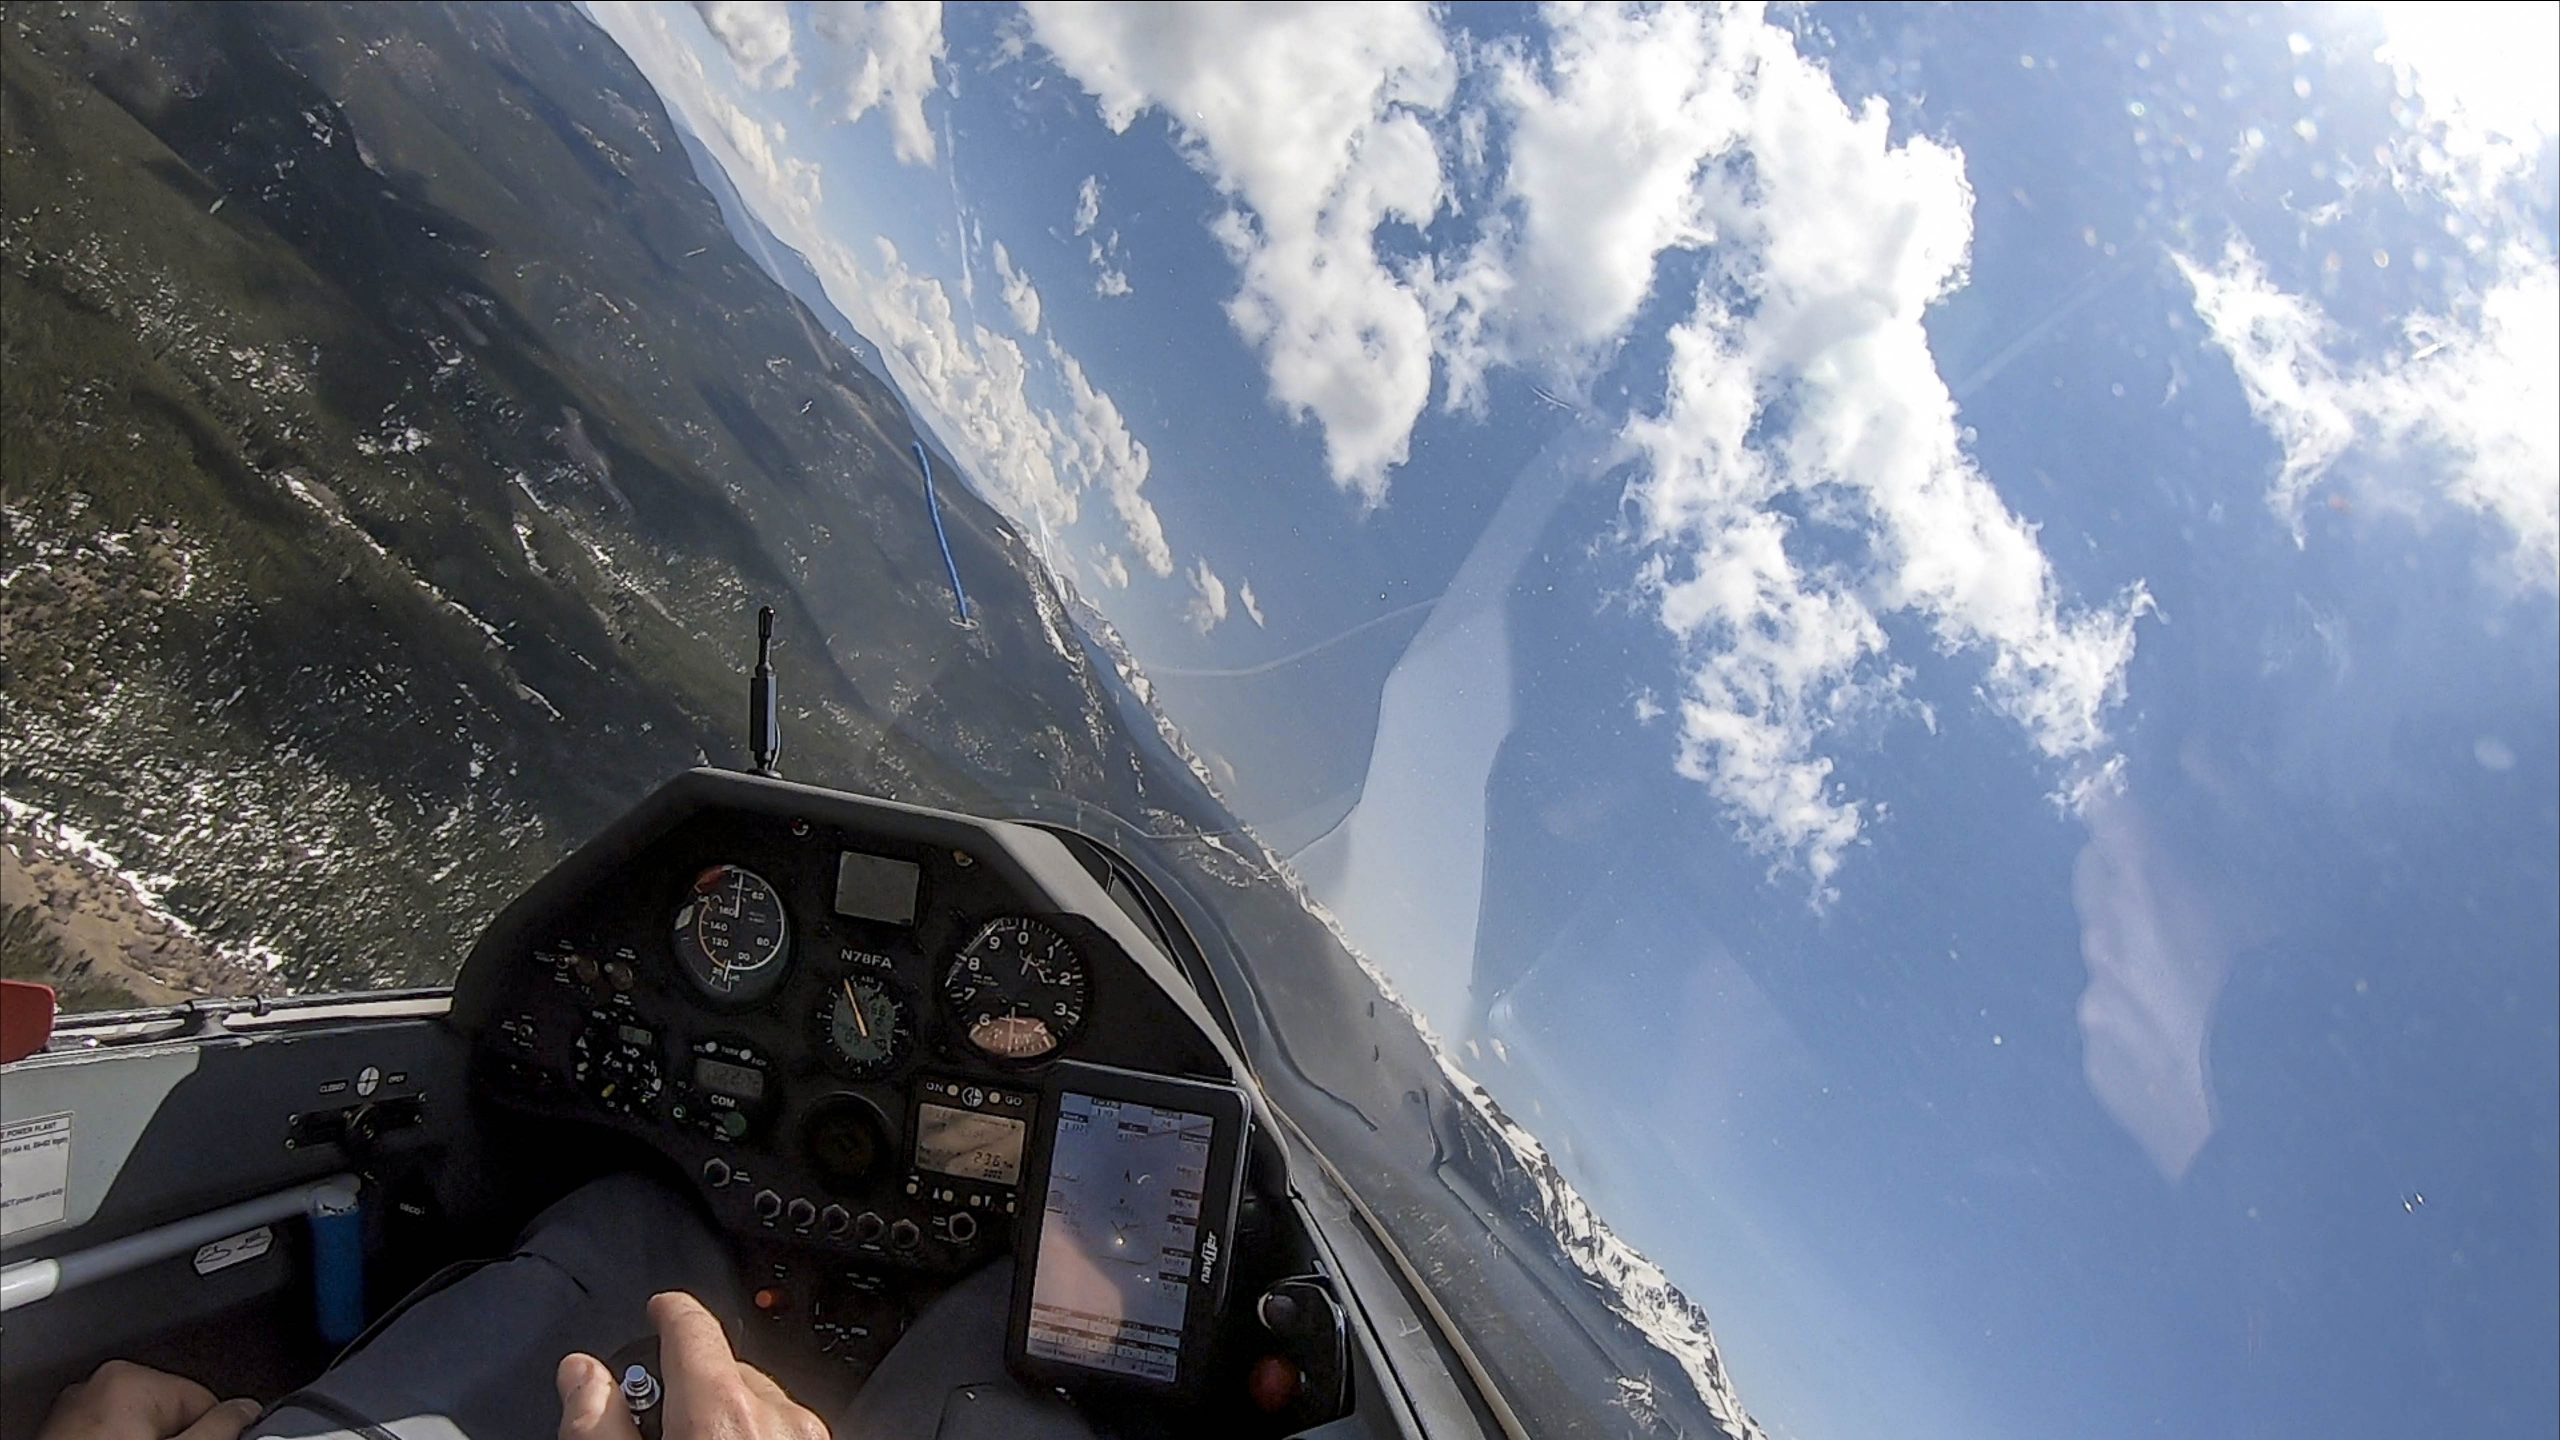
Impacting Mountain – Failure to Maintain Sufficient Distance and/or Airspeed when Flying Close To Ridges or Mountains

Ridge running and mountain soaring is likely to be more dangerous than flatland flying although it is impossible to demonstrate this because there are no reliable data available that break down all soaring activities into flatland vs. ridge and mountain soaring.  However, a significant number of accidents happen because pilots fly in close proximity to mountainous terrain and without maintaining extra airspeed.  The most typical case involves a pilot circling below the top of the ridge or just slightly above it, then getting unexpectedly close to the ridge (e.g. due to unexpected sink / lack of expected lift), pulling up, stalling, and spinning in. The temptation to fly too close and too slowly is greatest in weak conditions when flying at a safe speed and at a safe distance from terrain can make it impossible to climb.  Here are some examples:

Probably all of these accidents could have been avoided had the pilot followed the basic rules of 1) flying figure 8s instead of circling below the top of the ridge and until a safe distance to the top of the ridge is reached; and 2) maintaining extra air speed when flying close to terrain.

Flying into Clouds – Failure to Stay Clear of Clouds

These accidents tend to occur in wave flying conditions when pilots fail to make a timely decision to descend and the cloud layer closes below.  Examples:

Other Decision Mistakes

The examples above account for the vast majority of all accidents that can be traced back to wrong in-flight decisions.   Other decision mistakes happen as well but are quite rare.  Here are some examples.  All of them are one off occurrences.

How Can We Avoid “Fateful Decisions” And Resist Temptation?

To answer this question we must first consider that practically all decision mistakes in soaring are preceded by the temptation to do something that we know is objectively unsafe. (But somehow we are doing it anyway.)

There are three important factors at play that determine how hard it is for us to resist the temptation and do the right thing:

(1) how strongly we are tempted;

(2) how great we think the risk is;

(3) whether we have to take an active decision to to something that’s dangerous (e.g. deliberately fly low over unlandable terrain) or if the danger is coming at us and we would have to take an active decision to get out of it (e.g. deciding to switch from thermalling to landing in a field as we get closer and closer to the ground)

We are most likely to make a fateful mistake if the temptation is high; our subjective assessment of the risk is low; and if the risk is coming at us such that we have to take a pro-active decision in order to avoid it.

Consider the following (fictional) scenario: a contest pilot is in first place on the last day of a national competition.  He knows that he doesn’t need to win the last contest day but he has to complete the task: landing out would not only cost him the overall win, he would most likely be off the podium altogether.  He would also miss his chance to compete in the World Championships, something he has aspired to his entire flying career.  In short: his temptation to avoid a land-out is about as high as it can be.

During the flight, he made a minor tactical mistake and on the final leg he finds himself lower than he would like to be.  No big deal, he has been in this situation many times before.  In his club he is well known for his flying skills. He has thousands of hours of experience and has never had an accident. In other words: his subjective assessment of his personal risk when thermalling close to the ground is likely to be fairly low.

As he keeps looking for lift he is surprised (and increasingly annoyed) that he gets lower and lower as he continues on course.  All he needs is one good climb and he can make it home.  Somewhere between two fields that don’t look great but are probably land-able he finally finds some weak lift.  He is down to 450 feet.  This has got to work! He has gained back 600 feet when the lift dies.  He’s got to move on and there’s a newly forming cloud just ahead.  This is perfect! There also seems to be some kind of field right there.  He pushes for the cloud.  He’s down to 400 feet again when he encounters lift. He turns. Dammit – wrong turn direction. That hardly ever happens to him.  Why now?There’s some big sink – he’s down to 250 feet.  The field is within reach but he notices a power line running through it as he tries to center the thermal. This lift is narrow!  But it will work!  While he tries to center the turn, flying close to stall speed to keep the turn radius as tight as possible, he also tries to get a look at the field and the power line to figure out how he would land should this become necessary. Suddenly there’s a gust from behind, the glider stalls and spins in. The last thing our pilot sees is the ground rushing at him.  And he hasn’t even made an active decision to do something that’s risky!

(1) The Strength of the Temptation

When we fly we can be tempted either by our desire to achieve positive flight outcomes (e.g. a personal best, more OLC points, peer recognition) or by our desire to avoid negative outcomes (e.g. having to land out and losing a contest, losing peer respect, missing an important meeting).

Recognizing that “you will be tempted”, as John Cochrane puts it,  is the first and perhaps most crucial step towards making better piloting decisions. As John writes, “it’s much wiser to realize that you will be tempted and start preparing now to overcome that temptation, rather than just pretend you’re such a superior pilot it won’t happen to you.”

In applying Prospect Theory to soaring, Daniel Sazhin explains that the two types of temptations – positive and negative – are quite different in terms of human psychology.  “People take the biggest risks when they are confronted with losses rather than gains.” I.e., the temptation to avoid a negative outcome is much stronger than the temptation to achieve a positive outcome. That means, for example, that a pilot who wants to achieve a new personal best is significantly less tempted to take great risks (there will be another opportunity!) than a pilot who thinks that he will get reprimanded or ridiculed for landing out.

What really matters, however, is not so much the situation per se but how we as individuals think about it. If you are thinking of a land-out as something that you must avoid at all costs, it’s not surprising that you are likely to wait far too long before you decide to switch from thermaling into landing mode. But you can choose to think about it differently!  E.g., one of my fellow pilots in Boulder thinks of land-outs as opportunities to have a great adventure.  This is a great way of re-framing the same situation!  Instead of being something to be dreaded, a landout becomes something positive.  If you can convince yourself to think about it this way, you are much less likely to take great risks when you find yourself low above some farmer’s field!

(2) Our Perception of the Risk Involved

If we think that a particular course of action could put us in grave danger, we are obviously much more likely to resist the temptation than if we think that nothing will happen.

The problem is that most of the time we don’t actually know how risky a particular situation or maneuver is.  Instead we rely on our own subjective risk perception.  And our perception is primarily shaped by our own experiences.

This means, if we make decisions that rarely but regularly lead to disastrous outcomes, and which Martin Hellman calls 99.9% safe maneuvers, they will appear to us as less and less dangerous because each time we made such decisions “nothing happened”.  A glider flies until is doesn’t and we pay no price for repeating risky behaviors over and over again until the one time when it is too late.  That’s when we become complacent.

Daniel Sazhin explores the psychology of this in more detail in his article “Experience Can Kill You” where he illustrates why we are prone to underestimate the risks of relatively rare events especially when our decisions are based on past experience.

To stay safe, we must remain aware that dangerous situations and maneuvers are, well, dangerous.

(3) Risks That Find Us vs. Risks We Decide To Take

One way to look at soaring decision accidents is to examine if the pilot deliberately flew into a dangerous situation, or whether the pilot failed to make a timely decision that would prevent him or her from getting into danger.

The accident data shows that only very few accidents were caused by pilots who actively decided to get into potentially dangerous situations. One such accident happened after the pilot had flown two low passes and then stalled and spun in during the turn to land; one involved a pilot who decided to fly into a line of squall line thunderstorms; and two or three cases involved pilots who actively decided to continue their flights over unlandable terrain without keeping a land-able field in glide.

In the vast majority of cases, the pilot did not actively invite the risk; the risk found the pilot, and the pilot failed to make a timely decision that would have prevented the accident.

This is bad news for those who might have thought that accidents primarily happen to thrill seekers.  That is simply not the case.  There are some thrill seekers in this sport who deliberately lead dangerous lives, but they represent a small minority.  Most accidents happen to pilots who are generally risk-averse.

Ironically, being risk averse might make us even more likely to get into an accident in situations where the necessary evasive action carries some inherent risk as well.  This is particularly the case when we are low and confronted with a familiar dilemma: should we decide to land in a field and risk hurting ourselves; or should we keep trying to thermal and risk hurting ourselves?  Our fear of botching the land-out just adds to the temptation to keep trying to stay aloft, and the temptation continues to grow the closer we get to the ground. We are inclined to delay and delay the decision to land until one way or another, it is too late and we crash.

To stay safe, there are two lessons here: first, we must remember that the risks will find us without us having to go looking for them. We must make the timely and pro-active decision to take preventative actions. Second, we must mentally prepare ourselves for the possibility of having to land in a field.  This goes without saying for anyone flying cross-country but it is even true for those who intend to stay close to their home airfield.  Remember: eventually the risk is going to find you!

Strategies to Avoid Fateful Decision Mistakes

John Cochrane, Daniel Sazhin, Martin Hellman, and many others have proposed various strategies and I have added my own.  I don’t think that there is a single silver bullet that works for everyone.  I suggest you pick the ones that will work for you or even develop your own.  The key is that you are not only able to think about this while you are on the ground, but that you remain firm in your resolve when you have to make the tough decisions while in the air.

(1) Remember that you will be tempted and try to direct your mind to keep the temptation as low as possible.

  • E.g., if you think of landing out as something to be dreaded, try to reframe your perspective and channel your mind to think about all the positive experiences that you can gain from it.
  • It you’re flying in a contest, try to focus on the immediate activity to be performed (and not the day or the overall result).  Be like a tennis champion who is able to stay focused on each point and not get wrapped up in thoughts about the set, match, or the championship. If the task before you requires a safe land-out, execute it like a champion would. If your mind wants to go back to the bigger picture, broaden your perspective further and think about your family and the many years of soaring ahead.  Remember that today’s flight outcome is insignificant provided you stay safe so you can fly again tomorrow.
  • I also like John Cochrane’s suggestion that you pick a hero story to help you reduce the temptation:  he recounts the tale of his hero, John Seaborn, who refused to fly into a line of thunderstorms during the 2001 US Nationals, thereby forgoing the contest win and a chance to participate in the World Championships. Be like John Seaborn!  (Btw: this story continued.  At the 2018 US Nationals, John was in first place until the last day of the competition when he ran out of lift and executed a safe landout.  Then, one year later, his patience paid off and he finally got his reward and won the 2019 US Nationals.  Again: be like John Seaborn!)

(2) Regularly remind yourself that certain maneuvers such as thermalling low (even next to an airport), flying close to ridges without an adequate safety margin, circling below ridge-tops, crossing unlandable terrain (with or without an engine), low-energy final glides, terrain transitions at low altitude, etc, are – and will always remain – dangerous. This is true even if – and especially if – you have a lot of experience.  Here are some things you can do to remind you that these risks are real:

  • Regularly invoke your memories of situations when you scared yourself.  How did you get into these situations and what are you doing differently now to prevent them from happening again?  E.g., I write flight reviews with lessons learned to help me avoid repeating my own mistakes.
  • Try to learn from the experience of others, especially those that have perished while giving in to temptation (e.g. by reading accident reports). Do not dismiss what happened to them by thinking that you are better then them.  Instead, imagine how they got into these situations and how this might happen to you as well.
  • Invite flight instructors and peers to critique your flying and tell you if they notice any risky behavior. Correct it before it becomes a habit and your brain tricks you into believing that repeating a dangerous maneuver makes it safer (it doesn’t).
  • Recency matters so repeat those exercises from time to time. You can also ask yourself on every flight “what can possibly go wrong” and fly as if everything that could go wrong would come to pass.

(3) Plan ahead because the risky situations will find you and you will have to act to prevent them.  Pre-plan the most difficult decisions so when the time comes, your mind is already made up and all you need to do is execute your plan.

  • Decide what safety margins you will maintain.  E.g. “I will keep a minimum distance from mountainous terrain of at least x wingspans and I will never fly slower than x kts;  I will never attempt to thermal below x feet; I will not circle along a ridge until I am at least x feet above; I will always keep a landable field in glide with an arrival altitude of x feet and assuming a glide ratio of x:1 (or a MC setting of at least x); for final glides I will use a safety altitude of x feet and and MC setting of at least x;  I will never extend the engine unless I am at least x feet above a landable field.”  Write these safety standards down, and promise your spouse and your friends that you won’t violate them. Review your flight logs to see if you kept your promises.
  • Some situations are less suitable for such simple decision rules because they require constant adjustments in flight. However, you can still make commitments that will help you stay ahead of the game and avoid the other frequent “fateful decision” mistakes.  e.g. a good general rule is the familiar plan A/B/C paradigm: “whenever I decide to attempt something that is not 100% certain (e.g. a terrain transition, flying above unlandable terrain, approaching a ridge, soaring above clouds, etc.)  I will always maintain a plan B and a plan C that I can fall back on if plan A does not work out.”
  • Pre-planning is especially important for land-outs where our temptation to delay the decision is the greatest. Promise yourself that “when I am x feet above the ground I will land, and I will not change my mind”
  • Note that the same set of rules will not work for everyone and everywhere.  Your minimums should reflect terrain and site-specific considerations and must be appropriate for your glider and your skill level.

2) Basic Piloting Mistakes

This second category accounts for ~30% of Soaring Accidents. All of the skills necessary to avoid these accidents are regularly taught as part of basic flight instruction. You might ask, why then do these mistakes still occur? I had the same question.

One of the most interesting overall findings is that even the most basic piloting error accidents are rarely caused by true beginners!

In fact, only 10% of all improper aircraft handling accidents involve pilots with less than 50 hours of flight experience, and another 10% were caused by pilots with more than 50 but less than 100 hours of flight experience. The median level of experience of pilots involved in these accidents is 416 flight hours.

That means flight instructors overall do a pretty good job teaching the mechanical skills of flying.  The main problems can be found elsewhere!

What leads even experienced pilots to make basic flying mistakes?

Once again, I’ve tried to look at these accidents based on the root causes that got the pilot into a situation where they were unable to react properly and steer the plane.

You might notice that many of these cases also involve some level of negligence or improper decision making.  However, I classified all of them as “improper handling of the aircraft” because good piloting skills alone should have been enough to avoid the accident – even if the accident was preceded by carelessness and/or a poor decision.

I am discussing them in the order of how frequently they occurred:

Reaction to Emergency – Failure to React To Standard Emergency Situations

Pilots frequently run into trouble when they encounter a standard emergency situation that they have not personally experienced or trained for in a long time.  Many of them occur during winch launches where an immediate reaction is required.

Interestingly, pilots seem better prepared to deal with the clear-cut case of a standard cable break, than they are prepared to react to irregularities in the winch’s operating speed.  If you think about it, this makes sense because we have trained for cable breaks and our reaction in this case is more instinctive.  When the winch just slows down our instincts don’t work quite as well because our first reaction may be to hang on and figure out what’s going on. By then the glider may have already stalled and our reaction comes too late.

Extensive flight experience is not a good preparation for these types of emergencies.  Hundreds of uneventful winch launches make us drop our guard because we are not expecting a problem.  In fact, the data suggests that a student pilot who has just gone through cable break exercises is more likely to react correctly in these situations than someone who hasn’t experienced a winch problem in a long time.

Overconfidence and Complacency

Experienced pilots, even when somewhat rusty, are more likely than beginners to overestimate their flying skills.  Here are some examples of accidents where the pilot’s plane handling skills perhaps weren’t quite as good as they thought. These accidents could have been avoided had the pilot been a little more humble and avoided maneuvers that required more proficiency.

Inexperience – Basic Piloting Errors By True Beginners

Of course there are several cases involving students who lacked the necessary training to react appropriately. Here are some examples:

Unfamiliar Aircraft – Insufficient Familiarization with New Aircraft

Several accidents happened after experienced pilots transitioned to an unfamiliar aircraft.  Their experience might have contributed to making them less diligent in acquainting themselves with their new equipment.  Several of the cases happened after a transition to a more complex motor glider.

Inattention 

Experienced pilots are likely more relaxed than beginners.  While this means that they are less likely to suffer from tunnel vision, the downside is that it can also make them less attentive.  Four of these accidents happened when the glider pilot did not pat attention and accidentally climbed too high on tow.

How Can We Avoid Basic Piloting Error Accidents?

Basic piloting errors should be relatively easy to prevent.  However, since most of them happen to experienced pilots, who likely consider themselves to be least susceptible, the biggest obstacle to reducing their numbers is likely complacency.

Before we are willing to do something to address this risk we must first believe that it is us who are vulnerable!  Once that is accomplished, the remedy itself is relatively easy.

(1) Regularly practice standard situation emergencies such as rope breaks spin entries, and irregular occurrences, especially on tow

E.g., if you have not had a winch failure or an aero tow failure in some time it’s a good idea to fly with an instructor and have them pull the release on you when you least expect it.  Ask to also practice unexpected things such as a power reduction of the tow plane or an irregular winch speed.  These emergencies happen close to the ground and require immediate recognition and an almost reflexive reaction.  If we are stunned by what’s happening and are trying to figure out what is going on, the glider might have already stalled and it is too late.  Recognizing spin entries is easy to practice on our own at altitude (as long as you really know what to do if the glider does spin in and you first make sure that there’s no one else below you. Practice with an instructor first if you’re not 100% certain.) The important thing is that we instantly recognize what’s happening and reflexively do the right thing to stop it.

(2) Really get to know your equipment.

When you transition to a new glider be as diligent as you were when you transitioned into your first single seater. Do not underestimate the complexity of your new glider, especially if it has an engine or other unfamiliar controls and instruments.

(3) Stay current.

If you have taken a break from soaring for a few months, take a check ride with an instructor before you get back into your own ship. Read the operating handbook again and make sure you know exactly how everything works before you move the glider onto the runway.

(4) Worry – at least a bit.

If you tend to feel very relaxed when you get into the cockpit ask yourself what could go wrong: think of traffic, wind, weather, equipment failure, etc.  Imagine the worst and how you would handle it.  This will make you pay attention.

(5) Stay humble, seek critique, and critique yourself.

Reflect back after every flight: what did you do well? what could you have done better? what was the most dangerous situation? what could have happened in the worst case? what could you have done to avoid it? When you fly with an instructor, ask them to be ruthless in critiquing your flying.  If we develop bad habits (and we all do), chances are that we won’t notice until someone tells us.

3) Pre-Flight Negligence

12% of all soaring accidents are the direct consequence of things that the pilot did or did not do before they even took off.  In other words: once the launch process was underway, even the best piloting skills might not have been sufficient to prevent an accident.  The chain of events that led to the bad outcome was already in motion.

Once again, these accidents happen primarily to experienced pilots.  In fact, 85% were caused by pilots with at least 100 hours of experience and the median flight experience of the pilots involved was 700 hours.

Almost all of these accidents fall into a few groups, listed in order of frequency of occurrence:

Failure to properly assemble the aircraft and/or conduct a Pre-Flight and Positive Control Check (PCC)

The most frequent of these types of crashes involve disconnected control surfaces (mainly elevators or ailerons) and most could have been detected through a proper PCC. Examples:

Failure to consider a specific pre-take off emergency plan before launch

We were all taught to have a pre take-off emergency plan in place before each launch that includes what we will do in case of an emergency.  Unfortunately, as we experience one uneventful takeoff after another, we tend to become complacent and ignore or forget that lesson. Sometimes we maintain a vague plan but it is not specific enough and does not cover all eventualities. The problem is that if a take-off emergency does occur there is usually no time to think.  We find ourselves at a low altitude and in a situation where flying a normal landing pattern is impossible.  We may even be too low for a 180 degree turn and a downwind landing.  The land out options at the airport we are flying from might be poor and we may not have reviewed them in some time (or maybe not even at all).  We’re also over-stressed which means that neither our decision making skills nor our flying skills are as good as they would otherwise be.  And every second we lose altitude and our options get worse.

Many of these accidents could have been avoided had we already pre-decided what to do. But without a clear and specific plan in place we tend to waver and wander about until it is too late. Examples:

Failure to review the pre-takeoff checklist

These accidents typically involve either the canopy or the air brakes opening during takeoff.  Examples:

  • This airline transport pilot with 24,000 hours of flight experience took off without closing the canopy and airbrakes.
  • In this case the canopy opened on the downwind leg. Due to increased drag the pilot landed short of the runway.
  • Canopy opened on aerotow at 300 ft.  Instead of staying on and flying the plane, the flight instructor released and slipped into ground.

Failure to properly prepare a Cross-Country Flight

A few accidents (all in the American West) involved flights where a landing place shown on a map did not exist or could not be found by the pilot.

How Can We Prevent Pre-Flight Negligence Accidents?

Similar to accidents caused by poor basic piloting skills, these accidents are easily avoided if we realize that we are susceptible and are willing to be consistently diligent in our flight preparations.

(1) Always use and follow checklists.

The most important ones are: assembly checklist; pre-flight check including PCC; pre-take off checklist; pre-landing checklist.  Start over if you get distracted. Never ever skip the PCC!

(2) Have an emergency plan for each takeoff.

Be very specific and consider all eventualities. E.g., what do I do during ground roll if: the wing touches the ground; the towplane won’t climb, the winch slows down. Once airborne, what do I do if the rope breaks or if the tow plane/winch fails at different altitudes. For me, the best tactic is to actually call out loud what I would do “now” if the rope were to break: e.g. land straight ahead; small field 90 degrees left; larger field 30 degrees left; 180 degree turn to the left.  This way I know exactly what to do and can focus entirely on executing the plan that is already in place.

(3) Never fly into the unknown.

Even if the sky ahead looks great! You must positively know before the flight where you can land. Also: always keep a landable place in glide.

4) Accidents Caused By Insufficient Situational Awareness

About 6% of accidents are caused at least in part by a pilot’s failure to maintain situational awareness either through audiovisual observations and/or (radio) communications.  Most, but not all, of these accidents are mid air collisions that could have been avoided.

Failure to Maintain Visual Awareness

Failure to Communicate

Many of the following accidents could have been avoided if the pilots involved had been communicating more pre-actively and/or listened more carefully to the communications of others. Here are some examples:

How Can We Prevent Insufficient Awareness Accidents?

The simple answer is to always pay attention, maintain a good look-out, and communicate pro-actively.  That is true but probably insufficient advice.   We can’t tell from the accident reports why the pilots did not do those things.  It’s probably safe to say that we should

(1) Only fly when we are healthy and well rested so that we are able and willing to pay attention

(2) Ensure that our eyesight and hearing are up to the task. This is particularly important in countries (such as the United States) where pilots do not need a medical to fly gliders.

(3) Train ourselves to make regular position announcements on the radio, especially when we approach or fly in areas where we expect other air traffic. We must consider that glider pilots tend to seek out the same energy lines and are therefore frequently cruising towards each other at high speeds and at similar altitudes when it is close to impossible to see one another.

(4) Equip our gliders with compatible collision warning technology, especially when we fly in areas with other glider traffic.  This could have prevented several accidents and probably has already prevented numerous others.

(5) Speak up when we notice something that could get others into trouble even if we’re not directly affected.  This includes reminding others to pay attention or to communicate when we notice an opportunity for improvement.

(6) Pay close attention not just in the air but also on the ground.

5) Unavoidable Accidents

Like with any activity that involves dangers we must face the fact that some accidents really cannot be avoided by the pilot (unless of course they avoid to fly at all).

Fortunately, they represent the small minority of the cases.  My analysis shows that approx. 8-15% of all accidents could not have been averted by even the most proficient and diligent pilot.

Most of those fall into one of the following four categories (in order of frequency of occurrence)

Technical Failures

These are rare but they do happen from time to time.  I found this to be the cause in 9 out of 247 accidents (3.6%). This does not include issues that could have been detected by a thorough pre-flight check or failures that were caused by operating the plane outside its limits.  I’m also not counting cases here where the engine of a motor glider failed to start. Here are some examples:

  • In this relatively recent case, the rudder of an Arcus got uncontrollable at 17,000 feet causing the glider to enter an irrecoverable spiral dive.
  • In this case, a wing of a Duo Discus broke in mid flight at a perfectly normal operating speed due to a manufacturing defect.
  • And in this case, the connection between the controls and the elevator of a DG100 disconnected inside the fuselage after takeoff, making the plane uncontrollable.

Medical Conditions

Medical conditions that result in the pilot passing out during the flight could only have been prevented by the pilot not flying at all.

  • There were at least four cases where the pilot suffered an in-flight heart attack. Here’s an example.

Certain Midair Collisions

Some midair collisions are avoidable through pro-active radio communications and better situational awareness.  I have covered those under point 4) above.  However, there are midair collisions that even the most diligent glider pilots would  probably not have been able to prevent. These include cases where the other aircraft involved was not equipped with collision detection technology.

  • In this extreme case a glider was hit from behind in Class E airspace by a military aircraft traveling at 410 kts.
  • Multiple cases exist – such as this one – where two gliders collided head-on and where it was also practically impossible for one to see or take note of the other before it was too late.

Human Mistakes of Third Parties

In some cases an accident is caused by someone else and there is really nothing the glider pilot could do to avoid it.

  • One such case involves a winch launch, where a crew member incorrectly attached the cable in such a way that it could not be released by the glider.  Unfortunately the winch cable cutter was defective as well and the pilot had to try to land while remaining attached to the winch.

Methodology

Accident reports often just present what is known about the facts of an accident and sometimes even that is very little.  In the case of fatal accidents there may be no witnesses. And in other cases, the accident pilot may have had an incentive to rationalize their own mistake(s) and attribute the accident to bad luck.

To understand how we can prevent accidents we have to get to the underlying reasons.  In particular, I wanted to identify if the pilot had made a mistake or lacked basic skills that made it impossible for him or her to avoid the accident. This requires an act of interpretation, which is of course at least somewhat subjective.  Obviously, no one can really know what went on in the pilot’s mind and in many cases, there are several contributing factors and sometimes a series of mistakes that led to the accident. However, after reading and re-reading so many accidents, clear patterns emerge, and I believe a reasonably accurate interpretation is possible. Someone else might interpret any one individual accident differently, but they would likely arrive at the same themes.

After interpreting each accident, I analyzed and categorized the results to develop recommendations and strategies of what each of us can do to minimize the likelihood of becoming part of the accident statistic.

Conclusions

As I pointed out at the beginning, once every 50,000 flight hours a soaring pilot dies.  For every fatal accident there is also at least one accident with injuries.  That means serious accidents where people are harmed happen about once every 25,000 flight hours.

The fatality rate of our sport makes it 2x as dangerous as riding motorcycles and 40x as dangerous as driving cars.

However, a careful analysis of accident reports shows that soaring does not have to be so dangerous.  Approx. 90% of accidents are avoidable.  If we were successful in doing that, we would reduce the risk of the sport by an order of magnitude such that it would only be 4x as dangerous as driving.

Unfortunately, such a dramatic reduction of accidents is unlikely to happen.  However, each of us has an opportunity to drastically reduce the risks for him- or herself.

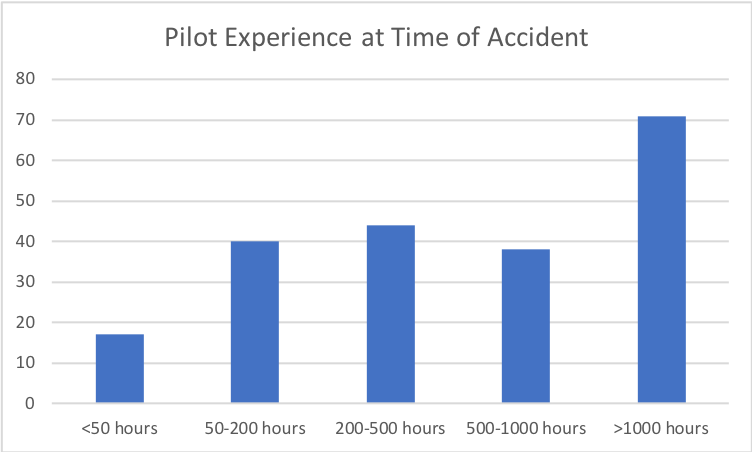
If you have read this entire post you have already realized that there are no silver bullets.  You also know that experience alone is certainly not sufficient – in fact, it probably works against you.   The median experience of the pilots involved in all these accidents is 522 hours.  34% of the accident pilots had flown more than 1000 hours. The following chart shows the distribution:

Here is a summary of the things you can do to help reduce your risk.  I have organized them based on the types of mistakes that caused the most  accidents, and the recommendations are listed based on my assessment of which ones are likely to have the biggest impact.

40% of accidents are caused by “fateful decisions” and “eroded margins”.  Most of them are made by generally conservative pilots, not by daredevil thrill-seekers.  How you can avoid them:

(1) Remember that you will be tempted to do something that’s dangerous and train your mind to keep the temptation as small as possible, e.g. by reframing potentially negative outcomes that you want to avoid at all cost (such as landing out) into positive opportunities (e.g. to have an adventure).

(2) Regularly remind yourself that certain maneuvers are always dangerous and that they do not get safer with experience. You may even be performing some of them regularly and no longer think of them as dangerous because nothing has ever happened. This is a dangerous trap that you have to get yourself out of!

(3) Pre-plan the difficult decisions such as when to stop thermaling and start landing; what you will do and not do when you’re in weak lift along a ridge, when to interrupt a final glide, etc. Your mind should already be made up when you get into these situations so you can focus on executing your plan.


30% of accidents are caused by basic piloting errors.  Contrary to popular belief, even basic mistakes are most often made by experienced pilots. How you can avoid them:

(1) Regularly practice standard situation emergencies such as rope breaks and spin entries but also power reductions on tow and irregular winch speeds.  We tend to be too slow in responding to situations that require a reflexive reaction if we have not experienced them in a while.

(2) Really get to know your equipment. Transitions to new and more complex gliders (e.g. motor gliders) often causes serious problems.

(3) After a break from soaring take a check ride with an instructor before you get back into your own ship.

(4) Worry – at least a bit. If you’re too relaxed there’s a real risk that you become inattentive. E.g., several people have dies because the glider pilot did not pay attention on tow.

(5) Stay humble, seek critique, and critique yourself.


12% of all soaring accidents are caused by Pre-Flight Negligence. The median pilot experience was 700 hours.  How you can avoid them:

(1) Always use and follow checklists. Never ever skip the PCC or the Pre-Takeoff Checklist!

(2) Have a very specific emergency plan for each takeoff that covers all the things that could go wrong. “I can turn around at 200 feet” is very often not enough!

(3) Plan your flight, know where you can land, never fly into the unknown.


6% of accidents are caused by insufficient Situational Awareness.  Most of these accidents are mid air collisions. How you can avoid them:

(1) Only fly when well rested so you can pay attention to the sky and the radio.

(2) Ensure that our eyesight and hearing are up to the task.

(3) Make regular pro-active position announcements when flying in areas with other air traffic. Expect other gliders to fly along the same energy lines.

(4) Equip your glider with Flarm and other traffic awareness technology.

(5) Speak up when you notice something that could get others into trouble.

(6) Pay close attention on the ground as well.

Soaring does not have to be so dangerous.  If you train your brain to resist the temptations; if you practice and are self-critical; and if you are diligent before and during your flights, you can dramatically improve your odds.

The Risk of Dying Doing What We Love

Many of us participate in activities and sports that are at least somewhat dangerous.  However, most of us also do not have a full appreciation of how risky these activities really are, especially compared to other things that we could be doing instead.

We just love our favorite pastime and facing up to its risks can be stressful because we also want to be safe while having fun. Psychologists call this type of stress “cognitive dissonance”, and we intuitively look for ways to remove the discomfort of our conflicting emotions, often by downplaying the risks to ourselves and to others. 

E.g., when I became a glider pilot some 35 years ago, my instructors used to proclaim that “the most dangerous aspect of the sport is the drive to the airport”.  This was a widely held belief at the time even though it could not have been further from the truth. And while the slogan was famously debunked by the prominent German pilot Bruno Gantenbrink in his speech “Safety comes first“, our instinct to downplay the risks to ourselves (and to others) has of course remained.

Given our natural inclination to deceive ourselves, it is not surprising that good data about the factual risks of many activities can be difficult to come by.  And even if data are reported, they are often accompanied by statements that soften, blur, or contradict the facts, frequently through the use of misleading comparisons.

Here is just one such example from scuba diving in which the author asserts that scuba diving is safer than driving a car. She does this by comparing the statistic that 1 in 5,555 people were killed in a car accident in 2008 with the statistic that only 1 out of 212,000 dives ended deadly.  Did you catch the fundamental flaw?  The comparison would be ok only if each driver would drive just once a year.  In reality, each driver makes on average 2 trips per day, i.e. 730 car trips per year, which means that the 5,555 drivers drove in aggregate about 4 million times (5555*730).  I.e., 1 in 4,000,000 drives ended deadly vs 1 in 212,000 dives. By this – still not perfect, but definitely more comparable – measure diving isn’t safer than driving but instead about 19x more dangerous! No matter the sport or activity, you’ll quickly find similar examples of apples to oranges comparisons and a conscious or subconscious attempt to downplay the risks.

When I looked for data on risky sports and activities, I also found the other extreme: a Google search will return plenty of articles listing “the most dangerous sports in the world,” almost all of which try to make most sports sound insanely dangerous. However, more often than not these articles are just click-bait to generate ad revenue and lack any serious effort to get to the facts.  Even the most well-intentioned ones that actually quote their sources tend to suffer from one of two major problems: either they lack a common denominator and therefore compare stats that are just not comparable; or they use a denominator that isn’t all that meaningful such as the general population while ignoring the differences in participation rates among different sports.

I wanted to know the honest truth and so I set out to do the research myself.  The most important decision that I had to make at the outset was to select the most appropriate basis of comparison and hence, what denominator to use.  I concluded that the most meaningful datapoint to me is the risk of dying (and the risk of getting injured) per hour of participating in a particular activity.  There are two reasons I picked this risk per participation hour as the most sensible base of comparison: First, it allows me to compare different choices for my spare time, e.g., the risk of spending an afternoon riding a mountain bike vs the risk of spending the same afternoon flying a sailplane. Second, it gives me a sense of how serious the risk really is and therefore how carefully I should prepare to mitigate it.

The graphic that we’ll get to below shows what I came up with.  To facilitate the readability of the comparison, I benchmarked all activities against traveling on commercial airlines, which happens to be one of the safest things you can do when you leave your home:  only once in 10 million passenger hours (i.e., once in 1,141 years) will a passenger die when traveling on a commercial airline.  In other words, the chance of a person dying within their next 1,000 participation hours is only 0.01%.

Other activities that I participate in regularly such as driving, cycling, skiing (on and off piste), or marathon running aren’t nearly as safe as traveling on an airliner but they are still quite safe.

Unfortunately, my favorite sport, flying sailplanes, aka soaring, is one of the more dangerous activities.  There are no reliable participation data available for the US but I found quite solid information for Germany and France where soaring is much more practiced than in the US.  In both countries the sport has a fatality rate of 1 in 50,000 participation hours; i.e., the risk of dying within the next 1,000 hours of participation is 2%, about twice as high as the risk involved in riding motorcycles.  It also means that an active pilot, who flies about 100 hours per season, has a 1 in 50 chance of dying in the sport within the next decade, and it makes soaring about 200 times more dangerous as traveling on a commercial jet. Other air sports tend to have similar risks:  flying powered airplanes is just a little bit safer whereas hang-gliding and paragliding are somewhat more dangerous.

Some of the data surprised me.  E.g., I found driving, skiing, and cycling to be safer that I expected, whereas climbing the Tetons and especially Mt Everest is actually much more dangerous than I anticipated.  Not surprising to me was the insanely high risk involved in Base Jumping, which is shown to be 480,000 times more dangerous than commercial aviation, with an expected death per 21 hours of participation, and practically no chance at all to survive the next 1,000 hours of flying through the air.  If you’re a Base Jumper you are likely to complain that my methodology of counting only the short duration of the jump (and, e.g., not the time you spend climbing up the mountain) puts your sport into an unfair light.  To that I say feel free to count differently if you want to convince yourself that jumping is safer than it really is.  As I pointed out above, you certainly won’t be alone in your desire to deceive yourself.

Unfortunately, all the information in the chart below only refers to the risk of death and does not account for the risk of injuries.  The reason is simply the fact that data about injuries are extremely unreliable since the great majority of sport injuries are never reported and/or accounted as such.  (The omission of injury information also means that activities that tend to have a relatively high injury to death ratio (e.g. skiing, equestrian eventing, marathon running, riding motorcycles, hang gliding, paragliding, downhill mountain biking) might look relatively safer than they really are, and activities that have a relatively low injury to death ratio (e.g. general aviation, soaring, skydiving) might appear relatively more dangerous than they really are.)

Without further ado, here is the chart:

Another way to look at the same data is to compare them to the normal risk of dying (of any cause) at different life stages.  Life insurance companies keep track of these risks as they seek to adjust their premiums based on the age of the insured.  It should be intuitive that an 18 year old person has a much lower risk of dying within their next 1,000 life-hours than a 90 year old.

Below is a chart that shows how this normal risk of death increases as you get older. E.g, the odds that an average 18-year-old American male will die within their next 1,000 life-hours is about 0.01%.  This happens to be exactly the same odds as traveling on a commercial airliner, once again illustrating how save commercial air travel has become. A 90-year-old male, by comparison, has a 1.9% chance of dying within their next 1,000 life hours.  You can see how the slope of the curve remains fairly flat until the age of 50, and how it really steepens around 75. If someone manages to survive until the age of 119, their odds of dying within the next 1,000 life-hours will have risen to 10.2%.

(The source of this information is the US Social Security Administration.  Note that they report the risk of dying within the next year, which I converted to the risk within the next 1,000 life hours, i.e. 41.7 days.  Note also that the risk level tends to be slightly lower for females since their life expectancy is higher, but for our purposes the gender differences are negligible.)

So how do the risks of the various activities compare relative to the normal day-to-day risk of dying at different ages?

To illustrate this, I placed the activity icons onto the same chart (see below).  Once again, you see that commercial air travel is the safest of these activities. Driving, skiing, cycling, back-country skiing, and marathon running are all along the relatively flat part of the curve.  The risk of dying per hour when swimming in open waters or while participating in equestrian eventing is about 0.3%, equivalent to the risk that an average 71 year-old person faces in their day-to-day life.

As you move right and up along the curve, the risk level increases much more noticeably. Scuba diving is about as dangerous as being 80 years old, and motorcycling corresponds to the normal risk of being 85.  Several air sports come next: general aviation, flying sailplanes, hang gliding, and paragliding.  Each of these is about as risky as the normal lives of people aged 88 to 95.  Downhill mountain biking also falls into this category.

As you continue further up the slope you can see two outliers: skydiving is about as dangerous as the normal life of a 107 year-old and climbing the Tetons is about as dangerous as being 119 yeas of age.

Three activities from the initial graphic above are still missing: Formula 1 racing, Climbing Mt. Everest, and Base Jumping.  The dangers of these three sports are so great they are literally off the chart because the Social Security Administration does not compute death risk statistics for anyone older than 119.  (You probably don’t know anyone of that age either.)  Since Formula 1 racing is about 2x as dangerous as Climbing the Tetons and Climbing Everest is another 2x as dangerous, you can roughly imagine how high up the risk curve you have to go.  With Base Jumping even that becomes impossible: it is more than 100x more dangerous than climbing Mt. Everest!

Why put all this information together?  I believe we should all be fully aware of the risks that we take, and that we should let our awareness of these risks be an incentive to take the appropriate preparations and precautions to reduce these risks as much as possible.  Most of the fatal accidents in sports are at least in part the result of human error and could have been avoided. If we close our eyes to the risks (as we are naturally inclined to do in order to remove this pesky thing called cognitive dissonance), we are also unlikely to do what it takes to keep the risks contained.

Commercial aviation is a great example that risk mitigation really works. After the invention of powered flight in 1903, flying was certainly one of the most dangerous things humans could possibly do. Gradually and over time, this risk has been reduced to such an extent that commercial air travel is now one of the safest things we participate in.

The concrete risks and the strategies for risk mitigation are obviously quite specific to each of the different activities and discussing them is beyond the scope of this article.  But risk mitigation strategies do exist for all activities and deploying them deliberately and consistently can be very effective (for some activities probably more so than for others).  If you do something that is objectively dangerous (and now you know that it is), learning about these strategies and taking them seriously can truly help you stay alive.

Have fun and be safe!

CX Landing in 20-30 kts Cross-Wind

Before the arrival of the cold front: fantastic fall-thermal soaring conditions along the Front Range.

This past Wednesday was a great fall soaring day.  Initially I struggled off tow for a while, but once I got up above the inversion I had a great and easy flight in strong convergence and thermal lift along the Front Range, covering 350km in about 3 hours.  Cloud bases were around 20,000 feet and the best thermals produced climb rates of up to 10 kts average.  Not bad for October!

This was before the cold front arrived.  I had not expected it until late in the evening but luckily I could see it coming just as I was planning to return to Boulder: the wind had been blowing from the southwest all day when I noticed a wall of dust rapidly moving in the opposite direction.  When I first spotted it, I was flying over the foothills west of the field, and the front was just north of Longmont heading south.  I accelerated my descent and landed safely in completely calm conditions.  10 minutes later the wind kicked up sharply and the temperature began to plummet.

CX wasn’t so lucky.  He arrived back in Boulder about 30 minutes after the front moved in.  Strong gusty winds were blowing from the north.  AWOS reported 20 kts on the ground, gusting to 31.  Boulder only has an east-west runway so CX was faced with a cross-wind landing in very challenging conditions.

Here’s what it looked like from the ground:

This was perfectly executed.  Well done!  (The video quality is not great but it’s definitely worth watching.) Note how he pulled right to his normal parking position 🙂

I also downloaded CX’s flight trace and took a closer look at the landing pattern.

CX began the “downwind” leg at 8,500 feet. That is 3,200 AGL (!) (The typical altitude at this point is less than 1,000 AGL.)  3,000 AGL might seem excessively high but extreme sink in the pattern is always a possibility in these conditions and the extra height allows the pilot to fly a bigger pattern, align with the runway sooner, avoid turning close to the ground, and it provides more energy reserves to maintain a greater speed in order to deal with extreme turbulence and other potential hazards.   CX chose to fly an approach to G26.  This is the best option when the wind is from the north because it allows the pilot to avoid landing next to buildings and vegetation that are located along the western half of the runway and could cause additional turbulence.  (Before entering the pattern, the pilot also pulled the straps as tightly as possible.)
CX used the high altitude to fly a much wider pattern than usual and to maintain a much higher airspeed. The trace shows CX turning base to final about 2 miles east of the runway at an altitude of 6,100 feet (800 AGL).  The ground speed is 120 kts (!), presumable reflecting an airspeed of about 80-90 kts and a tailwind of 30-40 kts.  The turn looks much shallower than it actually was: the wind drift is very significant and a relatively steep bank angle was required during the final 90 degree turn.
3,000 feet before the threshold, CX is aligned with runway at an altitude of 300 feet AGL and a groundspeed of 85 kts. The airspeed must be somewhat higher to compensate for the cross-wind.  (This is about where the video begins.)
CX reaches the runway threshold at 50-100 feet AGL. The ground speed is 70kts, the airspeed is still somewhat higher (presumably around 75-80 kts). The glider is still perfectly aligned with the runway. If you re-watch the video, you’ll also notice how CX is careful to always keep the right wing (on the windward side) slightly lower than the left wing. (This helps the pilot maintain direction and also prevents the wind from rolling the glider to the left.)  The video also shows that the glider appears to be much more stable and easier to control as soon as it enters ground effect.
CX flares perfectly and touches down just before the first buildings at a ground speed of 42 kts. The touch down location minimizes the risk of turbulence in the lee of buildings and vegetation along Independence Road. CX chose to land on the dirt runway to have more room to maneuver if necessary. Landing in the dirt may also reduce potential sideway forces at the point of touch-down.

PS: The pilot is one of the most experienced cross-country pilots in the United States.  In the video, the landing looked almost like a non-event.  This impression is amplified by the fact that he was able to roll right up to his normal parking spot, stopping precisely where he intended to (and where he always does).  The flight trace, however, tells a very different story and illustrates very well how unusual and challenging the conditions were. Most importantly, it shows the mitigating actions that CX took to minimize the risks associated with these conditions (much higher pattern entry, much wider pattern, much higher airspeed, always keeping the upwind wing slightly lower, choice of runway and touchdown point).

Wave Season is Here Again

It’s this time of year so I thought it would be worthwhile to reflect on the lessons from some of my past wave flights that included bruised rotor shins, have led to smarter transitions between wave bars, and even some high speed cruising.

Rotor / wave flight back in January of 2018.

So, here’s a quick wave flying refresher checklist:

  • Know how wave theory works – it’s imperative to have a solid mental model of the wave when you suddenly need to get out of 2500 fpm sink. Will you know where to point the nose?
  • Remember the lessons from hypoxia training.  What are your first symptoms? Will you be able to recognize them? If you have not taken a training class, I highly recommend it.
  • Dress very, very warmly – it gets effing cold up there, even if the temps on the ground are nice.  Look up the forecast temperatures at altitude.
  • Carefully study the weather that’s forecast throughout the day.  Know the strength and direction of the wind at different altitudes.  Know the moisture content of the air at different levels – will there be rotor/lenticular clouds?  Know the projected location of the wave bars throughout the day and the strength of the projected lift and sink. Also know that reality can and probably will be different. Here’s an overview of weather forecasting tools for Boulder.
  • Avoid flying when the winds are too strong, for the turbulence can be too violent.  Good climb rates can be found if winds are moderate – cruising speeds can then be even higher than in very strong winds as the necessary crab angle to stay in lift will be lower.
  • Know the rough air speed of your glider for the air in the rotor zone will be rough.  Know where to expect rough air and slow down before you get there!  Also, remember that rotor turbulence might suddenly surprise you even when you fly in laminar flow at high altitudes.  (I have experienced rotor turbulence at 17,500 feet.)
  • Know Vne of your glider at high altitudes.  (Remember, flutter is a function of TAS, not IAS, so your indicated airspeed limit gets lower as you climb higher).  Also know the maximum air speed for deploying the spoilers and how to do it when flying fast (very carefully) – you may need them to avoid getting sucked up into Class A airspace.
  • Double check the oxygen system before you take off.
  • Practice slack line removal.  Slack lines will form on tow and can be severe.
  • Pull all straps very tight and safely store all objects in the cockpit that could fly around (because they will).  Do this again before exiting the laminar flow and returning to the rotor zone.
  • Remember that the flying technique to climb in rotor lift and in wave lift is completely different from flying in thermals.  If you don’t know what it is, study the theory first, then apply it.  The theory works!
  • Remember that wave bar transitions into the wind cost a lot of altitude (because they take much longer and you have to fly very fast).  You can easily lose 6000 to 8000 feet in 3-4 minutes as you push into the wind.  Be prepared for this. If possible, fly transitions where there are no clouds – the sink rate may be much lower.  (Wave transitions with the wind are usually quick and the altitude loss is often a small fraction compared to upwind transitions.)
  • Know how to stay out of clouds.  Depending on your crab angle and the strength of the wind you might be drifting backwards relative to the ground and clouds can suddenly engulf you from behind if you’re not careful.  (Not only will you not see anything, the glider can also immediately take on a layer of ice.)  Rotor clouds can form within seconds where none have been before. Clouds can also close up below you while you are flying above.  Always, always pay very close attention to what is happening and descend before it is too late!
  • Reflect on the glide angle on final approach with spoilers fully open – then imagine what it would look like when the glide angle is twice as steep.  This is about what to expect in 2000 fpm sink between wave bars. Keep this in mind when you consider the altitude necessary to reach a safe landing spot.

Here are some additional considerations specifically for Boulder:

  • When wave flying from Boulder, it’s useful to review typical Boulder wave routes.  Since wave lift forms mainly in relation to the topography and the strength of the wind, it is usually found in the same places.  Knowing where others have found lift before can be of help.
  • If you’re heading west over the foothills, e.g. when transitioning from the secondary to the primary wave bar (which tends to be anywhere between the Hogback and the Peak-to-Peak Highway), remember to maintain a safety altitude much (!) higher than what would be necessary in the same location during thermal soaring conditions.
  • Before you initiate an upwind wave bar transition it is imperative that you decide upfront how much altitude you are prepared to lose before you connect with lift again. I.e., you must decide upfront at what altitude you will turn around if you are not climbing again.  It is impossible to know in advance how much height you will lose during the transition and therefore you must calculate and decide your turnaround altitude in advance as necessary to always keep a safe landing place within reach!  I repeat: you must do this before you begin the transition!  Once you are pushing forward you may be losing 2000-3000 ft per minute, and the ground, which seemed so far below a minute earlier, will be approaching very quickly.  This is not a good time to do math!  Treat your predetermined altitude as a “hard deck”, in other words, once you are down to your preset decision altitude, you will turn around and not continue to push forward!  This particular flight, where I lost 6,000 feet (from 17,500 to 11,500) at a maximum sink rate of 29 kts (2,900 fpm) during a 3 minute long upwind transition flown at 85 kts IAS in a Schweitzer 1-34 into a 40+ kt headwind, provides a good illustration of this concept.
This chart shows the trace of this particular flight. The glider icon is in the middle of the wave transition as I pushed west into a 40 kt headwind to get from the secondary wave bar to the primary which was located over the lower foothills. The altitude graph below shows the 6000 ft of altitude lost during this 3-minute long transition.
  • Even on strong wave days the air at the airport in Boulder is often calm in the morning due to a strong ground inversion.  This often allows for uneventful takeoffs in easterly direction.  Around noon, sometimes later in the day, sometimes never, the winds turn west at the surface.  Westwind takeoffs in rotor conditions can be dangerous and are definitely not for the faint of heart.  Landing into westerly winds is usually ok but it is imperative to arrive at the pattern with plenty of altitude and to maintain extra airspeed throughout the pattern to deal with wind shear and turbulence.  If rotors touch down near the field there can be extreme sink in the pattern.  Fly a close pattern and a steep final approach so you always have extra energy available. If there is a northerly crosswind component, it is good to touch down before MHG to minimize the risk of additional turbulence from buildings and vegetation along Independence Road.
  • Remember that there are no good places to land over the foothills, i.e. maintaining a safe escape route towards Boulder (or another safe landing area) must be the number one priority.  However, if you made a mistake and have no choice but to land in the foothills, it is always good to know the few emergency fields that do exist.  These may not be good enough for you and your glider to remain unscathed but they should be good enough to safe your life.  Last week I checked out one of these fields that is directly along the Peak to Peak Highway between Nederland and Boulder (see pictures below).
South Sourdough Trailhead Field.  The field gets occasionally mowed.  During my last visit only a small area to the east was freshly mowed.  The grass on the rest of the field was about 10 inches tall.  The field slopes slightly up towards the northwest – landing is best in this direction, wind permitting.  In west wind conditions there may be hazardous turbulence along the line of tall trees. There is an access road from the Parking Lot on the west side of the Peak to Peak Highway.
Screenshot from Google Maps. The field is about 1300 feet long and is located 2.5 miles southeast of Niwot Ridge directly along the Peak to Peak Highway between Ward and Nederland. Route 116 is a spur road from the Peak to Peak Highway to the South Sourdough Trailhead, hence the name.

Across The Divide: Diamond Distance!

Yesterday was my sixth attempt to complete a Diamond Distance task.  The basic requirement is a pre-declared 500km task with up to three turn-points.  My strategy for setting these types of tasks has improved over time.  I now adhere to the following principles:

  1. Select a task area that provides the best soaring weather over the course of the day.  Some parts of the task area might work best in the morning and other parts might work best in the afternoon. Thermal height and depth, thermal strength, convergence lines, development of cumulus clouds, over-development risk, wind direction and speed at different altitudes, buoyancy/shear – all of these things matter, and I try to account for all of these factors.  I predominantly rely on Skysight for providing the forecast because it makes it easy to examine all factors for the entire task area throughout the day.
  2. Place the first and second turn point furthest away from Boulder and place the third turn-point closer to home such that the last part of the flight can be flown within glide range of Boulder.   This drastically reduces the likelihood of having to land out when the day might die towards the end.
  3. Pick accessible turn-points.  I.e., avoid turn points that might be difficult to reach, such as high mountain peaks.  Each turn point should also be in an area of forecast lift at the approximate time or rounding it.
  4. Ensure accessible landing places along each task leg.  The spacing of these is most critical early and late in the day.  The part of the task that lies during the best part of the soaring day (approx. between 1pm to 4pm) can be the most challenging.

Yesterday’s task adhered to these principles.

The task line is shown in blue and the turn points are marked in red by 45 degree sectors.
  1. The Start point was at Nugget Ridge as I planned to take a northwest tow and Nugget Ridge is right on the typical tow route in the morning.  Putting the start to the north while my first TP was in the south would also ensure that I would be in close proximity to the airport as I would try to get underway.  Thanks to Pedja Bogdanovich for this tip!
  2. I set my first TP at Woodland Park, a few miles north of Pikes Peak.  Skysight forecast a convergence line to the south in the morning along the foothills, and the first cumuli were projected along that line.  Cloud bases – which were generally a bit lower than I liked – were forecast to be higher to the south than to the north.  Also, the south was projected to be less windy.  (Strong winds can shear off the thermals, making it harder to climb.) Perry Park was my go-to landing spot on the southbound leg.
  3. My second TP was at Toponas, due west of Boulder.  This would make for a challenging second leg across some difficult terrain but the route was supported by the forecast and my fall back plan was to go back north along the convergence before heading west. Potential landing spots were Perry Park, Henderson Ranch (in the nw corner of South Park – thanks to Tom Z), some fields north of Silverthorne, the airport in Kremmling, as well as some fields near Toponas. While the second leg was the longest, it would not increase my distance from Boulder.
  4. My third TP was Squaw Mountain, located south of Idaho Springs on the ridge that extends from Mt. Evans towards the northeast. I have often found lift in this area even in west wind conditions (however, you do not want to get any closer to Mt. Evans on the lee side on west wind days).  Kremmling and Granby would be easy-to-reach landing spots west of the divide on this leg should a land out become inevitable. Squaw Mountain is already relatively close to Boulder and 13k feet would put me in glide range.
  5. I set my Finish at Kenny Mountain, east of the Twin Sisters.  This ensured that my entire last leg could be flown within glide range of Boulder.  (I would have to round Kenny at 11k+ feet to have Boulder in final glide. Having the finish point away from the airport (but within final glide) has the side benefit that rounding it would invariably ensure compliance with SSA rules for Diamond Distance tasks. These rules require that the finish altitude is not more than 1000m below start altitude.)

Total task distance was 312.1 miles or 502.2 km (plus the final return to Boulder).

First Leg

Fortunately the day started early and there was no need for a big mountain tow.  I took off at 11:12 am, released at 11:21 and flew across the Start line at 11:30, at an altitude of 11,000 feet.

Having my first leg pass the airport meant I could get going on course without first having to climb up high.

I released right above the entrance to Left Hand Canyon. After a few turns I flew across the Start Line on Nugget Ridge and headed out south.

There was good lift along much of the first leg even though I chose to fly in thermals several miles west of the convergence line because the cloud bases were significantly higher than along the convergence.  Following the convergence might have been a bit faster but keeping a good altitude was more important to me along this stretch because there are very few landing options and the only good one is the private airfield of Perry Park.

It was nice having (unplanned) company on this first leg.  5K was heading to Pikes Peak and both of us left Boulder at about the same time.  Flying side by side at times helped to see as to who had the better line.

My flight trace is shown in red. 5K is shown in light blue. We parted ways south of Deckers when I left the lift line to round my turn point at Woodland Park while 5K stopped to climb, heading to Pikes Peak.

I averaged 81kph on this 128 km leg and rounded Woodland Park at 12:56pm.

Turning Woodland Park.

Second Leg

Looking ahead after turning Woodland Park the second leg seemed daunting.  The distance to Toponas was almost 200 km, much of it across challenging terrain and tall mountains.  The cloud bases were still relatively low, around 16,000 feet.  This may seem quite high for those used to flying at lower altitudes, but it really isn’t when considering that much of my direct route ahead led over unlandable terrain between 10,000 and 13,000 feet.

The area north of Woodland Park is a bit lower but that makes it all the more insidious.  There are no places to land and there is an elevated ridge to the east (and to the west).  It is imperative to maintain an altitude that allows clearing the eastern ridge to glide out to Perry Park.  The further west one flies, the higher one has to be.  I scared myself once before in this area and was determined not to let it happen again.

This screenshot captures my flight trace north of Deckers as I am trying to stay on course. You may notice my erratic-looking flight trace with a hook to the right (east) at the top. The ridge to the east is between 9000 and 10000 feet tall and being able to clear it at all times is essential to staying safe. You can see why following the course line takes you further away from the plains and requires additional altitude. My altitude dropped below 14,000 and in response I turned east to get closer to the plains. This is why cloud bases of 16,000 in this area should be considered relatively “low”.

I quickly found some good climbs back to cloud base and got myself back on course, passing Mount Evans on the west side.

Passing Mt. Evans and heading towards Silverthorne (Evans is the tall mountain to the right of the flight trace. Silverthorne lies in the valley ahead.)  It is easy to see that cloud bases of 16k are uncomfortably low in this area.

Unfortunately, the cloud bases had still not risen much beyond 16k feet.  I made it to the ridge south of Keystone Mountain and then stopped, milling around in middling lift unsure what to do.  There were some clouds ahead but they did not look reliable. I could definitely glide ahead towards Silverthorne but I was concerned that I might get stuck in the valley.

Circling near Keystone Mountain east of Breckenridge. The western flank of Mount Evans is center right in the background. A glimpse of the Flatirons, 45 miles away, is visible on the horizon in the distance on the left.

I also wondered about the impact that Dillon Reservoir would have on the thermals.  Ironically, the best looking cloud seemed to be right above the lake.  I was not willing to trust it.  There was a 12-16kt southwesterly wind at my altitude so I figured I might be able to ridge soar along the south-west facing slopes of the Ptarmigan Range north of Silverthorne if I could get there close to the top of the ridge line.  Which seemed possible, although by no means certain.  I also considered the potential impact of Eagle’s Nest Ridge, upwind of the Ptarmigan Range.  This ridge was even higher and I figured it might mess with the wind direction.  It could also mean lee side turbulence and sink.  The more I thought about it, the more uncomfortable I became.

Dillon Reservoir is in the upper left. The valley beyond the reservoir in the distance leads directly to Kremmling.

So after a lot of hesitation, evaluation, and considering my options, caution prevailed and I decided to return to the east of the Front Range.  I remembered what I learned in Austria: when flying in big mountains, especially ones that one is not intimately familiar with, it is always best to stay well above the ridges.  I was not certain that I could do that.  Maybe cloud bases of 16k were simply not enough for my first trip to the west…

Returning to the Front Range. Georgetown along I-70 is in the valley below. The Front Range is straight ahead. Longs Peak is visible in the distance.

I crossed over Mt Bierstadt and Mount Evans, heading north towards the Divide.  Just before I got to Winter Park, I spotted my opportunity: a line of clouds had developed in westerly direction.  I had just climbed to almost 17,000 ft, i.e., cloud bases were finally rising.  The airport of Granby was within glide range.  No mountain ridges were in the way.  I had wasted some time but it was still early enough in the day.  There were no more excuses. And with that I resolved to jump to the west.

The moment I decided to make the jump to the west. The divide is still a few miles ahead. Granby is at the bottom of the valley towards the right.

Crossing the Divide was a big moment.  It felt daunting and liberating at the same time with the former gradually giving way to the latter.  I reached full acceptance once the distance to the divide had increased to the point where gliding right back was no longer possible without gaining altitude first.  At that point I just focused on one thing: progressing forward and not run out of time.

Whenever you fly over new terrain your inclination – rightfully so – is to stay high.  But staying high also comes at the cost of being somewhat slow.  Centering thermals takes time. Centering and climbing in weak thermals takes even more time.  Centering and climbing in weak thermals while going into a headwind is even worse.  I was wondering: how high is the working band?  How low can I afford to get without having to spend even more time digging myself out.  These were questions that had no answers for me.  So whenever I found reasonable-seeming lift I turned at least to test it.

Fortunately the terrain between the Divide and Kremmling looks a lot more hospitable than the terrain over the foothills.  If the clouds are high enough you can easily keep an airport (first Granby, then Kremmling) in glide.  And even in the worst case of hitting massive sink – which actually seems a lot less likely given that the terrain is more mellow – there are often some farmers’ fields around where putting the glider down safely seems possible.

I managed to stay high enough to never get out of glide range of an airport.  This saved me a lot of stress albeit at the cost of speed.  One hour after crossing the Divide I finally got my turn point in view, still 15 miles away.  I had expected a little town but all I could make out from the distance was a road intersection.

The immediate issue at hand was that I had almost reached the end of the clouds before a significant blue hole above the lower terrain to the west.  I tried each of the last remaining three little clouds and finally found a good climb to cloud base under the last one allowing me to head out into the blue, round the turn point and stay within easy glide of Kremmling the whole time.

Rounding Toponas

I rounded Toponas at 4:16 PM.  The Divide looked very far away.  But the sky ahead looked great, considerably better than on the outbound leg.  I was hoping it would stay this way for a while for I had a lot of ground to cover.  Looking at the clouds I was pondering which of the two most promising lines to take.

A few minutes after rounding Toponas. Very nice looking clouds beckon ahead, promising quick progress on the return. Kremmling (not visible) is in the valley beyond the hills in the foreground. The Continental Divide is far away, barely visible on the horizon.

The southerly line (the one to the right of the nose in the picture above) was better aligned with my 3rd turn point but it would keep me on the west side of the Divide for longer. The northerly line (the one to the left of the nose) went directly towards Granby and the nearest point on the Divide.   My number one goal at this point was to make it back over the Divide, my number two goal was to complete my task.  I chose the northerly line.

The town of Kremmling is below, surrounding the airport. The Divide is now better visible on the horizon. The scenery was just beautiful.

A dark flat-bottomed cloud slightly north of Kremmling promised compelling lift. I figured it would be worthy of a small detour.

The cloud that promised delivered. If every climb had been like this, I would have been around the course in half the time!

Thanks to lift like this and the wind in my back, progress on the return was blazingly fast. Even despite little mistakes like the one in the picture below.

As I followed the line in front I could readily see that the cloud straight ahead was decaying. I should have detoured around it via the cloud to it’s right. Instead I held course and was rewarded with substantial sink under the dying cumulus.

Only 40 minutes after rounding Toponas I was already approaching the Continental Divide.

Close to cloud base it is often not easy to see the direction of the cloud streets. But the cloud shadows can be a dead giveaway like in this prime example. It was easy to see which way would get me over the Divide the fastest.
The town of Granby and the airport are below on the right. Lake Granby features prominently in the center. Longs Peak is towering right behind.

These clouds were the best of the day.  I barely had to stop for a circle or two. Most of the time I could just dolphin up in lift and then drop the nose to bridge the short gap to the next cloud.

Beautiful view of the Divide from the west in late afternoon sunshine. Longs Peak is on the horizon to the left.

Approaching the Divide was a non-event and although it was already 5:15 pm, the day was still looking great.  Now my mind could start to focus on something else: was it still possible to complete the task?  I had another 110 kilometers to go.

A big blue hole greeted me as I crossed the Divide via Mt. Neva.  The air on the east was very turbulent and I hit massive lee-side sink.  I pushed the nose down, accelerated to 90+ kts and headed straight to the nearest spot along a long cloud street that seemed to stretch from Longmont towards Berthoud Pass but then turned away from the Divide towards Idaho Springs and continued in south easterly direction beyond.

As I approached the line I could readily see that it was generated by a convergence of different air masses.  I connected with the line southwest of Rollinsville and immediately found myself in strong lift.  After a few turns in turbulent rising air I continued southbound along the line.

This line seemed like a present from the powers to be: it was perfectly aligned to curve around towards my third turn point at Squaw Mountain.

Rounding Squaw Mountain, my third turn point.

I turned Squaw Mountain at 5:33 pm with another 70 kilometers to go to the Finish at Kenny Mountain.

Instead of heading straight to my goal in the north, I backtracked along the line I had just come from.  This required an almost 40 degree deviation from the direct course line (see flight trace above) but it was most certainly the fastest route.

Without a single turn I continued to climb along the line, which allowed me to make rapid progress.

Cruising in straight flight along the powerful convergence line. Here I am on the final (northbound) leg south-west of Nederland. Barker Reservoir is about 8 miles ahead 15 degrees to the right of the nose.

I continued in straight flight along the line until I reached 16,000 feet near Gross Reservoir. I had 35 kilometers to go to my Finish Point at Kenny Mountain and from there another 20 kilometers to get back to Boulder.  Barring some extreme sink event, I had more than enough altitude to complete the rest of my flight in a single glide and arrive back in Boulder with height to spare.

Flying past the Indian Peaks as the evening sun breaks through decaying cumulus clouds while I head north towards my finish point.

I told myself that it was still too early to get excited.  My route would take me into the lee of the Twin Sisters.  I still could not be certain.

Approaching Kenny Mountain – part of the rocky area right below the nose. Estes Park is further ahead.

The big sink did not come.  At 3 minutes past 6pm I rounded my Finish Point with an altitude of 12,000 feet – 1,000 feet above my start altitude, and 1,500 feet higher than I needed to safely make it back to Boulder.  It was a great moment.

Rounding Kenny Mountain: the 500km task is complete.

After five failed attempts, I finally had made my 500 km Diamond Distance.  And it was in good style with my first excursion to the west of the Continental Divide.

There was still some lift as I’m returning to Boulder.

I hit a good line on the return to Boulder and had enough altitude to spare for a celebratory fly-by of the Flatirons before returning to the airport where I landed at 6:24 pm after 7 hours and 12 minutes in the air (my longest flight duration thus far).

My OLC flight distance based on optimized six legs was 564 km with an embedded FAI triangle of 439 km (also my biggest yet).  One day later I also noticed that the flight was the highest scoring flight for the day worldwide with 651 points on OLC plus.  The flight track is here.

Unexpectedly, my flight turned out to be the highest scoring flight for the day on OLC Plus worldwide. Granted it was a weekday with far reduced competition and I clearly benefited from outstanding soaring weather.

Lessons Learned

  • Don’t Give Up.  It took me six attempts to make Diamond Distance.  It’s eminently doable without taking any risks but it requires a really good day and a bit of luck. (My bit of luck was the perfectly aligned convergence line at the end of the day that allowed me to cruise to TP 3 and the Finish without turning.)
  • Yay to the West. The Continental Divide can be intimidating because it can get in your way on the return to Boulder.  But flying in the west certainly isn’t any harder than it is in the east. And the terrain towards Kremmling is much more hospitable with better landing options and good low-traffic airports within easy reach. If you pick the right day – you want high cloud bases, good thermals, modest winds, and a low risk of over-development – then you’re set for a lot of flying fun.
  • The Height of the Cloud Bases Matters a Lot. Obviously this isn’t a new lesson but this flight really drove it home.  You must always factor this into your flight planning.
  • Stay Above the Ridges.  This is one of the main principles of early mountain flying that I was taught in Austria. Thermal lift is almost always best above the ridge lines.  Ridge lift will work best at ridge top level but you have to be sure about the strength and direction of the wind.  This is not a given because often the wind aligns with the direction of the valleys looking for the path of least resistance. Being on top of the ridges also gives you the best view, the smallest chance to get lost, and the widest choice of thermals to pick from.  So in short, especially when flying across unfamiliar terrain, it is always best to stay well above the ridges.
  • Carefully Examine the Forecast for Good Lines and Select Lines Over Hospitable Terrain.  Skysight correctly predicted the energy line to the west across Granby, Kremmling, and beyond.  The line extended much further than I could even see.  I’m pretty sure I could have kept going west for another 50 to 100 miles. (I just would have run out of day coming back).  Lines that run over landable terrain with good airports are the best!  The easiest starting point to find good energy lines in Skysight is by looking at projected XC speeds throughout the soaring day.  This combines the forecast for thermal and convergence lift. You will then want to validate your choice by looking at cloud bases, thermal strength and a low Buoyancy/Shear ratio (indicated by “stipple” on the thermal strength chart).
  • My Flight Planning Strategy Worked (summarized at the beginning of this post). After five failed attempts I had learned from prior mistakes.  If you plan your first long flights I recommend you adopt a similar approach to planning your route.
  • Fly Around Decaying Clouds. Expect to find sink underneath. A slight detour can be a better option, especially one that takes you across an actively developing cumulus.
  • Cloud Shadows Indicate Clouds Streets. When flying close to cloud base it can be impossible to see the direction of the street ahead.  But the shadows on the ground are a great marker.
  • More Field Walking Is Required.  On my next drive out west along I-70 I will want to check out a few fields north of Silverthorne.  It was tempting to try soaring the ridge along the Ptarmigan Mountain but without having seen the fields at the bottom of that valley this was clearly a no-no.  (I have researched several fields in this area via Google Maps but my degree of confidence in a field improves hugely after seeing it on the ground.)
  • How Do I Determine the Height of the Working Band?  I could have flown much faster, especially on my leg to the west into the headwind, had I been more choosey about the thermals I picked.  But this would have meant being comfortable getting lower before picking a thermal to climb in.  Without experience in the area that I was flying in, I had no idea how low I could let myself get before having to worry about climbing back up.  I still don’t know.  If you have any tips, please let me know!


When 13k Is Too Low

I’ve had a few days to ponder another failed Diamond Distance attempt on August 6 and reflect on what prompted me to abandon my task very early on a promising looking day.

The weather forecast was strong, particularly to the northwest, and I had set an ambitious task with the first turn point at Bridger Peak, 40 miles south of Rawlins WY, and halfway between the airports of Saratoga, WY and Dixon, WY.  To get there I would have to cross the Continental Divide into North Park, fly across North Park and then continue along the next mountain range to the northwest.  The direct air distance from Boulder is 125 miles.  The road distance is more than twice that, and driving there takes about 5 1/2 hours.

Declared Task. The turn point on the upper left is Bridger Peak.

I had a good and early start after releasing from tow south of Coal Creek Canyon (between Boulder and Golden).  I then climbed to 16,000 feet over the Flatirons, quickly crossed my start line and headed in north-westerly direction.  It was still early in the day with few clouds.  My immediate objective was to find a good spot to climb up to the Divide and then cross it at a location that would give me a safe passage into North Park.  The best area for that seemed to be northwest of Estes Park.

A few miles to the east of the Twin Sisters I found a strong 6-7 kt climb to cloud base at 16,400 ft and headed west from there towards the Divide.  Although the cloud bases were still relatively low, my last few climbs had been good and I felt fairly confident that I would find good lift as soon as I would reach the Divide.  So far everything had been quite easy.

East of the Twin Sisters I found a strong climb that took me to cloud base at 16,400. This seemed sufficient to approach the divide. I was hoping for additional lift above the Twin Sisters and along the northern flank of Mt. Meeker and Longs Peak.

That’s when my troubles began.  The 12 mile push through the lee cost me more altitude than I had expected and when I reached the Divide above Flattop Mountain my altitude had dropped by more than 3,000 feet.  I was down to 13,200, which put me at only 900 feet above the ridge.  I remember thinking, “there has to be a climb here” and, “what do I do if there isn’t”?

Flight track approaching the Divide. On this 12 miles stretch above high terrain I expected good air but only found sink. The glider icon is above Flattop Mountain, directly at the Divide, at 13,000 feet – 3,400 feet lower than I had been just 10 minutes earlier.

The airport of Granby was in glide range. But the conditions in the Granby Valley, which I could now see for the first time, looked unsoarable and cloud bases there were very low, probably well below 12,000 feet.  I felt almost certain that diverting towards Granby would mean accepting a retrieve.

3D screen shot from the same position over Flattop Mountain at 13,000 MSL (900 ft AGL), looking towards Grand Lake and Lake Granby. Granby Airport is at 8,200 feet MSL – a fairly safe looking glide from this position (20 miles away). 

The direction towards North Park looked much better but I first needed a good climb to get there.

Except for the escape route to Granby, 13,000 feet was not a comfortable altitude at my location.  The nearest airport to the east was Vance Brand, 30 miles away and there was a lot of high terrain in the way.  Fort Collins was 35 miles away, also with high terrain to clear east of Estes Park.  I had to decide quickly what to do if I didn’t find a climb fast: turn west, which would almost certainly end with a landing in Granby, or turn back east, find lift or risk having to land in a field near Estes Park.

3D view towards Estes Park from above Flattop Mountain. You can see the high terrain east of Estes Park towards Fort Collins. The odds of clearing this terrain in straight glide from my position were fairly low and definitely not something to count on.

I still had a high degree of confidence in the thermal conditions to the east. And, very recently I walked a field at the base of Lumpy Ridge, less than 2 miles north of the town center of Estes Park.  While I was not thrilled about the prospects of potentially having to end my flight there, I felt reasonably confident that I would be able land in that field without damaging the plane (or myself) if I really had to.

2D view of my position above Flattop Mountain. You can see the location of my emergency land-out field just north of the town of Estes Park.

All this went through my mind in the one minute that I flew along the ridge looking for lift.  Lift did not come and I ran out of time.  A decision had to be made: turn left to Granby and land or turn right towards Estes Park and look for a climb?  I turned right.

I still remember vividly the moment when I had to make that decision.  Was it a risky choice?  Subjectively it felt that way.  Objectively, it probably wasn’t.  I was at 13,000 feet.  The field in Estes is at 8,000 feet.  That meant I had about 4,000 feet of altitude to work with before I would have to decide to land.  4,000 feet gave me about 20 minutes to look for lift, maybe more.  I had found strong lift several times that morning already and the conditions in Estes did not look any worse than the ones I had been soaring in for the last hour. And I now had a plan B, i.e I knew where I would land if I had to.

I followed a sun-facing ridge line towards Estes and, fortunately, I only needed a little more than one minute of my 20 minute lift-searching-allowance before I found the climb I was looking for.

It only took 1 minute and 20 seconds from the moment I turned east to finding a climb right above the ridge that runs east from Flattop Mountain. Note the oddly shaped trace during the climb. The lower part shows wind drift from west to east and this changes about half-way through. This is a sign of strong wind-shear and ultimately explained why I would continue to struggle climbing near the Divide.

Eight minutes later I had climbed back to 14,800 feet and the world was once again a better place. But the climb had been odd: between 12,400 and 14,100 the wind drift had been from west to east, and from 14,100 to 14,800 I had to push west to stay in lift and the climb became very uneven.  That also meant the average climb rate was only 3 kt, the worst of the day thus far.

I quickly put that aside, given that I could not be choosey in picking this climb and pushed west again.  Determined not to get so low again, I tried to take the next climb but it was very windblown and difficult to center.  This time, I only managed to average 2 kts but managed to climb to 15,700.

A few miles further west, I once again only found very poor lift, taking me from 15,000 to 15,600 and the climb rate was less than 1.5 kts.  Then, another few miles further west, an even weaker climb topped out at 16,100.  That was the highest I could go.

This 3D trace shows the sequence of weak, uneven and windblown thermals as I tried to gain enough altitude to comfortably push northwest into North Park. The last climb was more of a holding pattern as I tried to make up my mind whether I should continue or abandon the task.

I was clearly high enough to push into North Park and there were clouds on route but I hesitated. And hesitated.  I could get there but would the lift be any better than my last 4 climbs, which were extremely poor and got worse as I moved west?

View into North Park from my position above Trail Ridge Road after my long slog to reach 16k. There seemed to be good clouds all across North Park but would they work better than the weak climbs I had just experienced? If I look at them now in retrospect I can only think, “of course they would have worked!” Clearly my judgment at the time of making the decision was clouded by “recency bias”.

The top of the Divide can be very windy and the thermals there are often weak and uneven.  Maybe, even probably, the conditions would be better if I went on.  But I did not know that.   Would the clouds work?  I wanted to try it and then return if they didn’t work as well as I hoped.  But maybe I wouldn’t even be able to come back?  In which case I would likely be landing in Walden.

On the horizon, exactly in the direction of my first turn point, I could now see a towering cumulonimbus cloud billowing up.  It was only 12:30pm.  That seemed like an early indication of potentially massive overdevelopment in the afternoon. The forecast had not projected any storms but what about this cloud? It certainly looked threatening.  Forecasts have been wrong before.

This is a segment of the same picture as above. But now I had spotted the rose-colored cb at the far side of North Park, above the snow capped peak in the distance that were directly on route. In retrospect, I think my mind was trying to do some mental gymnastics looking for reasons that would provide a justification for not to go on…


Circle by circle I was going back and forth in my mind.  Should I push on or should I return?  I already had my dose of adrenalin earlier when I got low above the ridge.  The probability of completing the task seemed like a coin-toss.  Maybe it would work, maybe not. Another circle of indecision.  Then another. And another.

Circling above Trail Ridge Road below, as I was trying to make up my mind.

I looked towards Granby again where conditions had markedly improved in the last 20 minutes but the bases were still lower than to the east and northwest and the cloud bottoms still weren’t particularly promising.

View towards Grand Lake and Lake Granby from Trail Ridge Road at close to 16k feet. The cloud base was clearly rising but the clouds still didn’t look compelling. (Flattop Mountain, where I was low earlier in the flight, is the level high ground at the left side of the picture above the wing.)

My mind had finally found enough reasons “against” pushing across.  In the next circle, I exited towards the south, having abandoned my task.

After abandoning the task I flew along the west side of Longs Peak before crossing back to the east. The clouds in the distance towards the Flatirons (at the right edge of the picture) still looked very welcoming and that is also where I would find very good climbs again.

I went on and had a good flight on the east side of the Divide, but for the rest of the day I kept second guessing my decision.  I watched the day improve.  Cloud bases rose as one would expect. The weather never overdeveloped except for a few localized virga and showers. In hindsight, I am almost certain that completion of the task would have been possible.  But you have to make these decision in the moment and with information available at the time.

To be clear, the decision to abandon the task was not due to a real or perceived safety risk.  There was no question in my mind that I could reach the airport in Walden or at least another safe landing place.  So the risk I was not willing to take was a sporting risk, not a safety risk.  It was one of potential inconvenience: finding myself sitting on the ground in Walden, having to wait for a retrieve, if things didn’t work out.

The real question is of course: what will I do next time when completion seems uncertain?  How confident do I have to be in my ability to complete my task?  I must be honest: there will never be 100% certainty.  Does it make sense to push on if the chance of completing the task is only 25%?  Probably not.  If the chance is 75%?  Probably.  If it is 50%?  I still don’t know.

My flight track is here.

Lessons Learned

  • 13k MSL Can Be Really Low.  It always depends on where you are relative to safe landing places and any terrain in between.  13k above the Divide west of Estes Park is too low for comfort.  I should not let this happen again.
  • Walking Fields Pays Off.  Having walked the field at the bottom of Lumpy Ridge, I knew where to find it and how to fly an approach if I needed to.  This gave me the confidence to look for lift where I was almost sure to find it, and the clarity of thought to look for it without stressing out over whether or not I would be able to glide out to the prairie.  Had I not known this field, diverting to Granby would have been my only viable choice.
  • Don’t Ever Get Into a Marginal Situation without a Pre-Decided Plan B.  When I approached the Divide I was so confident that I would find lift on top that I had not pre-decided what I would do if I that did not materialize.  So I only had one minute to consider my options.  This felt too short and too stressful.  It’s best to make a Plan B while you still have a lot of options so you just have to execute what you already decided. (This is no different to the decision of what to do in case of a rope break or any other emergency situation.  Don’t wait to decide what to do when it happens.  You must know what to do in advance.)
  • Don’t let your most recent experience in a small area cloud your judgement (recency bias).  The day started very strong with solid, reliable climbs along the foothills.  When the small area immediately next to the Divide did not work well, I lost confidence in the conditions across the divide as well.  Similarly, I did not anticipate that the Divide would not work because I had found such great lift over the foothills.  I must try to avoid falling victim of recency bias.
  • Learn to better differentiate between safety risks and sporting risks.  These are very different things.  Never take safety risks.
  • Pre-declare (to yourself) the level of sporting risk you are willing to take.  Landing back at home is never 100% certain on a XC flight.  It may be useful to pre-declare before the flight the land-out probability you are willing to take.  E.g., “Today I am willing to accept a 30% land-out probability.”  Then you can reflect during the flight what you believe the odds of landing out are if you continue on task. It might make it easier to decide whether to go on.
  • Pre-arrange a retrieve in case you need it.  There is huge peace of mind knowing that someone will come and get you if you have to land away from the home field. In fact, unless this is pre-arranged it’s really difficult to accept a significant land-out risk.