I’ve previously written about why Condor is a great practice tool for soaring pilots and recently I followed up with a tutorial for Condor pilots interested in joining multiplayer racing. Both assumed some basic level of familiarly with Condor. This article is for anyone who would like some more basic help to get started.
What do you need?
Here’s what you need to get started:
- A computer with a reasonable graphic card. (You do not need a high end gaming machine.) Condor only runs on Windows but you can use it with a Mac under Bootcamp. (That’s what I have). You find the specific requirements here.
- A decent joystick. In my opinion, the best one for Condor by far is the Microsoft Sidewinder Force Feedback 2. Other joysticks work but this one is the best. It is long out of production but you can get one on eBay.
- The Condor 2 software. You can buy and download it directly from the source, or, if you’re in the US and would like to benefit from Paul Remde’s excellent support, you can buy it from Cumulus Soaring. The standard version is perfectly fine but if you already know that you will want to fly a lot of different gliders, you can go straight to the Pro version.
In addition, although not necessary, I highly recommend that you get:
- Rudder pedals. This is particularly important if you fly (or intend to fly) gliders in real life because you will want to build the right muscle memory. If you are not a real-life pilot you can use a twist joystick to control the rudder. The ones I use are no longer available but any brand should do.
- Infrared Head-tracking. This is huge because you control what you see on the screen by slightly moving your head. Without it, you have to use the head switch on the joystick or your mouse to control what you see on the screen. Neither of these options is intuitive and either increases your workload when flying. The head-tracker is expensive but hugely improves the experience. Before you buy it, check that there is no direct sunlight coming in from behind where you will be sitting when you use Condor. Sunlight confuses the tracker and it will not work.
- An external hard-drive to store additional sceneries. There are dozens of Condor sceneries (landscapes) freely (!) available for most soaring areas around the world so you can fly in lots of great places! These are very detailed and get larger and larger. The biggest one is >200 GB. And that is just one landscape. I have a 3TB external hard drive where I store all my sceneries and I keep the software itself on the main drive of the computer.
If you want to go all-in on an immersive experience consider a VR headset. Some people absolutely love them as everything is truly in 3D and you might forget that you are not in a real cockpit. However, they are not for everyone. I have tried a headset and I much prefer the head tracking option and a regular computer screen instead. (I find the headset heavy and uncomfortable, I do not like to have a screen directly in front of my eyes, and I like to be able to look at a print out of the task on a map while I’m flying.) If you go for a headset, you will obviously not need an infrared head tracker. Sunlight will be no issue for the headset. Before you buy one, I recommend that you try one first.
OK, I have everything. How do I set it up?
Setting up Condor has become fairly straightforward. Just follow the installation instructions in the manual.
Condor comes standard with a scenery for Slovenia (that’s where the company is based).
If you want to install additional sceneries (aka landscapes) go to the website of the European Condor Club, then go to the Landscapes tab, and click on the link to install Condor Updater. This is an excellent tool that will automatically install landscapes for you. (This used to be a complicated process and is now totally intuitive.) You can see that there are many dozens of landscapes available already and additional ones are being added all the time. (These are created by volunteers and are offered free or charge. It takes a huge amount of effort to build one. Consider donating a little bit of money to the scenery creator if you find a scenery that you like a lot.) Also, do consider subscribing to the club. This will give you more bandwidth on the server and reduce the time it takes to download sceneries.
You do not need to install additional landscapes before your first flights but once you’re hooked you will want to try other top soaring locations such as New Zealand, the Alps, the American West, South Africa, or the Andes, just no name a few.
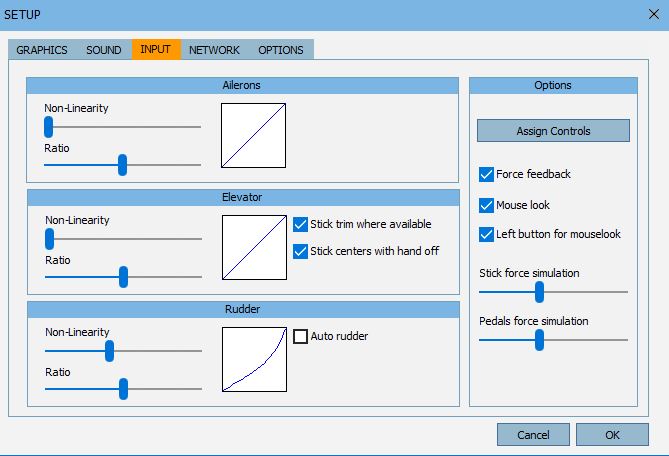
After installing the software, and before you can fly, follow the instructions in the manual for “Setting Up Condor”. The Graphics option allows you to tailor the detail to the power of your computer. The better your graphics card and processor, the higher level of detail you can pick. You may have to experiment a little bit. If the software runs sluggishly, come back to this screen and reduce the level of detail. If it runs perfectly fine, you can try to increase the level of detail.
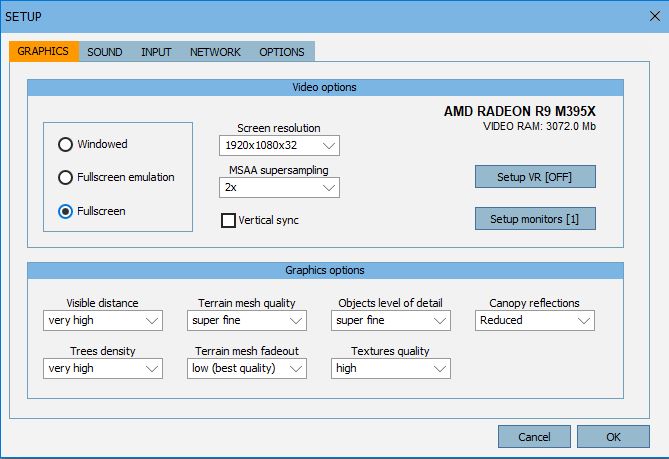
Work your way through each of the tabs. I suggest you leave the default settings in most cases until you find that you really want to alter anything.
The main exception to that recommendation is the Input Tab (see below). There you will want to make sure that you click “Assign Controls” (on the right side under “Options”) and program the buttons on your joystick.
The following screenshot shows the “Assign Controls” dialog.
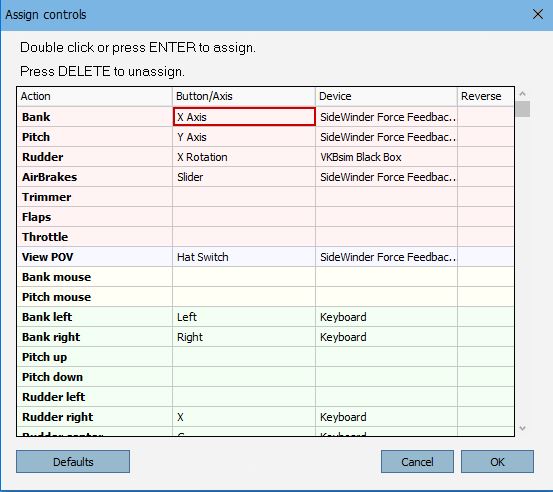
Before you start to change things around, think about what functions you really want to have on the joystick vs. which ones you want to keep on the keyboard. This depends in part on your joystick and how many buttons it has.
I recommend that you prioritize the buttons based on how often you expect to change things during a flight. E.g., retracting/extending the gear, releasing water ballast, or using the wheel brake are all things that I typically only do once during a flight and which I have kept on the keyboard. On the other hand, things that I do most often during a flight I have moved to the joystick, this includes: moving the flaps up or down, centering the trim, moving between screens on the flight computer, zooming in and out on the flight computer, toggling the vario between lift/and cruise mode, and operating the spoilers (I use a lever for that on the joystick).
If you’re just starting out with Condor and are beginning with School or Club Class gliders (e.g. no flaps) your list of things that you do most often may be a bit different from mine.
Some things can be a little confusing. E.g., some gliders have stick trim while others have a trim handle. (The same is true in real life!) There are different commands based on what trim the ship has. If something does not work quite as you would expect it to, chances are good that you find the answer on the FAQ page.
When you’re done with the setup, I recommend that you make a list of the keyboard commands on a sheet of paper. Appendix 1 in the manual provides a list of the default commands. Be sure to note which ones you have reprogrammed! There are so many commands that you may find this daunting. In practice you won’t use all of them and you will soon have memorized the ones you need.
I’m done with the setup. How can I get in the air?
Well, it is important to know how gliders work. If you’re a real pilot this part will be fairly easy but there are still things you may find challenging at the beginning. (E.g., I find aerotowing and landing to be harder in Condor than in real life.)
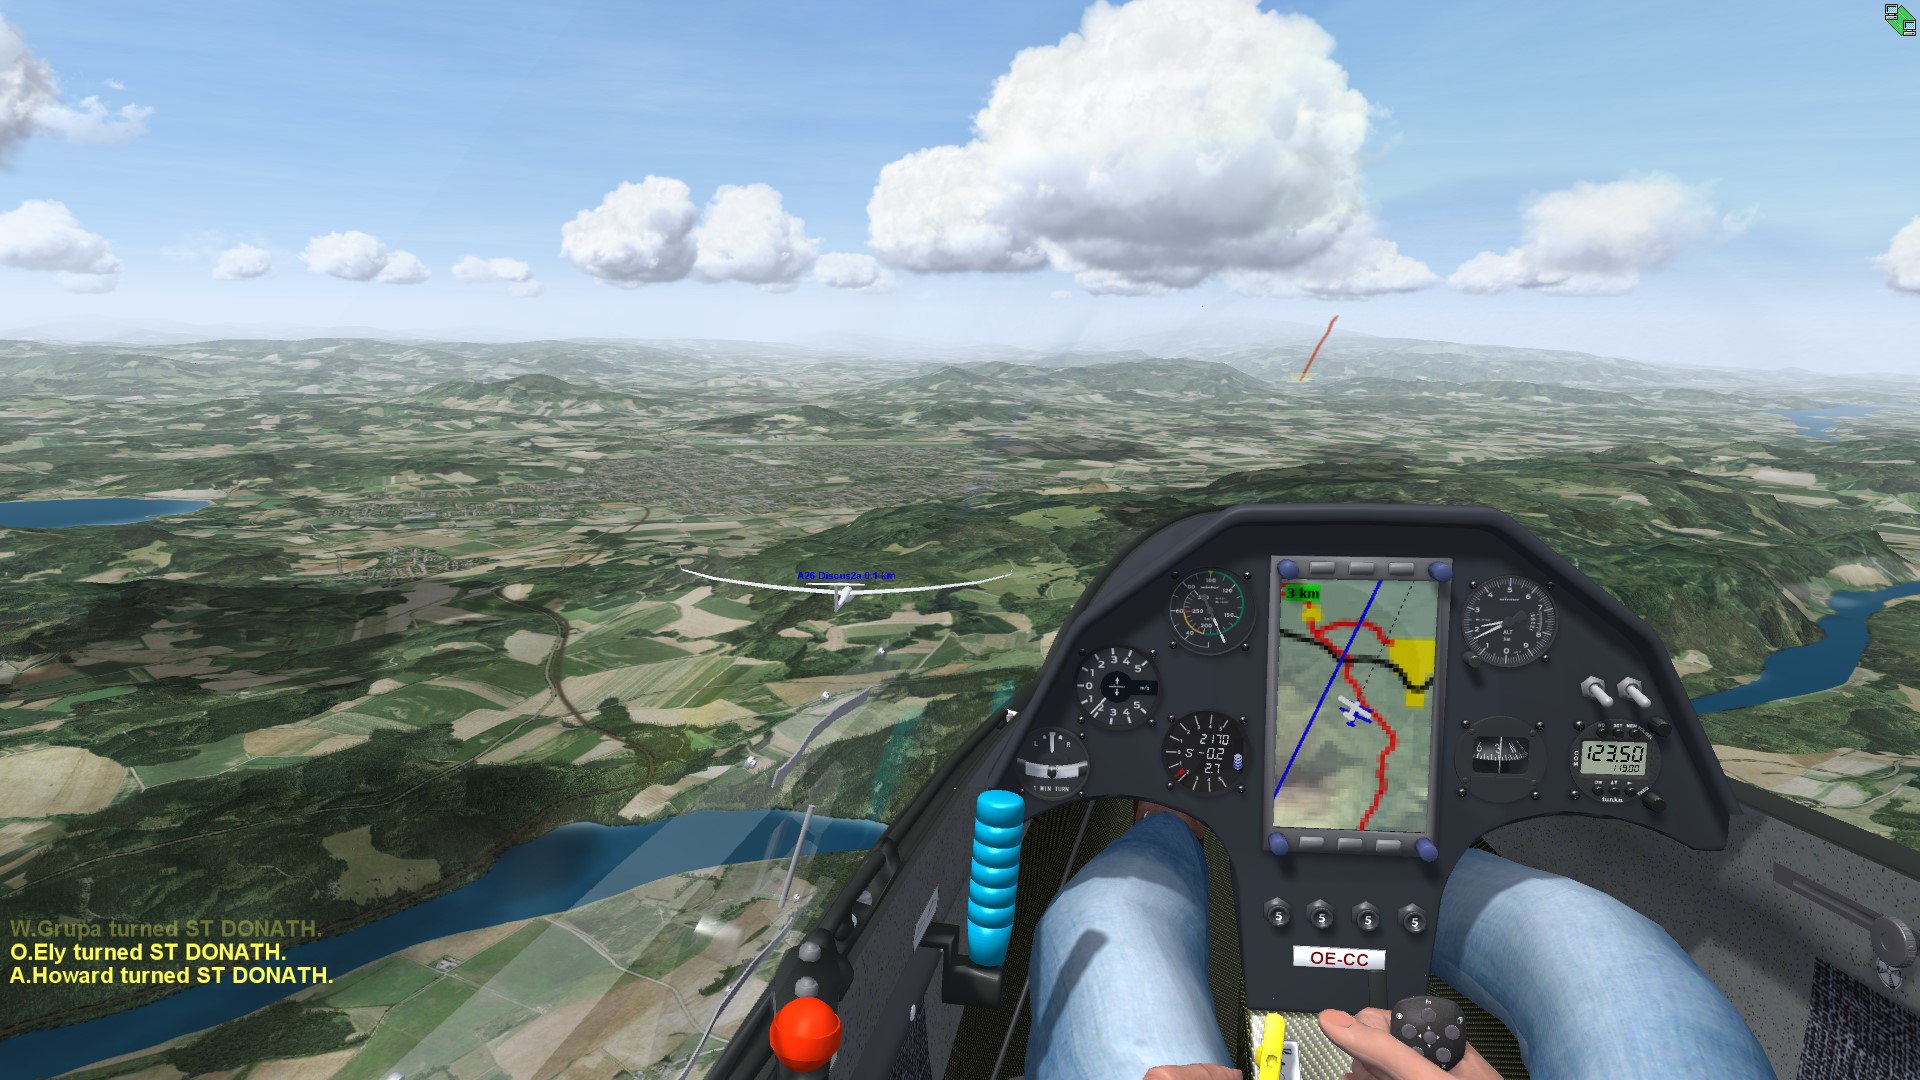
If you already know how to fly a glider you can jump right in. On the main menu you find a button for Free Flight. This will take you to the Flight Planner and the following window will pop up.
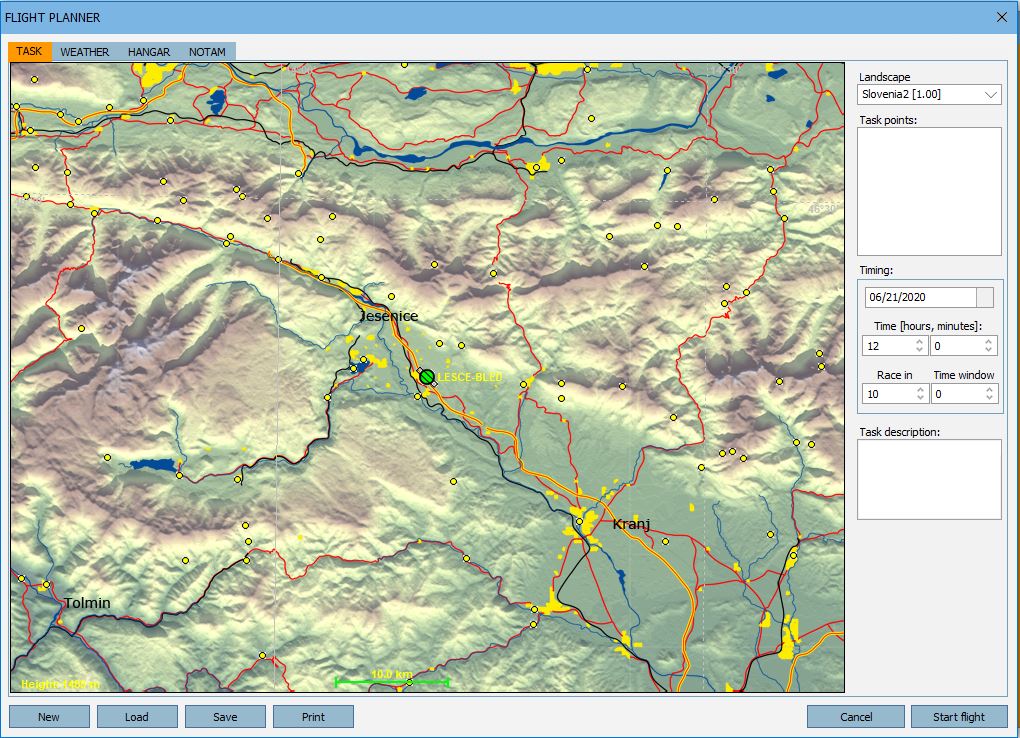
In the flight planner (look at the tabs on top) you set up a task (the route you plan to fly), determine key weather parameters, and pick a plane from the hangar (and set ballast and CG position). Look at the “Free Flight” section in the Condor manual to learn to use the flight planner.
Under Notam you can pick other options related to your flight. E.g., you can select between aerotow, winch launch, or airborne start (if you want to fly right away and not spend your time with launching). Also take a look at the Realism settings. If you’re only starting out you may want to enable thermal helpers for your first few flights. These will miraculously show you where the thermals are. There are also some other useful miracles for beginners such as plane recovery, height recovery, and mid-air collision recovery. (In online races miracles are usually not allowed or their use is so heavily penalized that you cannot compete if you use them.) You may not think you need a magic wand. By all means try without one first. However, you may soon find out that it can be quite handy when you’re just starting out!
If you are not a real glider pilot, your learning curve will be longer but you should be able to learn everything you need to fly Condor by working your way through Flight School. You can find a link for Flight School on the main menu. Start with Basic and work your way through all the lessons. Flying is not easy but Condor makes the learning process as accessible as possible.
Even if you master Condor you will of course still need real life flight lessons before you can fly a real glider, but the chances are good that you will need fewer of them and your training will be less expensive. Especially if you take the Condor lessons seriously and avoid taking any shortcuts. (E.g., if you’re starting in Condor with an eye towards learning to fly in real life, please use rudder pedals from the beginning. Coordinating the control inputs from your arms and legs correctly is absolutely critical and you would have to unlearn muscle memory later and this could make your real flight lessons longer and more frustrating.)
I think I have mastered the basic flying skills in Condor. What should I do next?
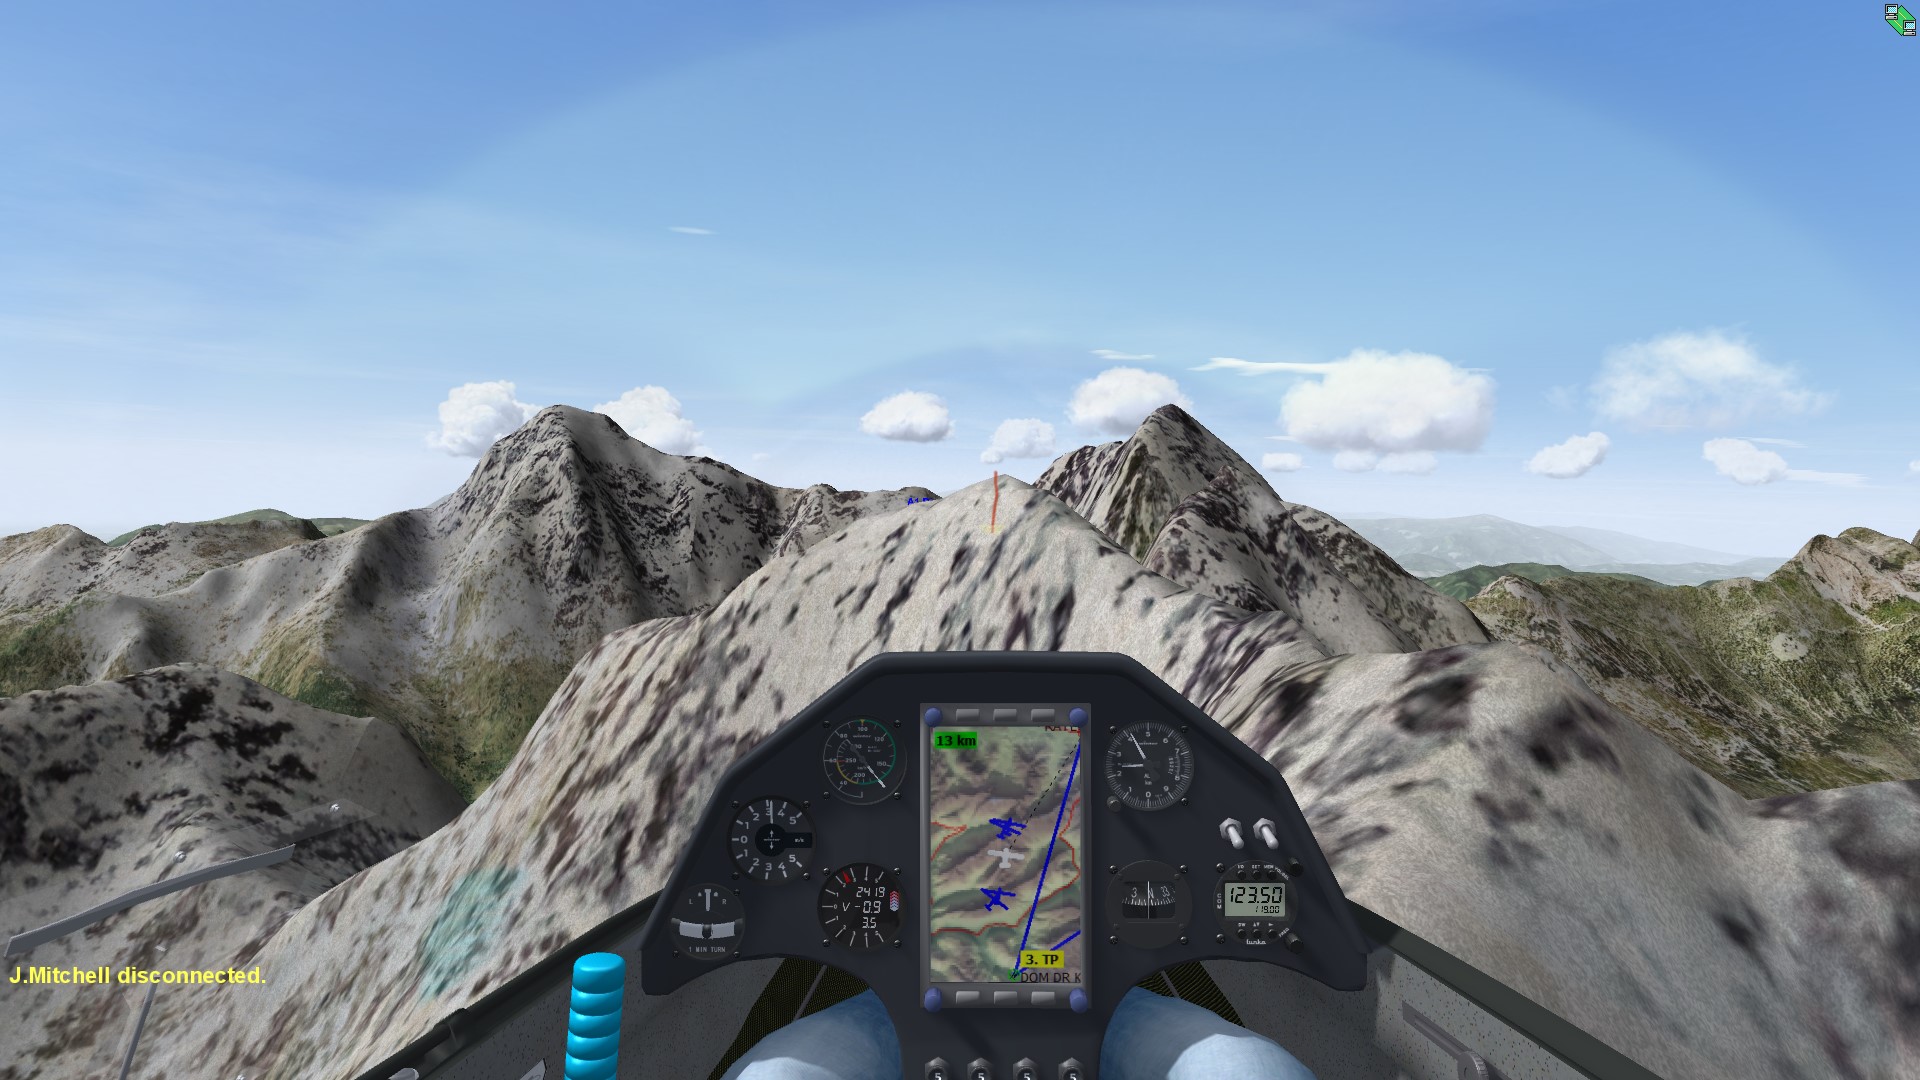
Once you have worked your way through Flight School (or have otherwise mastered all the skills that are covered there) you should be ready to fly cross country.
Just like in real life, a great way to test your skills is to earn your soaring badges. The Condor Club website makes this easy to do. Go to Badges and Diplomas and fly the suggested tasks that are listed there. Work your way through to earn your Silver, Gold, and Diamond Badges.
(Tip from a recent Silver Badge pilot: not all planes are allowed for all badges. Read the fine print to avoid disappointment. E.g., for the Silver Badge you must fly a School Class glider without PDA (i.e., you must navigate by compass and ground features although turn point helpers are allowed – press “J” to see them) and you have to press S to take turn point pictures over your wing when you are in the turn sector just like it was done in the olden days (before GPS). )
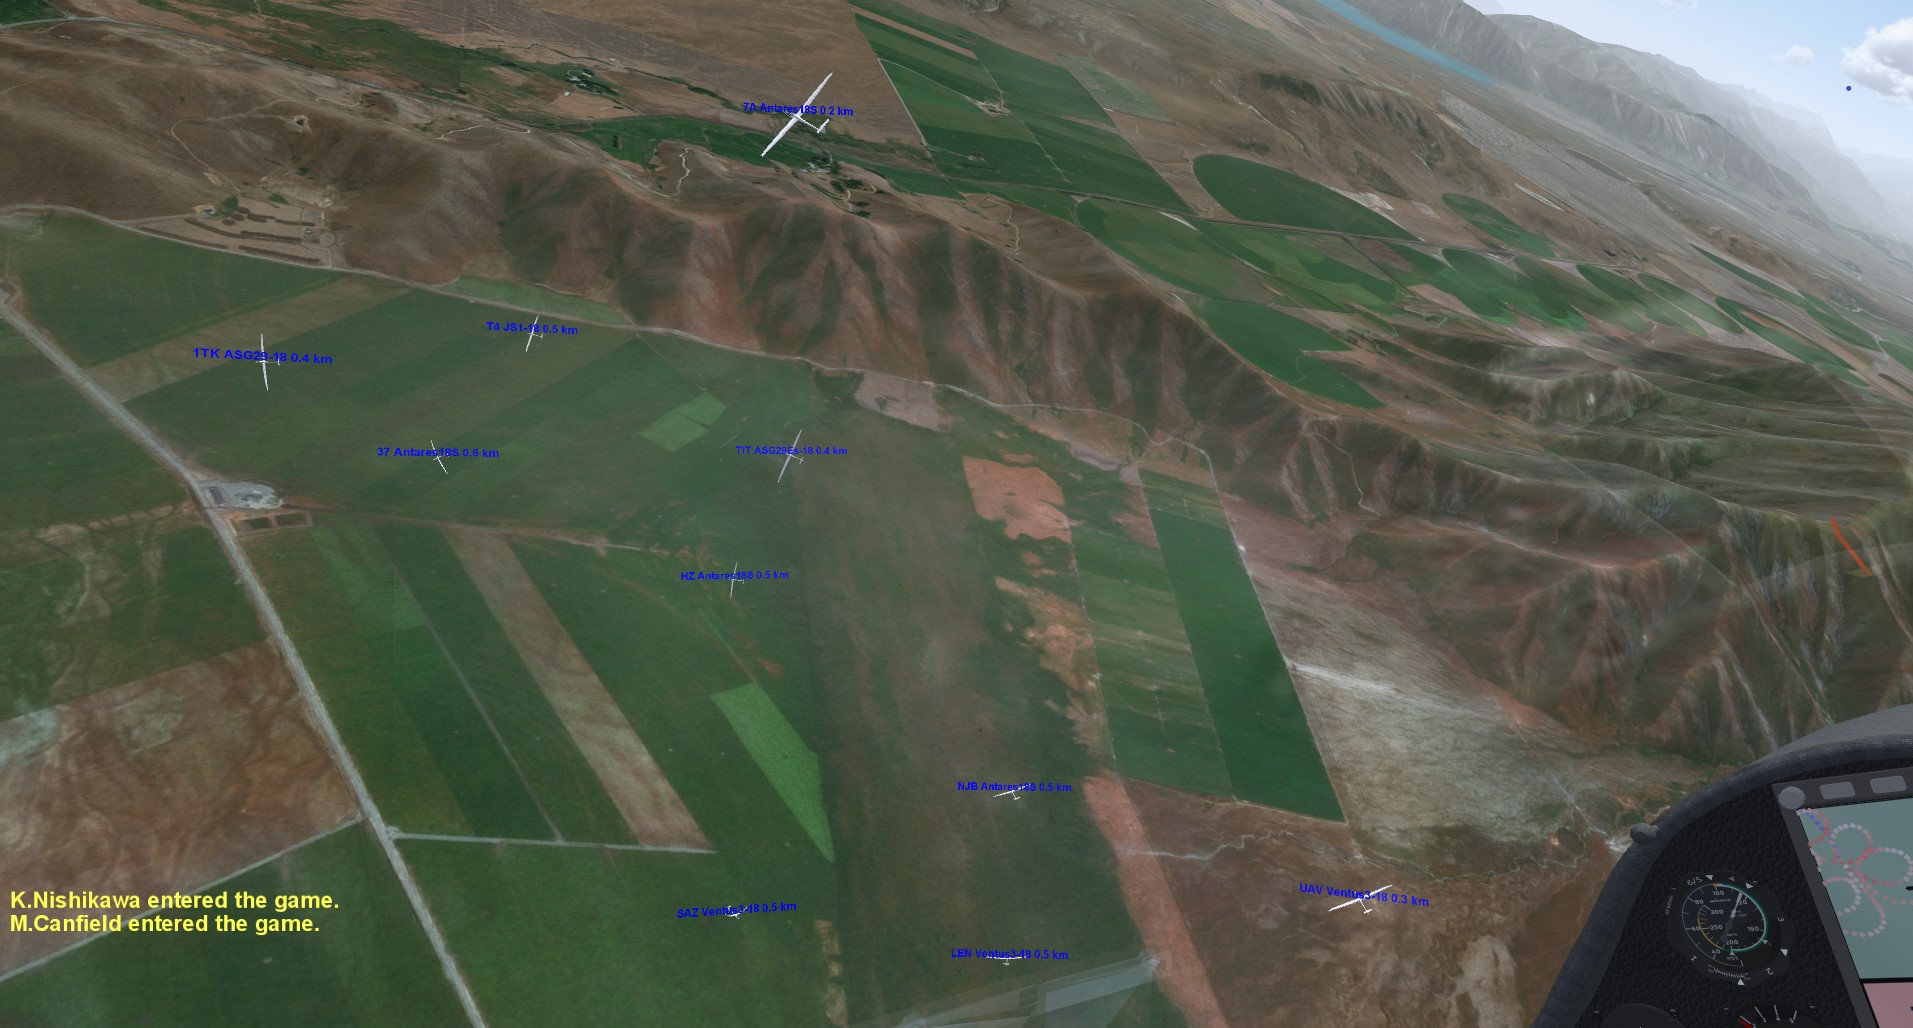
Once you have done that (or you are at least confident that you can do it), congratulations! You are ready for the pinnacle of Condor fun: multiplayer online racing!
There are a lot of online contests on offer. The best way to check what’s available and suitable for your time zone is on the Competitions tab of the Condor Club. Some races are more geared towards beginners while others are more suitable for experts. Read the descriptions of the race series you’re interested in – they usually provide some clues as to who they are seeking to attract.
The Condor community is very friendly and welcoming to newcomers. You can join a race even if at first you don’t want to fly the task. It’s cool to learn some gaggle skills while flying with so many other pilots in the start area. There’s no need to feel intimidated. However, if you are, a totally “private” way of flying against other pilots exists as well: you can download a particular task from any of the race series and fly that task by yourself. And you can even download the flight traces of others who have flown that task and set them up as “ghosts”. This way you can see them on your screen while you are flying the task. This is also a great way to practice getting faster. Download the traces of a few good pilots and try to follow them around the course.
But sooner rather than later you will want to start to join your first live multiplayer races. Whenever you’re ready, read this tutorial to shorten your learning curve.
Have fun! I look forward to seeing you on the Condor race circuit!
PS: Here are some additional resources to find more information about Condor:
- Condor Soaring Hompage
- The official Condor Manual
- Home page of the Condor Club. This is where you find sceneries to download, multiplayer races to join, flights to earn your badges, links to the Condor soaring community, and much more.
- Condor Forum. This is a great resource if you have questions about Condor that you have not find an answer for elsewhere.
- Condor Tips from Paul Remde with Cumulus Soaring
- Paul Remde’s Condor Page – a wealth of information; You can also purchase Condor and various accessories here in which case Paul will support you if you have questions.
- Daniel Sazhin’s Condor page on his website soaringeconomist.com. Daniel is not only a top glider pilot in real life, he’s been organizing Condor Soaring Contests in the US for the past decade.
- Scott Manley’s Condor Glider CFI page. This is based on Condor 1, which has been superseded by Condor 2. However, much of it is still relevant.
Clemens, thanks for the very thorough and easy to follow write ups on Condor. As a pilot in training I very much appreciate your blog and tips. Big thumbs up!
Thank you for the kind feedback! Good luck with your training. Hope you’ll be able to continue in the not too distant future!
Sure, I recommend the joystick, which is no longer for sale …. Thanks for the help. 🙂