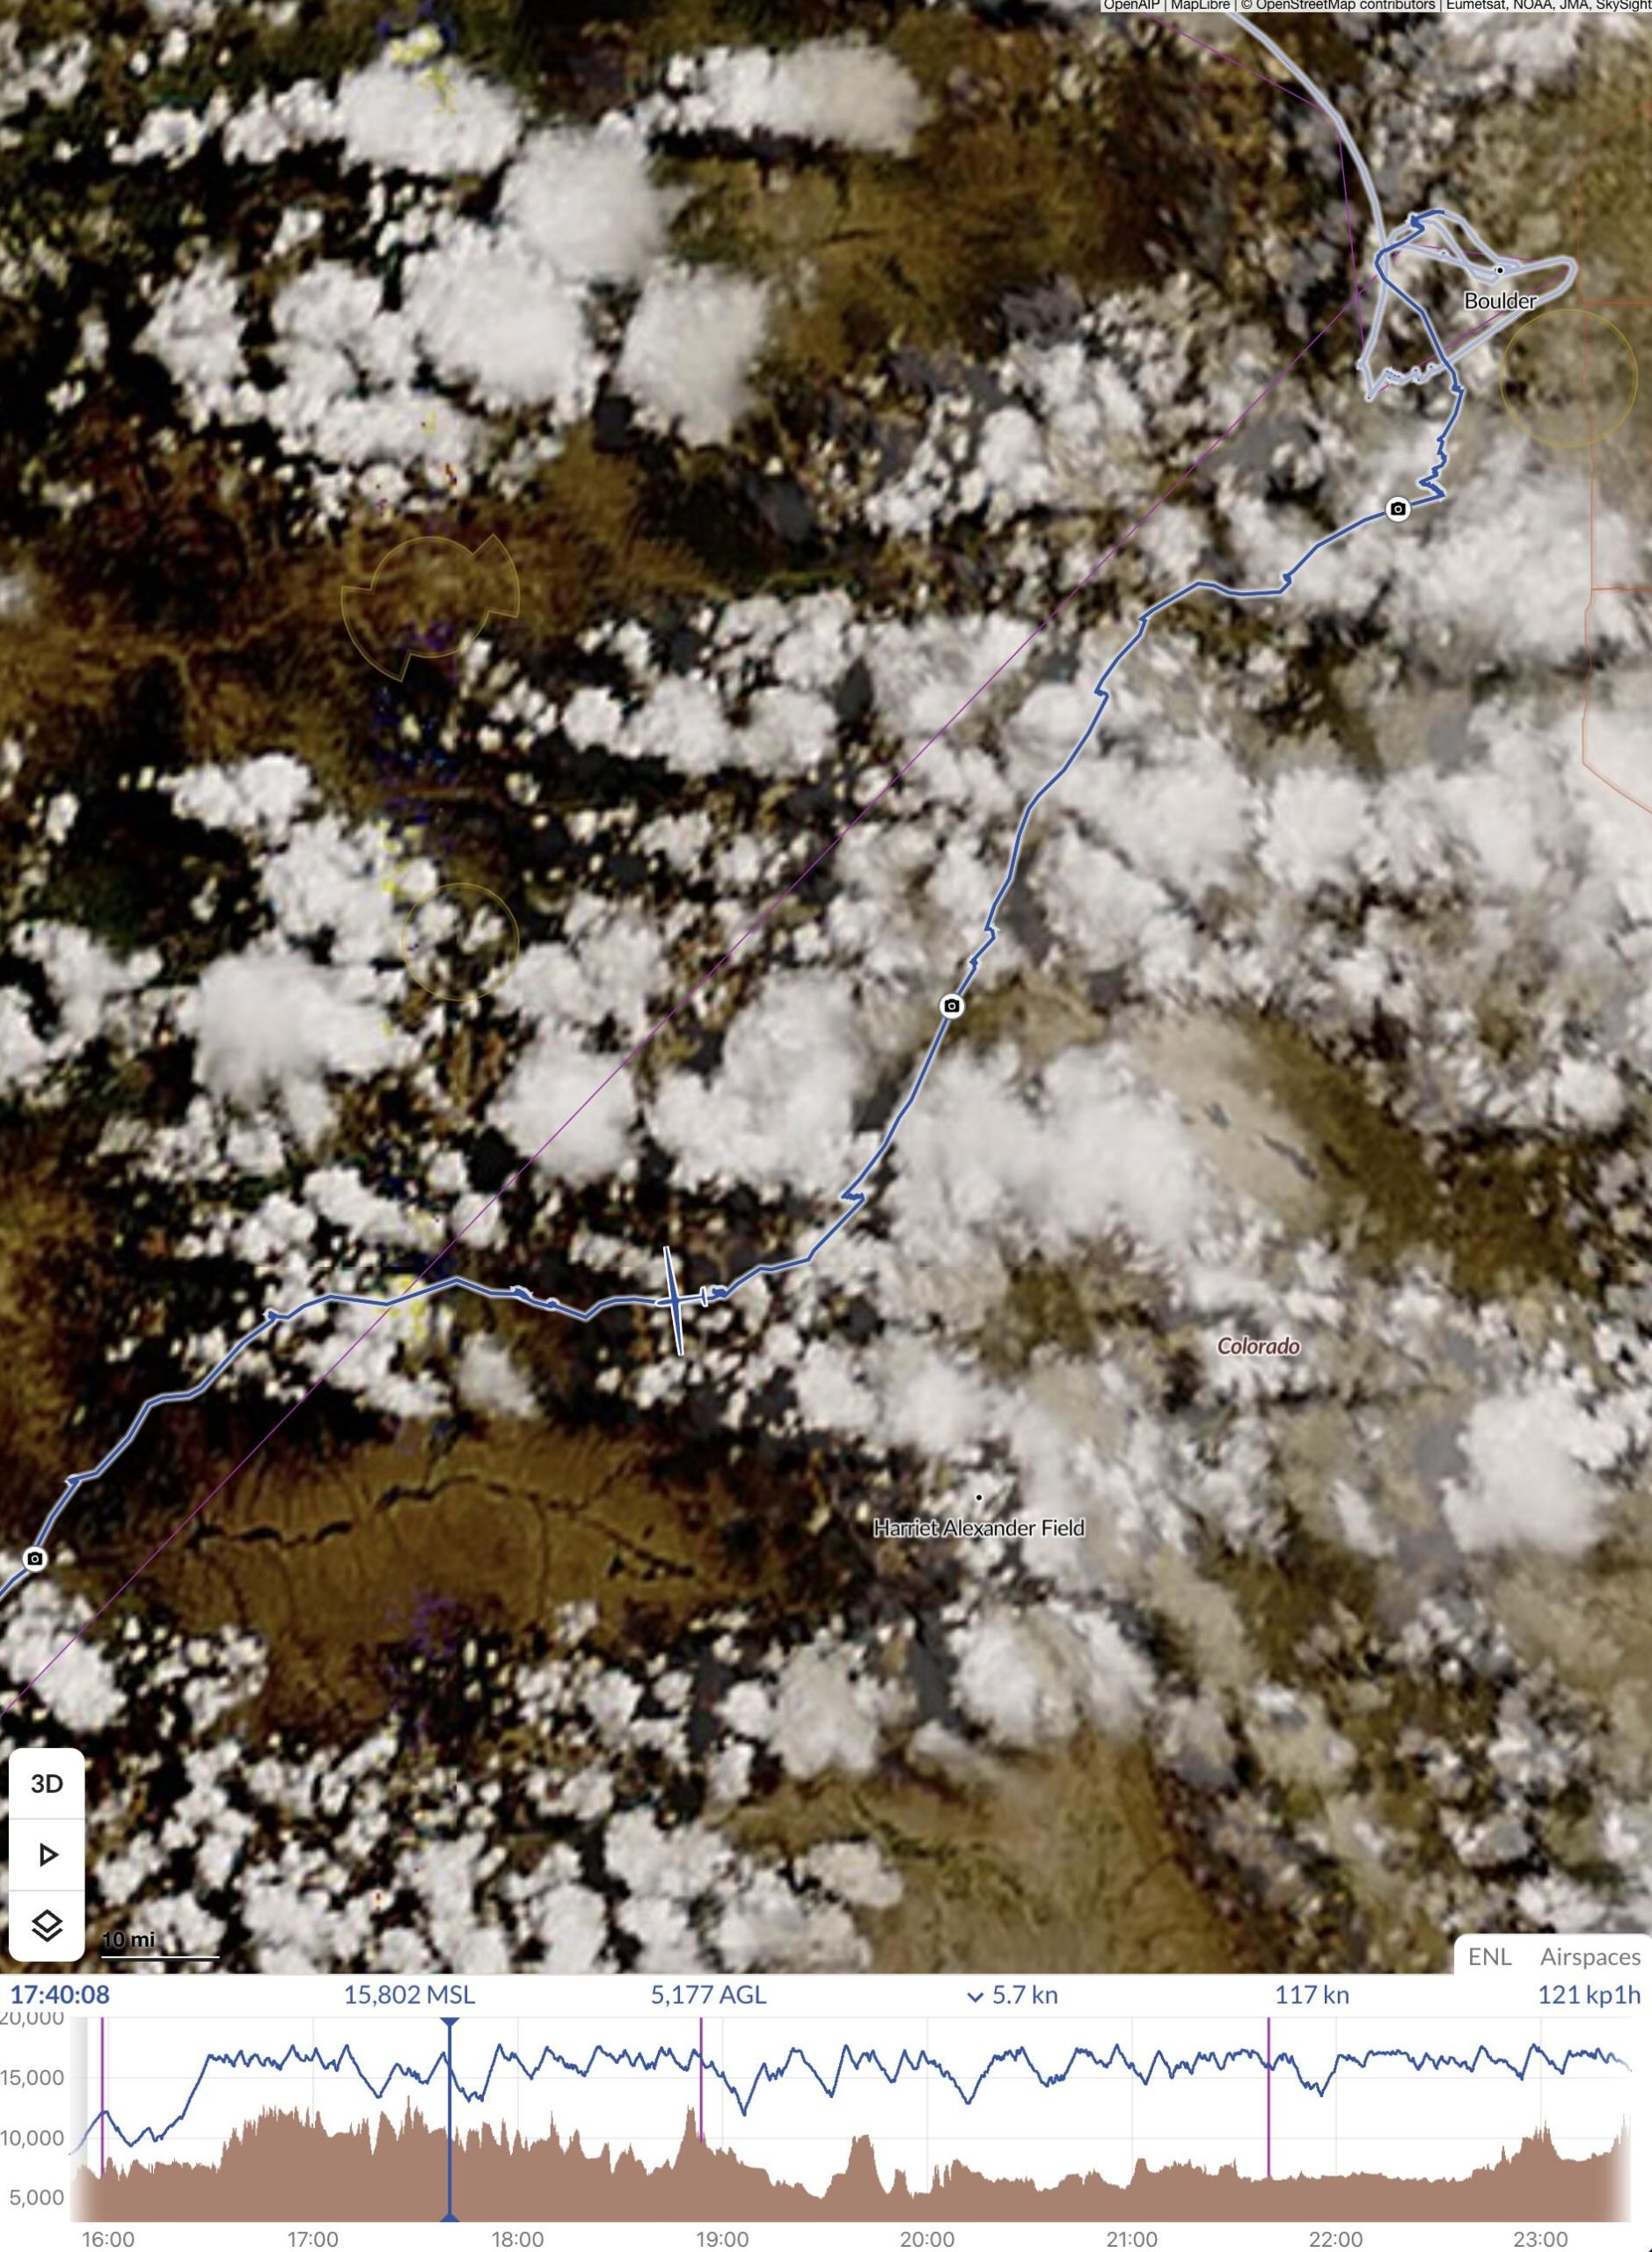
On July 8, 2025 I completed a flight that set new Colorado State Records for Longest Declared FAI Triangle (1111.1 km distance) and for Longest Free FAI Triangle (1159 km distance). And also a new record for fastest speed around a 1000+ km declared triangle.
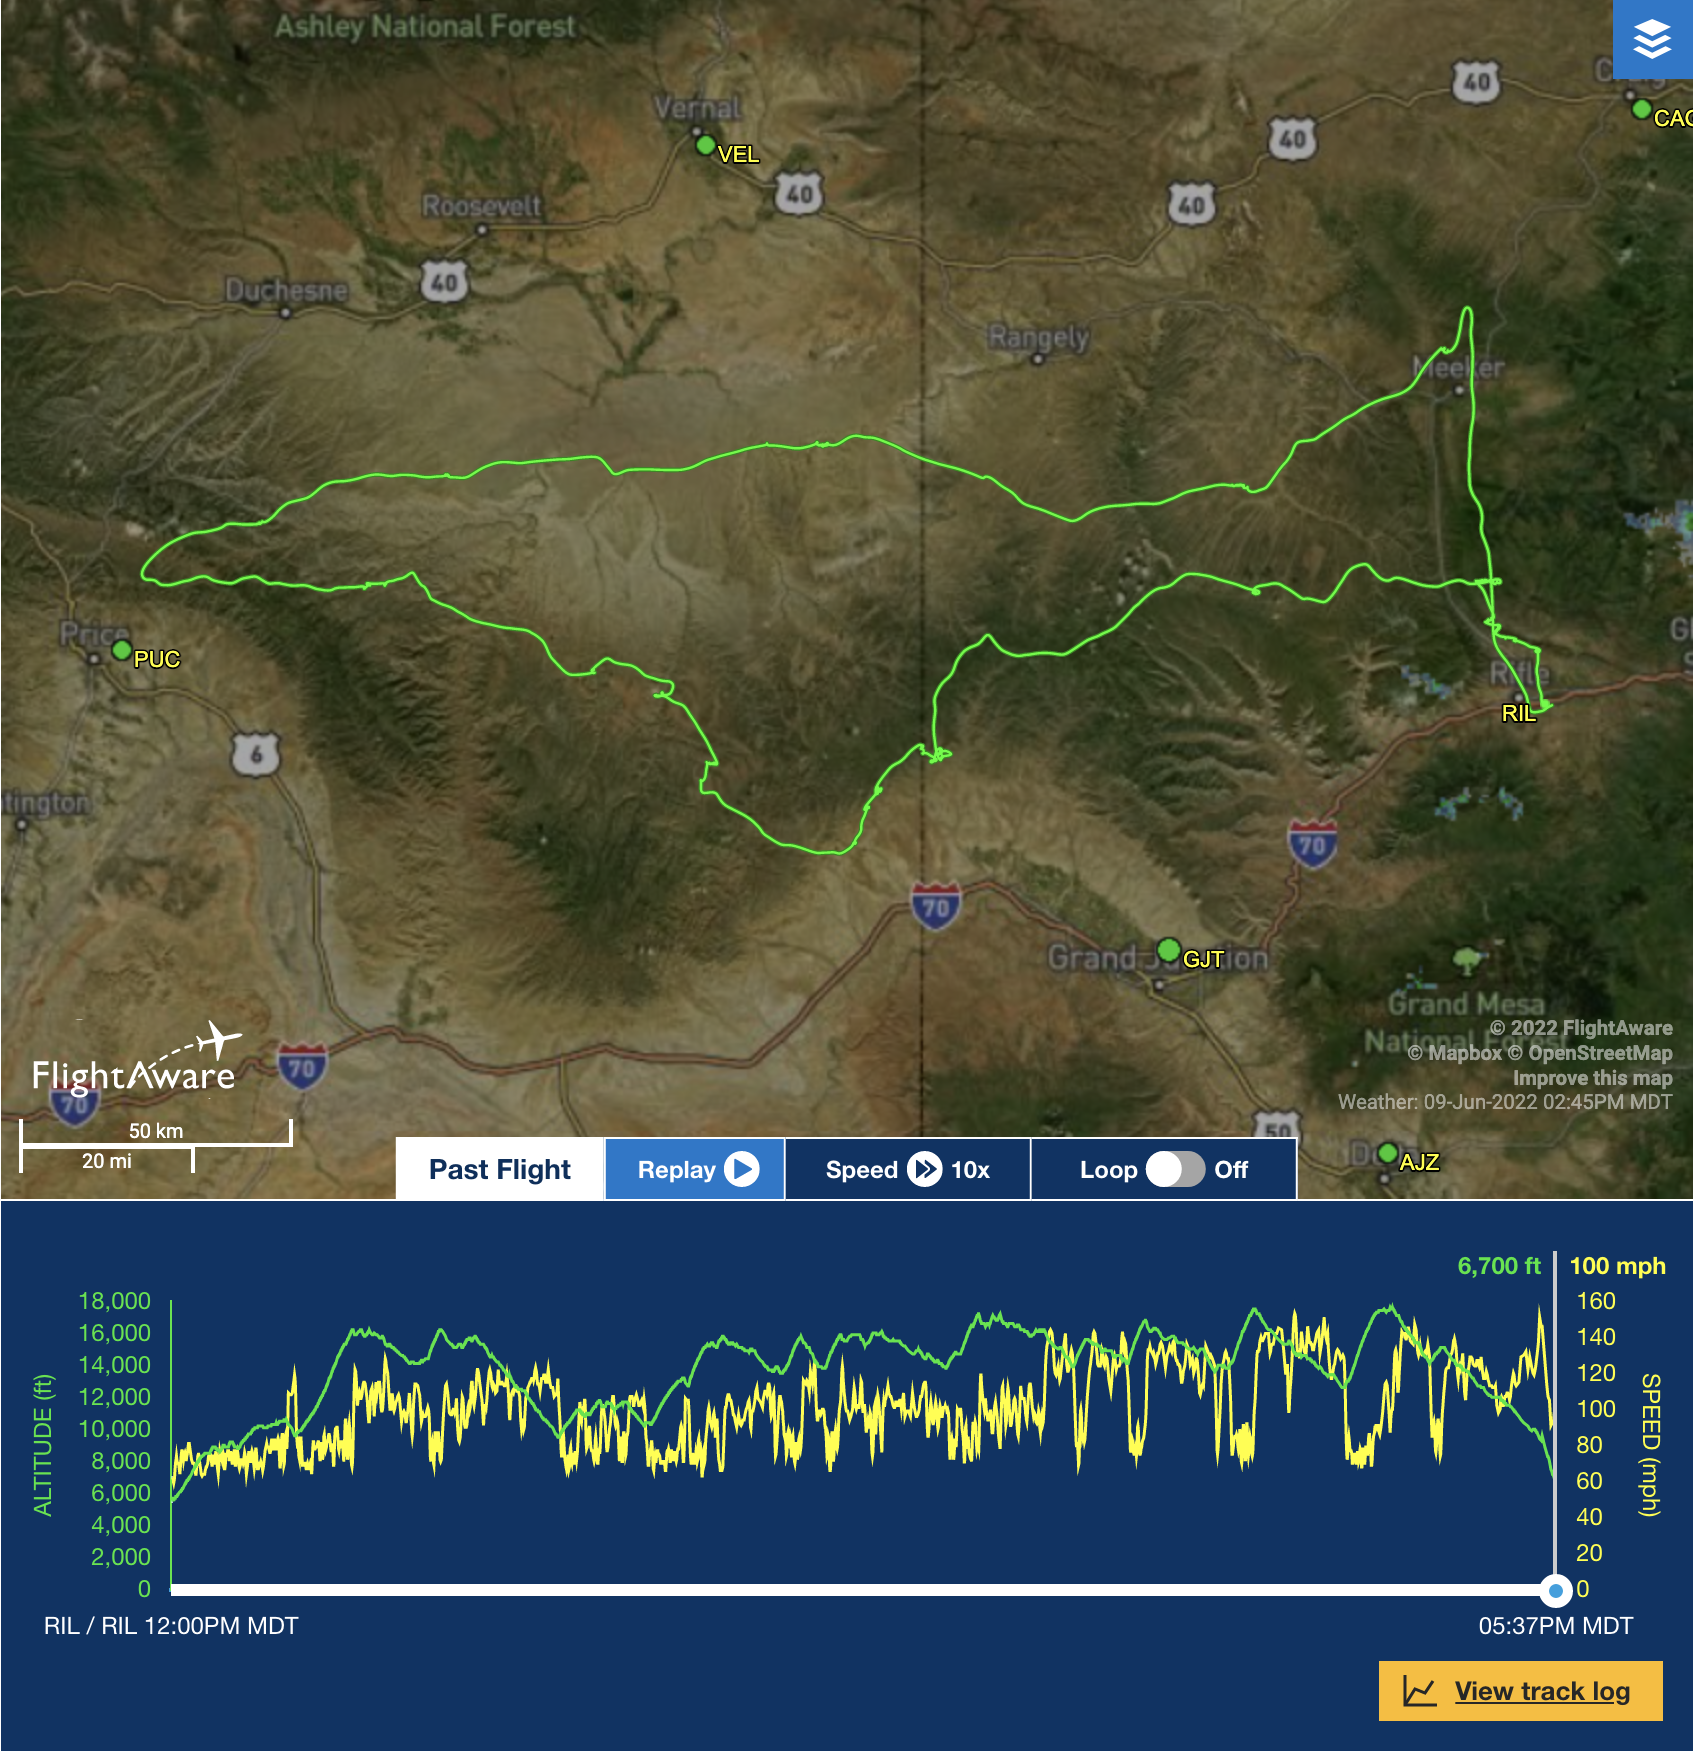
The flight trace can be found here: https://www.weglide.org/flight/637007
It’s only the second time a declared 1000 km FAI Triangle has been achieved in Colorado. (The prior one was “just” 1001 km. You can read up on it here.)
Long distance flights in the mountains (especially big declared triangles) don’t just require strong soaring conditions (e.g. good lift, nice clouds to mark it, not too much wind). That’s just a given. In addition, you need a day that starts early and lasts until late – ideally all the way to sunset. In Colorado, such days tend to be very rare. Usually thermals are either late to develop (such that you must delay the start), or they develop early, and then the day blows up prematurely with widespread virga, showers, and thunderstorms. Big Triangles (or very long Out and Returns) require an early start, a late finish, and everywhere in-between must work as well.
That’s where precise task planning helps tremendously. In decades past, this was basically impossible due to the lack of sufficiently reliable weather tools. But thanks to the increasing power and precision of the latest weather models, we can now much better anticipate how a day will develop along any specific route we might consider. Then we can pick a task that is optimally aligned with the forecast, along the entire track throughout the day.
In this article, I’ll first explain the methodology I use to plan such flights followed by a detailed report about this particular flight. There I will also illustrate how my preparations helped me keep going when things got challenging. Finally, I will conclude with some reflections about what may be possible now that we have much better weather tools available than ever before.
Flight Preparation (for thermal flights)
The flight preparation shown below may look quite time consuming. But with some practice it goes rather fast. Using the methodology described, it takes me not more than 10-15 minutes to plan a flight. Because the flight on July 8 involved a record attempt I was extra thorough and spent about 20-25 minutes on it.
I usually watch the forecast a few days in advance to identify the best day(s). Then I prepare a general plan the night before the flight, and I update this plan in the morning based on the latest weather models as they become available.
Note: the following flight preparation process is focused on thermal soaring conditions only. Flights in wave conditions require a different methodology.
Step 1: Picking a Suitable Day for a Potential Record Attempt
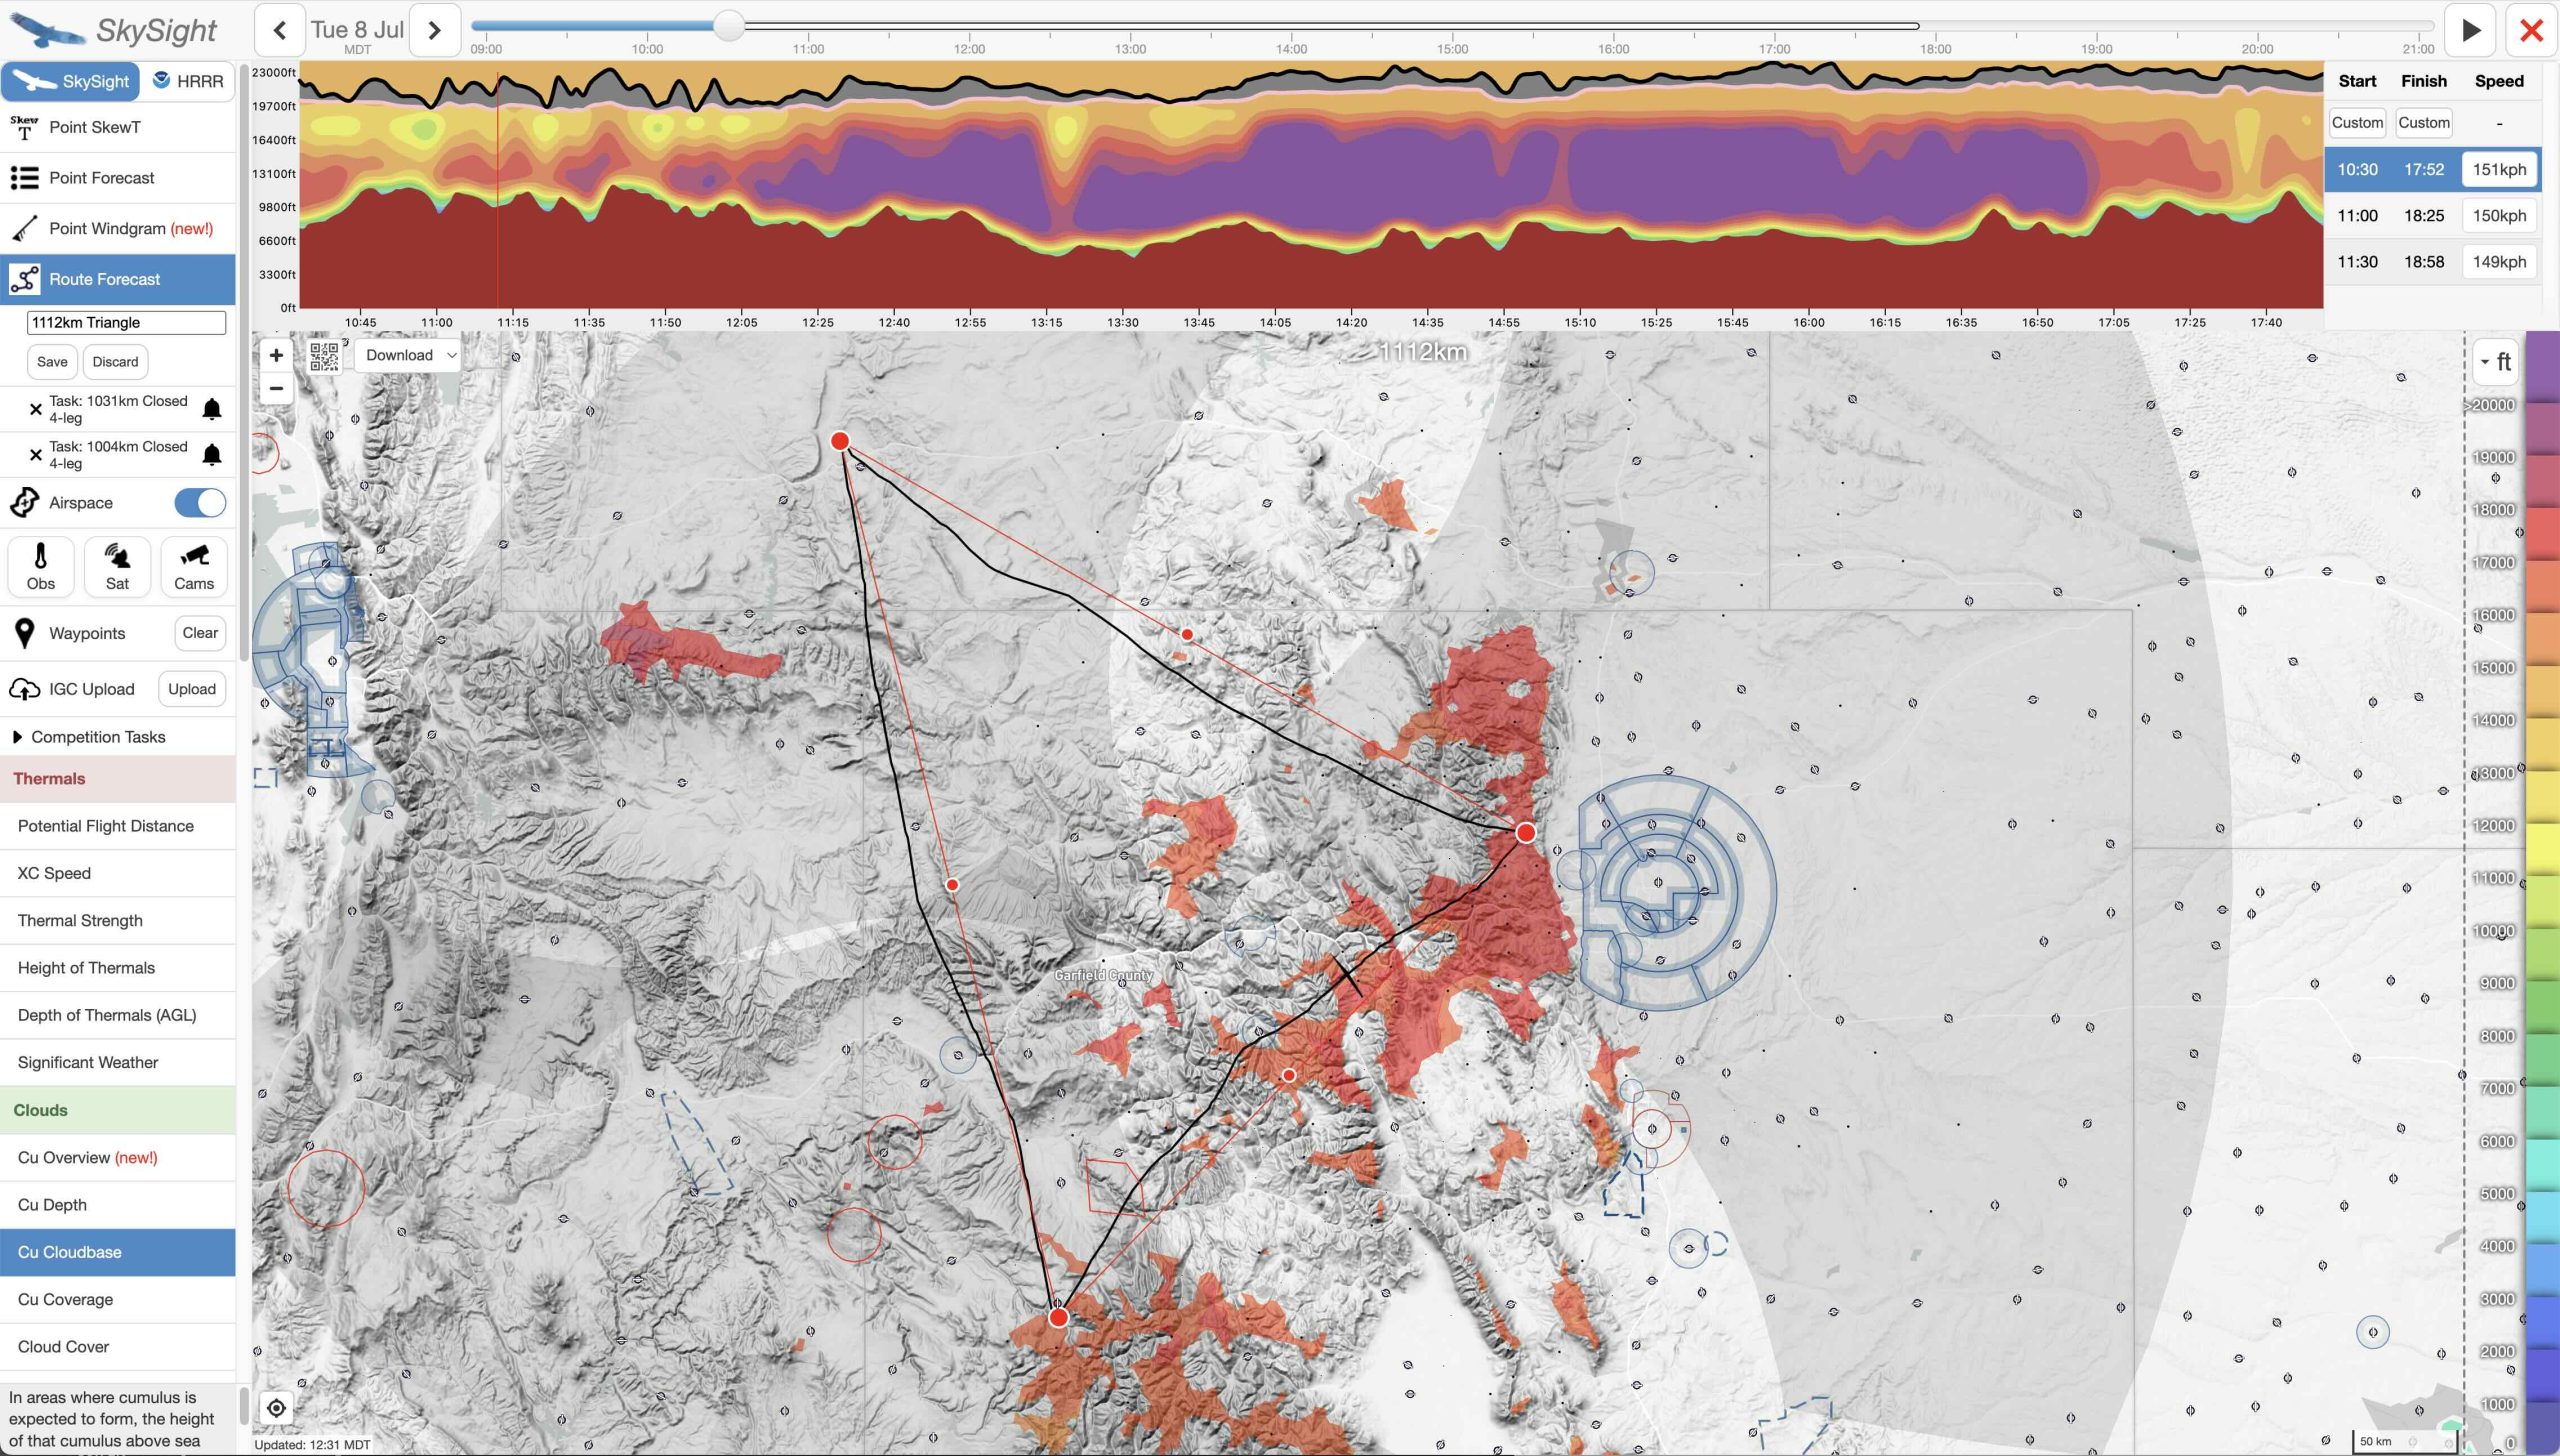
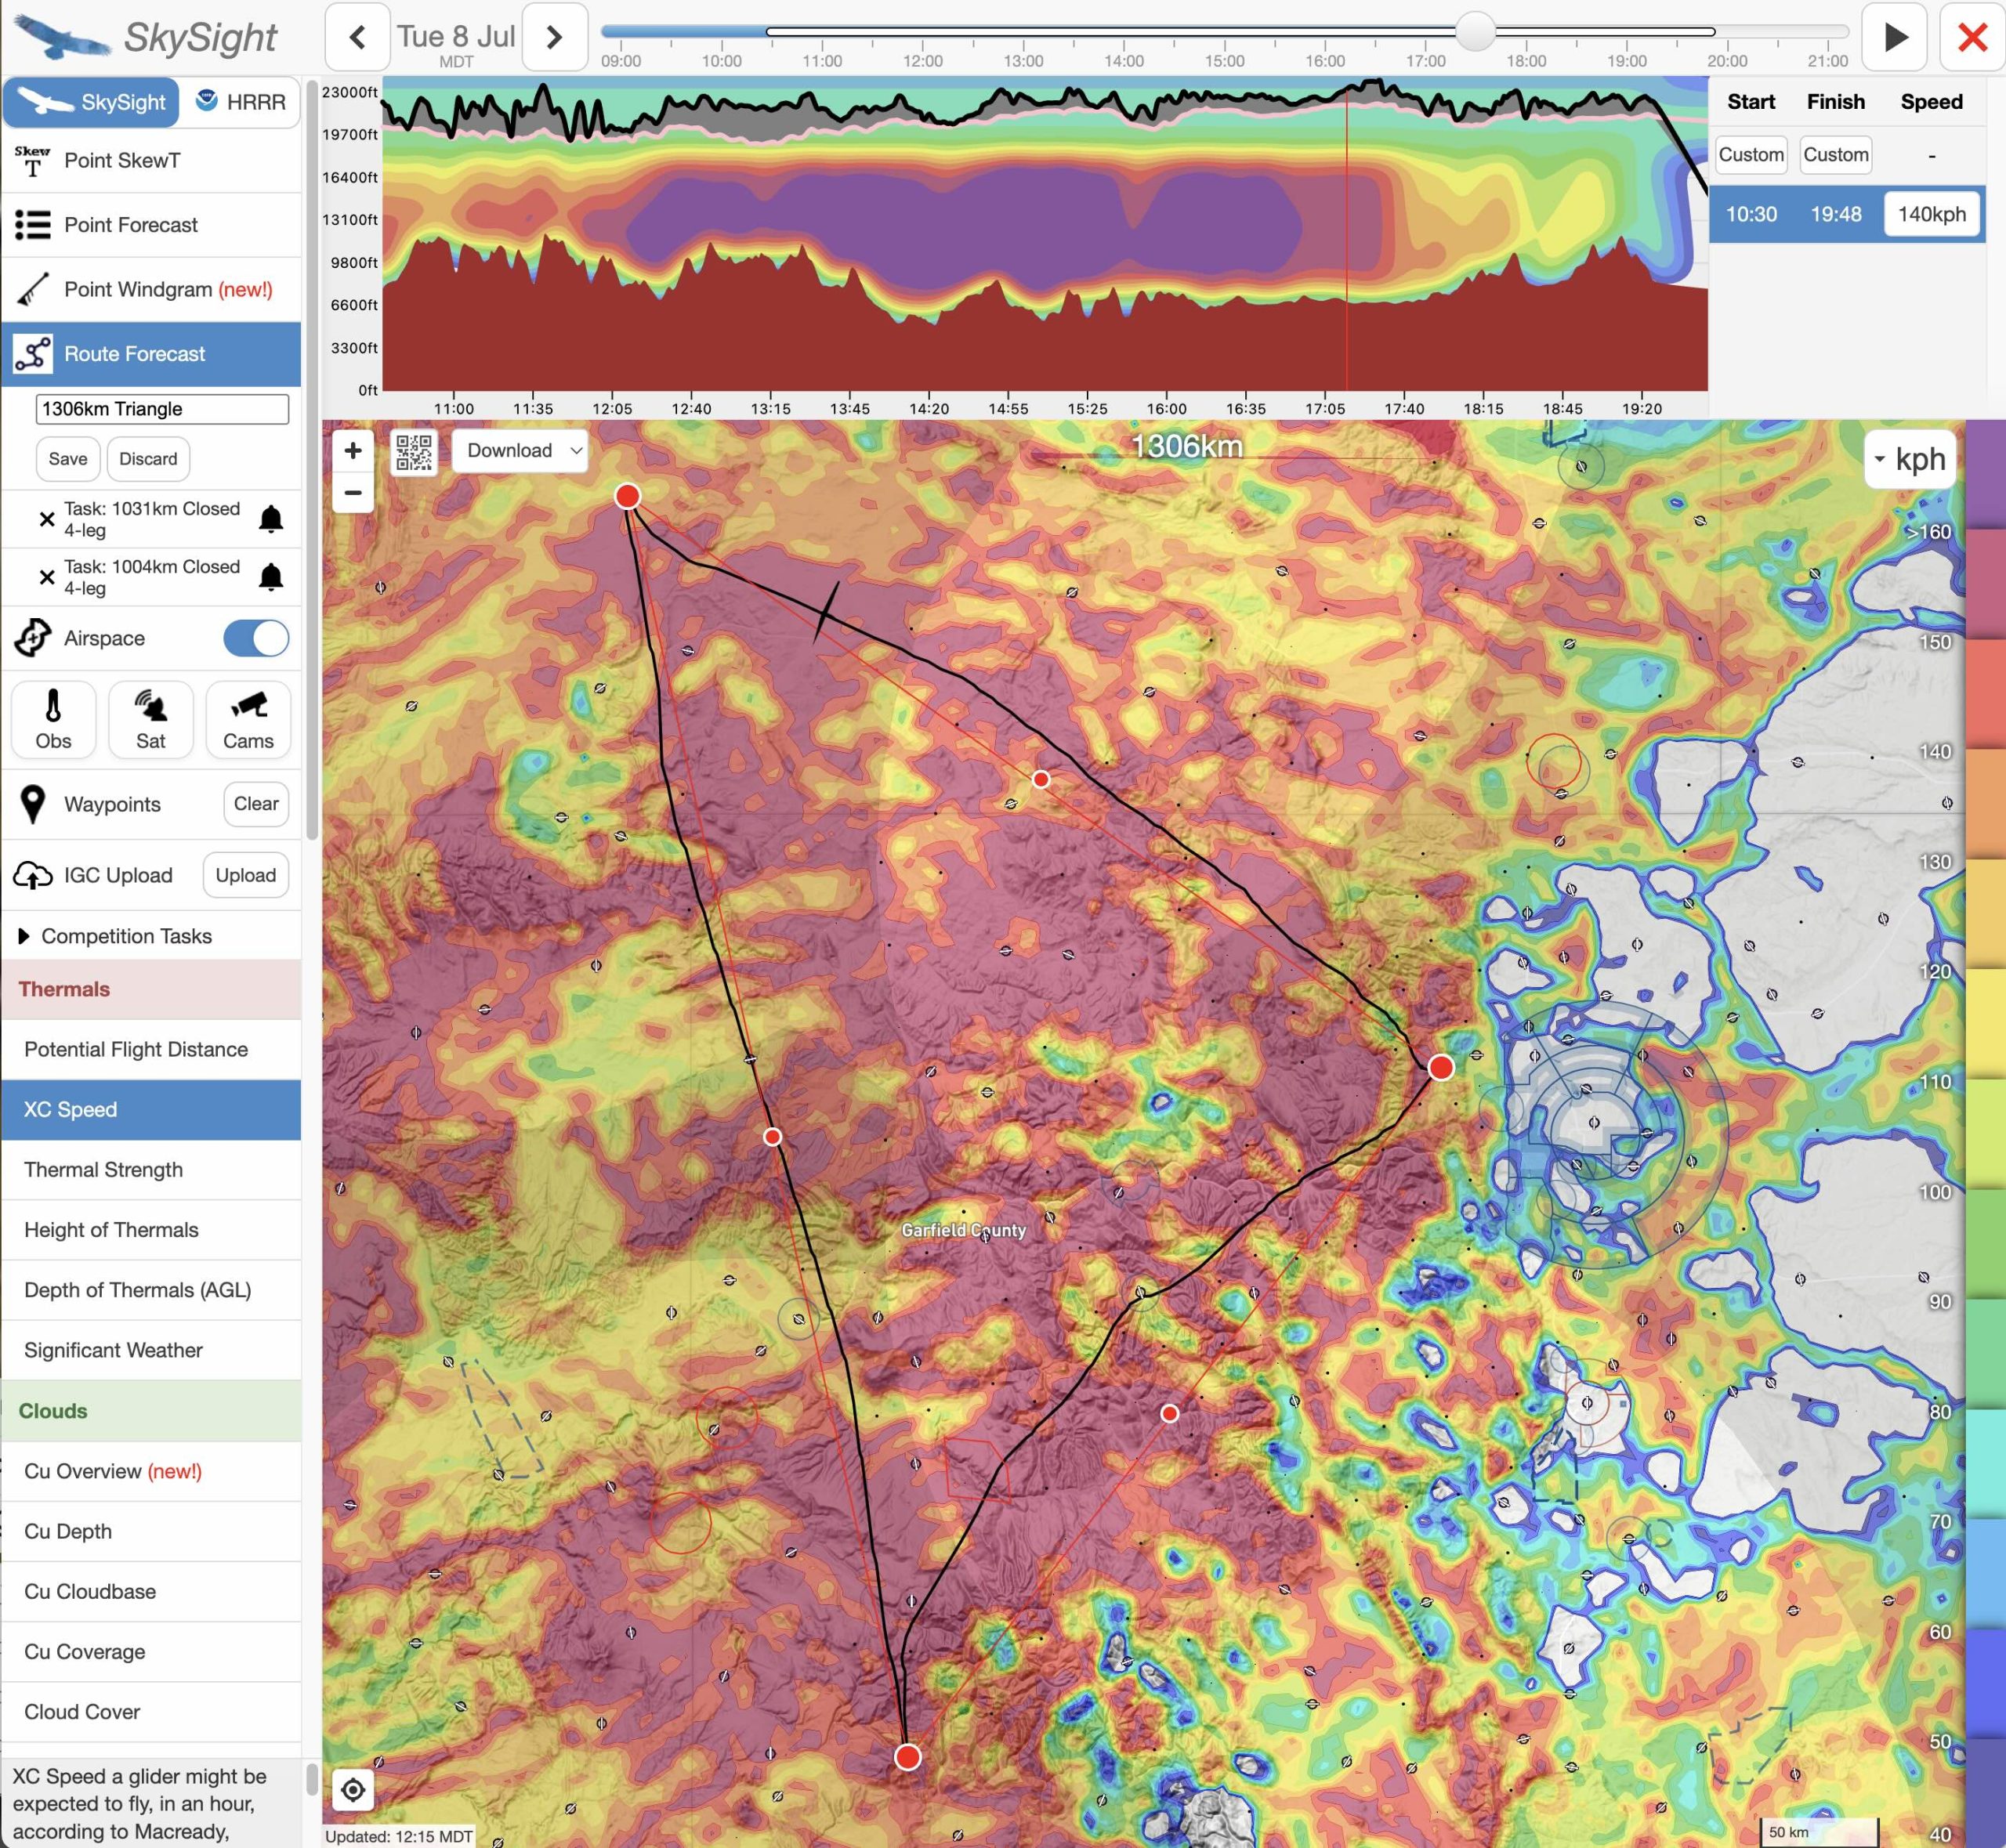
With the right weather forecasting tools (I mainly use Skysight but other tools are improving too) it is now relatively easy to pick potentially suitable days. For me, the best and fastest starting point to pick suitable days is the Potential Flight Distance (PFD) Chart.
If the PFD Chart shows your task area looking mainly red (as below) you might have a winner and should investigate further.
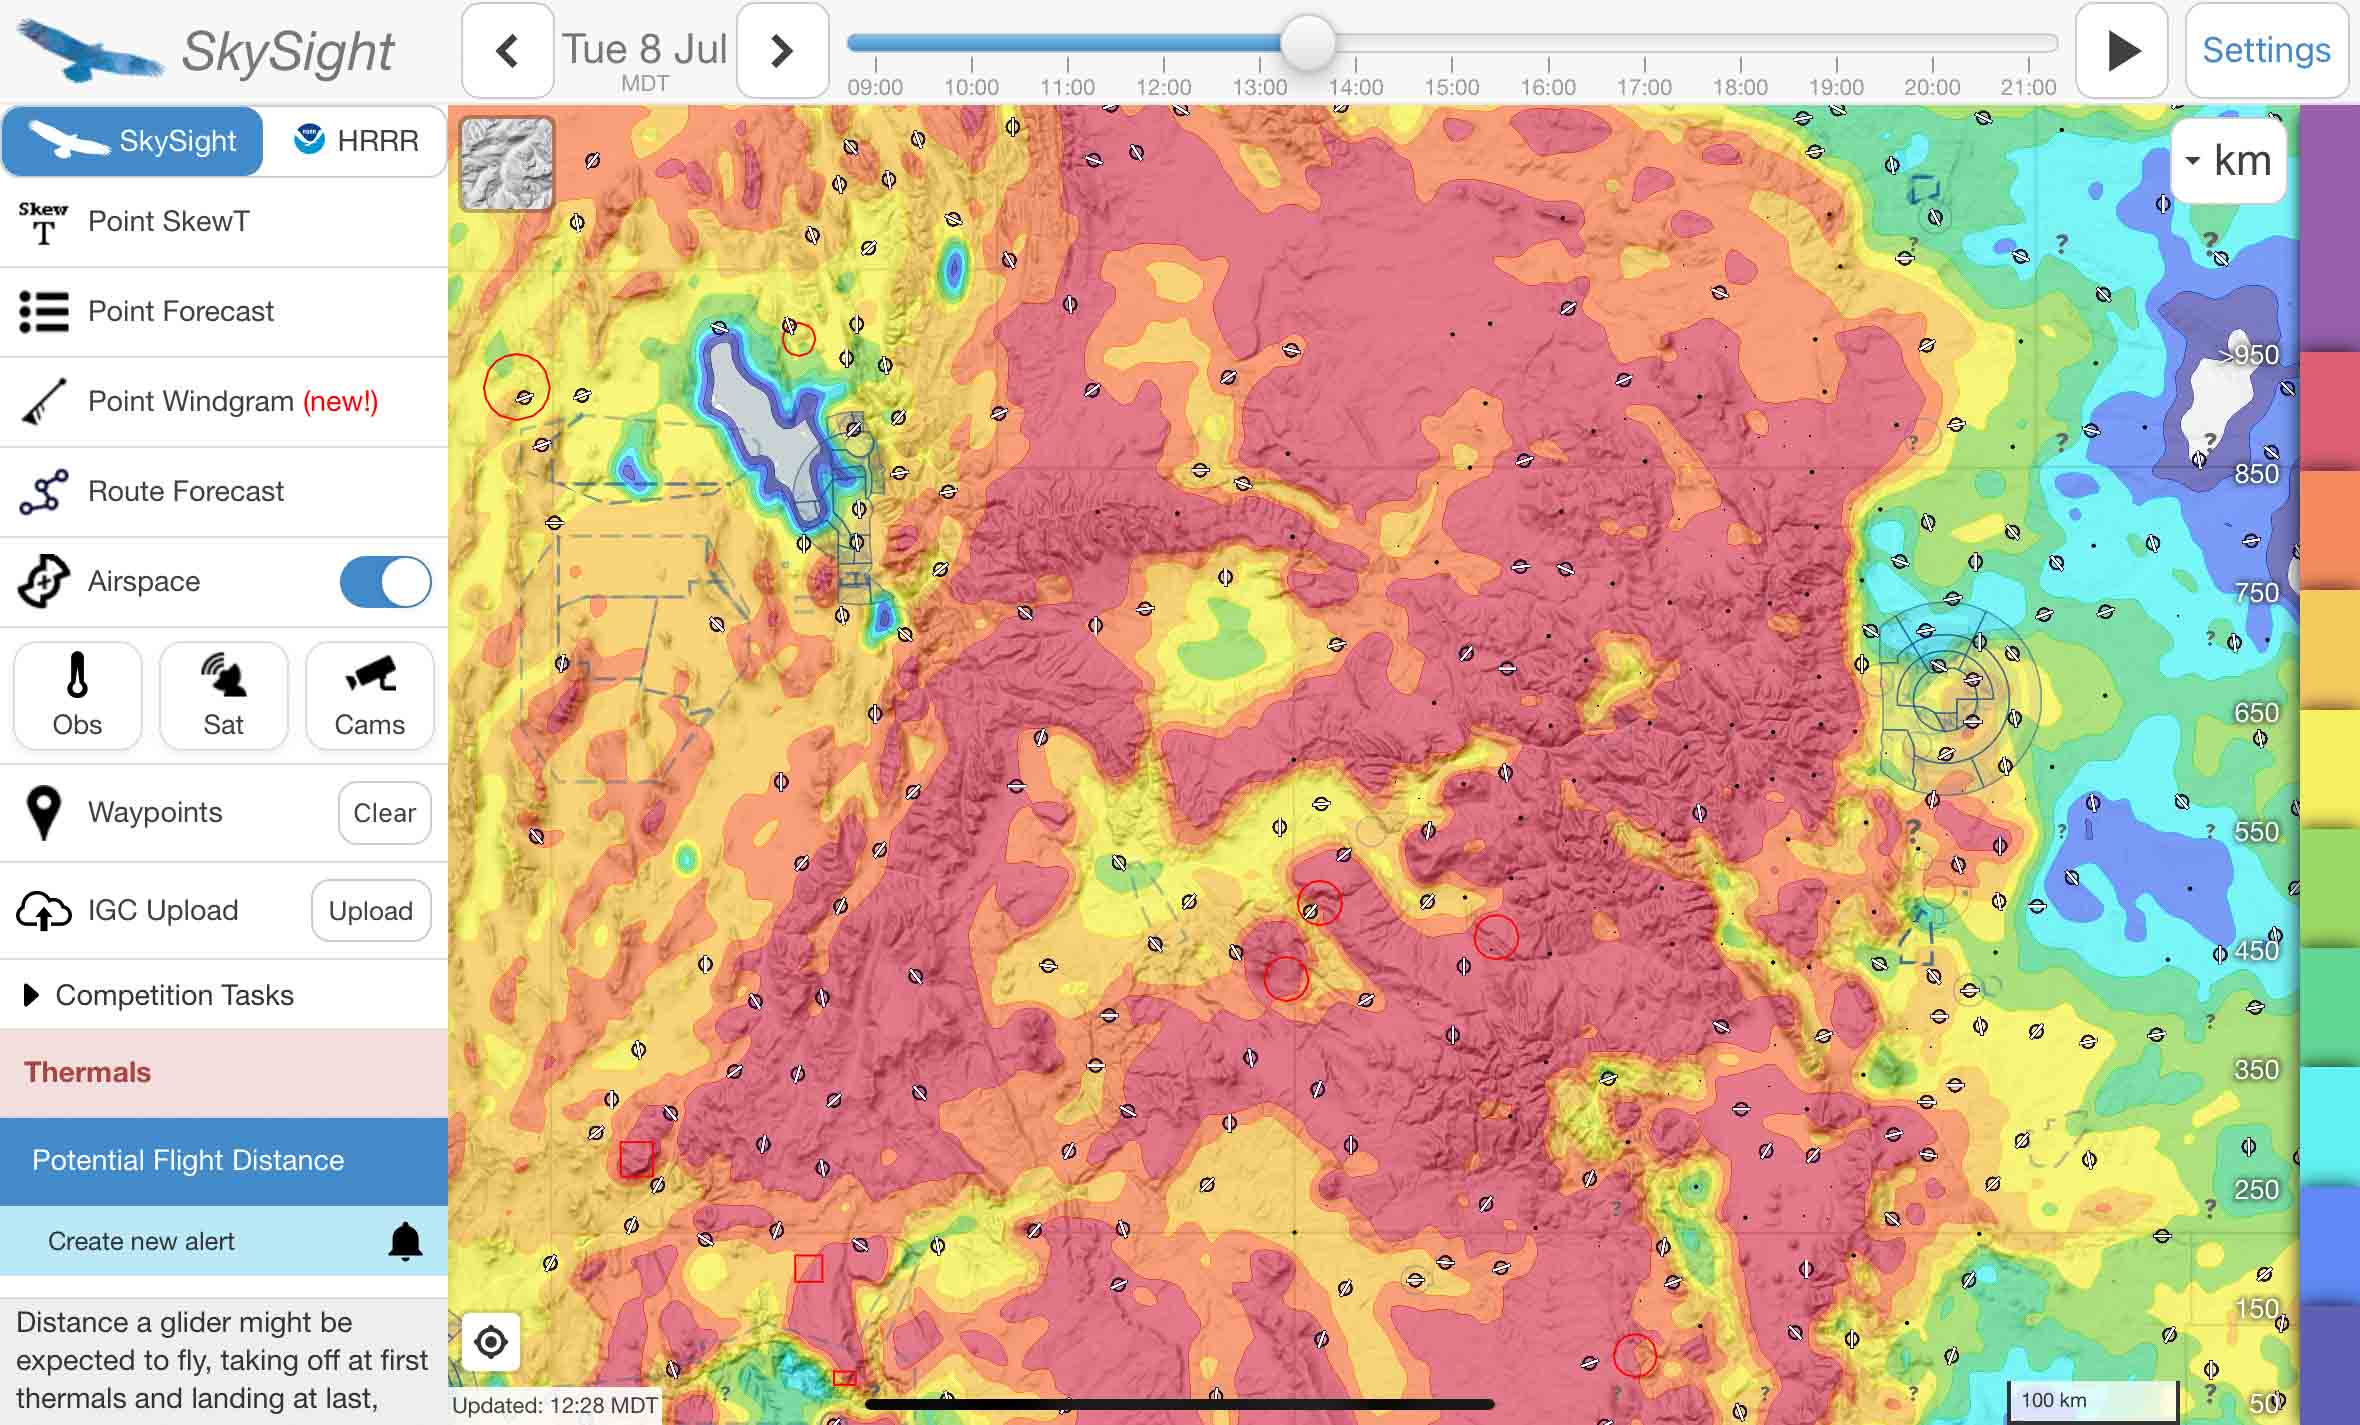
Why even investigate further? If the chart shows that you can fly long distances pretty much anywhere isn’t this all we need to know? Not quite! One important reason is that weather models don’t account for the unique hazards of a particular soaring area. E.g., if thermals are good and forecast to last all day, the chart may look red even if there is no cloud in the sky and thermal heights are capped by an inversion at 15,000 ft. Is a Big Flight possible under such conditions? Possible, yes, but flying in the blue over totally unlandable terrain without airport in glide would not be exactly safe.
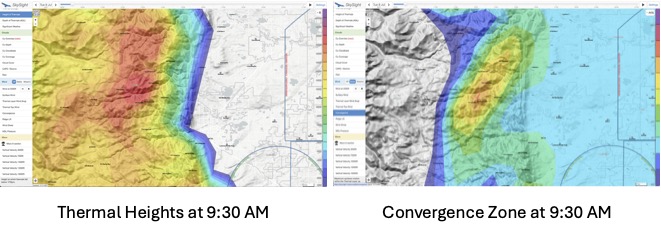
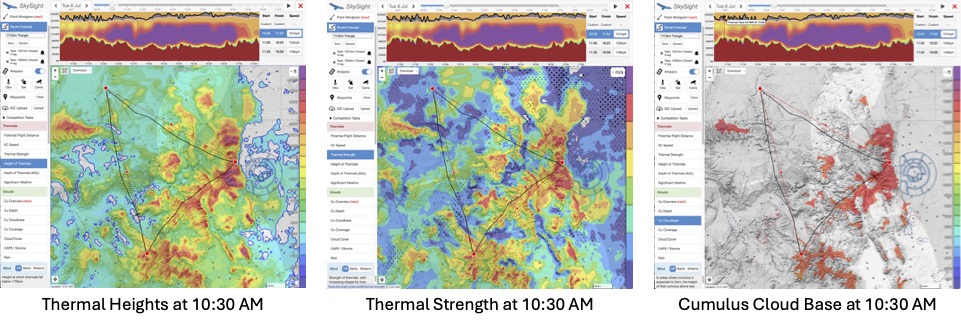
So I look for three additional things in my preliminary investigation before I decide whether I want to go on a long soaring adventure: thermal heights (which in Colorado should ideally go up to 18,000 ft or more), thermal strength, and cumulus cloud bases. In each case, I highly recommend playing with the time slider so you can see when thermal development will kick in, how high thermals will go, and whether there are “holes” that can spell trouble – especially towards mid to late afternoon and close to home.
If these things all look good, you have a potential winner.
Here’s what these charts looked like for Tuesday, July 8:
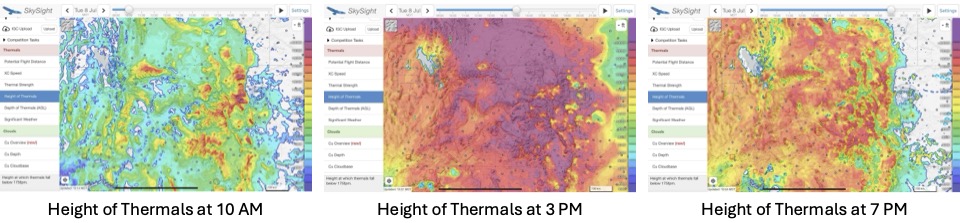
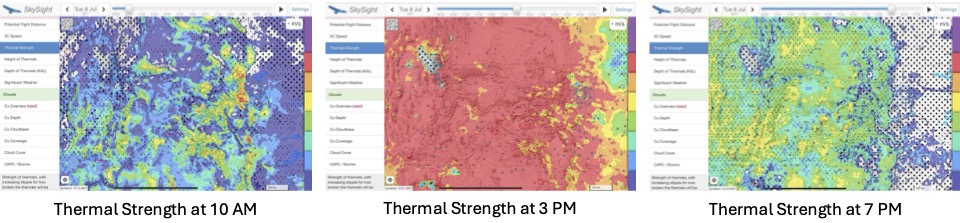

Tuesday, July 8 definitely looked like it would be a winner.
Step 2: Planning a Task
Whatever your home base, certain routes are flown over and over again. On average, these tend to be good and fast routes because they follow frequently forming energy lines. But just because these routes tend to be good on average, this does not automatically mean that they are also the best routes on the day of your flight.
The conventional wisdom associated with such routes can also lead to unwarranted orthodoxies or tabus that can consciously or subconsciously constrain your ambition. E.g., I’ve heard people say “don’t go to Wyoming, it’s always windy there”; or “avoid the plains, the best lift is always over the mountains”. These rules of thumb have merit – on average – but you should not automatically assume they are true on the day of your flight.
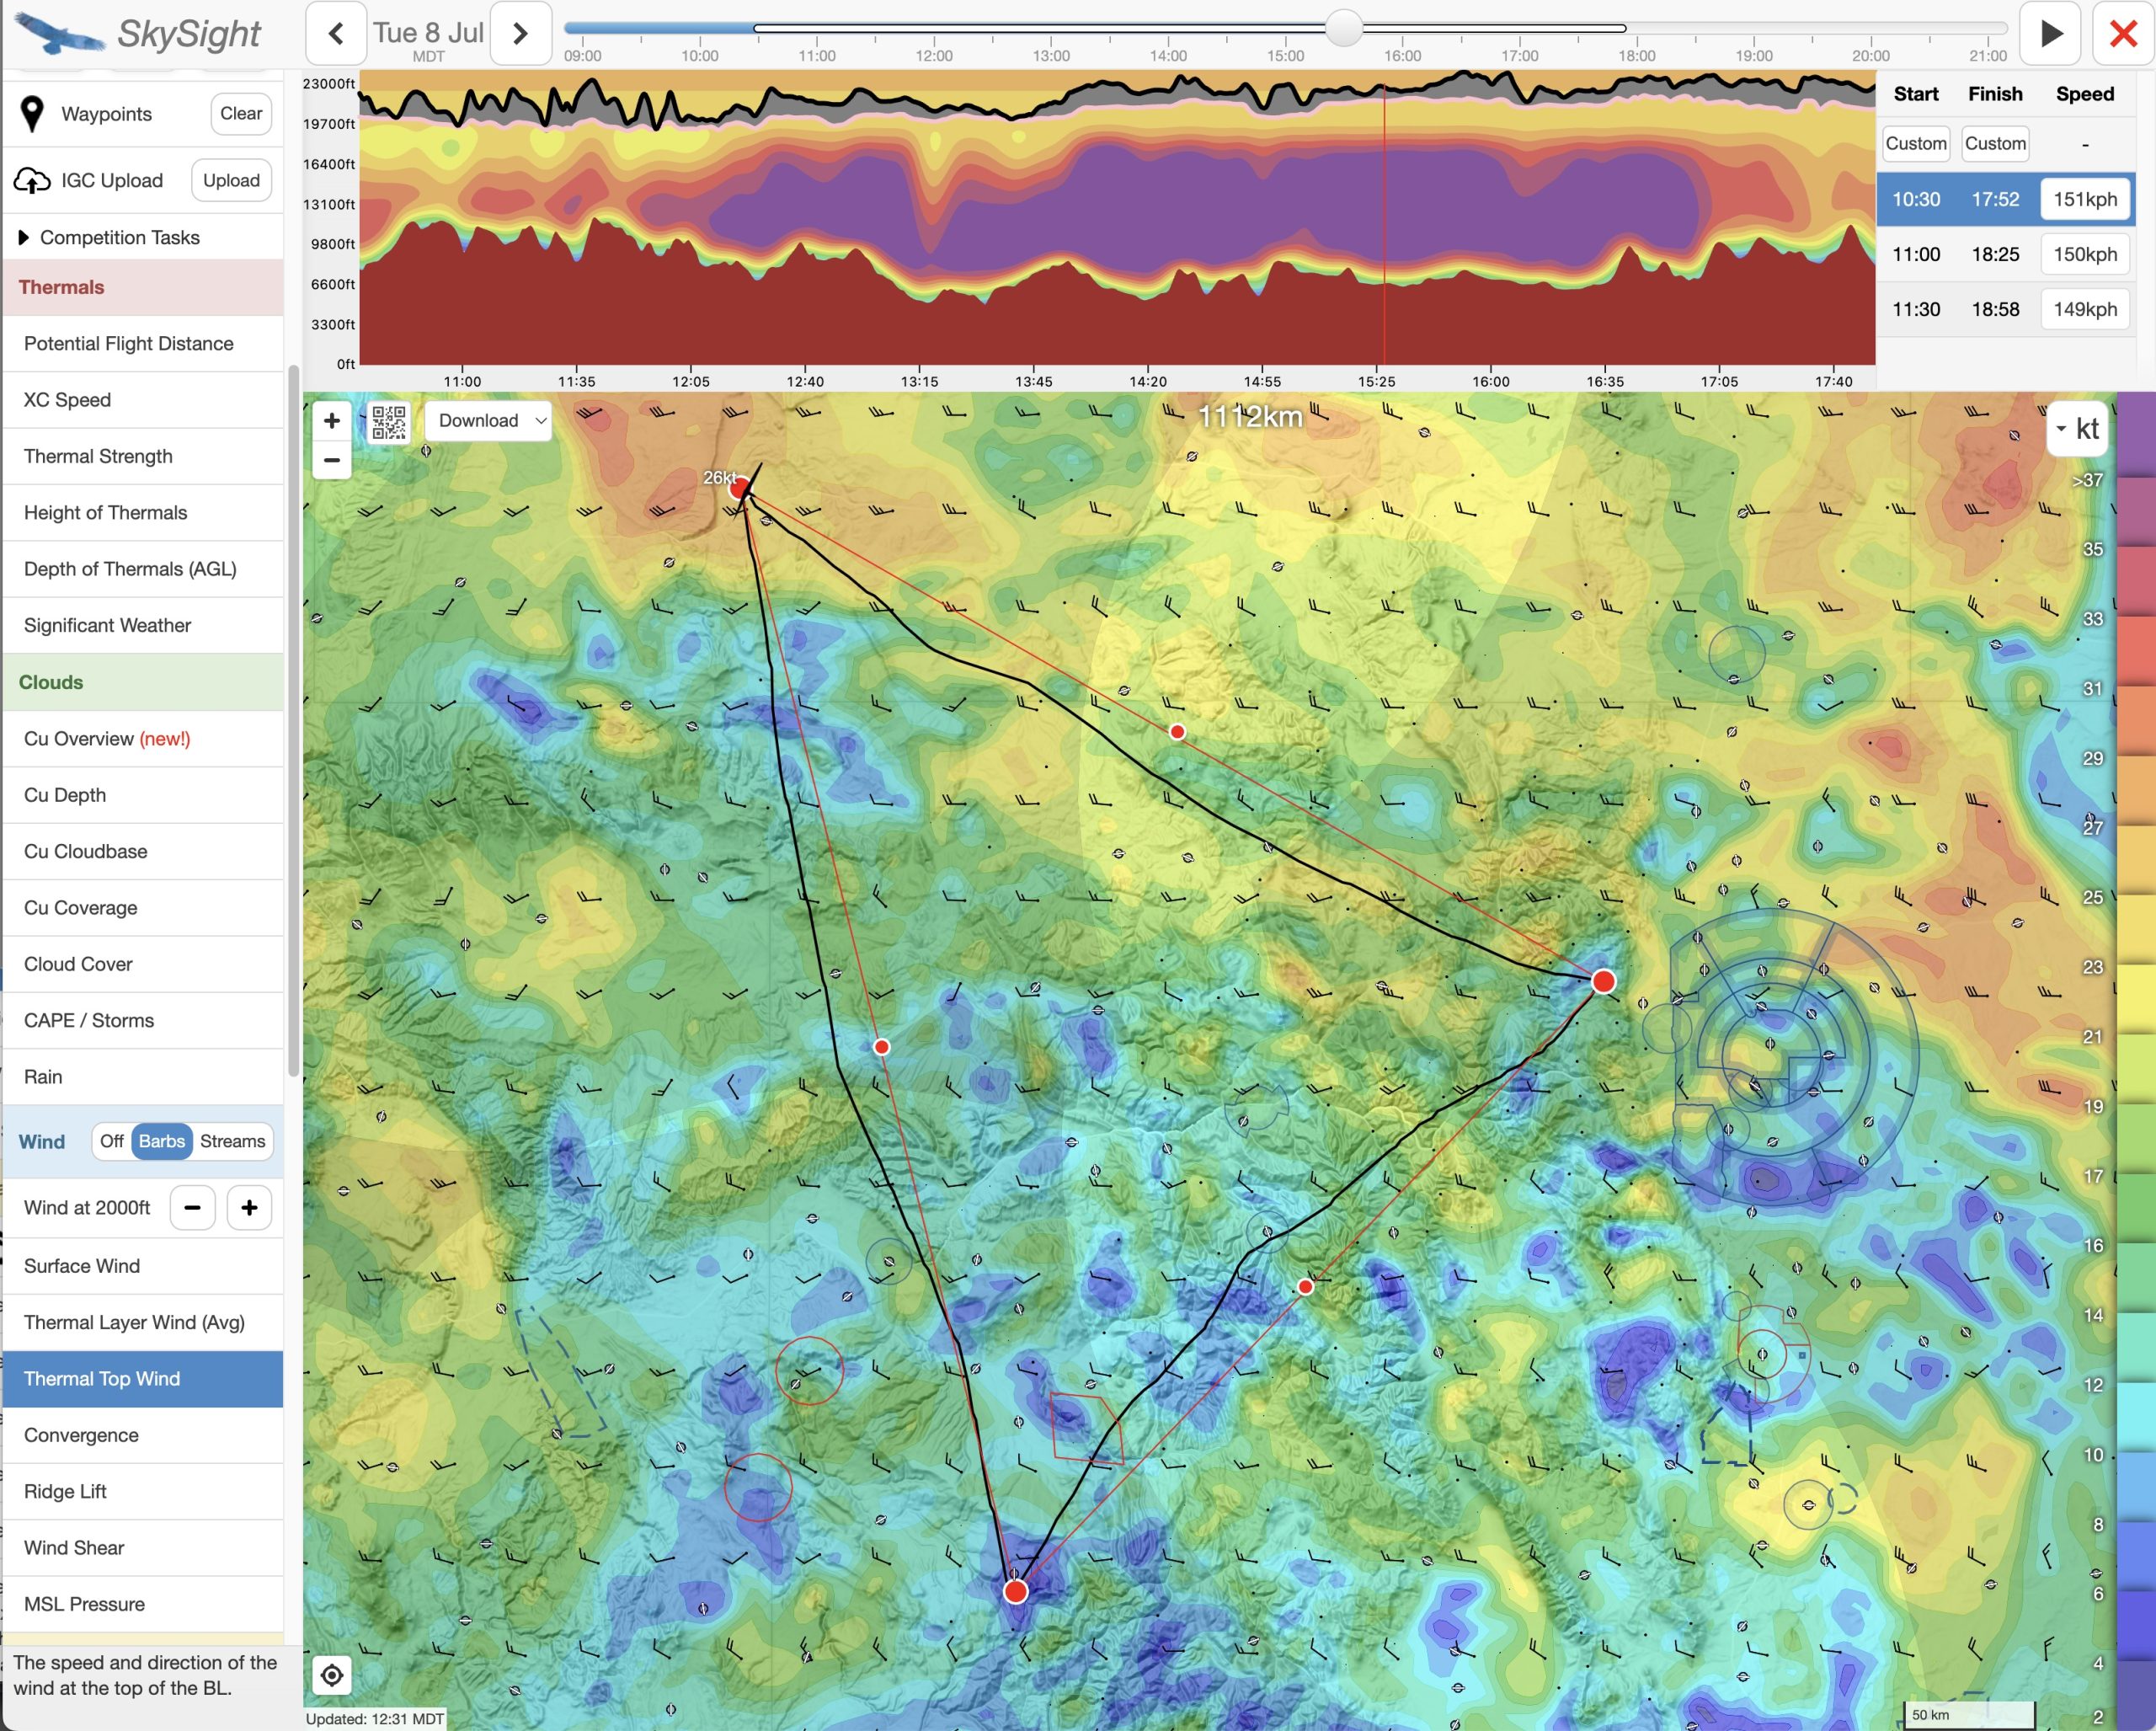
Fortunately technology can help us challenge these orthodoxies and open up our imagination for what’s possible. That’s why I often start with Skysight’s “Route Forecast” tool. If you click on a start point and give Skysight a little time to calculate, it will return a broad range of route suggestions.
When planning a particularly long flight, I start by looking at the longest and most challenging ones: the ones’ listed in red at the bottom of the suggestions that Skysight generates. I don’t just look for the ones with the longest distance, but especially the ones with the greatest average speed. That’s because forecast attainable speed is a great proxy for the the best soaring conditions.
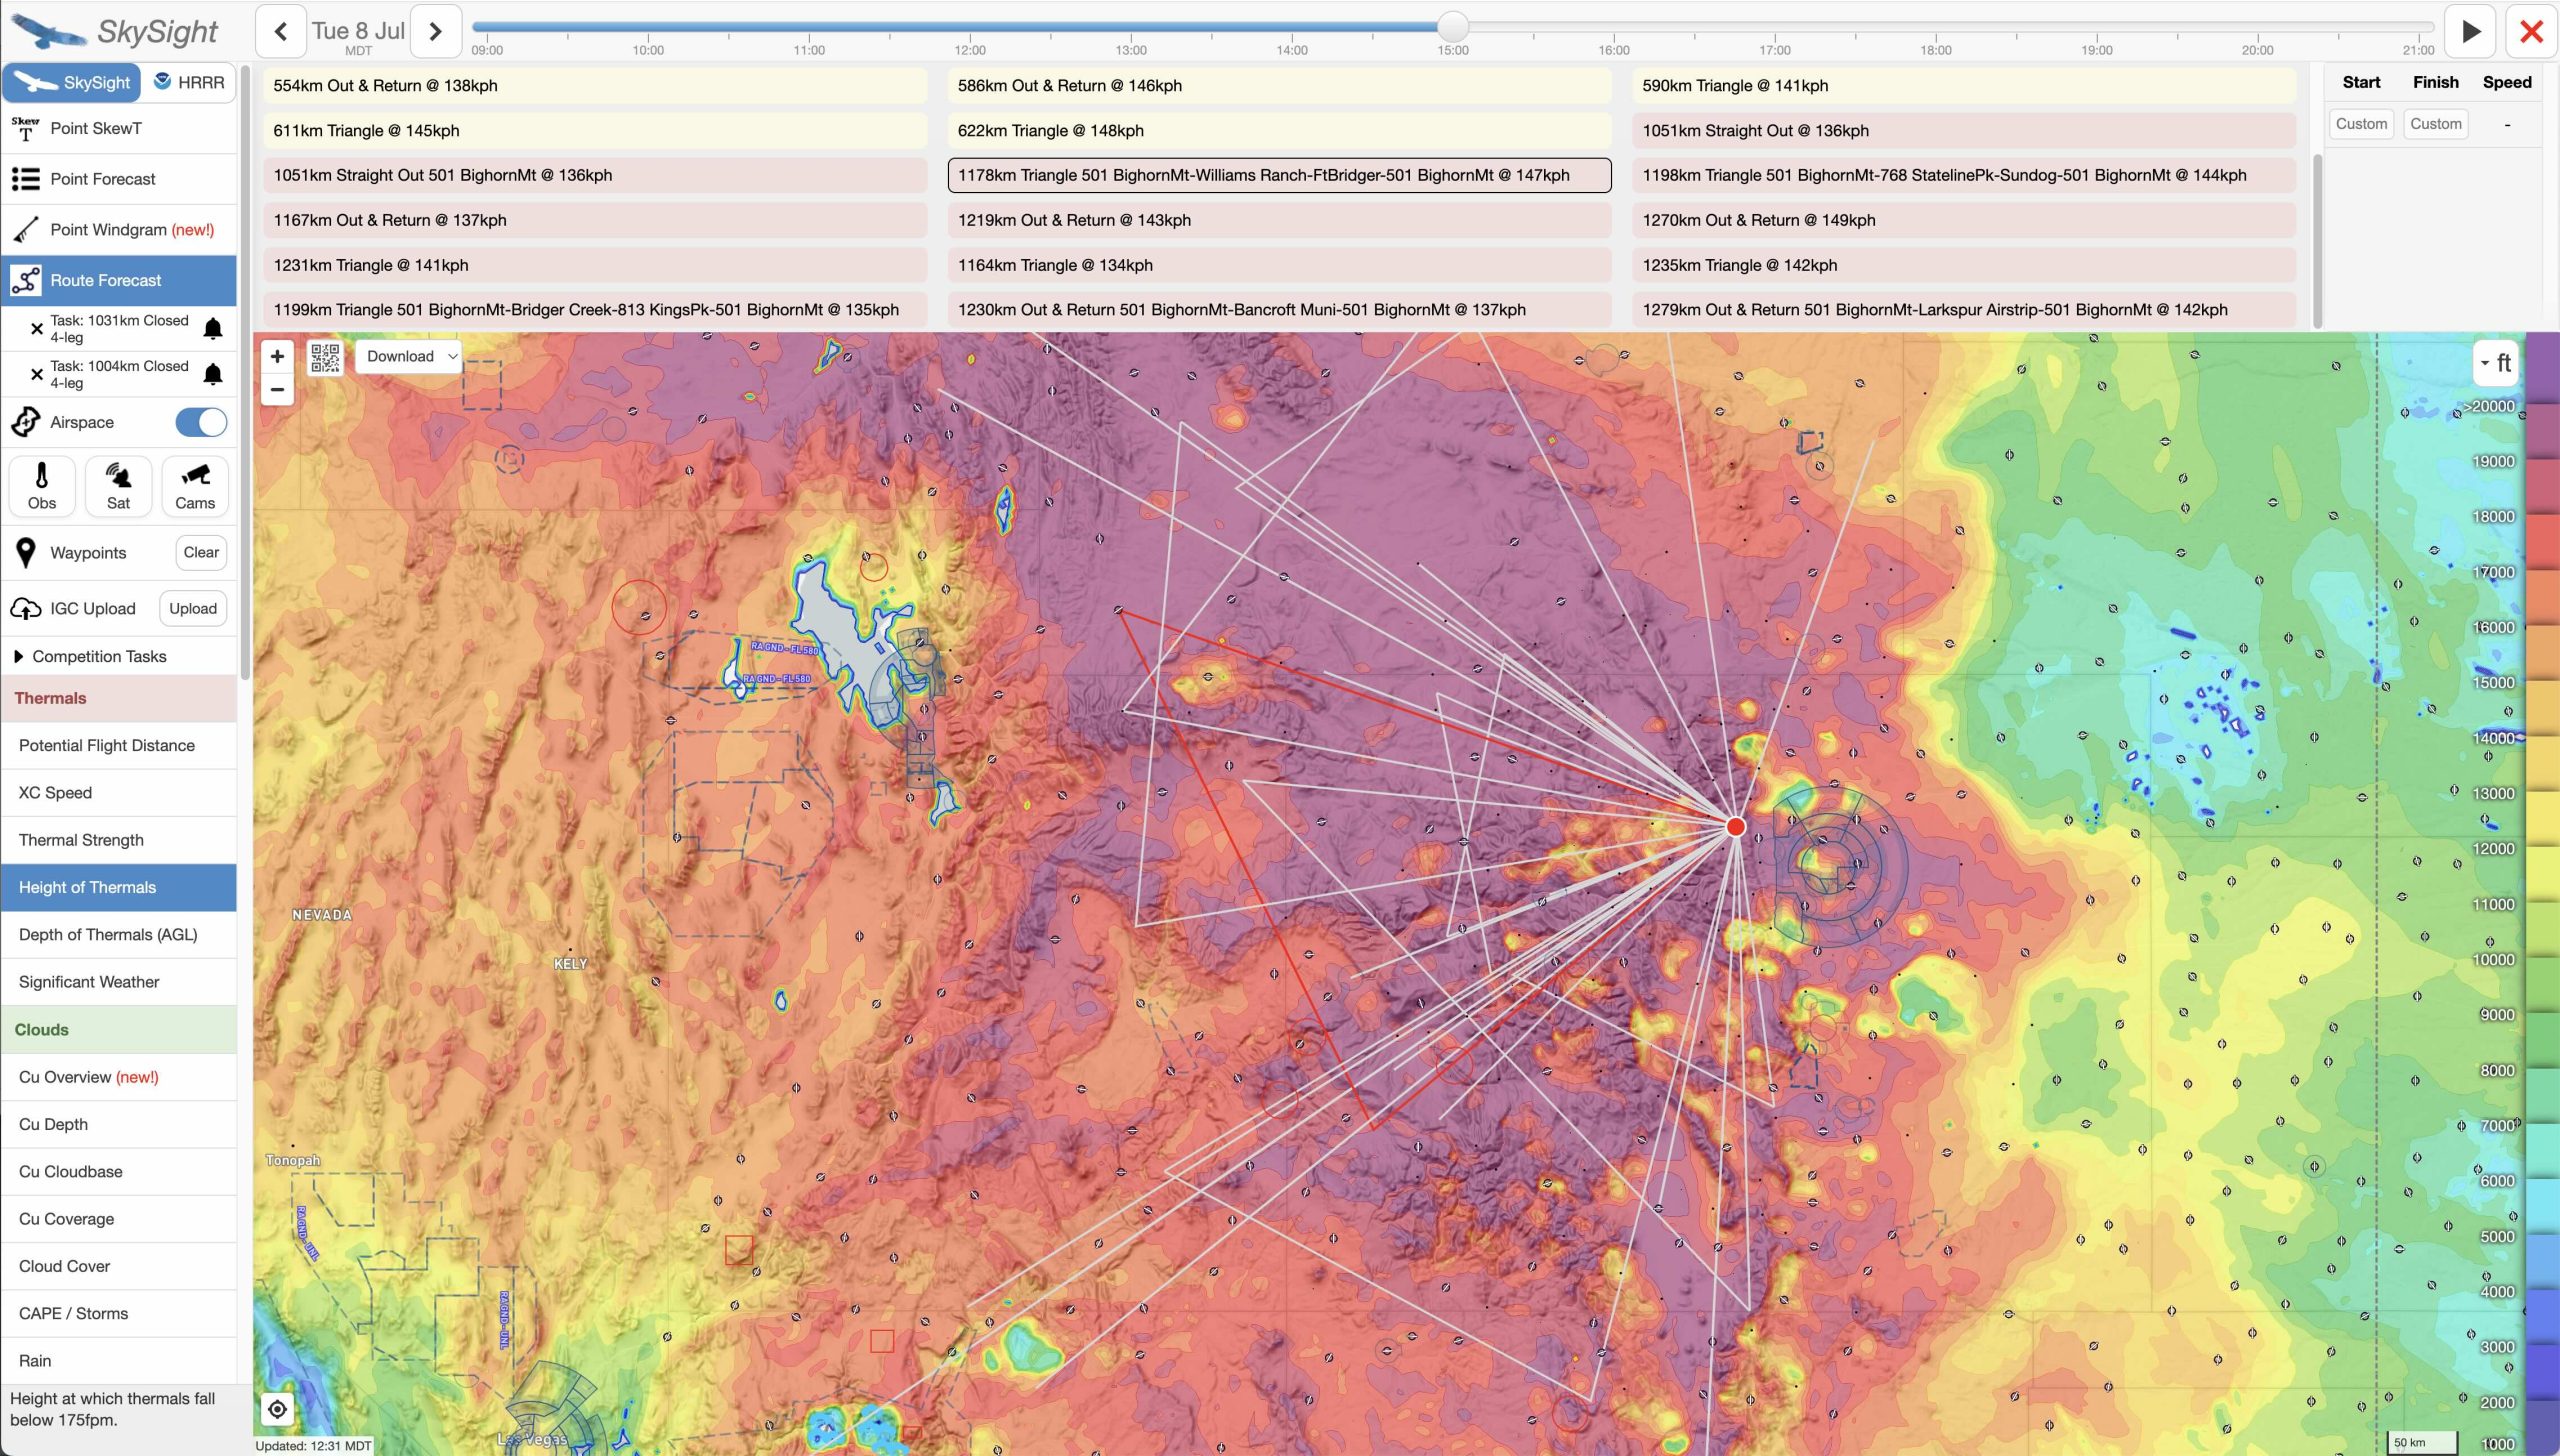
I don’t take the potential distances and speeds that Skysight returns at face value. At least in Colorado, Skysight tends to be overly optimistic. I regard the suggestions more as the absolute maxima, assuming everything works perfectly. (Results may differ depending on where you’re at: e.g., in Southern France I’ve found Skysight to be overly pessimistic. I can only speculate why there might be such a difference – perhaps Skysight uses/prioritizes different weather models in different parts of the world, perhaps there are other factors at play.)
The key value of Skysight’s suggestion is that it will generally point me in the right direction.
Once I have a general idea of where I want to go, I usually start by modifying one of the most attractive of Skysight’s route suggestions, typically by cutting back it’s length by about 5-10% (accounting for the fact that I’m not Sebastian Kawa) and laying it out in a way that I can keep at least one airport in glide at any point along the route.

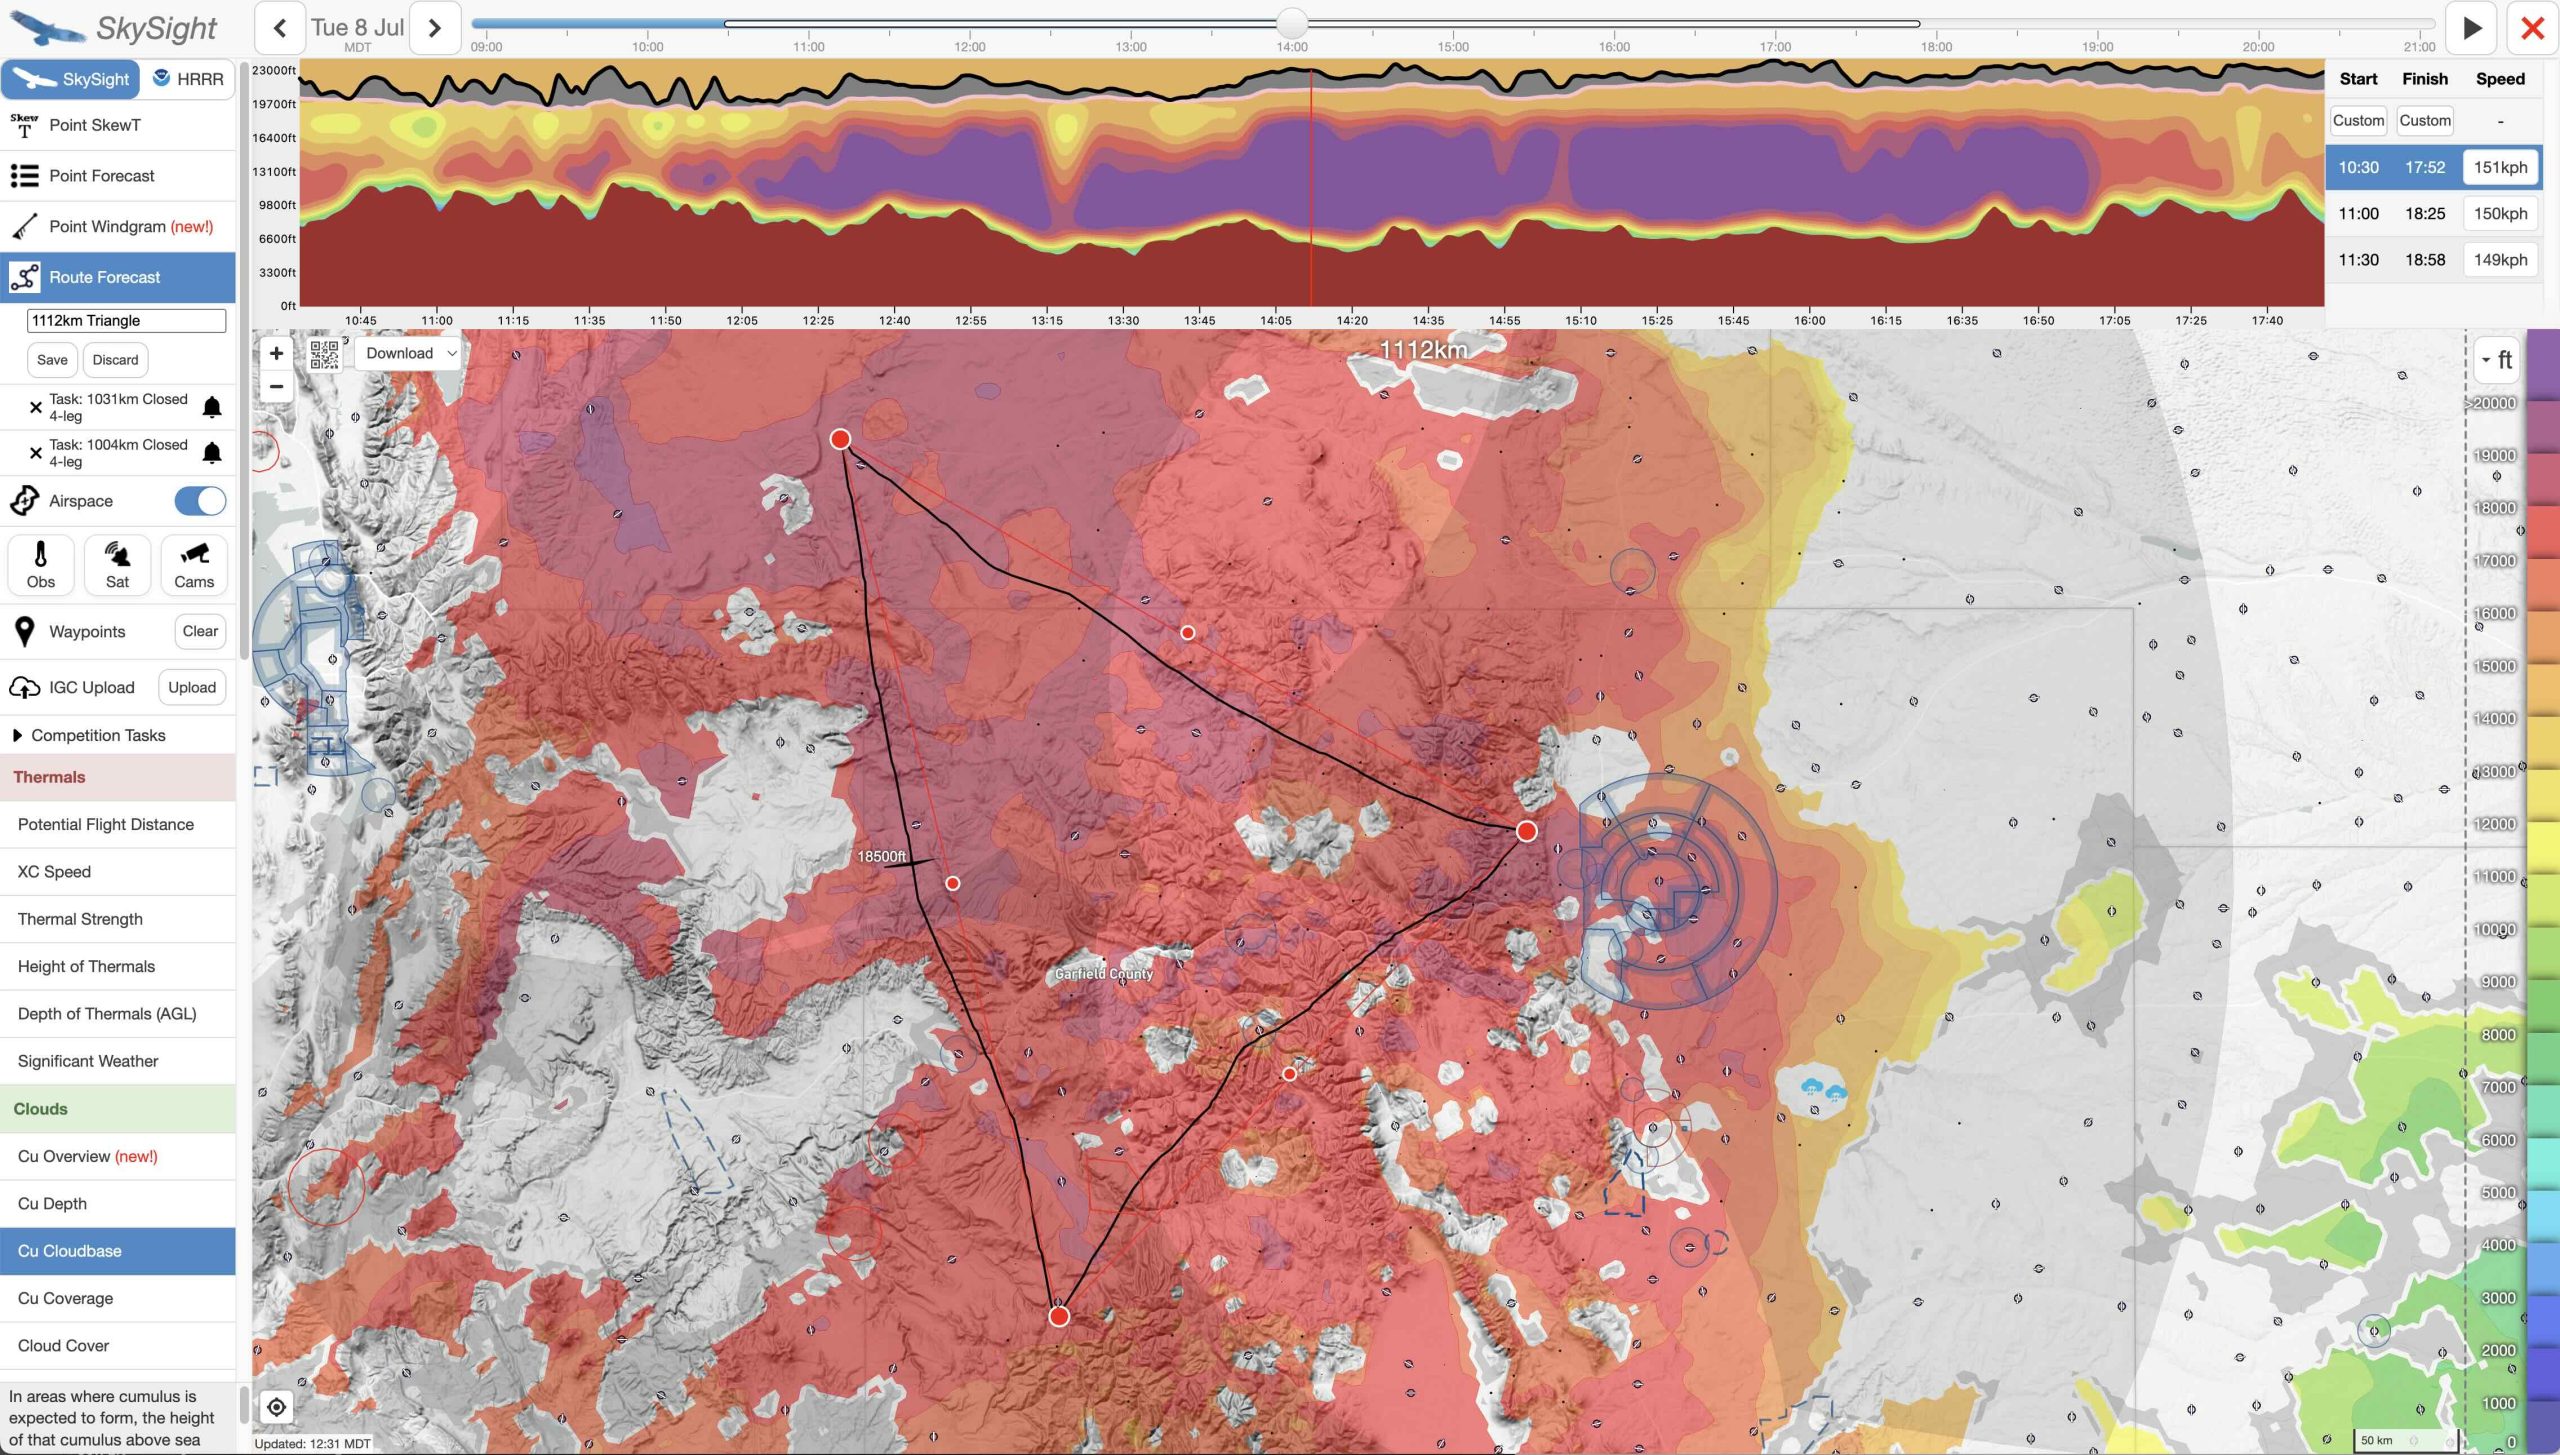
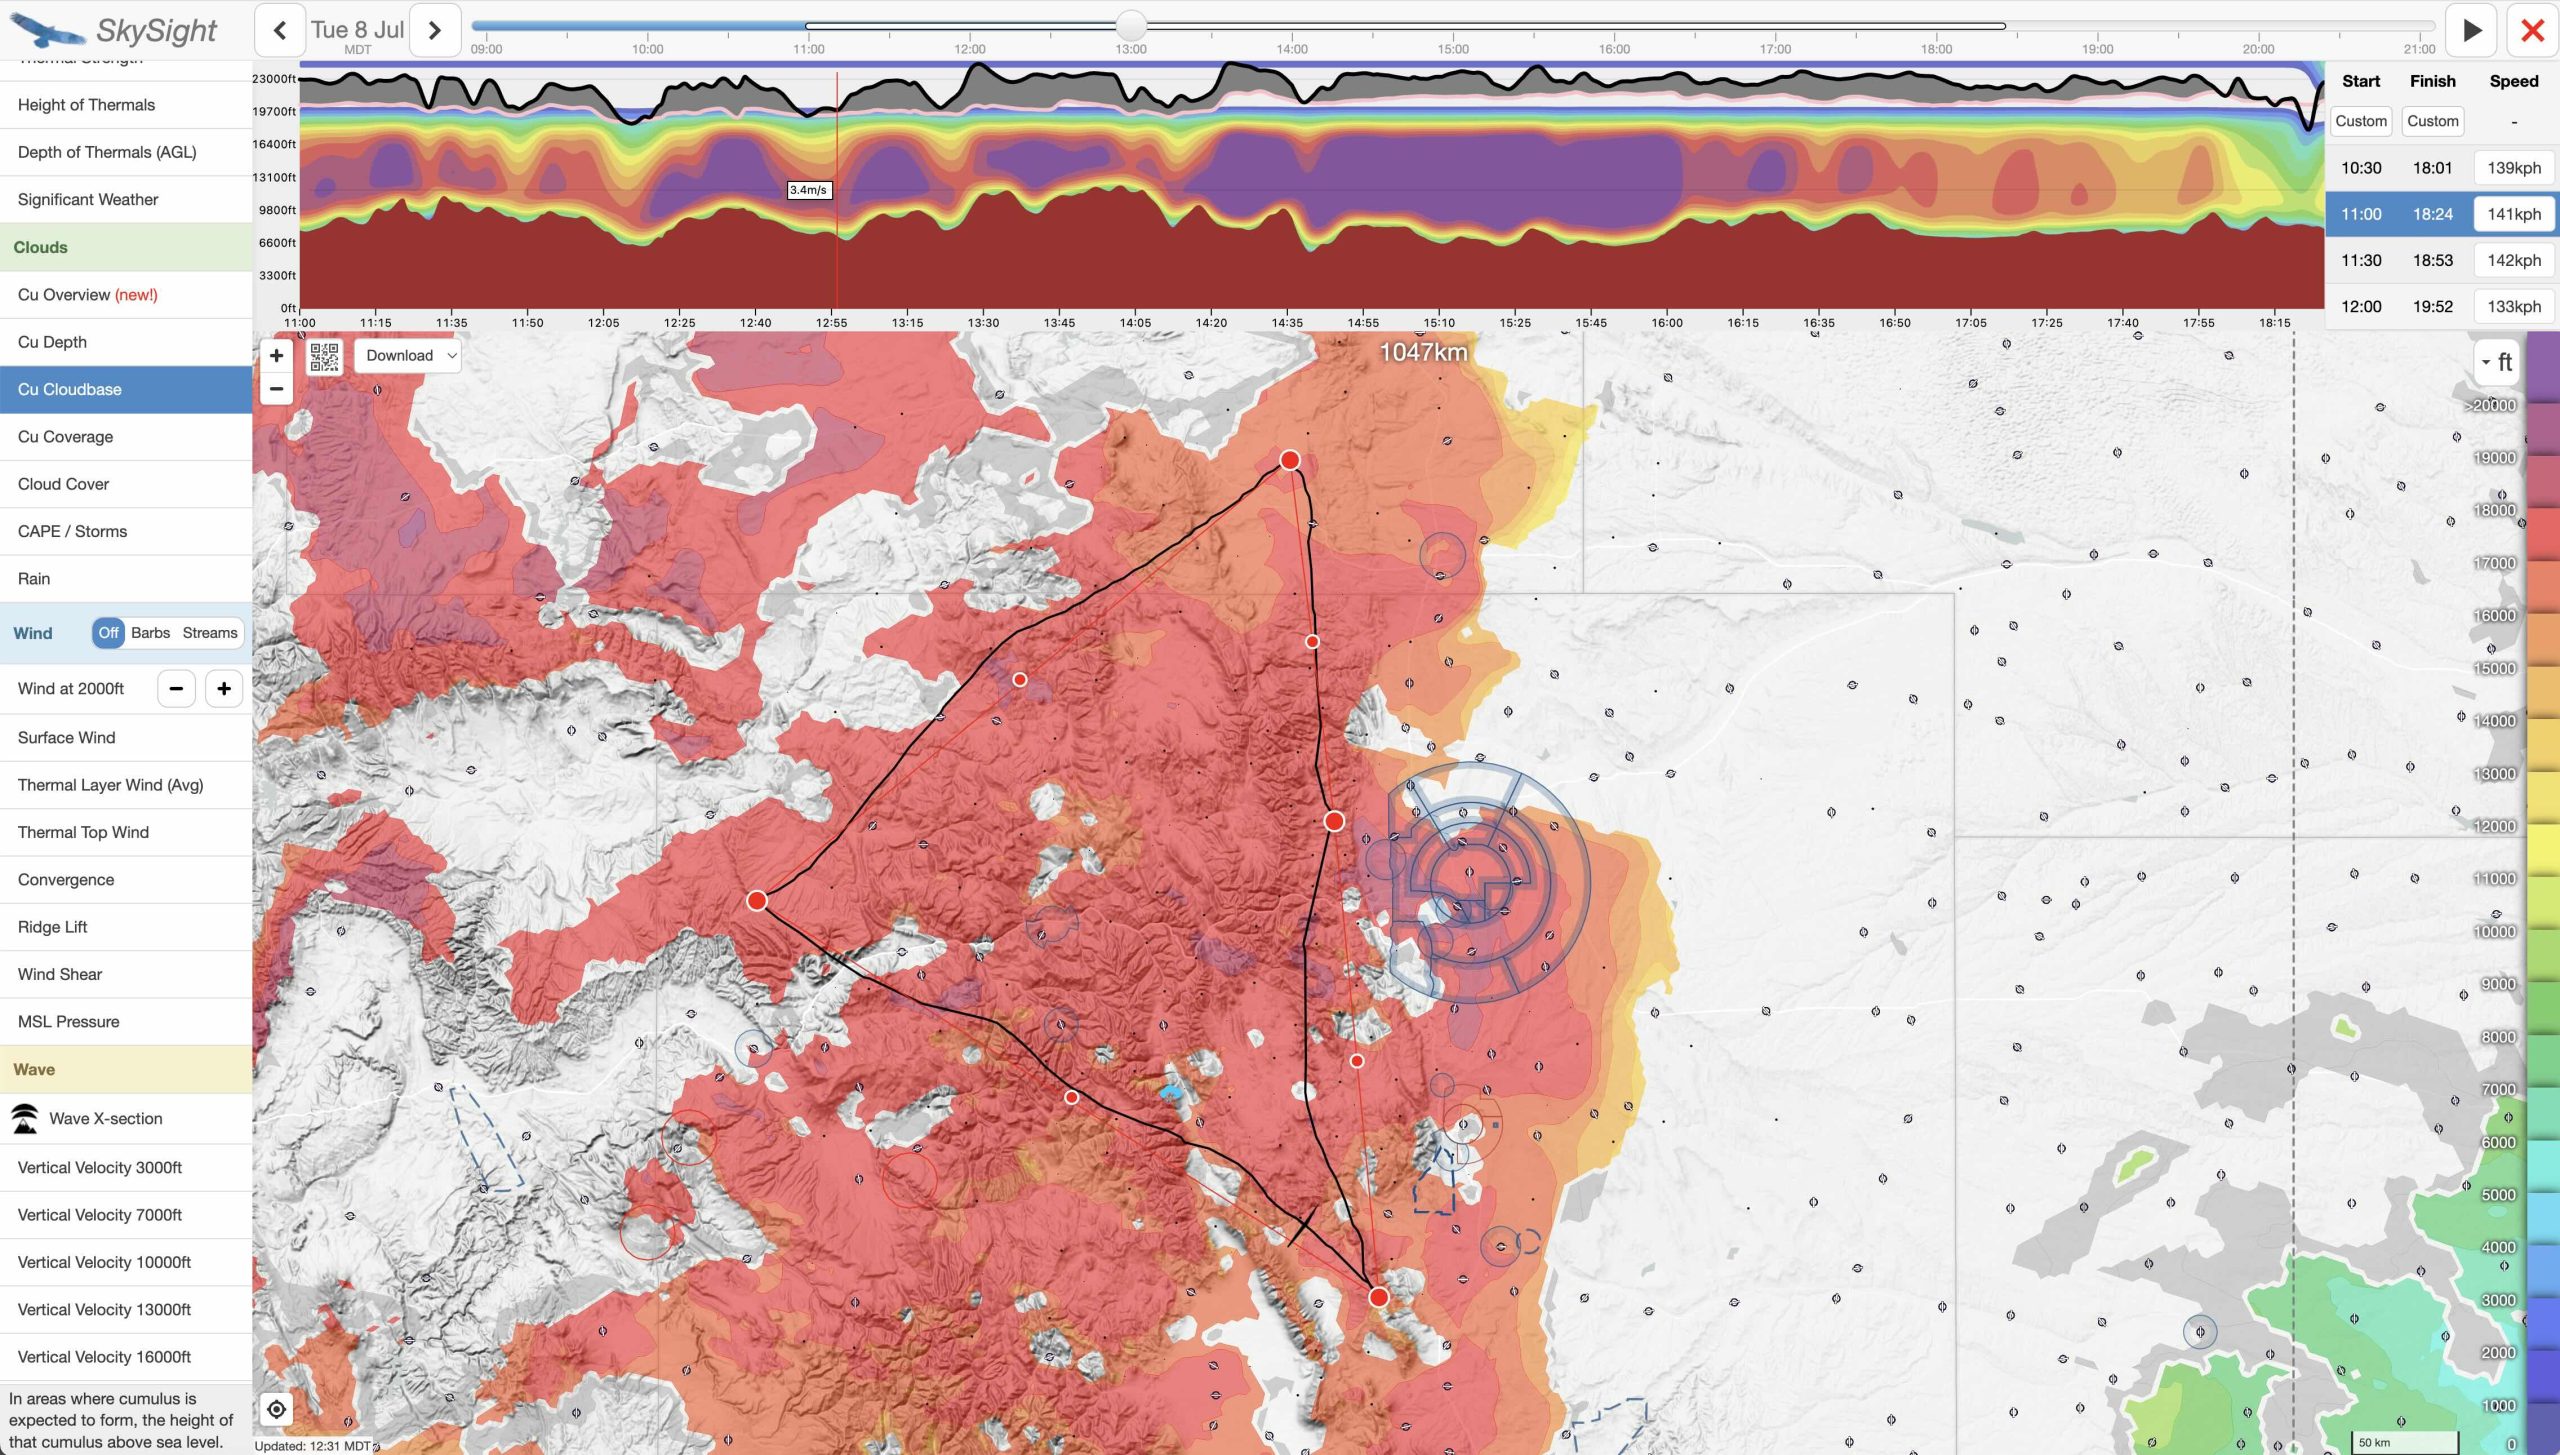
When adjusting my route, I usually overlay the Cumulus Cloud Base chart or the XC Speed Chart as these work well to quickly identify the fastest and most reliable task lines. Usually it only takes me a minute or two to get a provisional route on screen, and I can see what average speed Skysight considers possible. If I do this well, the maximum attainable speed of my task should be at least equal to or even greater than any of the tasks that Skysight automatically generated.
When planning a big triangle, I often also test additional geometries. E.g., if the weather supports it, I like to put my Start/Finish Point along one of the triangle’s legs, rather than at a corner. (Skysight only suggests triangles with the Start/Finish at a corner.) The advantage of placing the Start/Finish Point on a leg is that it gets me closer to home on the second to last leg and gives me the option of cutting the flight short in case the weather deteriorates prematurely, or in case that I’m simply too slow to make it around the course. But planning such a 3-turn-point triangle course only make sense if the weather forecast supports it.
Step 3: Fine-Tuning the Route
Once I have the preliminary route plan drawn in Skysight, I fine tune it using the following tools.
1. Setting a Precise Start & Finish Point
I want my start point (which should be near where I would plan to shut off the engine) in an area that promises the best chance of a good climb to the top of the morning thermals. This helps me to get started quickly, without wasting any time.
In Boulder, that point can vary widely from day to day. Sometimes it is only a few miles from the airport, on other days it may be necessary to motor/tow for some 15-20 miles towards the Continental Divide. Good Start Points are normally immediately to the west of the forecast convergence line that typically runs east of – and parallel to – the Front Range. But the position of the convergence line varies from day to day. Don’t just always pick the same start point simply because it has a good reputation!
Once I have a good Start Point I check if it is also suitable as a Finish Point. Here I have to be particularly mindful of the late afternoon weather. E.g., I want to minimize the risk that a big thunderstorm could sit right over my finish point by the time I expect to return home. Obviously the precise location and timing of afternoon storms is (still) impossible to predict but I can definitely reduce the risk. If the risk of late day storms in the vicinity of my Finish Point is high, I consider setting a “remote” Start &Finish Point. That’s a point considerably removed from the point of my motor shut off location. Of course, the time I need to get to and from the remote Start and Finish Point reduces the available time on task.
2. First Leg
I usually plan the first leg of the flight in a direction where good thermals and cumulus are first forecast. In Boulder often – but not always – the best initial leg is parallel to the Front Range of the Rocky Mountains because the east-facing slopes receive the most heat from the morning sun. Sometimes clouds are first forecast to the north, sometimes to the south. (This largely depends on the strength and location of any morning inversion and the moisture content of the airmass.)
If my first turnpoint is not directly in the direction of the best early lift, I may need to initially deviate from the direct course line. This will add extra distance and result in a relatively slower speed on my initial leg. I try to anticipate this and take it into account in the timing of the flight.
3. Thermal heights, thermal strength, and cumulus around the course
The time of thermal development can vary widely in different parts of the task area. In Boulder, we’re fortunate that the earliest Colorado thermals are often along the eastern slope of the Front Range nearby, allowing an early launch. (The reason is that the eastern slope of the Front Range is directly exposed to the morning sun.)
Being able to launch early also means that it is quite possible that I may arrive in other parts of the task area too early, i.e. before thermals there have had a chance to develop. For flights from Boulder this can be a real problem. E.g., a good example would be the transition from South Park to the Wet Mountains on early south-bound legs. If I get there too early, I risk sinking out in the valley to the South of Pikes Peak and not making it onto the Wet Mountains at all.
Similarly, it can be risky to jump across the Front Range before the sun has had a chance to heat up the west-facing slopes. Any early morning crossing of wide valleys can put one in an analogous predicament.
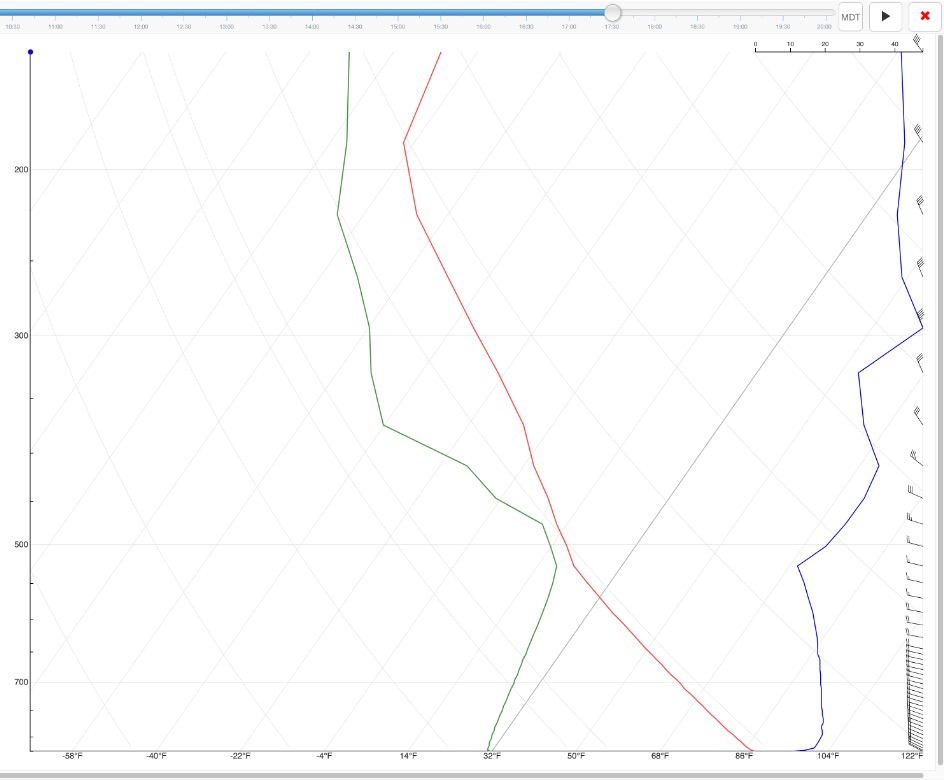
Once a route is drawn, the easiest way to test the timing is by examining the Vertical Profile atop Skysight’s route planning tool. For any given start time it shows around the entire course: the forecast thermal height; the thermal strengths; the height of the condensation layer; and the predicted presence and depth of cumulus clouds. This is a fantastic way to spot likely problems along the route such as: extended transitions with low thermal heights that may be hard to cross, areas where no lift can be expected at all, sections without any cloud markers, etc.
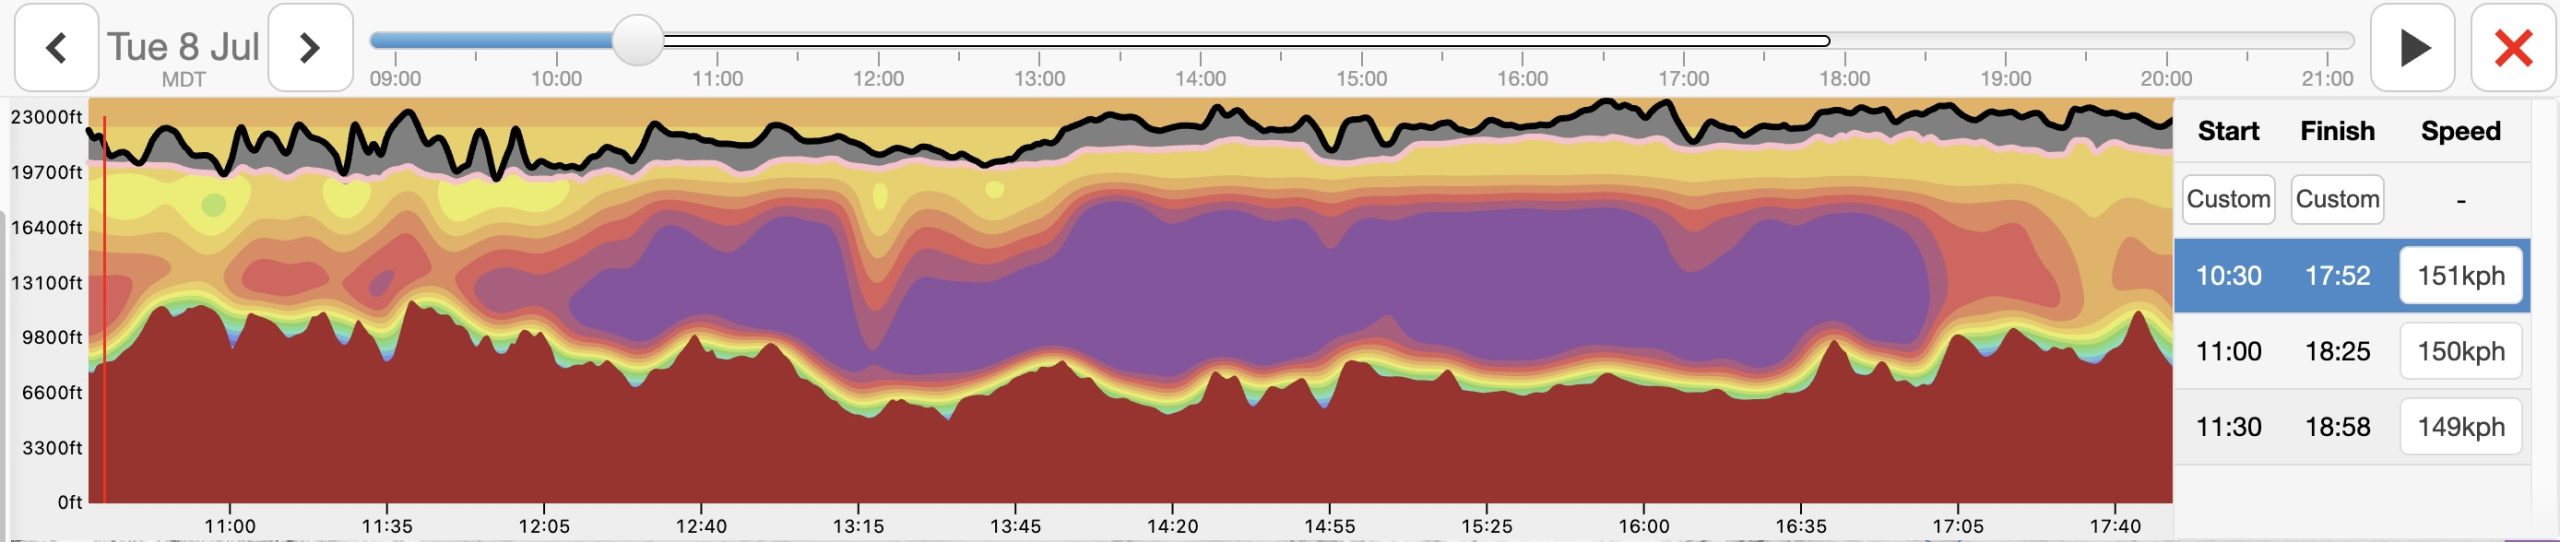
If this would have revealed big problems associated with a very early start, I could have moved the time slider to delay the start time back by 30-60 minutes or try to change the route to avoid or reduce the problems.
The best and fastest routes will have no weak areas at all. Creating such a route is often impossible but the closer I can get to this ideal, the faster my flight will likely be.
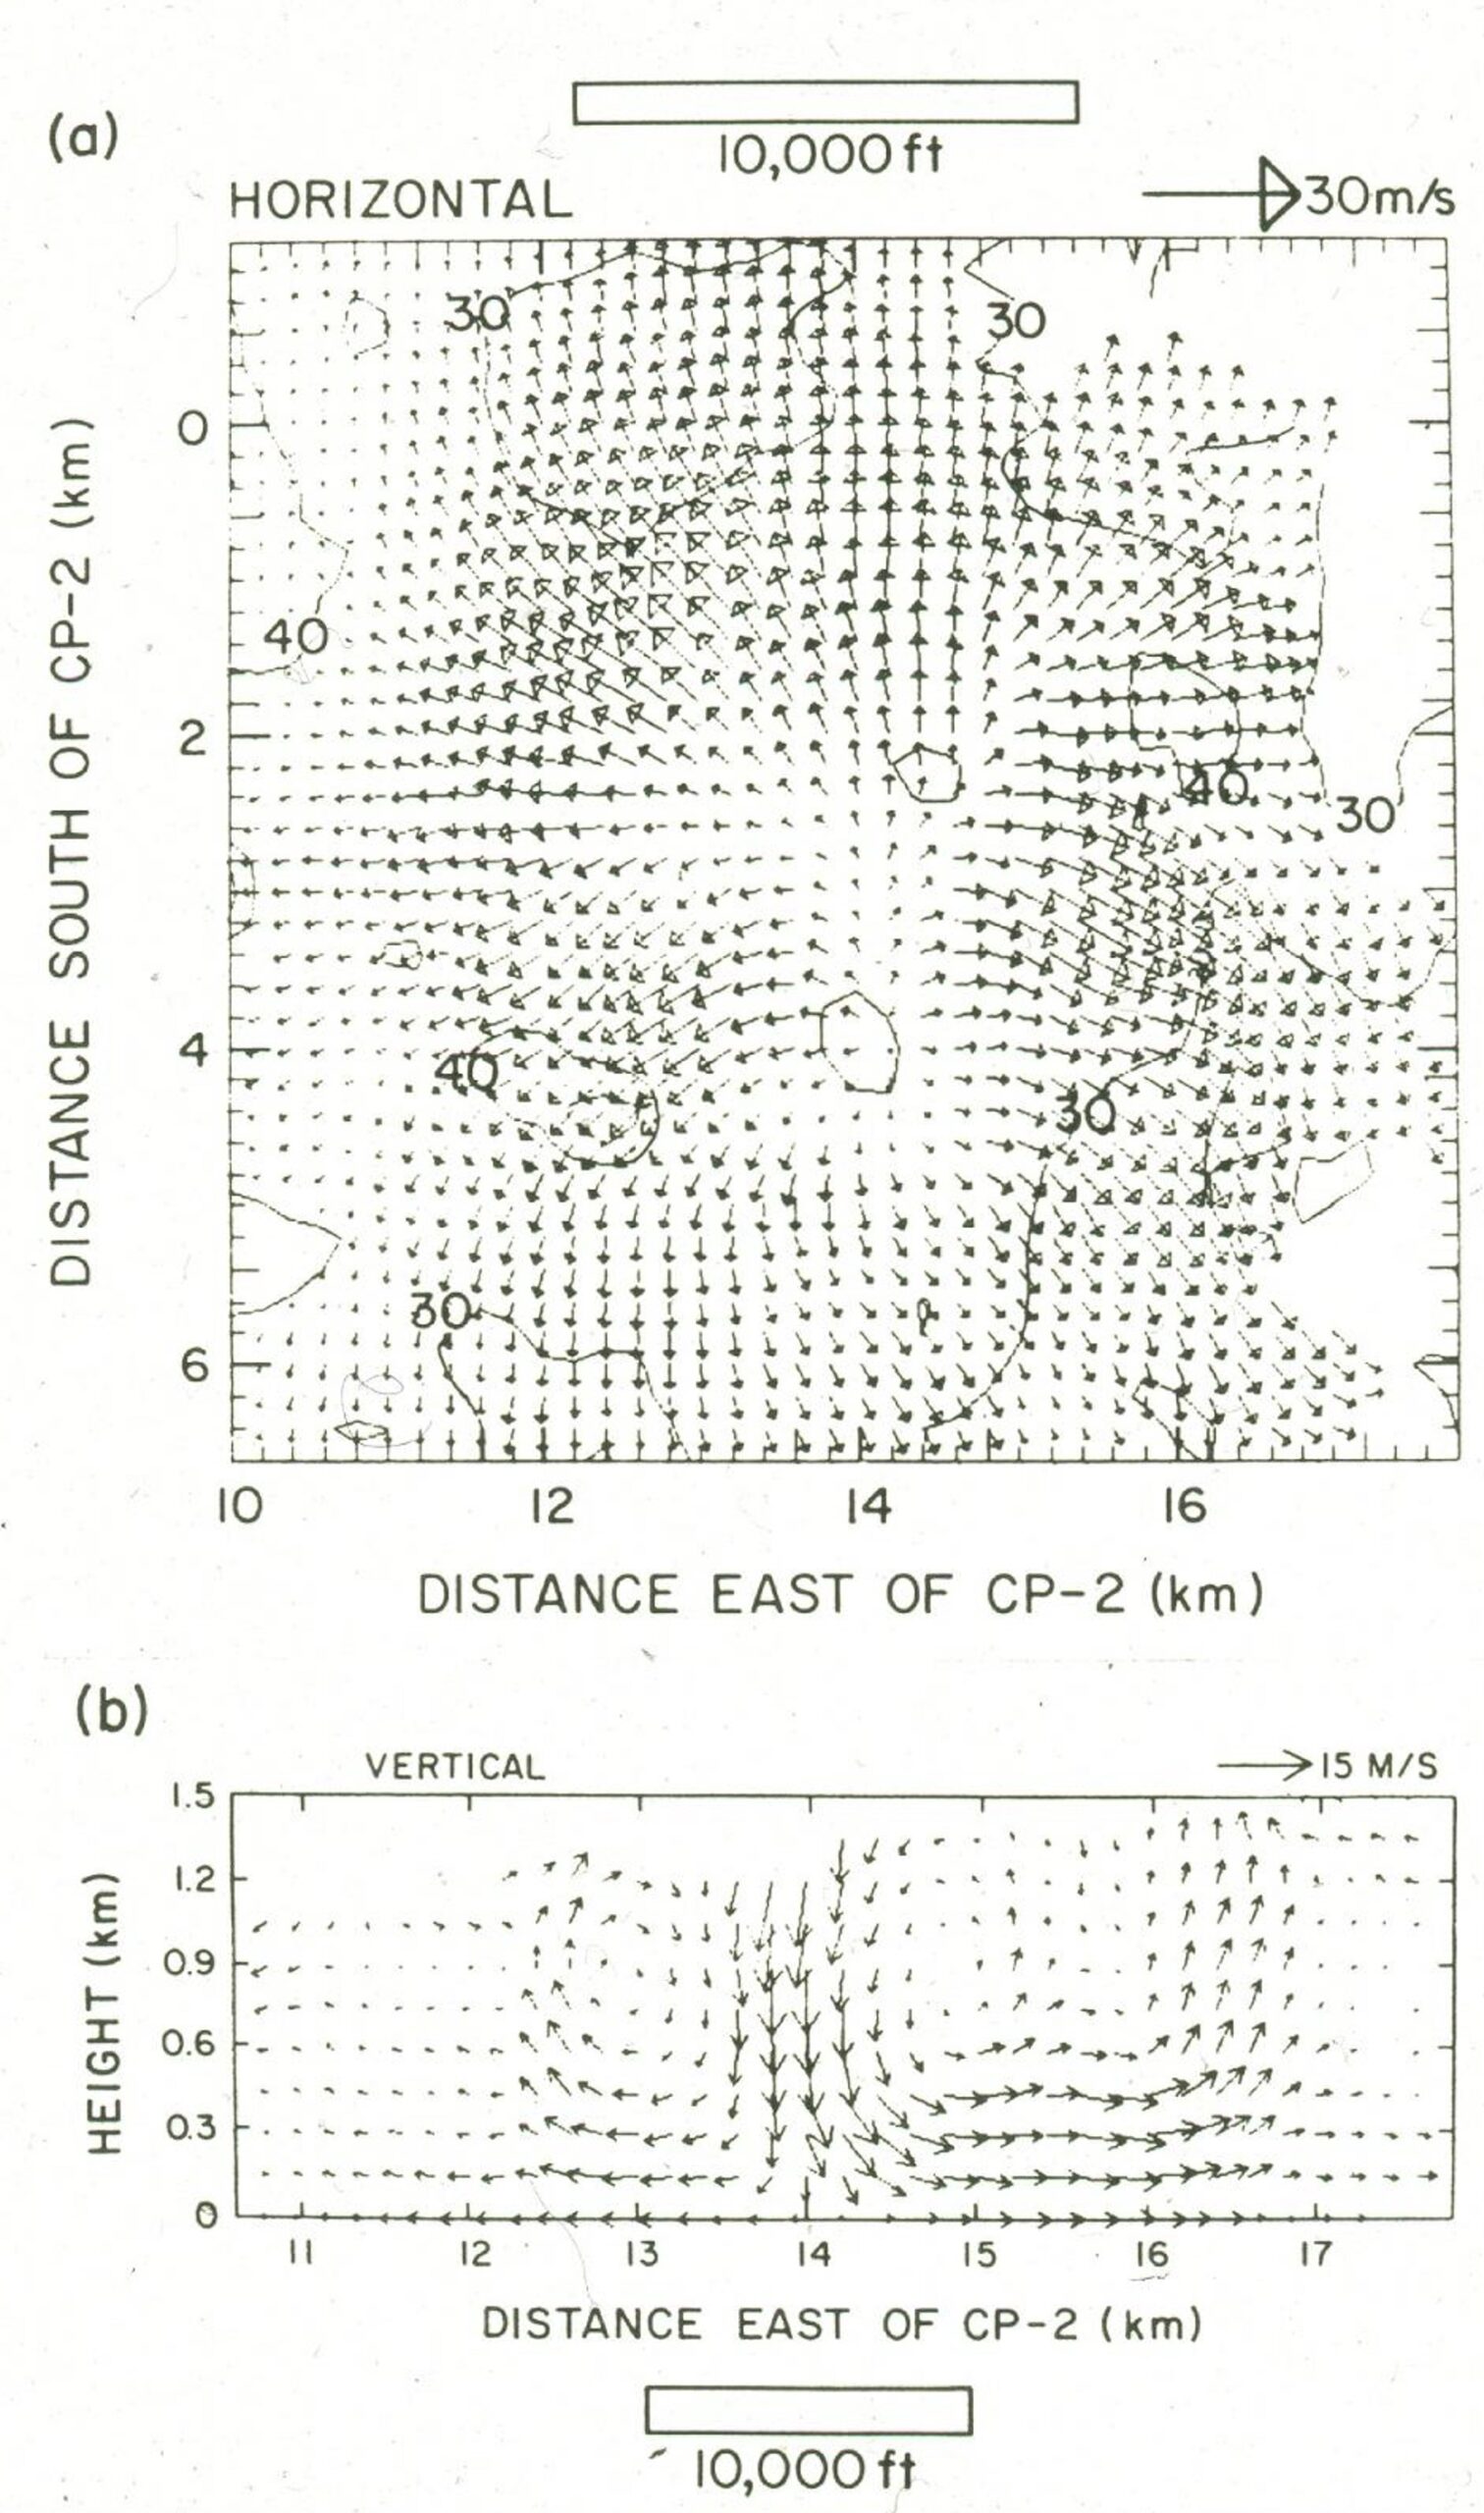
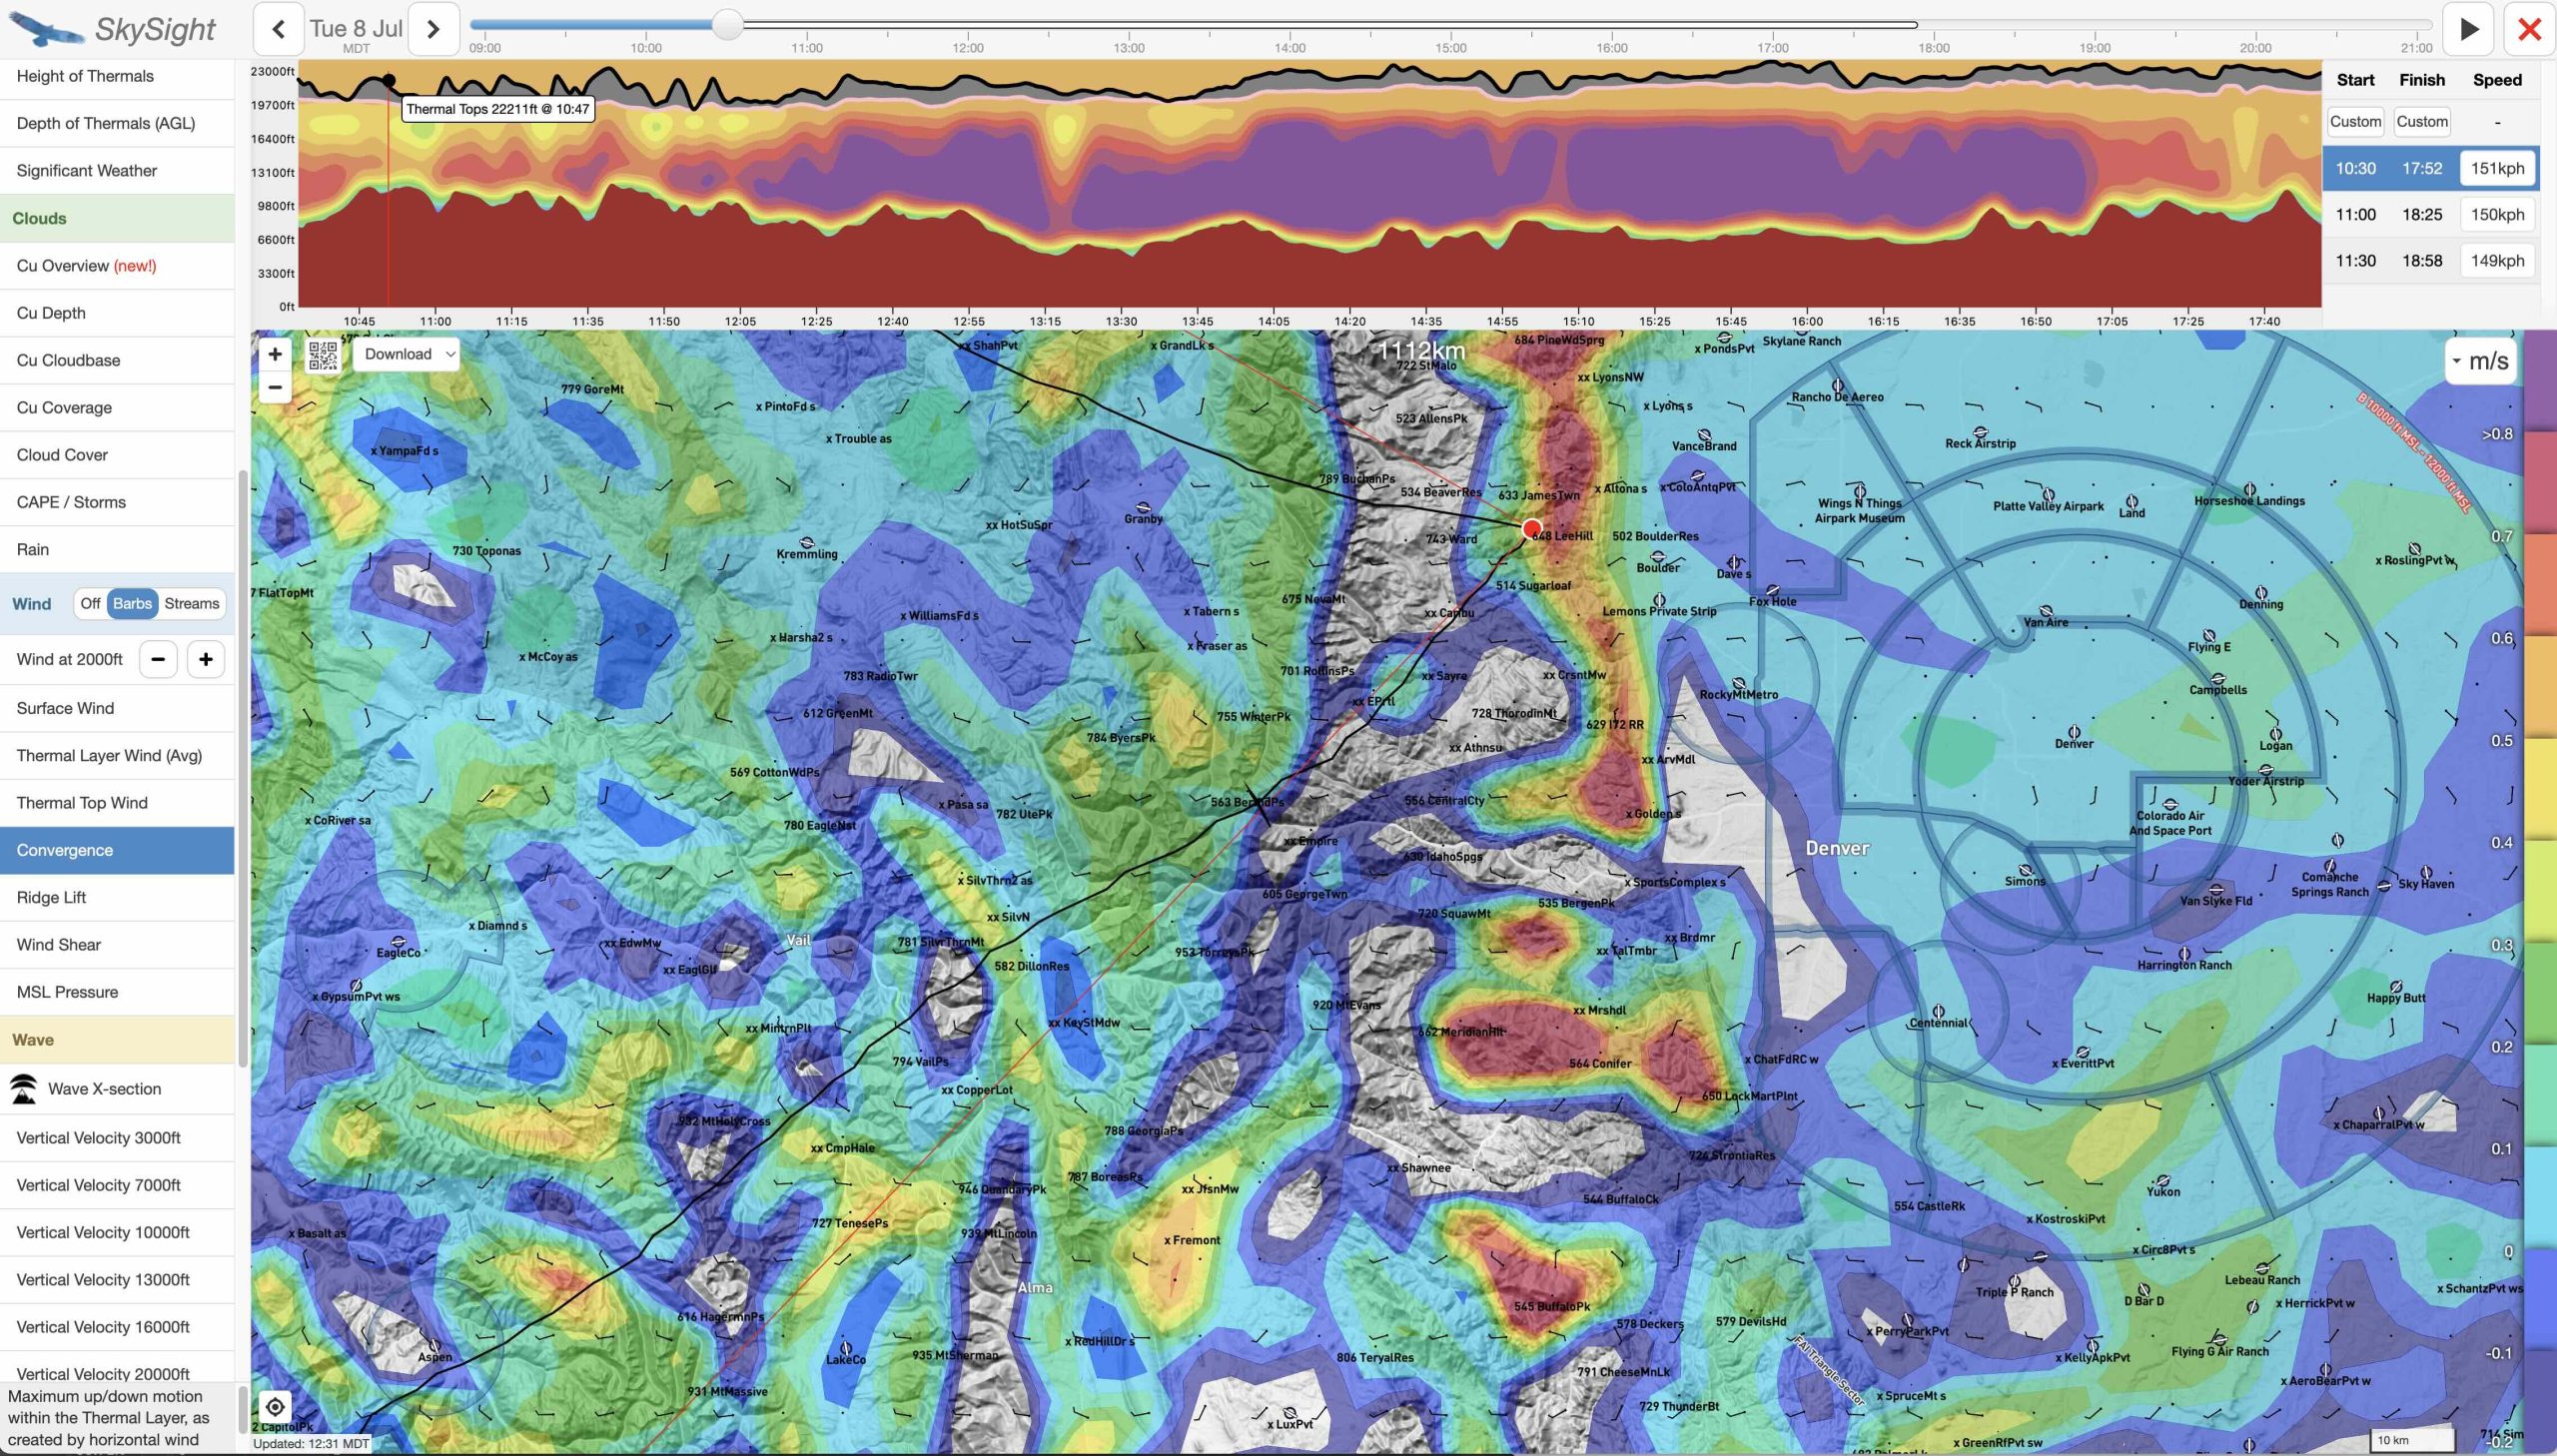
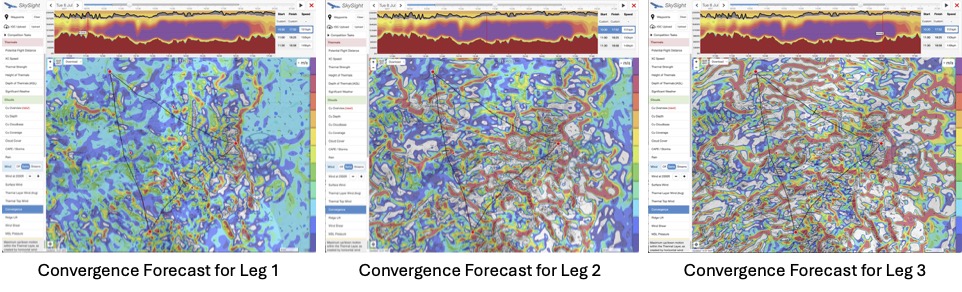
4. Convergence Zones
Convergence zones are areas where different wind streams are flowing towards each other, forcing the air within the convergence zone to generally go up on average (because it obviously can’t go into the ground). Planning a task along convergence zones is generally a great idea because it means you will spend less time circling, and more time going straight, covering more distance at a higher average speed. In addition, thermals are more easily triggered within and along convergence zones. (However, be mindful that convergence zones also tend to be the first areas to overdevelop!)
In my experience, convergence forecasts tend to be more accurate in the morning and gradually become less predictable later in the day. But often the direction of convergence lines will still be the same, just the position of the convergence zone may shift. If there are clouds, this is of course easy to see.
Convergence usually plays a much greater role in the mountains than in the flat lands and convergence zones tend to produce more lift (and divergence zones more sink) when there is significant wind.
If a flights can be aligned with long convergence zones there’s a good chance of much higher task speeds.
If strong convergence is expected, the forecast convergence zones can also be helpful in the specific selection of turn points. E.g., in my task planning, I prefer to create a new turn point located in a convergence zone instead of simply picking an already existing waypoint which may happen to be in a forecast divergence area. )
5. Wind Direction and Wind Speed
Wind can play a big role in determining potential task speeds. When setting big triangle tasks it is important to consider the likely possibility that the wind speed and direction will vary in different parts of the task area. Because of this, with all else being equal, flying a triangle in one direction will result in a different task speed than flying it in the other direction.
Whenever possible, I also try to avoid legs directly into a strong wind when or where thermals are weak (e.g. very early or late in the day).
Considering the wind speed is also very important for setting appropriate mental expectations of the attainable speed on each leg.
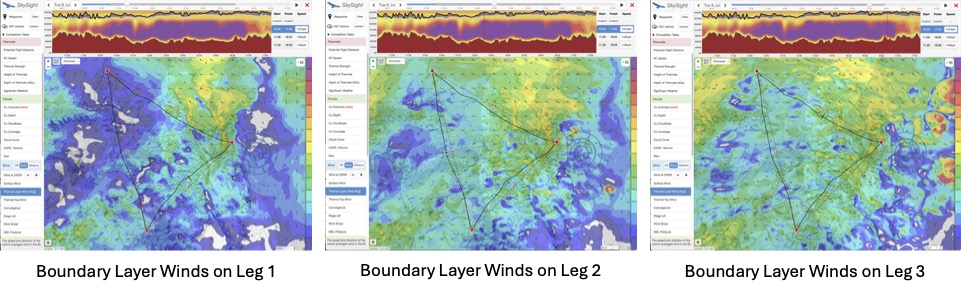
I also like to compare the forecast wind speed for the average of the boundary layer with the forecast wind speed for the top of the boundary layer.
Sometimes the difference is marginal, sometimes it is very significant. If wind speeds at the top of the boundary layer are much higher than for the boundary layer on average, this means that I want to stay very high when flying with a tail wind, and I plan to stay a little lower when flying into a head wind (provided that this can be done safely).
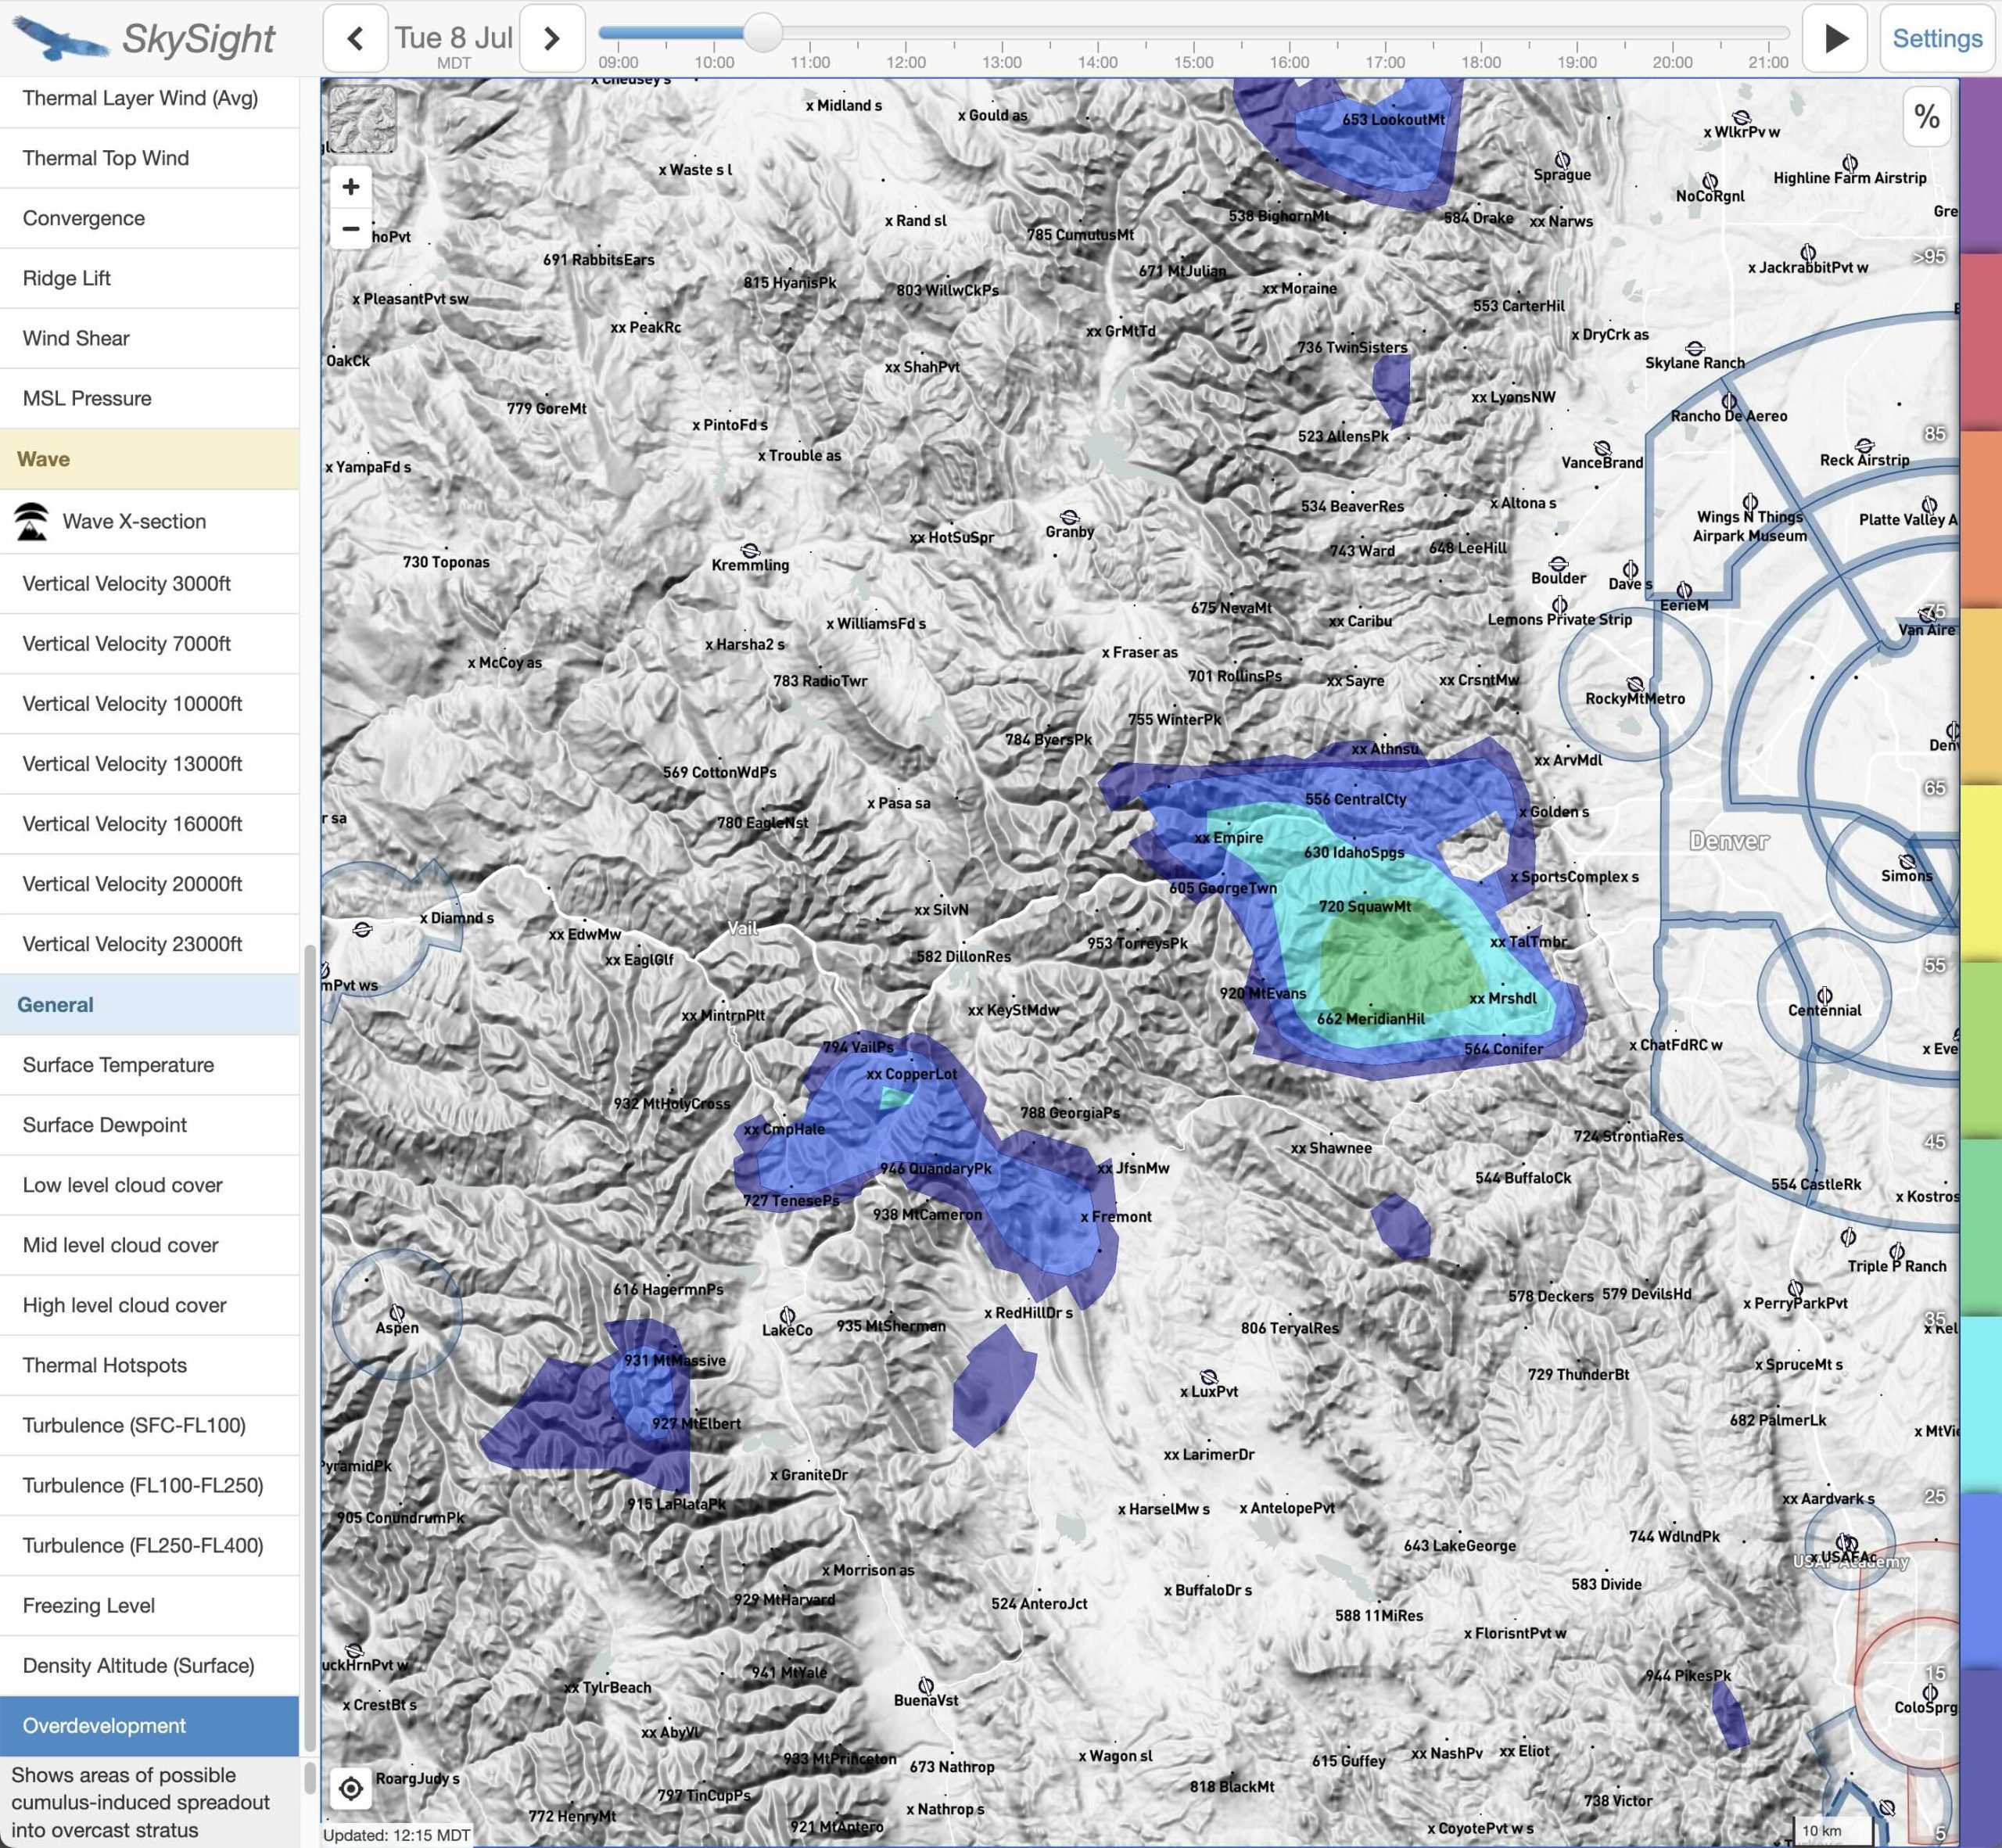
6. Overdevelopment
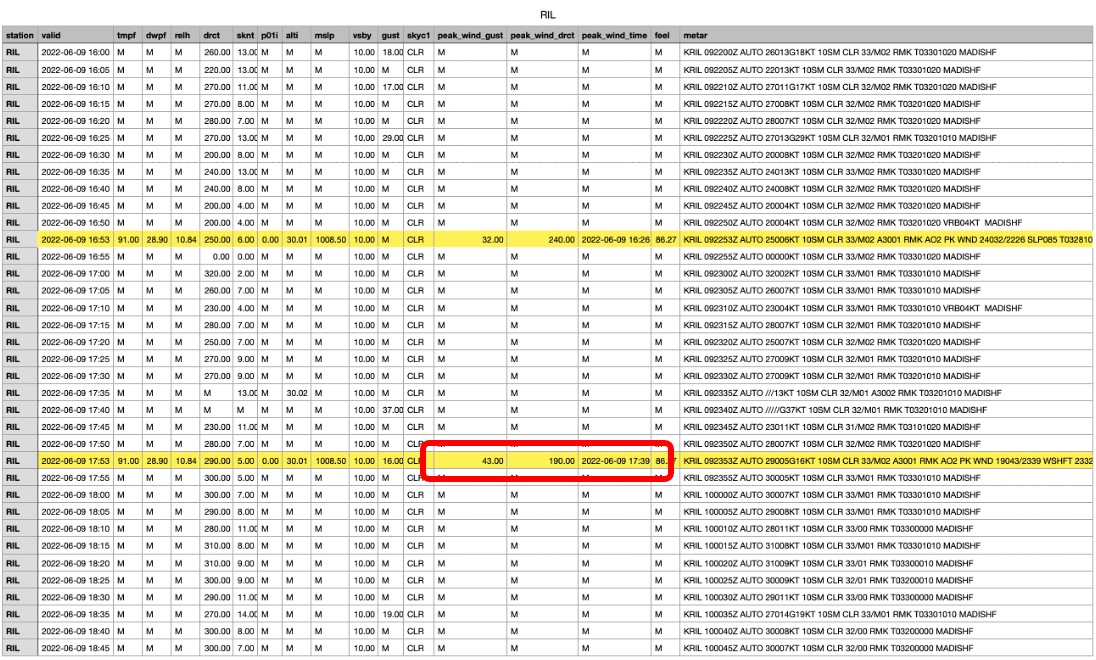
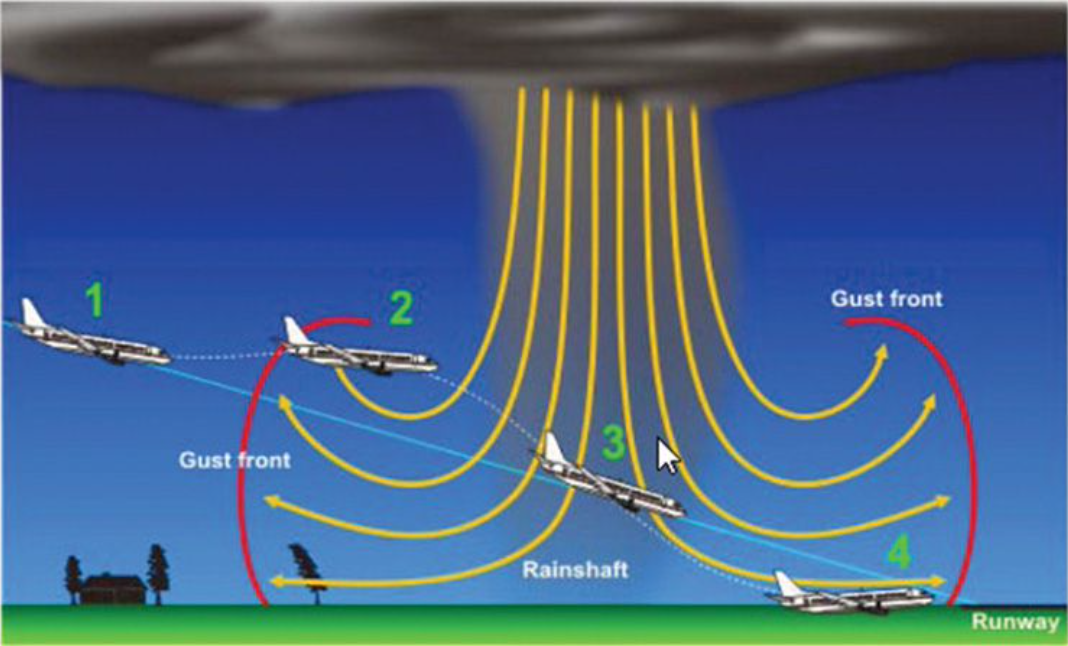
Overdevelopment is a tricky thing. A little bit of it tends to be good because it characterizes a somewhat unstable airmass and good thermal strength. But get too much of it and it quickly become a problem: clouds spread out, making it harder to find the lift; virga and rain cells form, forcing detours; and overshading of the ground suppresses new thermal development. Add even a little bit more, and there could be thunderstorms and gust fronts – real safety concerns.
Our experience tells us that overdevelopment usually gets worse during the day. I want to draw attention to the fact that this is not always the case. Sometimes an airmass will gradually dry out as air temperatures increase, reducing the prevalence of overdevelopment throughout the day rather than increasing it. Such days – although somewhat rare – are often the best for very long flights because they tend to start very early without blowing up later.
Furthermore, long tasks almost always involve flying through air masses with different characteristics. Some air masses may be prone to overdevelopment while others are not. When you find yourself surrounded by virga cellls and showers it is easy to assume that everywhere else is just like that even though conditions 50 kilometers further on along the course might look much better.
In my experience, Skysight tends to under-forecast cloud development and therefore also under-forecasts overdevelopment – at least in the Western US. Even if there is only a small chance of OD forecast, I expect some virga to appear. Once Skysight suggests 50% or more chance of OD at a particular time, a safe soaring flight through such an area may not be possible.
For the flight on July 8, the potential for (too much) overdevelopment was my top concern.
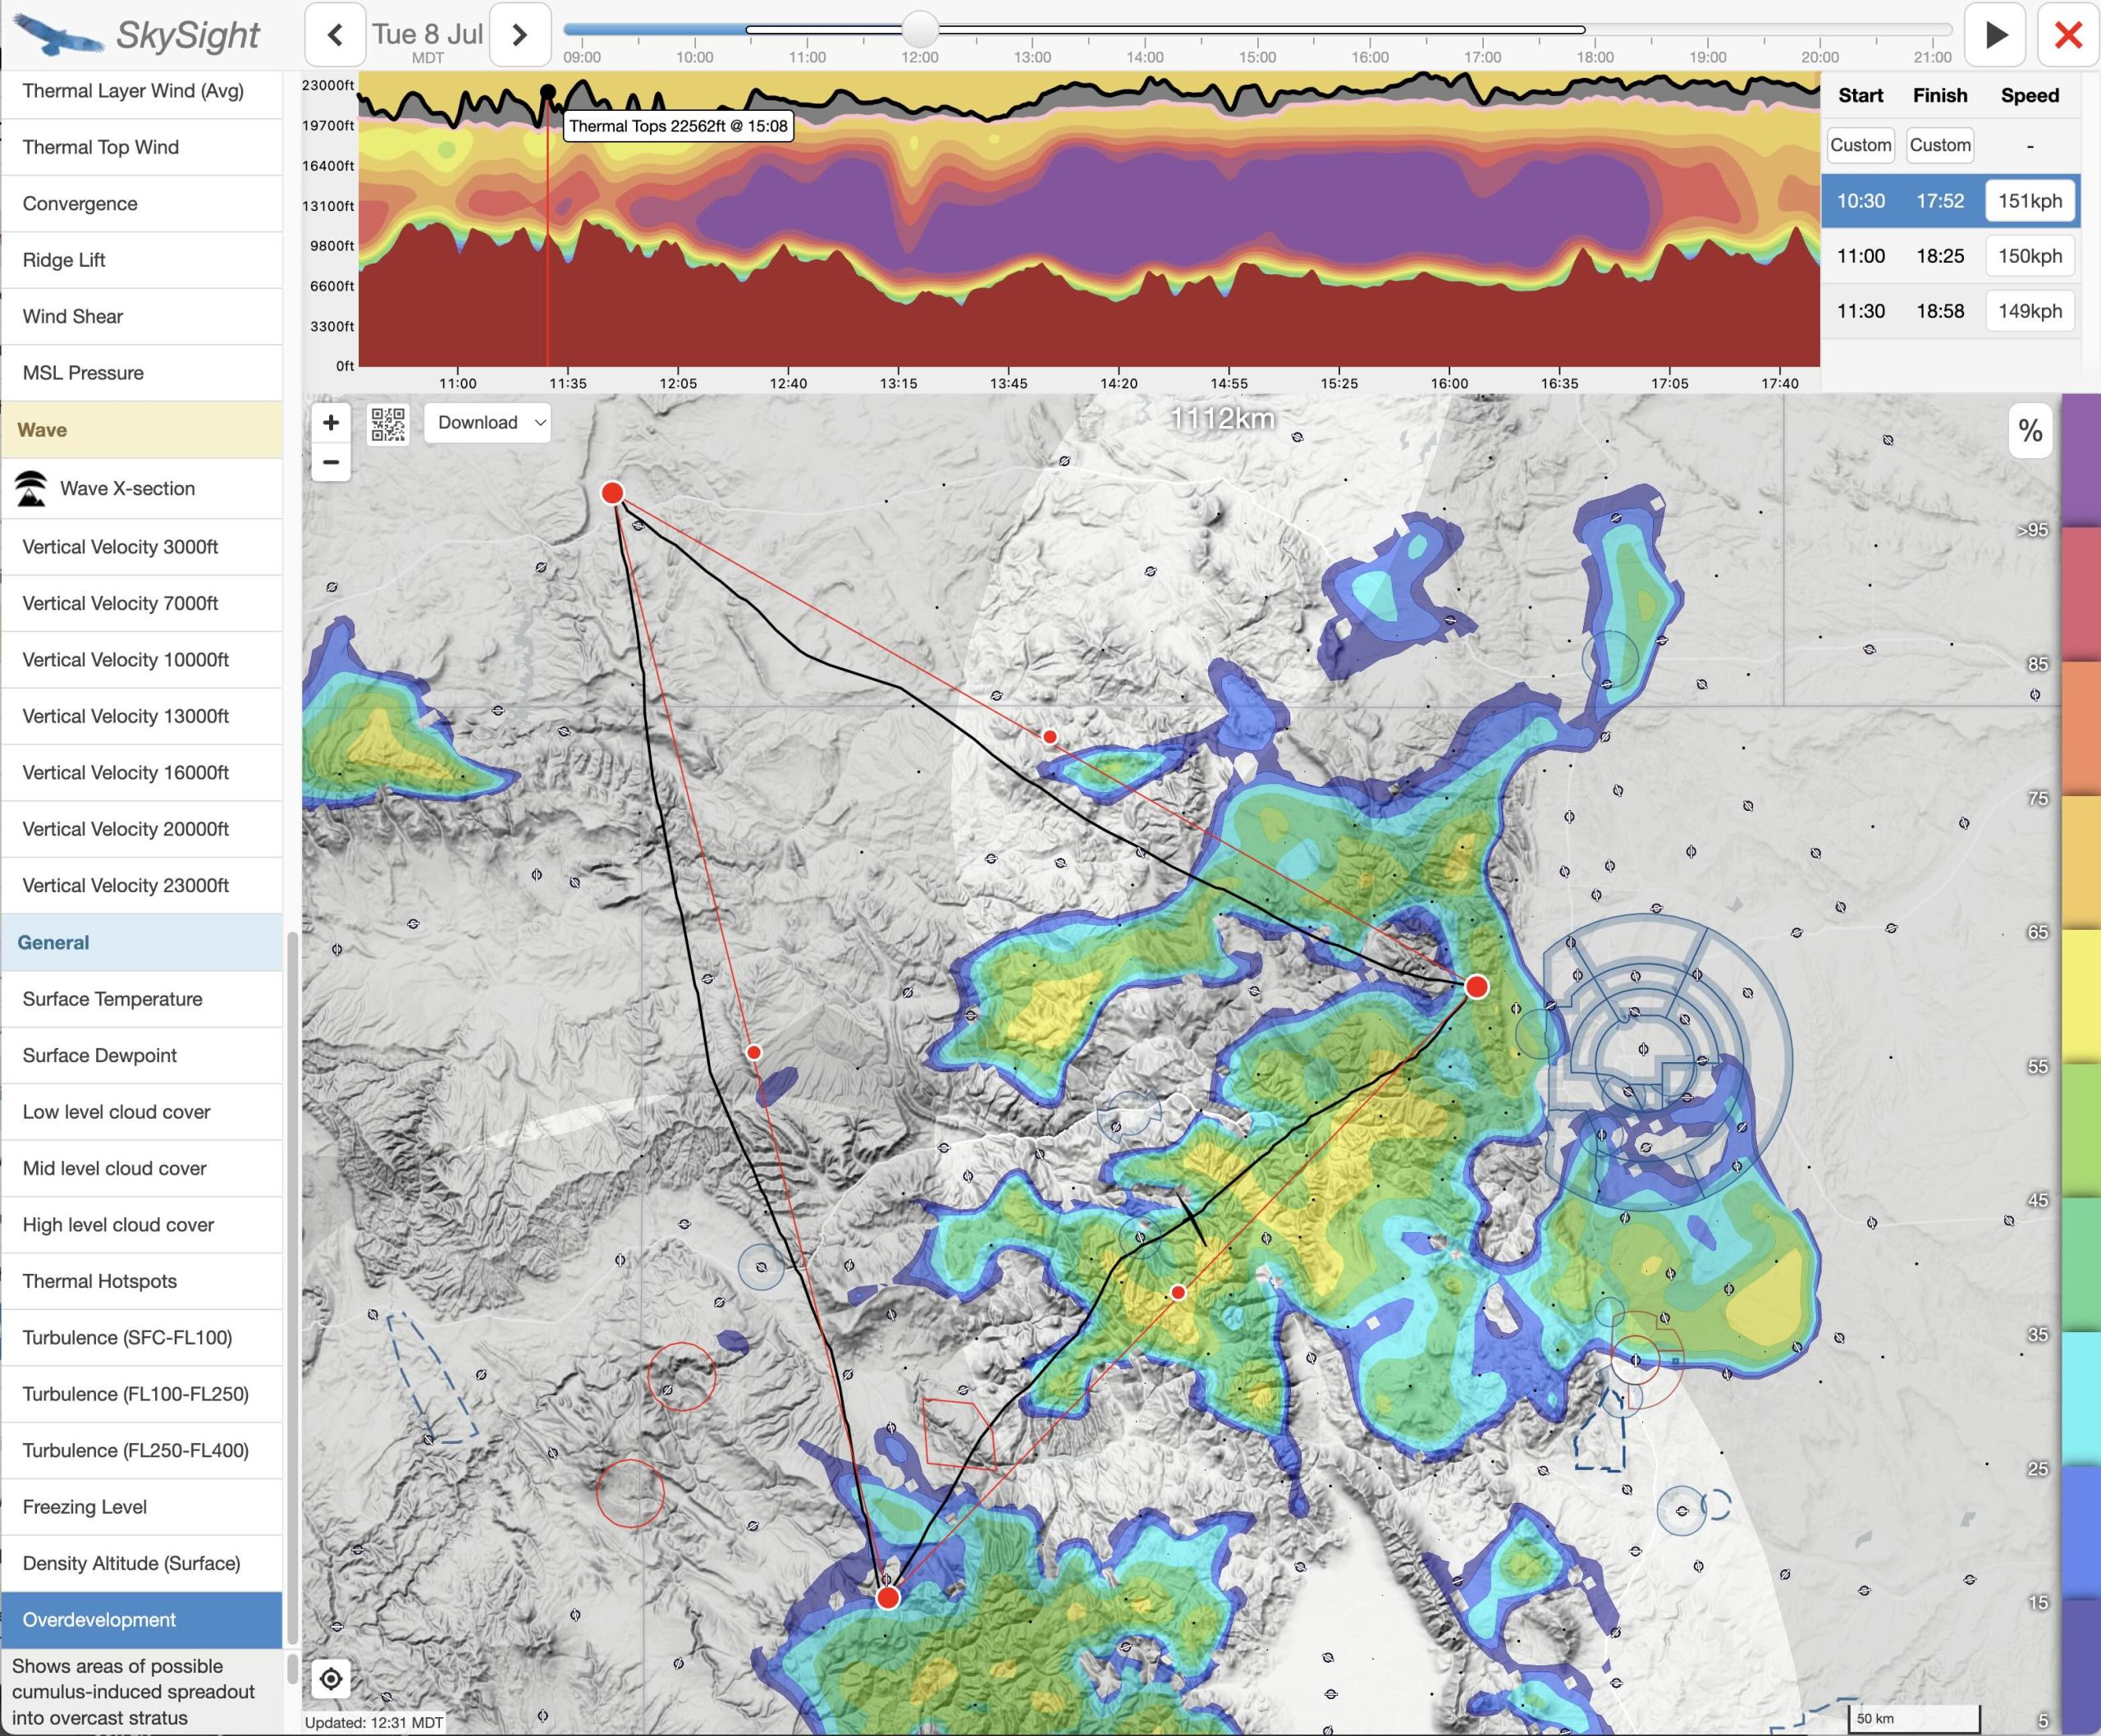
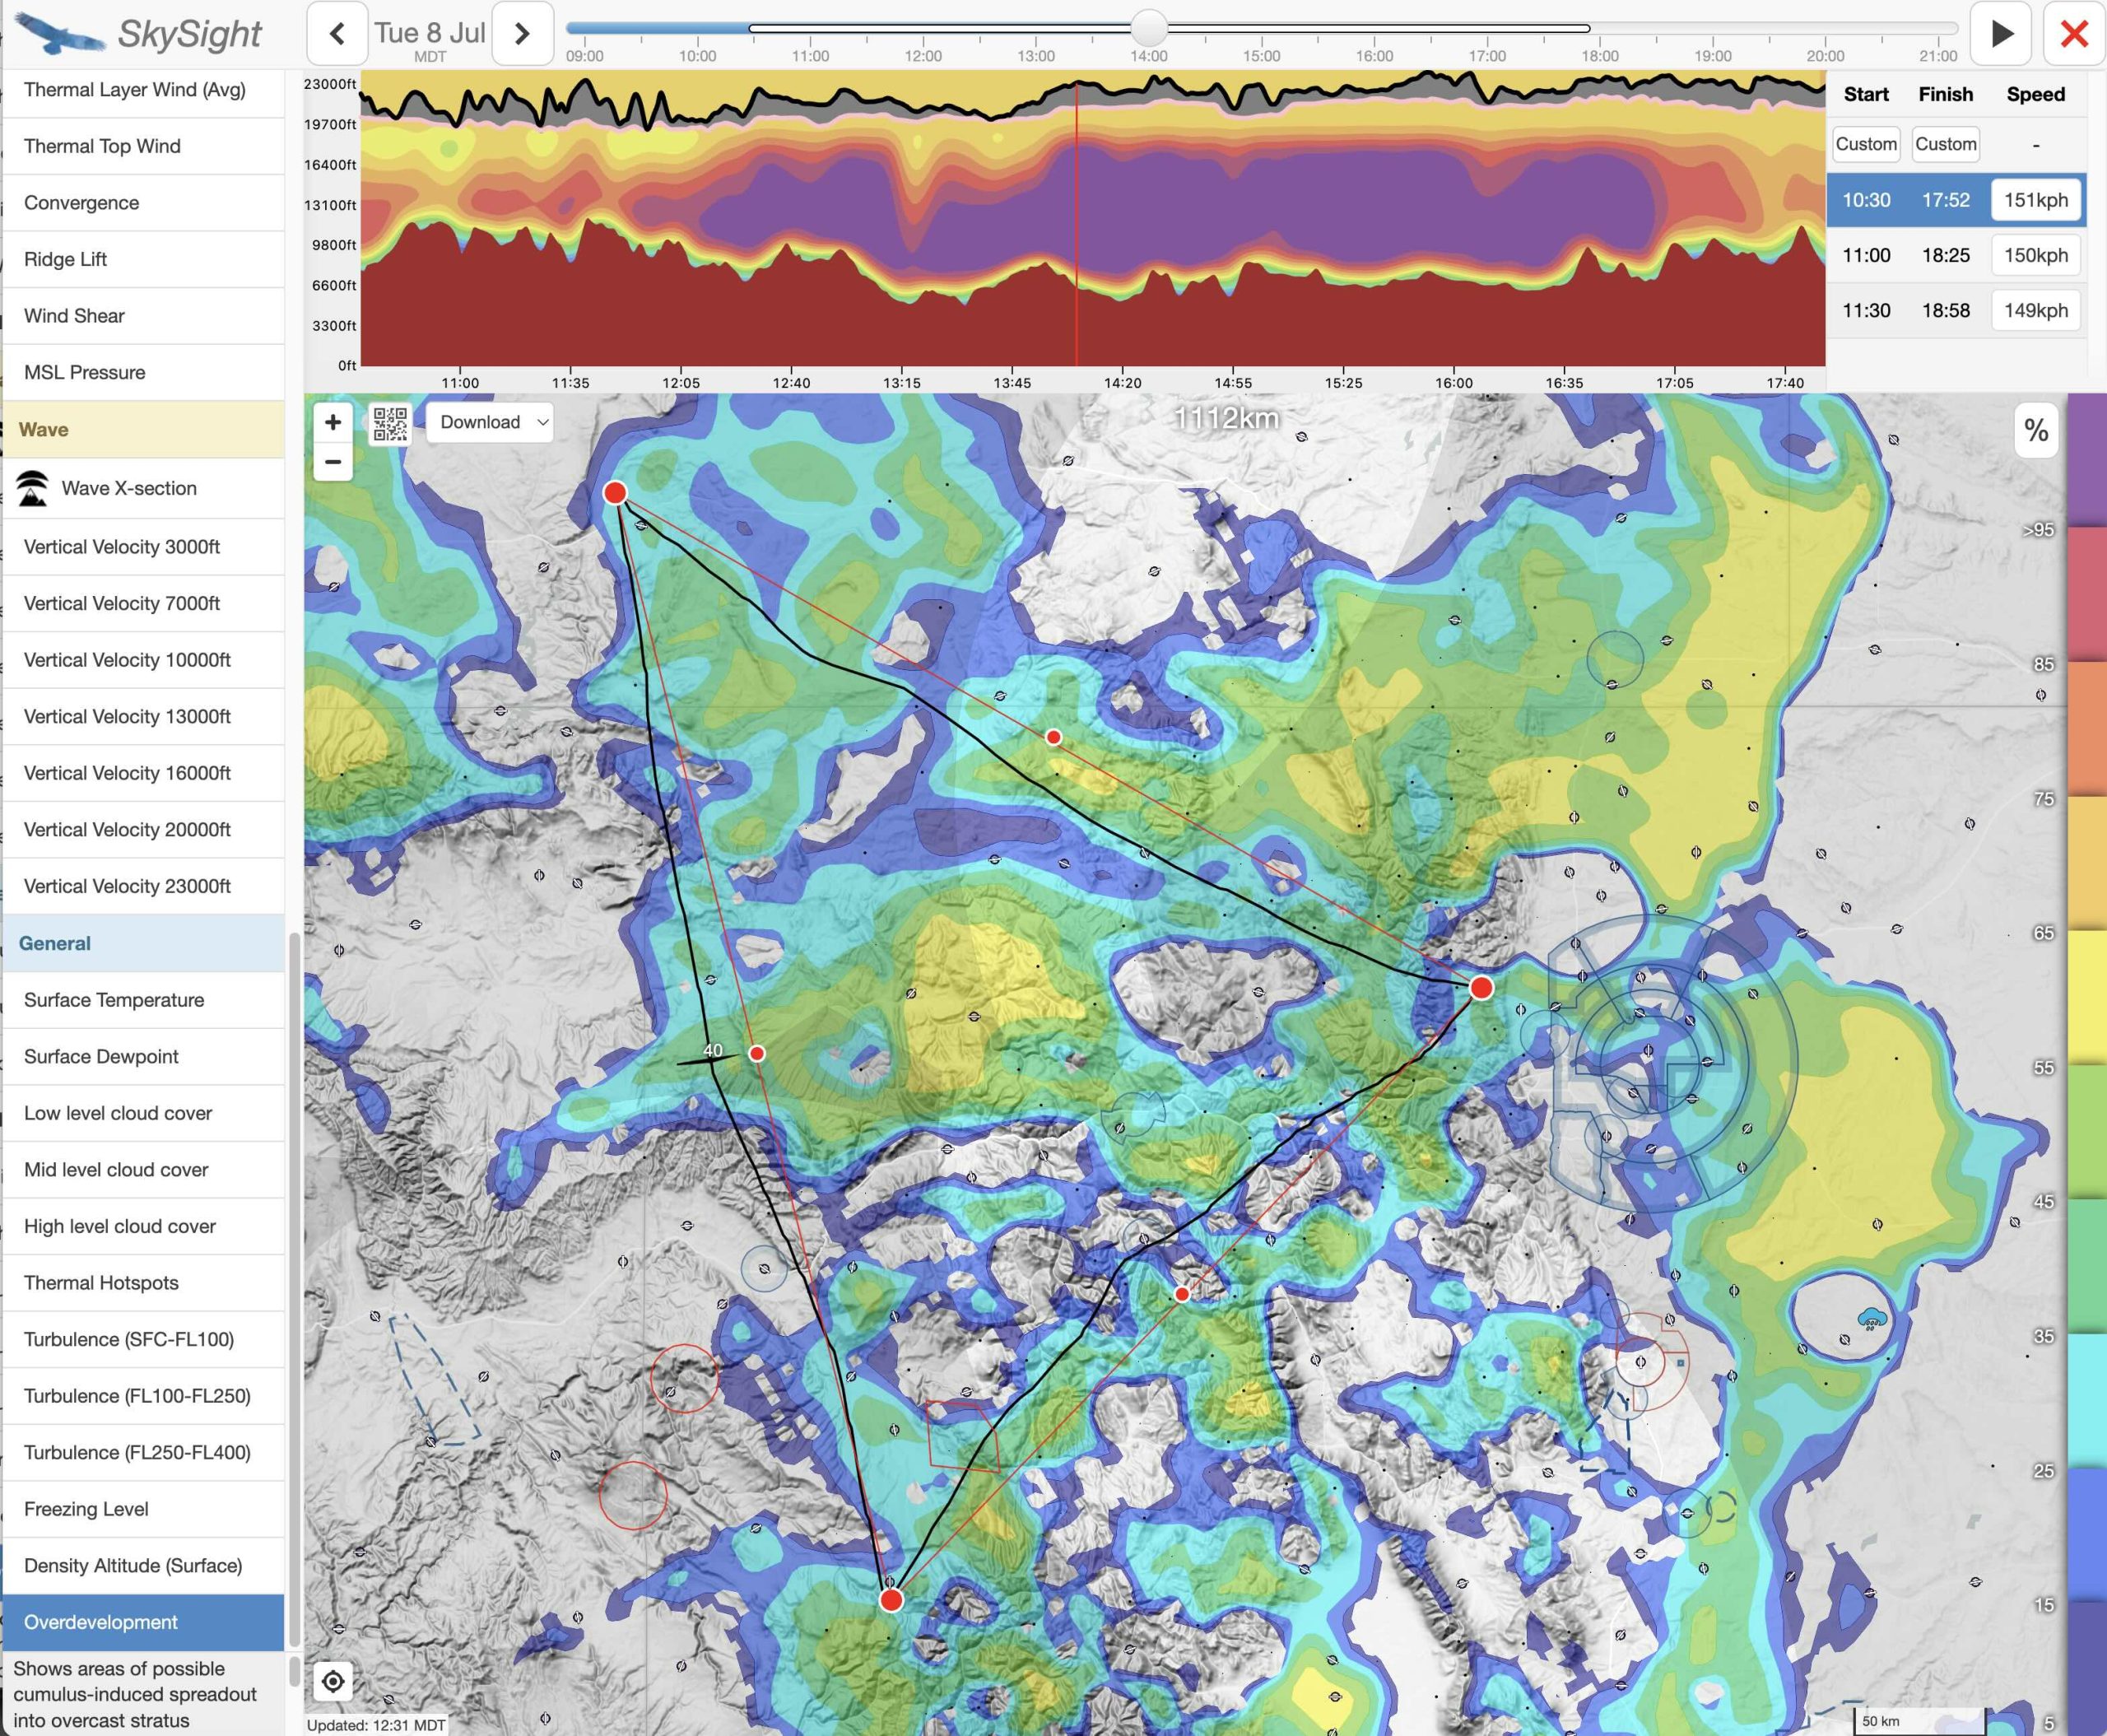
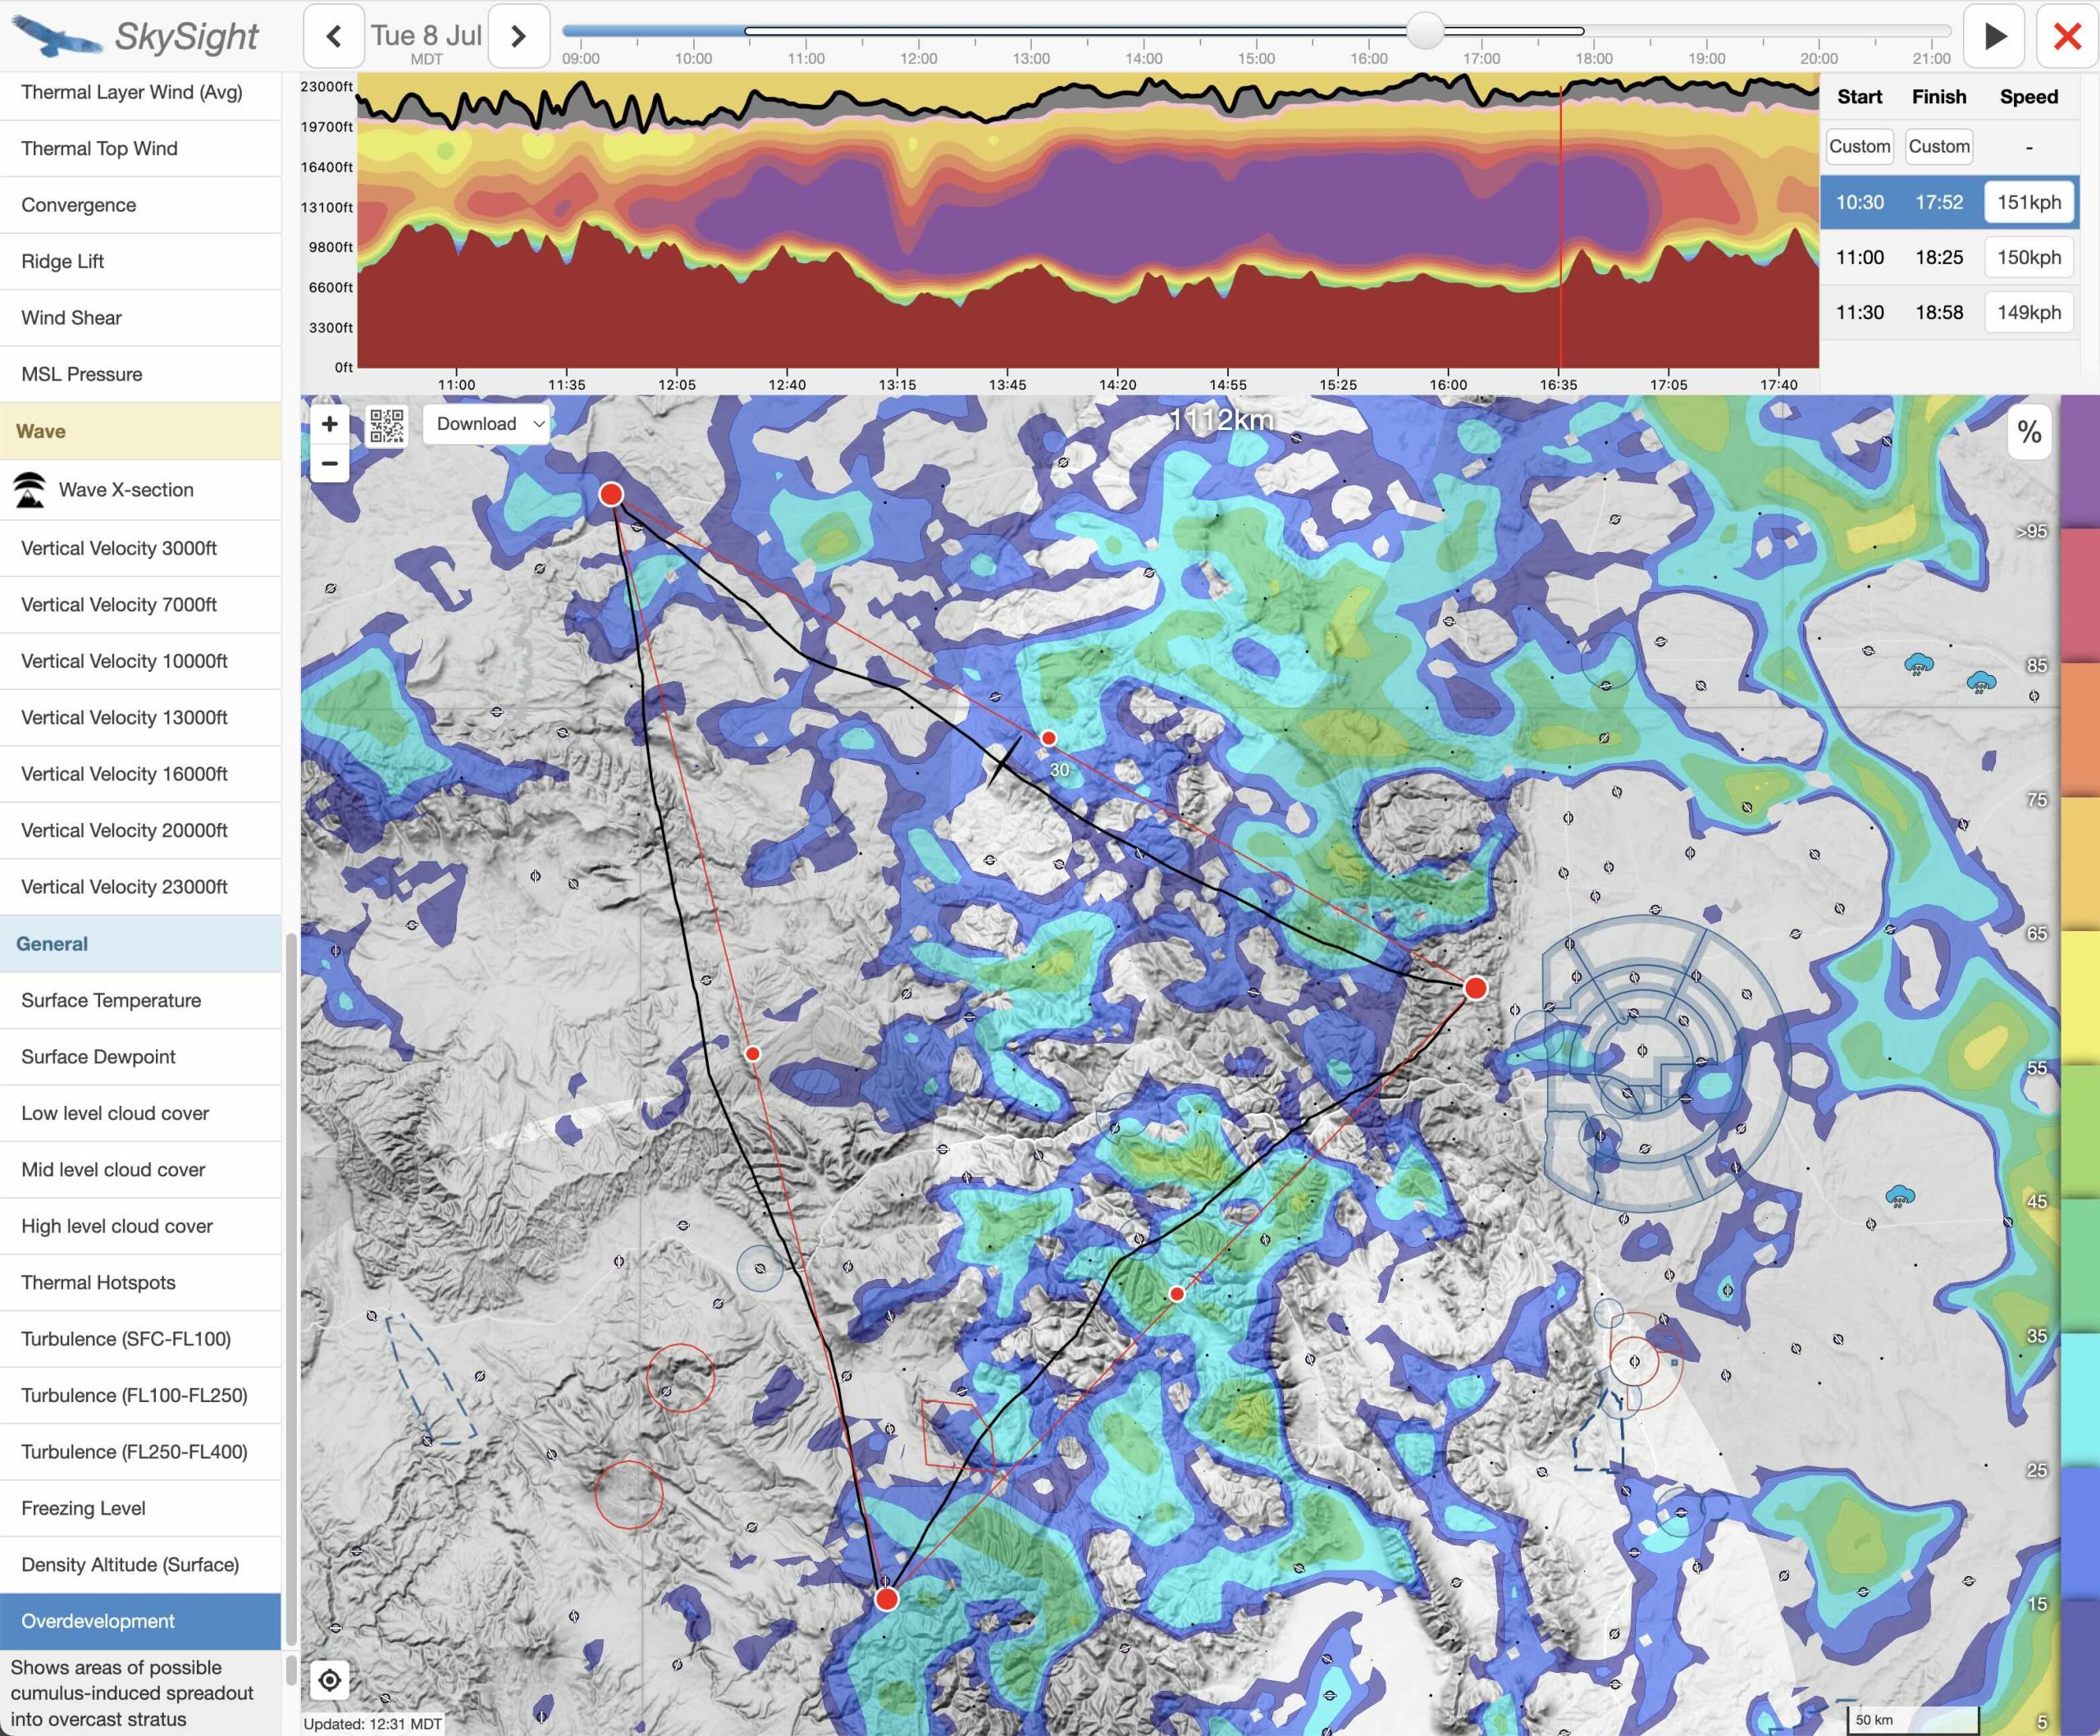
My careful preparation for the eventuality of OD proved crucial in the execution of the flight as we shall see later.
7. CAPE Index and Significant Weather
I also take a quick look at the CAPE (Convective Available Potential Energy) Index which measures the propensity for vertical development and thunderstorms. I want to see as little of it as possible because even values as low as 250-400 Joules can be an indication of severe thunderstorm activity in the mountains.
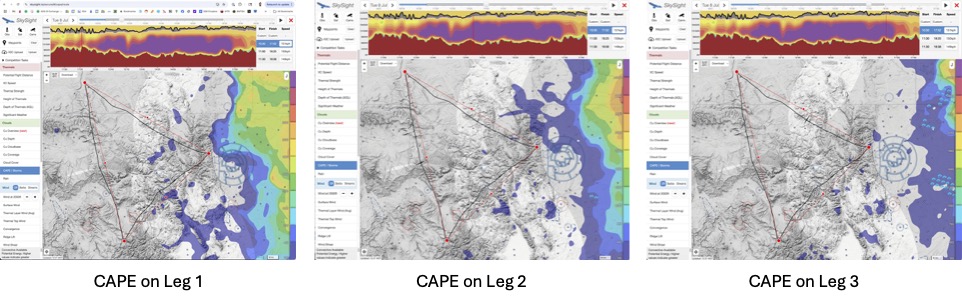
Sometimes, I also double check the “Significant Weather” chart but this is mostly to ensure that I have not overlooked anything.
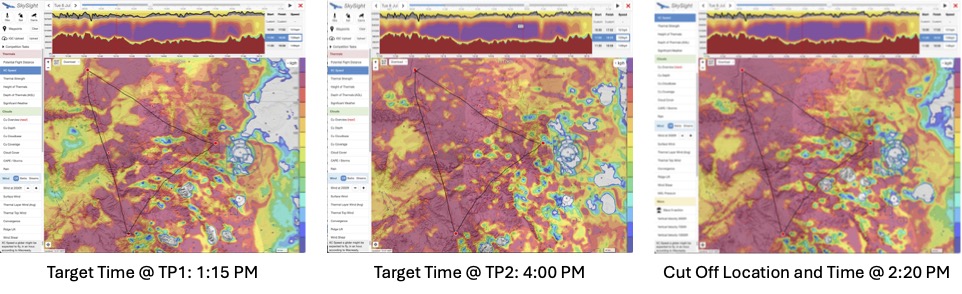
8. Turn-Point and Cut-Off Timing
Finally, with very long flights it’s important to have a time plan to know whether it makes sense to keep going before time is running out.
For me, this is usually as simple as setting a target time for reaching each turn point, and a point and time where I would decide to cut the flight short if I fall behind schedule.
For triangles, the cut off point and location is typically somewhere along the second leg at a point where it would become obvious that I can’t reach the last turn point on schedule. (This is where the advantage of triangles that have the Start/Finish Point along one of the legs becomes obvious: they allow for a much later cut-off point than triangles that have the Start/Finish at a corner. )
For long Out and Returns, I simply set a latest turn-around time: if I don’t reach my turnpoint by that time, I commit to giving up on the task and turning around.
Doing this type of planning at home is important because it avoids that I have to do the mental math in the cockpit when all my concentration should be focused on flying well. It also gives me the confidence to keep going all the way to the last turn-point provided that I am still on schedule (and as long as there aren’t any unanticipated problems along the course ahead.)
With Skysight, the tool to use for this is simply the Route Planning tool. I usually pick the second to last possible start time that Skysight suggests for my task and then move my glider icon around the track, taking note of the time when each turn point should be reached. For the cut-off point, I pick a recognizable point along the second leg from where it should be relatively easy to head home directly, and take a note of the time that I have to reach this point to stay on schedule.
(Note: I don’t like picking the last possible start time for this exercise because I would be committing myself to flying as fast as Skysight considers possible – something that rarely works.)
Step 4: Stress Testing the Route
If I’ve done Step 3 well, I should already be well prepared and ready to go. However, especially with very long flights that require a high average speed for successful completion, it helps to look for potential problems that may arise along the way, and to form a mitigation plan should the problems be worse than anticipated.
1. More OD and Storms Than Predicted
Given Skysight’s propensity for under-forecasting clouds and OD I try to determine where this could become a real issue along the course and what I would do if this is the case.
That’s important for safety reasons because increasing OD and/or storms might mean that simply turning around and heading back home may not be possible. So I ask myself if there is an alternative and safer way to make it back, or if I have to make plans to land someplace else and possibly spend the night.
Since storms are not just a sporting risk but a safety risk (more about this distinction), I also check the weather forecasts for important airports along my flight route using tools other than Skysight. This will strengthen (or weaken) my confidence in the Skysight forecast, and it helps me understand if there will be safe places to land along my route should I have to break off the flight.
My favorite tool for this is meteoblue.com because it is based on many weather models and provides predictability ratings for each point forecast. Low predictability means that the various weather models disagree with one another. Days with low predictability are usually not well suited for very long flights. The “multi-model” view then allows me to dig deeper if necessary and helps me understand if storms could become a real safety threat, especially late in the day. In addition to airports, I usually also pick one or two points along the final leg of my route to see if storms are likely a real concern on the way home. (E.g. when I expect to come back from the northwest across the Continental Divide, I might check the forecast for Longs Peak and Estes Park; from the southwest I may check the forecast for Mount Evans and Idaho Springs, etc.)
2. More Blue Sky Than Predicted
The inverse could also be the case such that there will be fewer clouds than anticipated. To be prepared for this I look for the forecast thermal heights and thermal strength over areas near the task line that actually are predicted to be blue.
This helps me anticipate whether a lack of clouds would just indicate a dryer airmass (where I could still anticipate to find good lift in the blue), or whether it would suggest a problem with thermal development in general (e.g. a strong inversion, weaker thermals and/or lower thermal heights). The former would just slow me down somewhat (as long as flight safety is not compromised), the latter would suggest that the task as planned may not work at all on that particular day.
If there may be big blue gaps with no lift at all (e.g. when crossing an area with a strong inversion layer below), I try to plan ahead of time to understand if climbing up high before such gaps will allow for a safe and successful transition using a long glide near the best glide speed considering the expected wind. (E.g., in Colorado, the transition from South Park to the Wet Mountains early in the day is an example where this strategy can be quite successful, and Skysight is usually quite accurately forecasting the width of the gap that should be anticipated as well as any helping tailwind or hurting headwind.)
3. High Clouds
If high clouds move into the task area, they can shield the ground from the sun and cut off thermal development. The exact extent, position, and thickness of high clouds is not easy to accurately predict. If any high clouds are forecast in the task areas it is good to watch out for them an be prepared. On my first 1000km triangle flight in Colorado, high clouds were my biggest problem. I also had not looked for their likelihood in my task planning and they took me by surprise. I have since made it a habit to check for the potential of high clouds ahead of time. Using the time slider, it only takes a a few seconds to do so. (No high clouds were forecast for July 8 throughout the entire task area.)
4. Other Issues
Once on course there are obviously any number of other issues that one might encounter: the wind could be stronger than forecast causing broken thermals, the thermals could be weaker, the clouds lower, etc. Such issues may make it impossible to complete a long task as planned.
If I have done my homework ahead of time, I am usually able to quickly recognize such discrepancies if they occur. This helps me decide early if it makes sense to try to continue on task or whether it’s better to change my plan and make something else out of the flight.
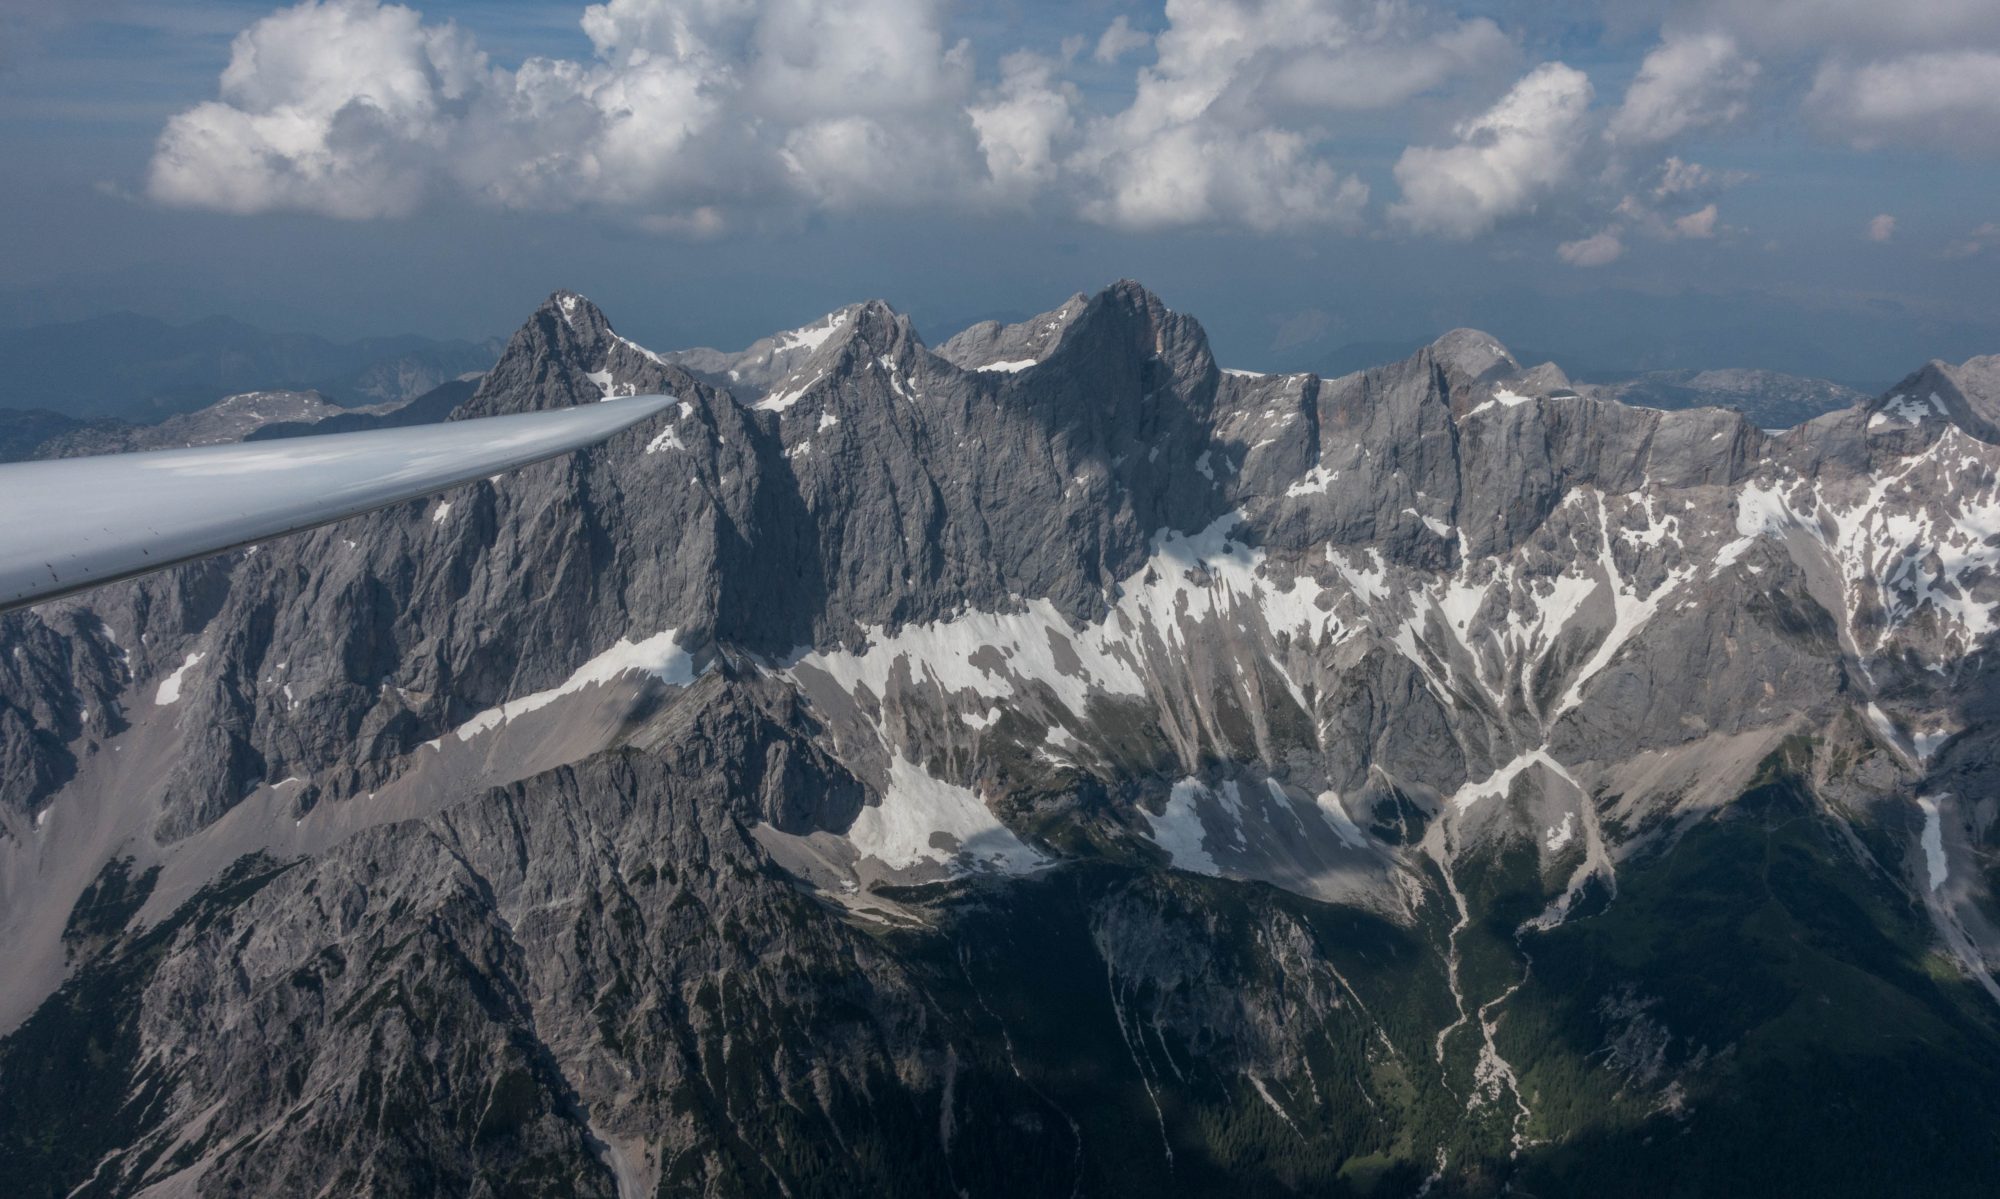
Flight Execution
In this second part of the article, I recount the flight itself. This is where it will become clear that the thorough flight preparation did not only help me pick the most appropriate task for the day but that it played a key role in in-flight decisions as well. Especially, it gave me the confidence to keep going when things looked challenging or questionable ahead.
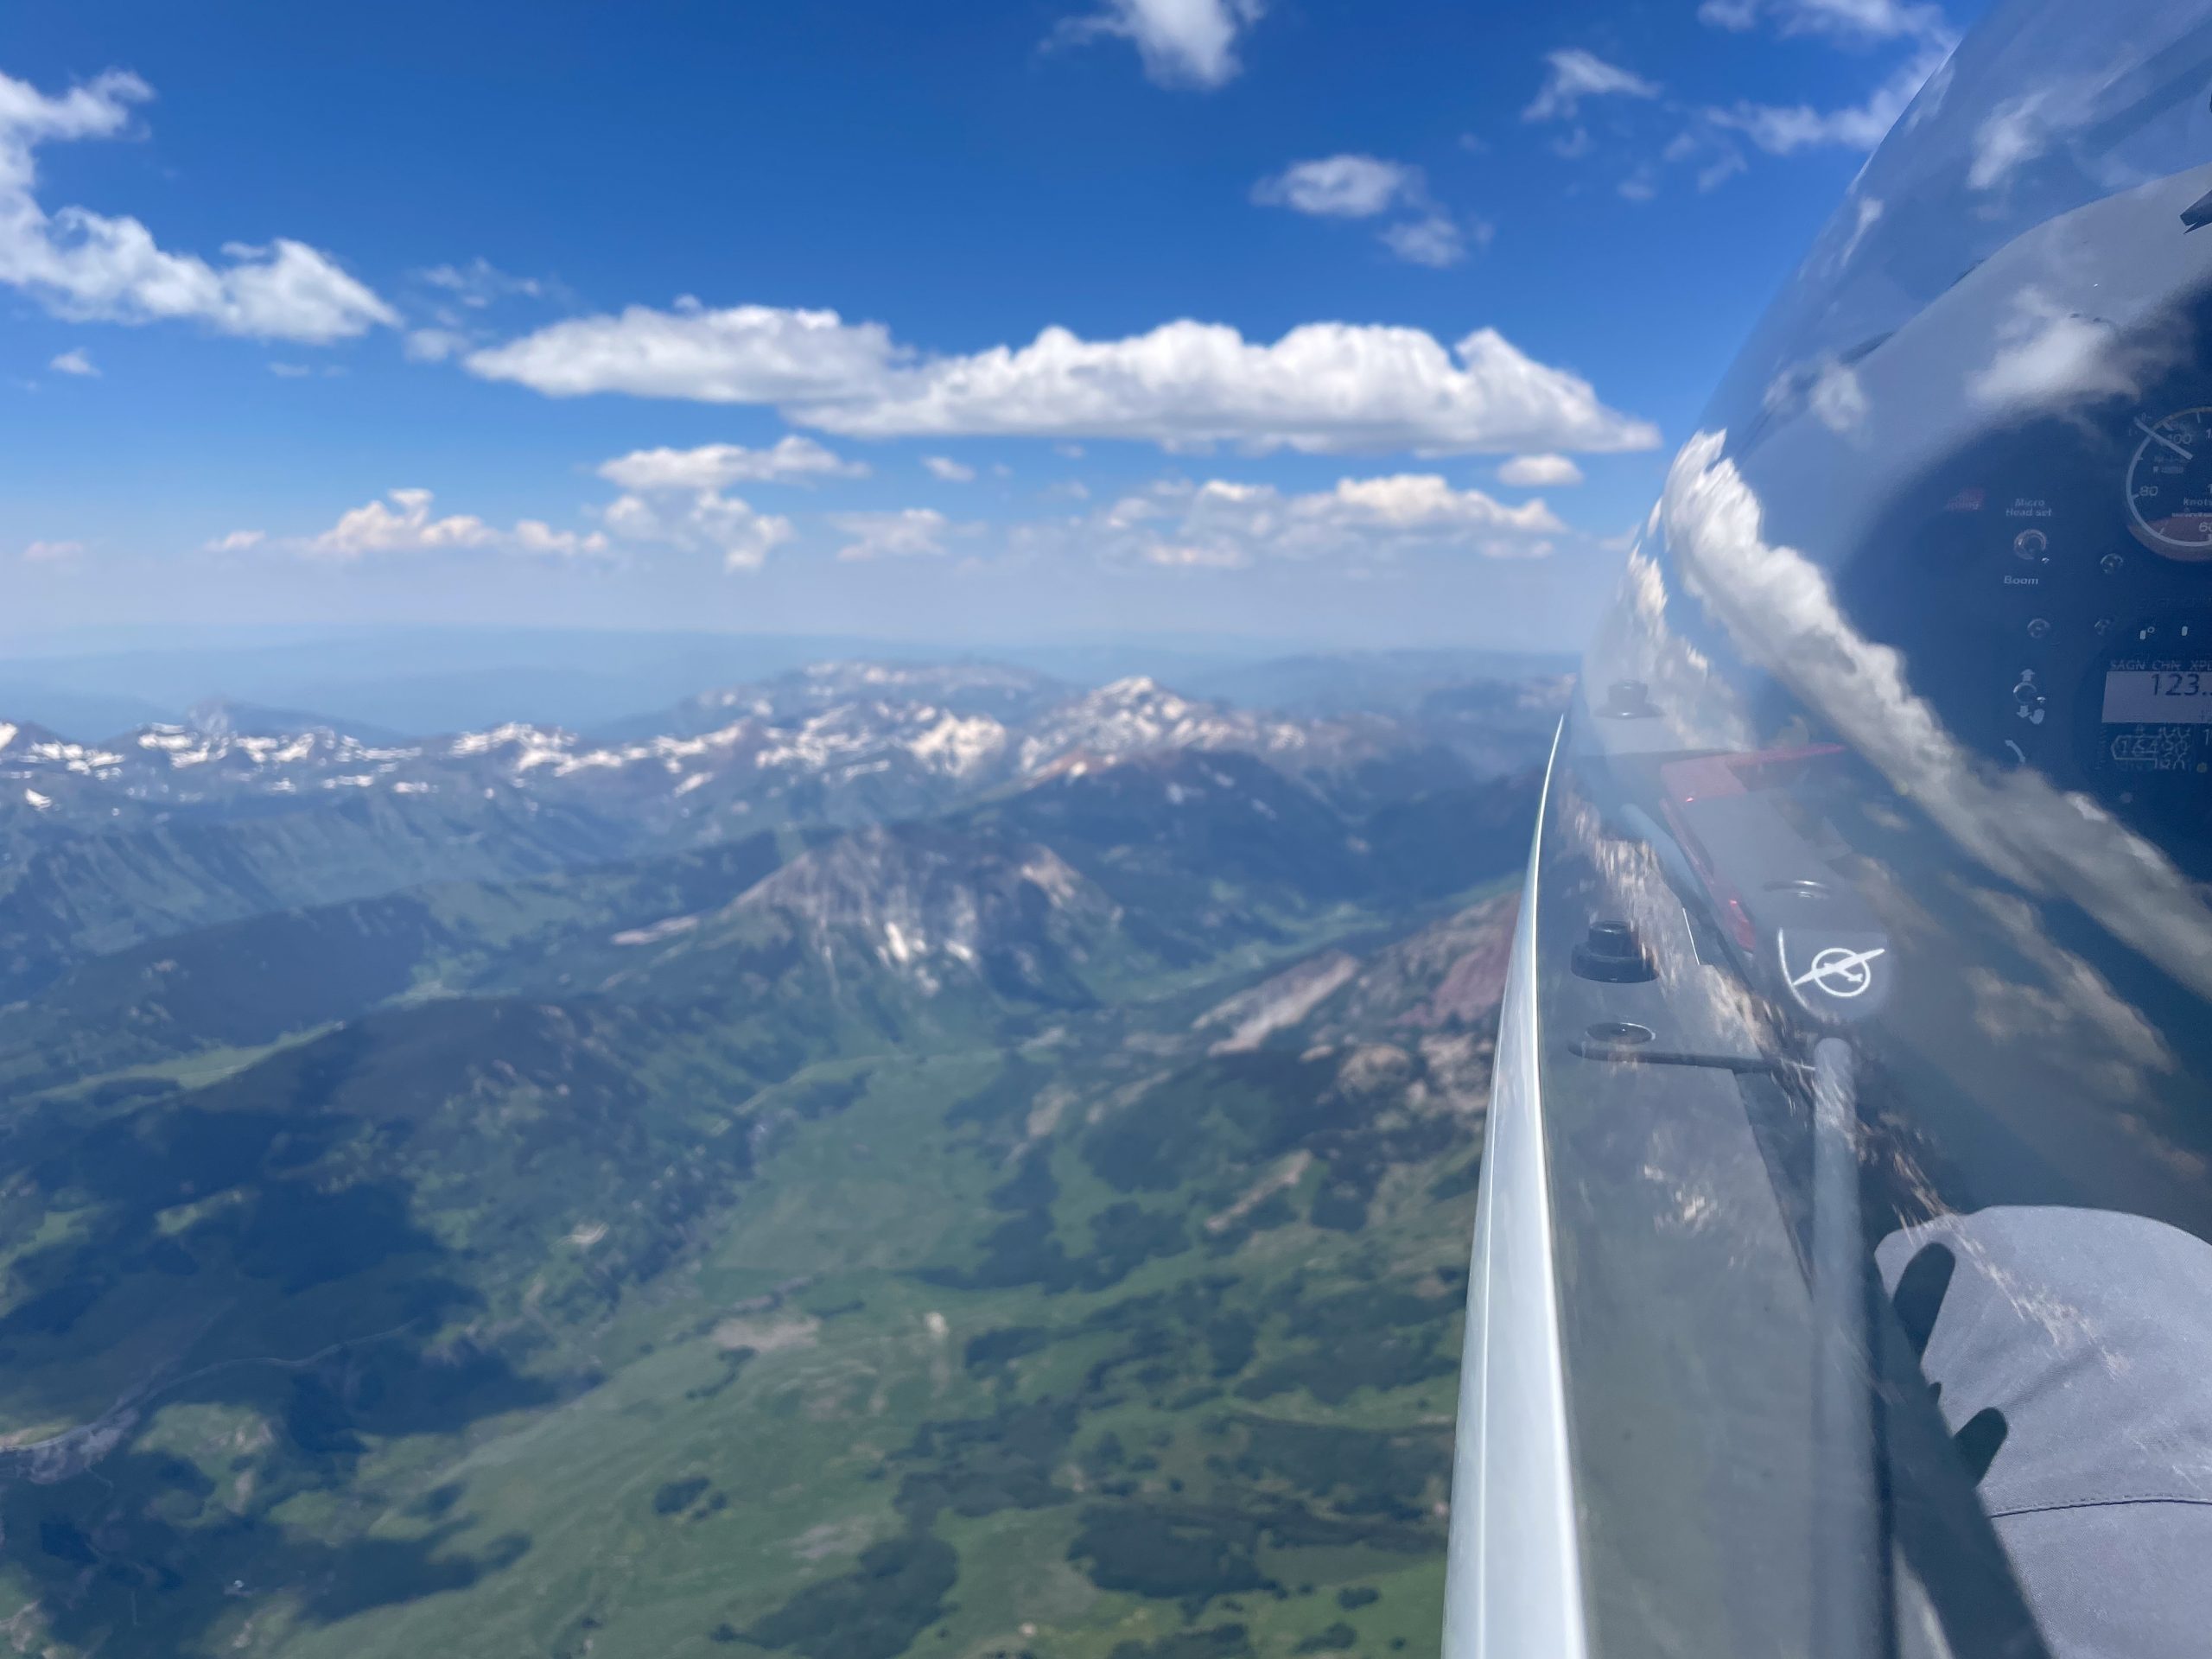
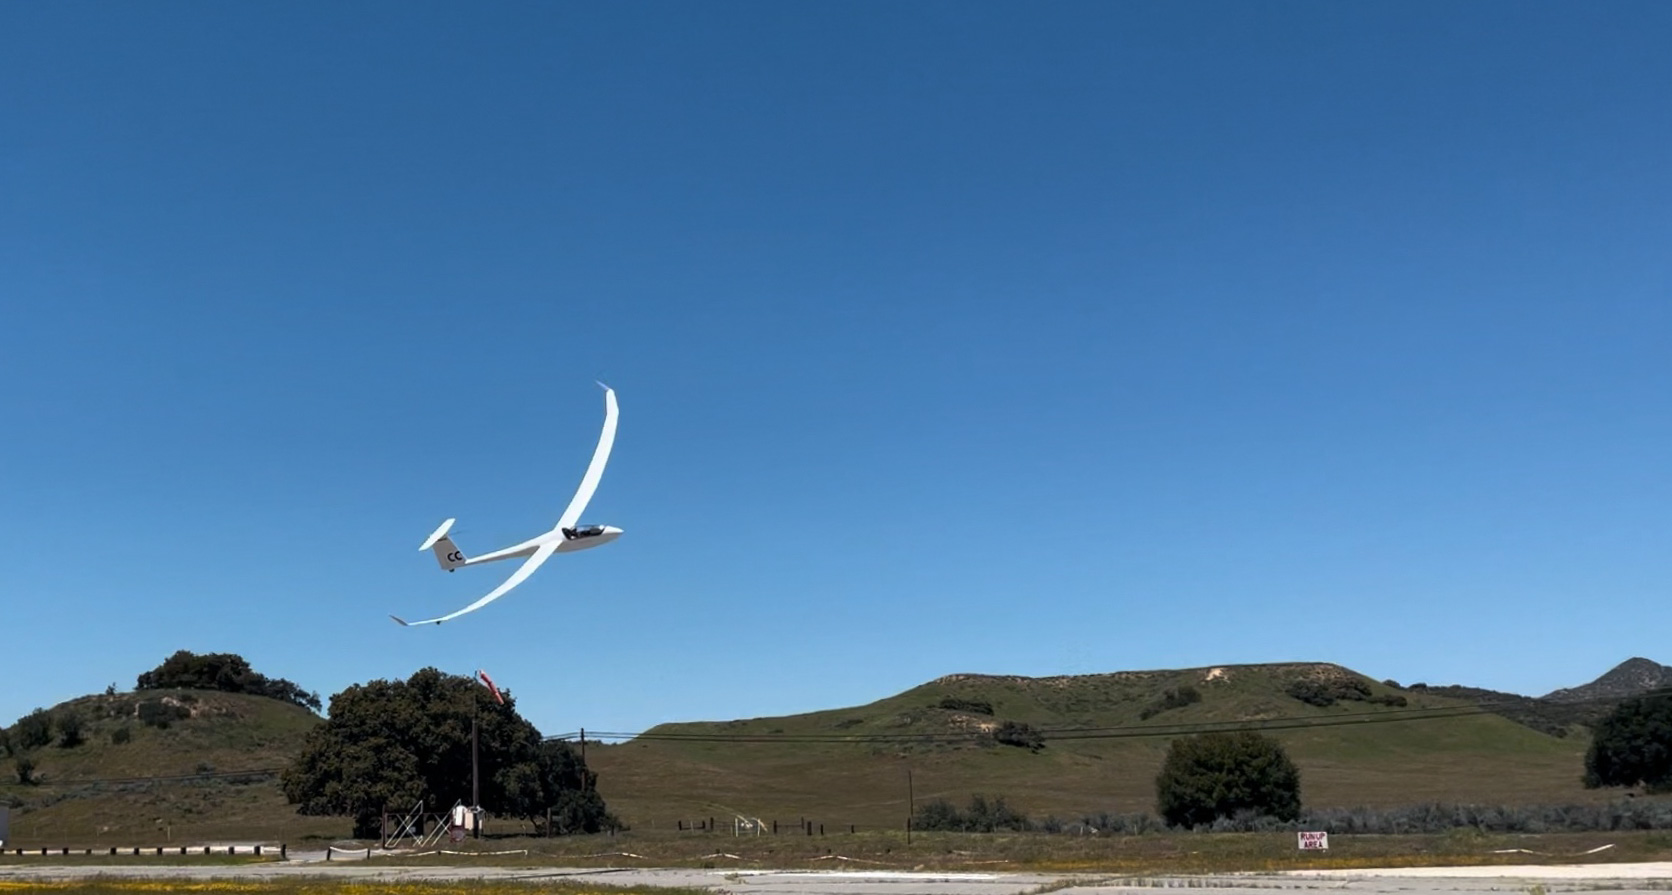
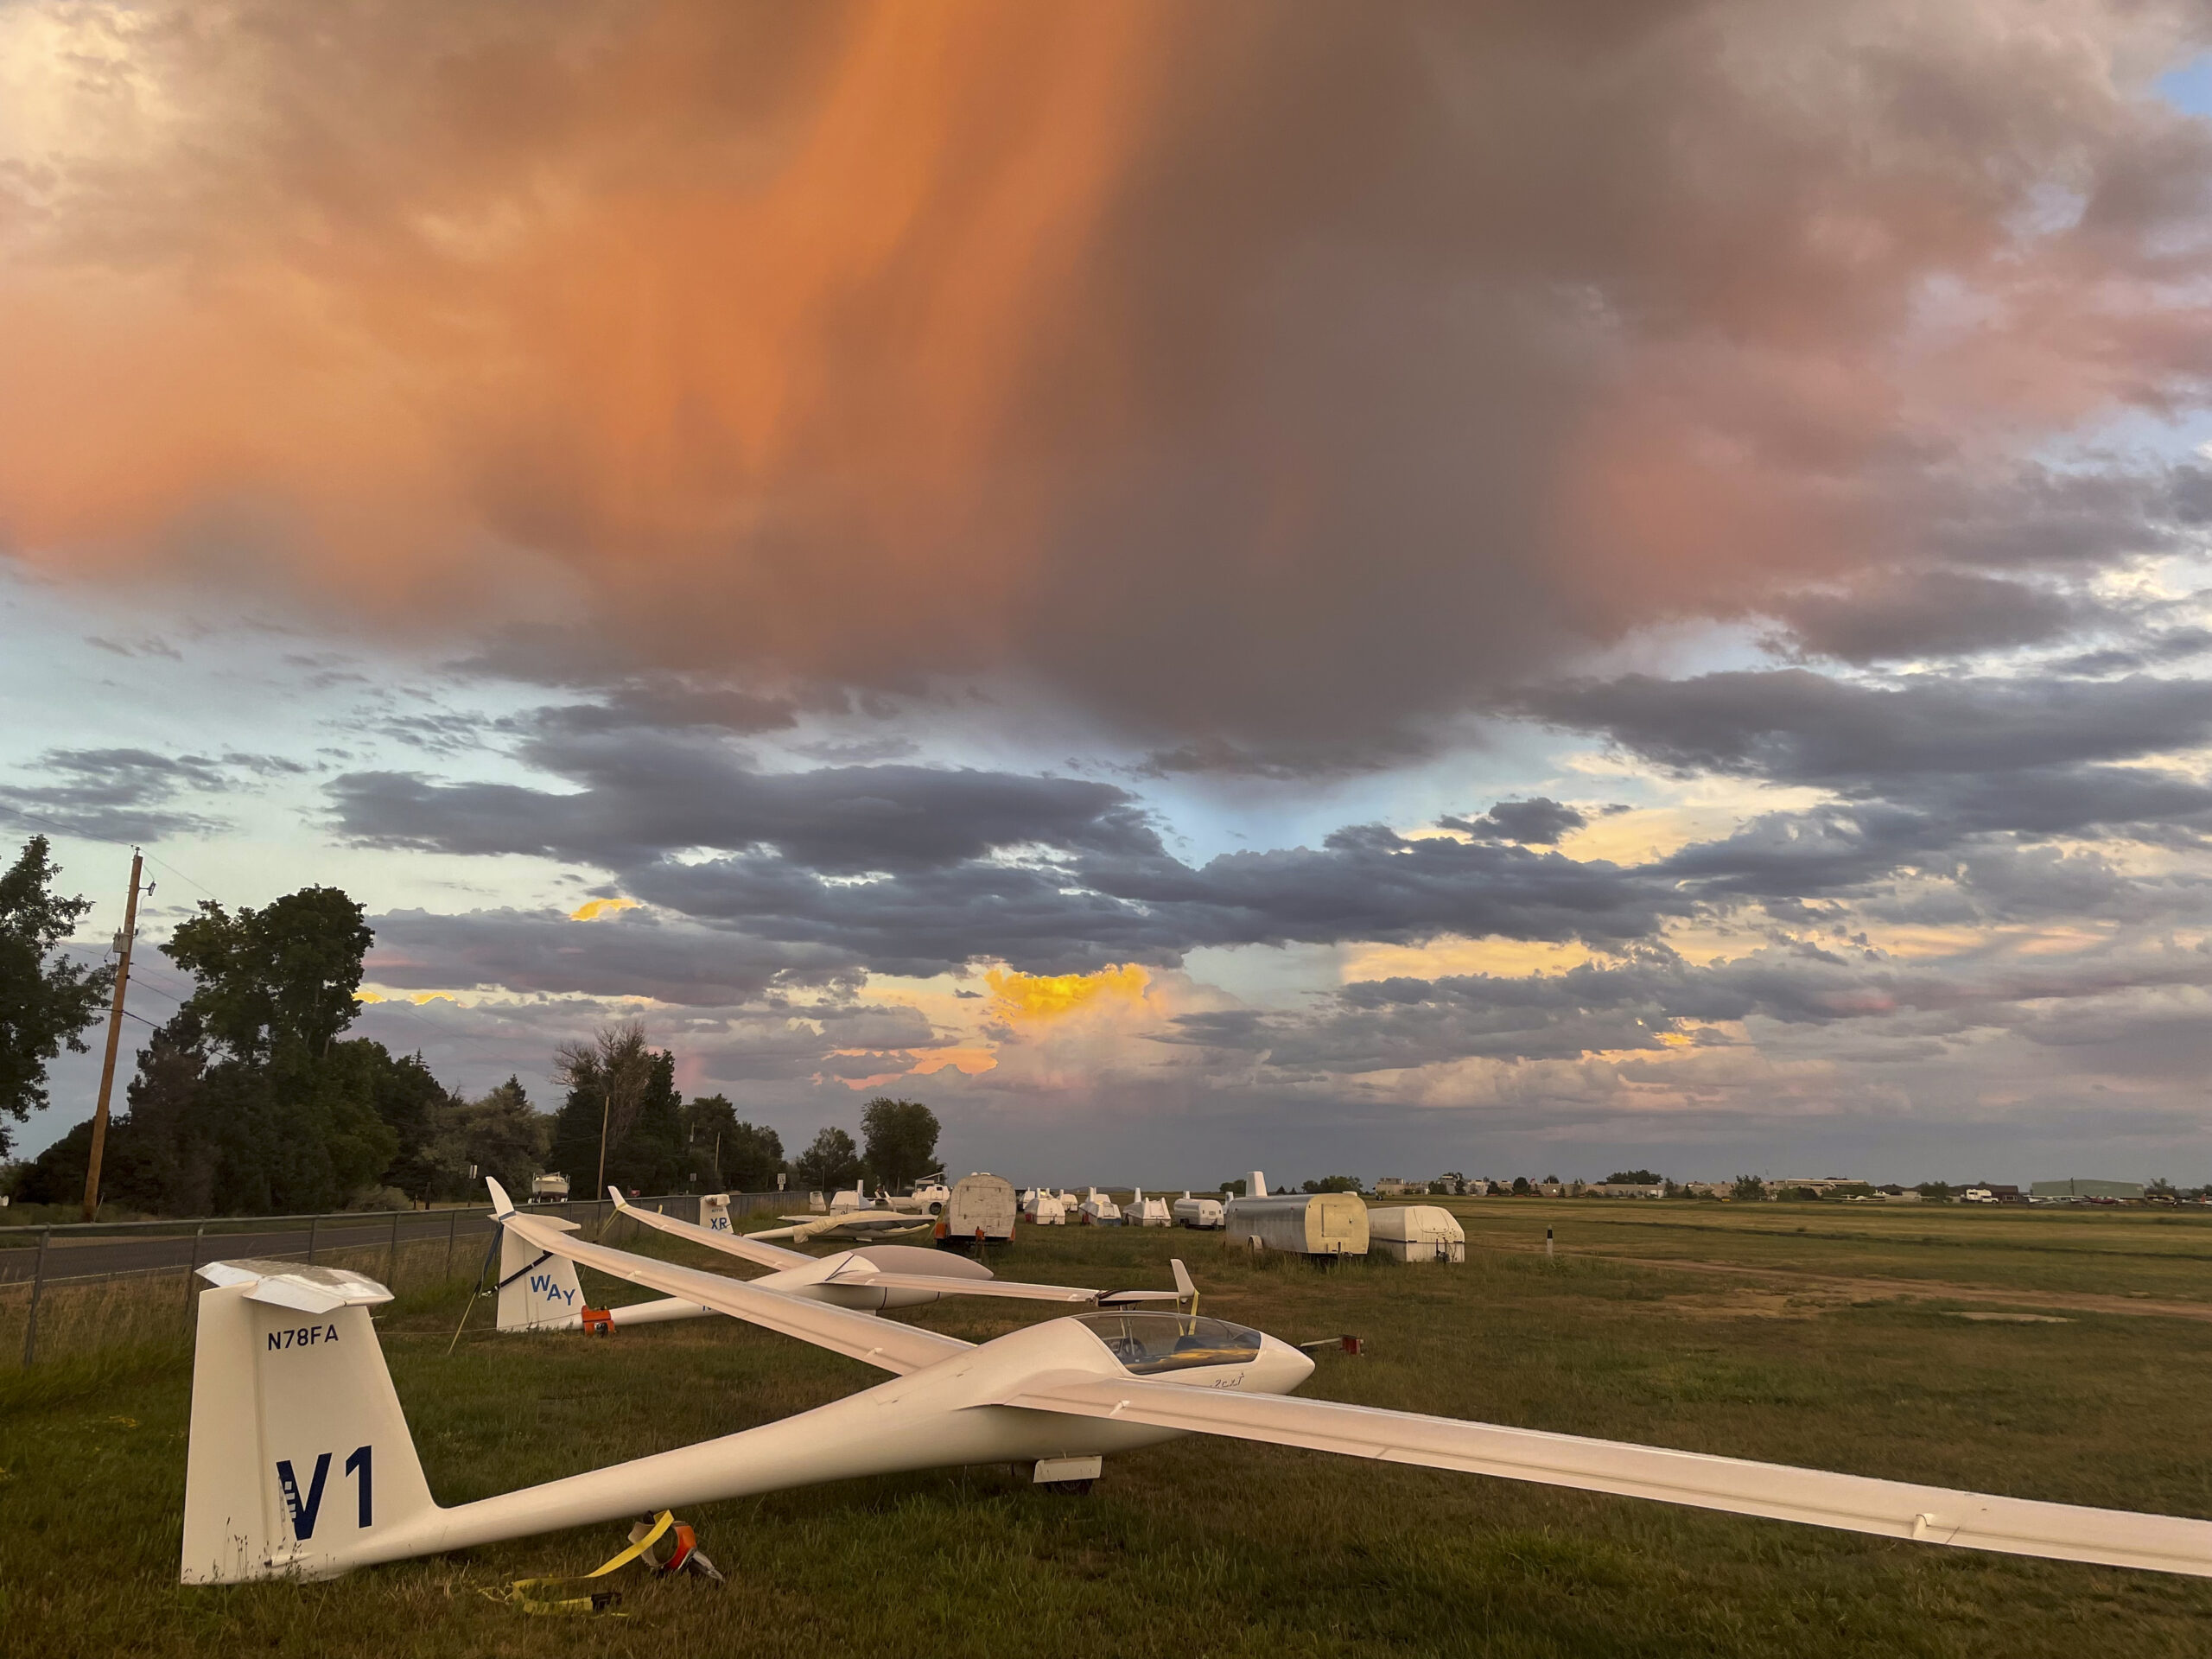
Launch
Around 9AM I could already see the first clouds building some 30 km or so to the southwest of Boulder. But near Gold Hill, my declared Start Point, the sky was completely blue. For a moment I contemplated changing my flight declaration, move the Start and Finish Point further south and motor to the first lift.
Upon some reflection I realized that an earlier start could put me in trouble on Leg 2, which would only begin to develop around noon. So I kept the flight declaration unchanged and waited. By 9:40AM there was still no cloud near Boulder but I decided it was time to launch anyway. I took the usual tow route towards Nugget Ridge where I encountered the first strong lift a few miles away from my Start Point at Lee Hill. I stowed the engine and quickly climbed to 12,000 ft where the lift topped out, hitting the inversion layer.
I decided to start anyway and headed to Gold Hill, crossing the start line at exactly 10AM, 30 minutes ahead of schedule. Unfortunately there was no further climb at Gold Hill and my altitude of 11,700 ft meant I was too low to head straight to the clouds in the southwest (towards Idaho Springs).
I had to follow the convergence along the eastern edge of the foothills. West of Golden my fourth attempt to climb higher was successful: at 10:28 AM I reached 16,700 ft and was on my way.
Leg 1
Now at altitude, I got a good luck at the beginning of Leg 1 ahead. It was only 10:31 AM and there was already over-development ahead with several clouds shedding virga.
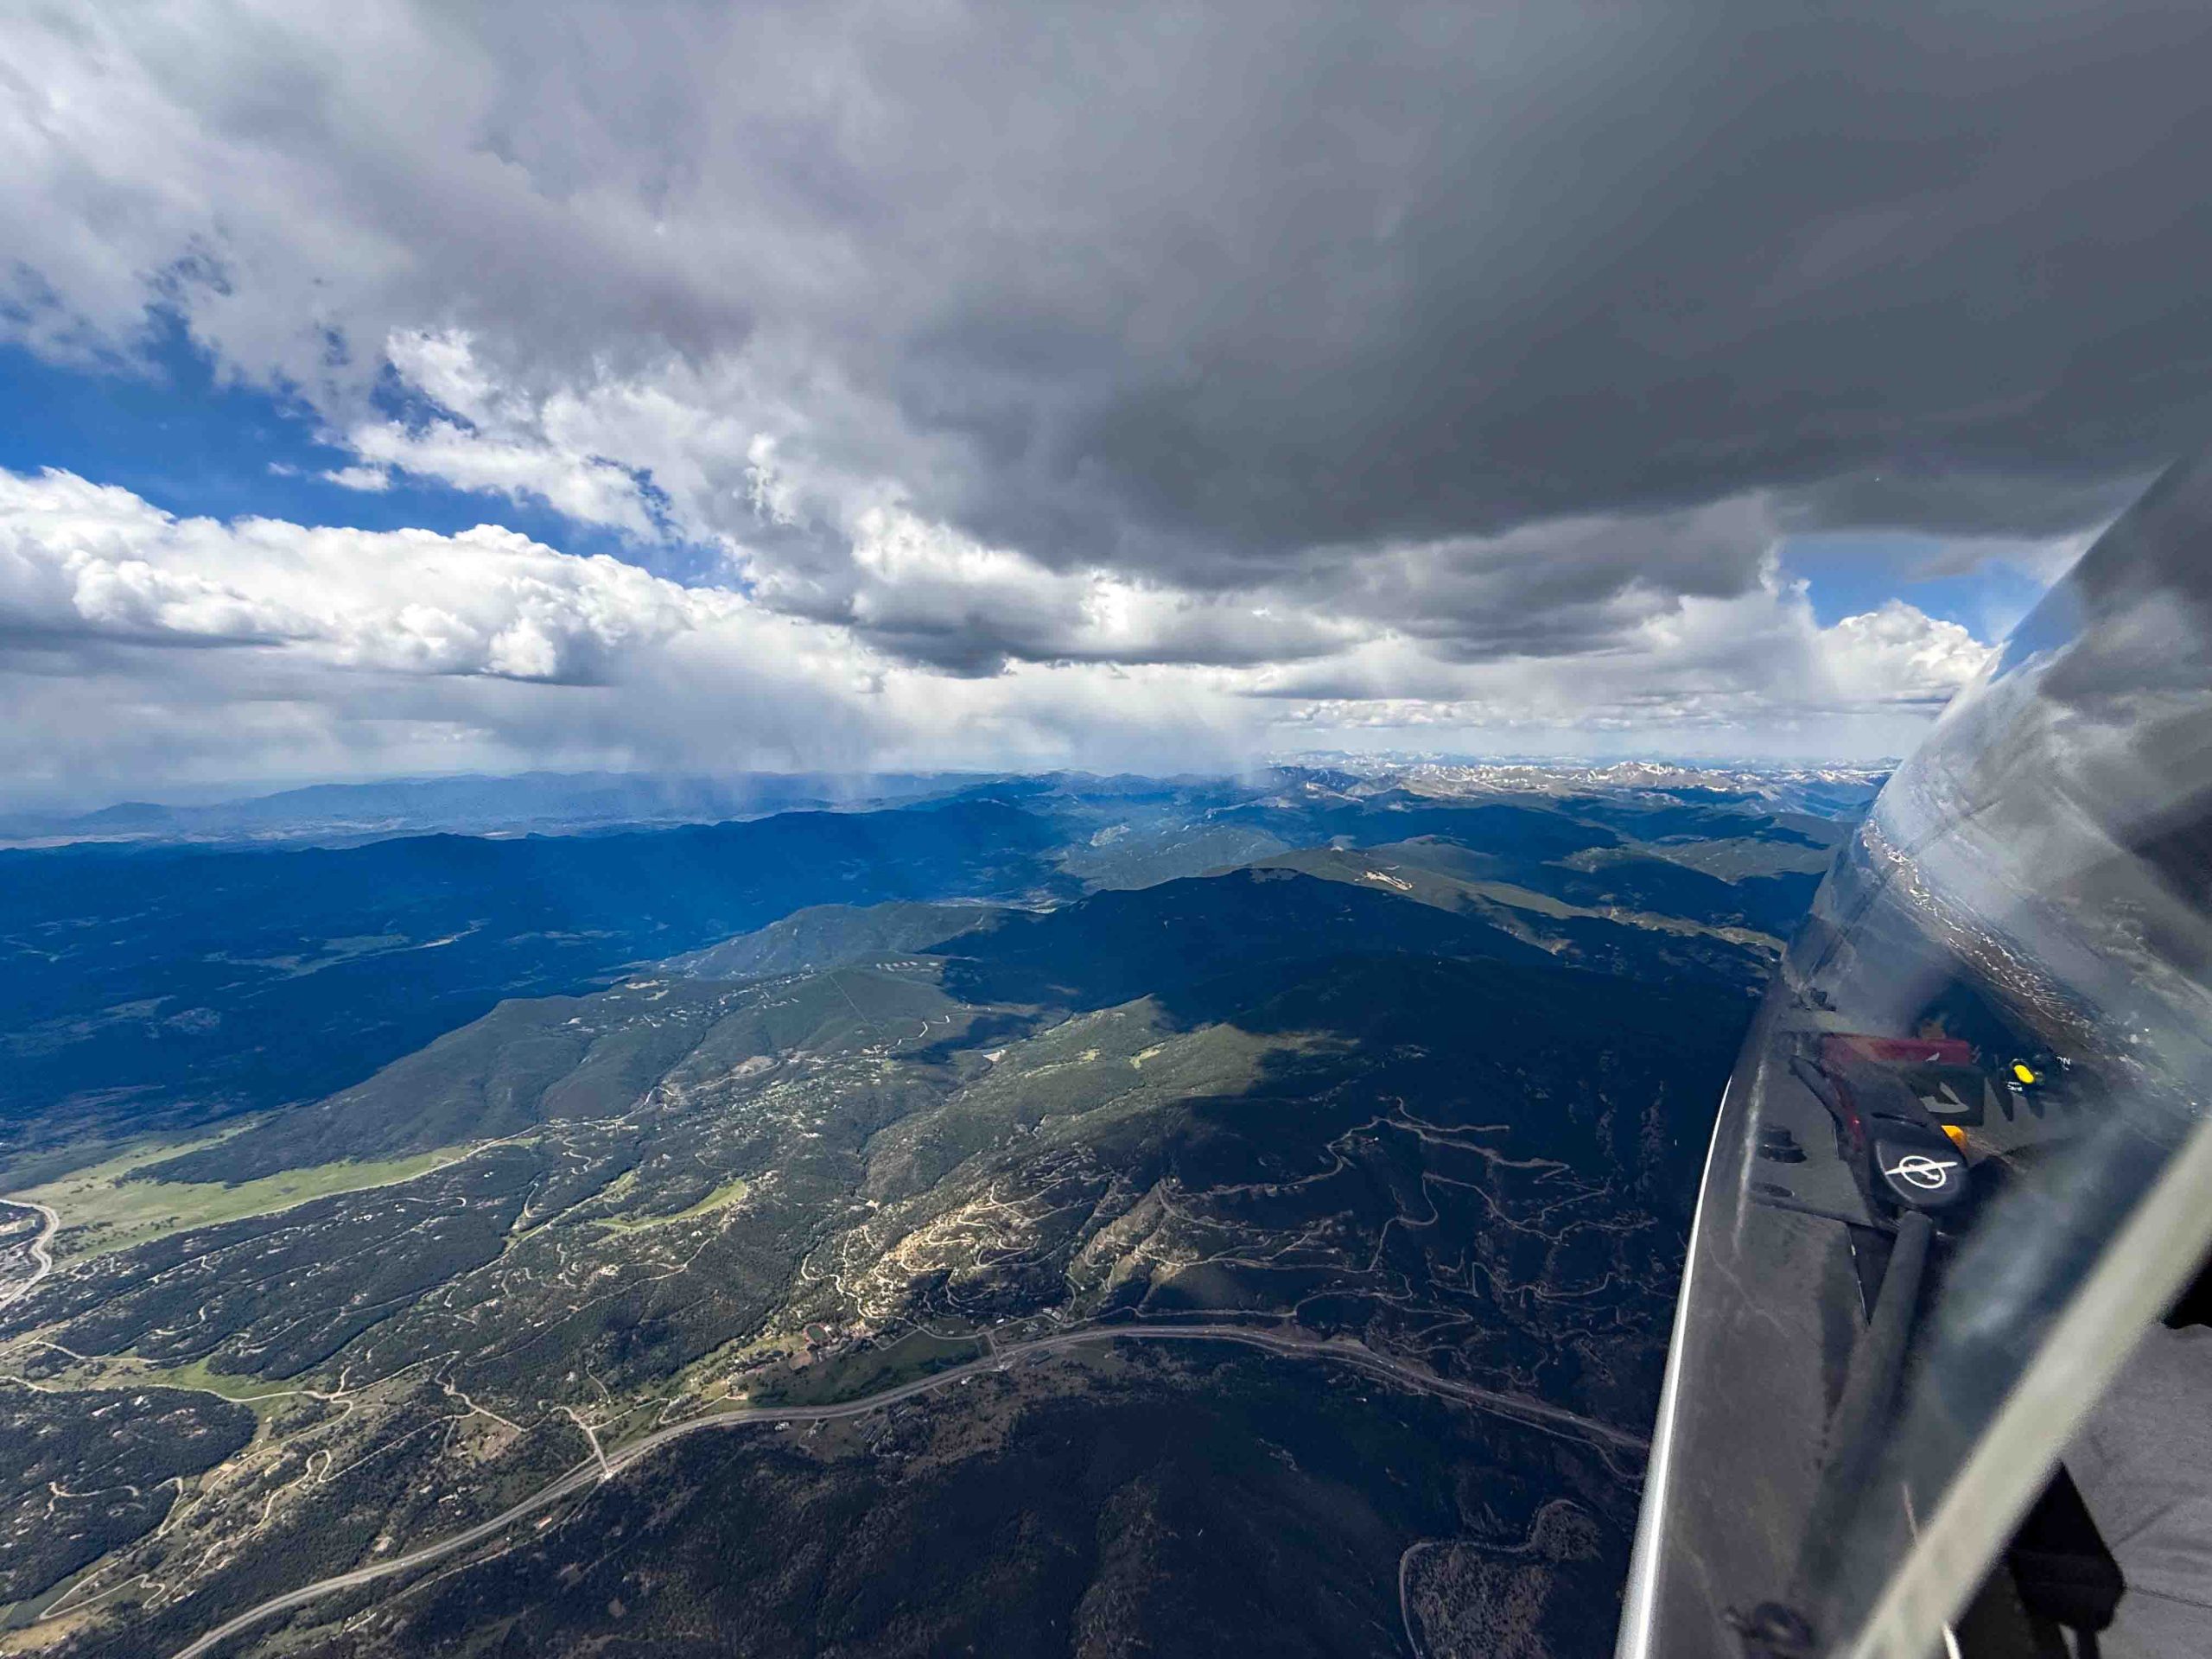
OD so early in the day usually spells trouble for later. But I recalled that virga had been forecast for this particular area and so I should not be surprised to see it. I convinced myself that it really meant nothing for the rest of the flight.
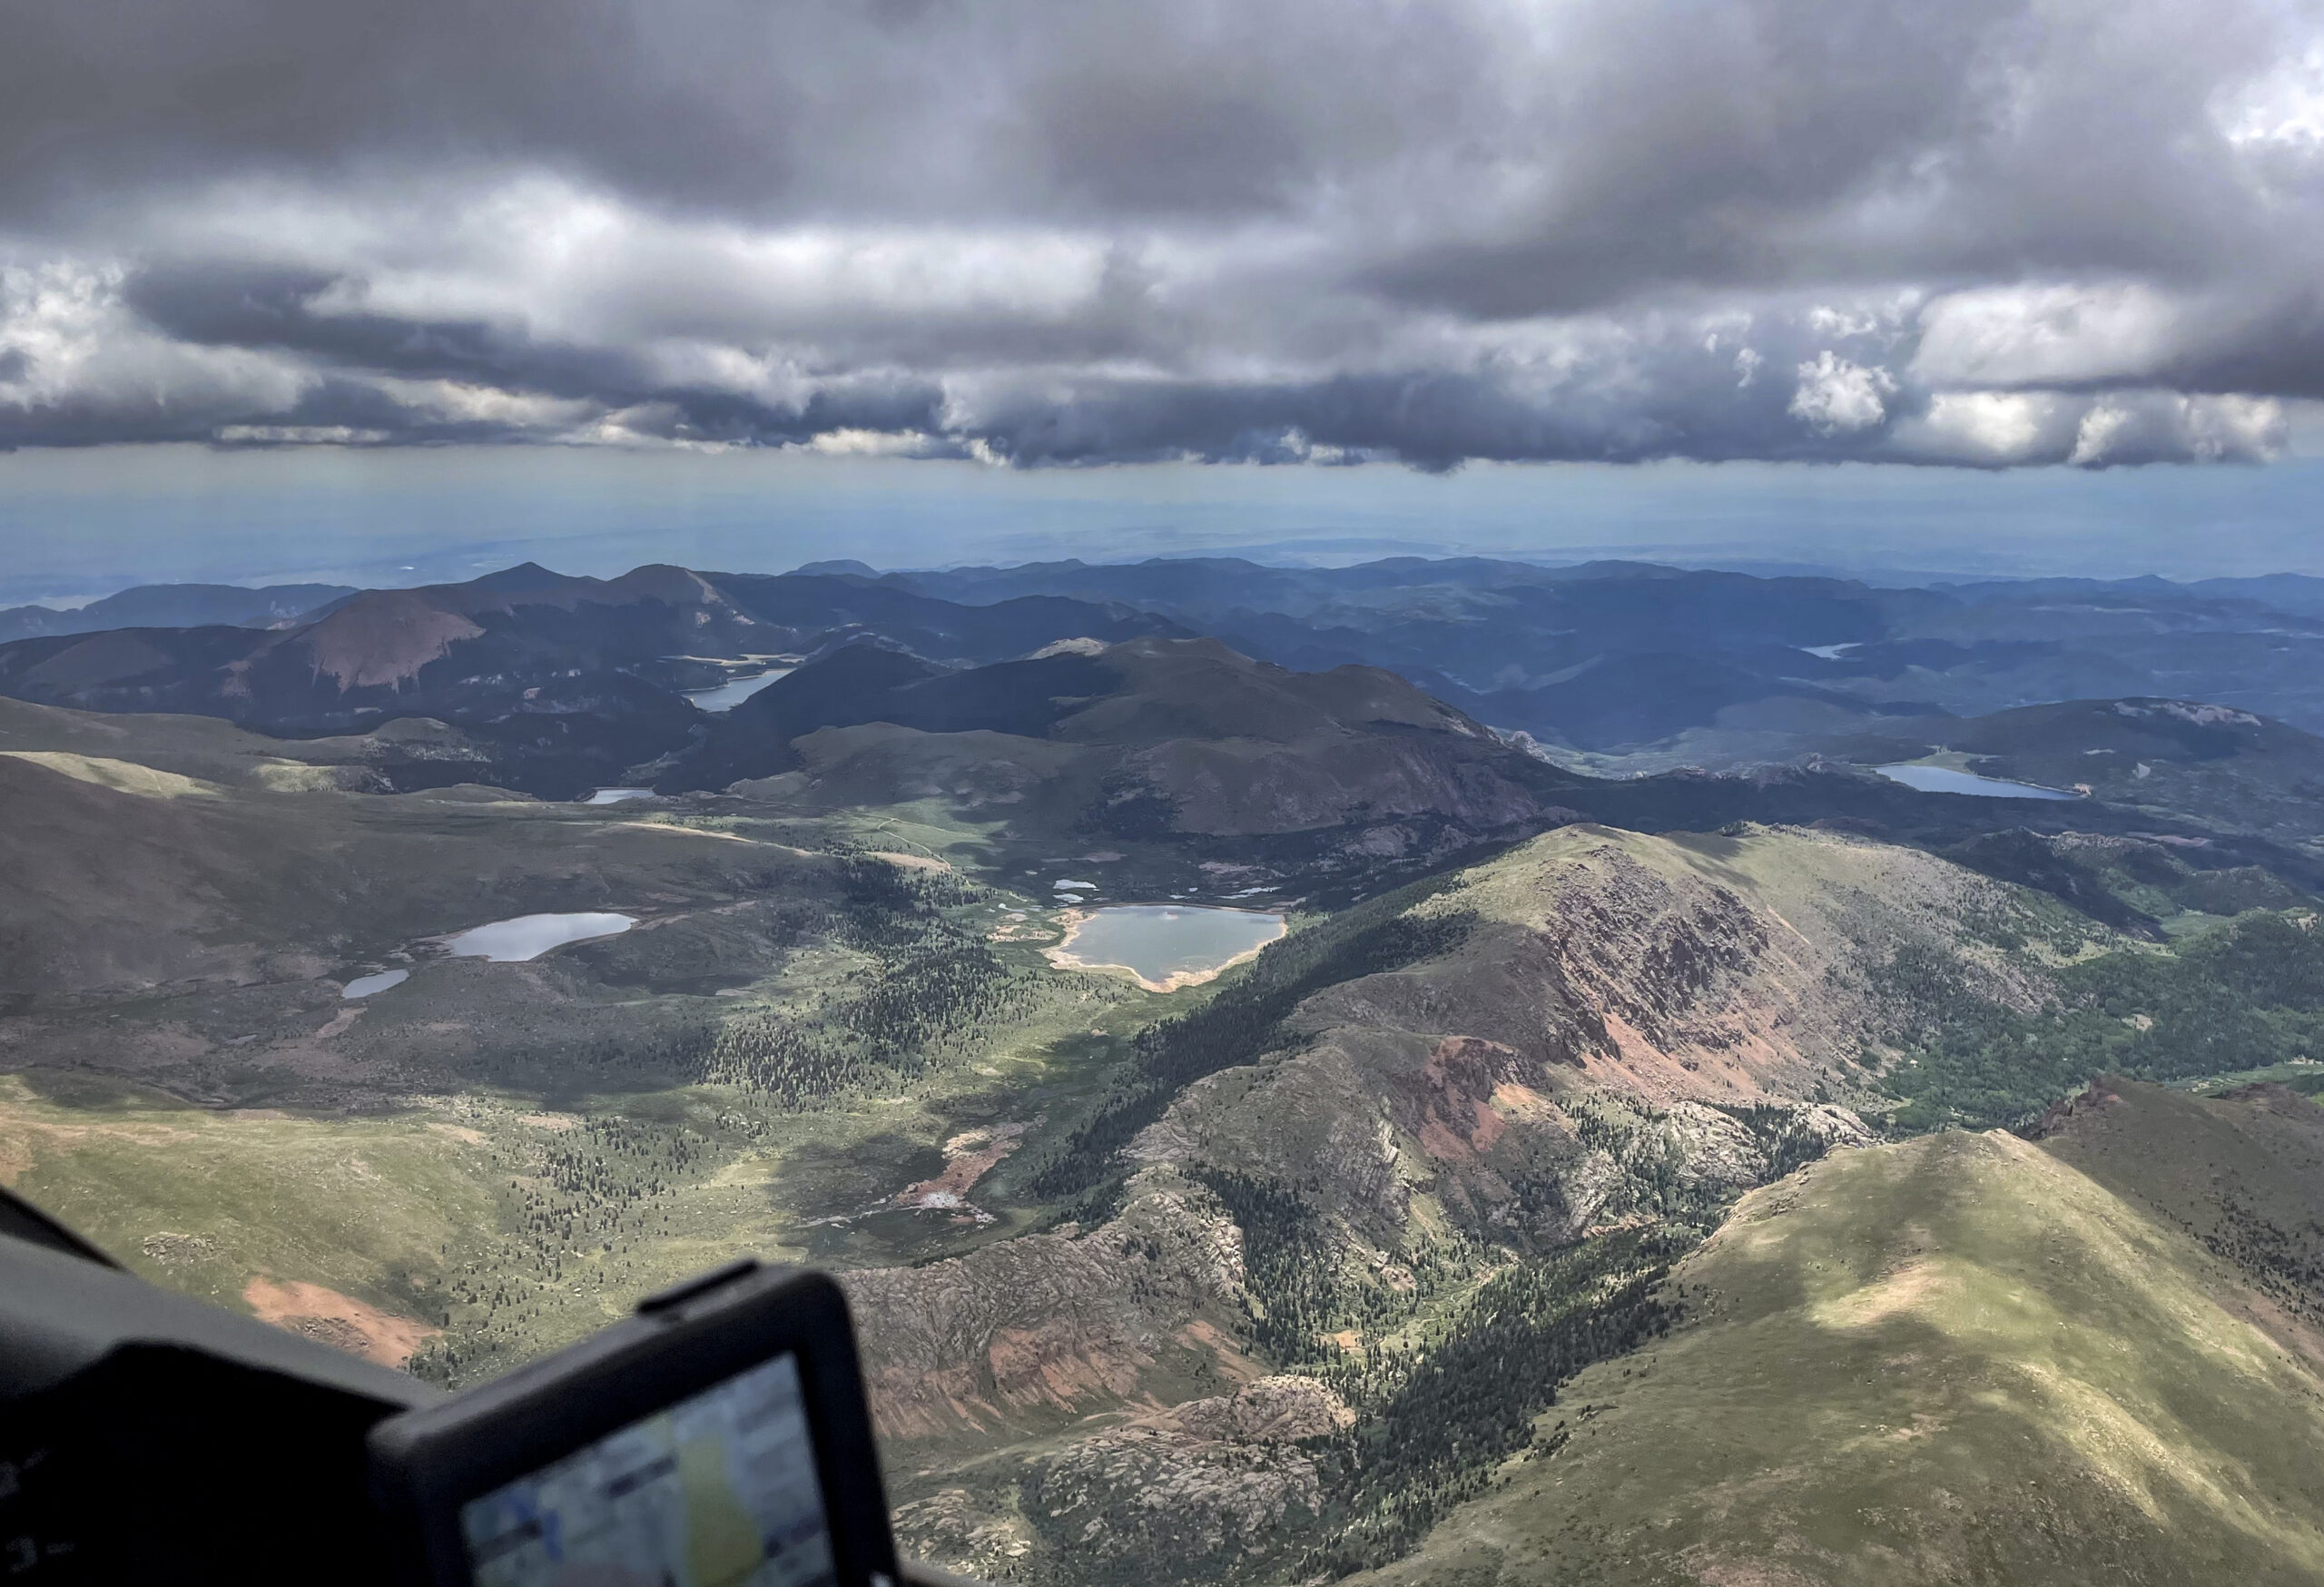
As expected, there was good lift underneath the dark clouds that didn’t shed virga yet. I managed to stay high and quickly made progress along the northern rim of South Park.
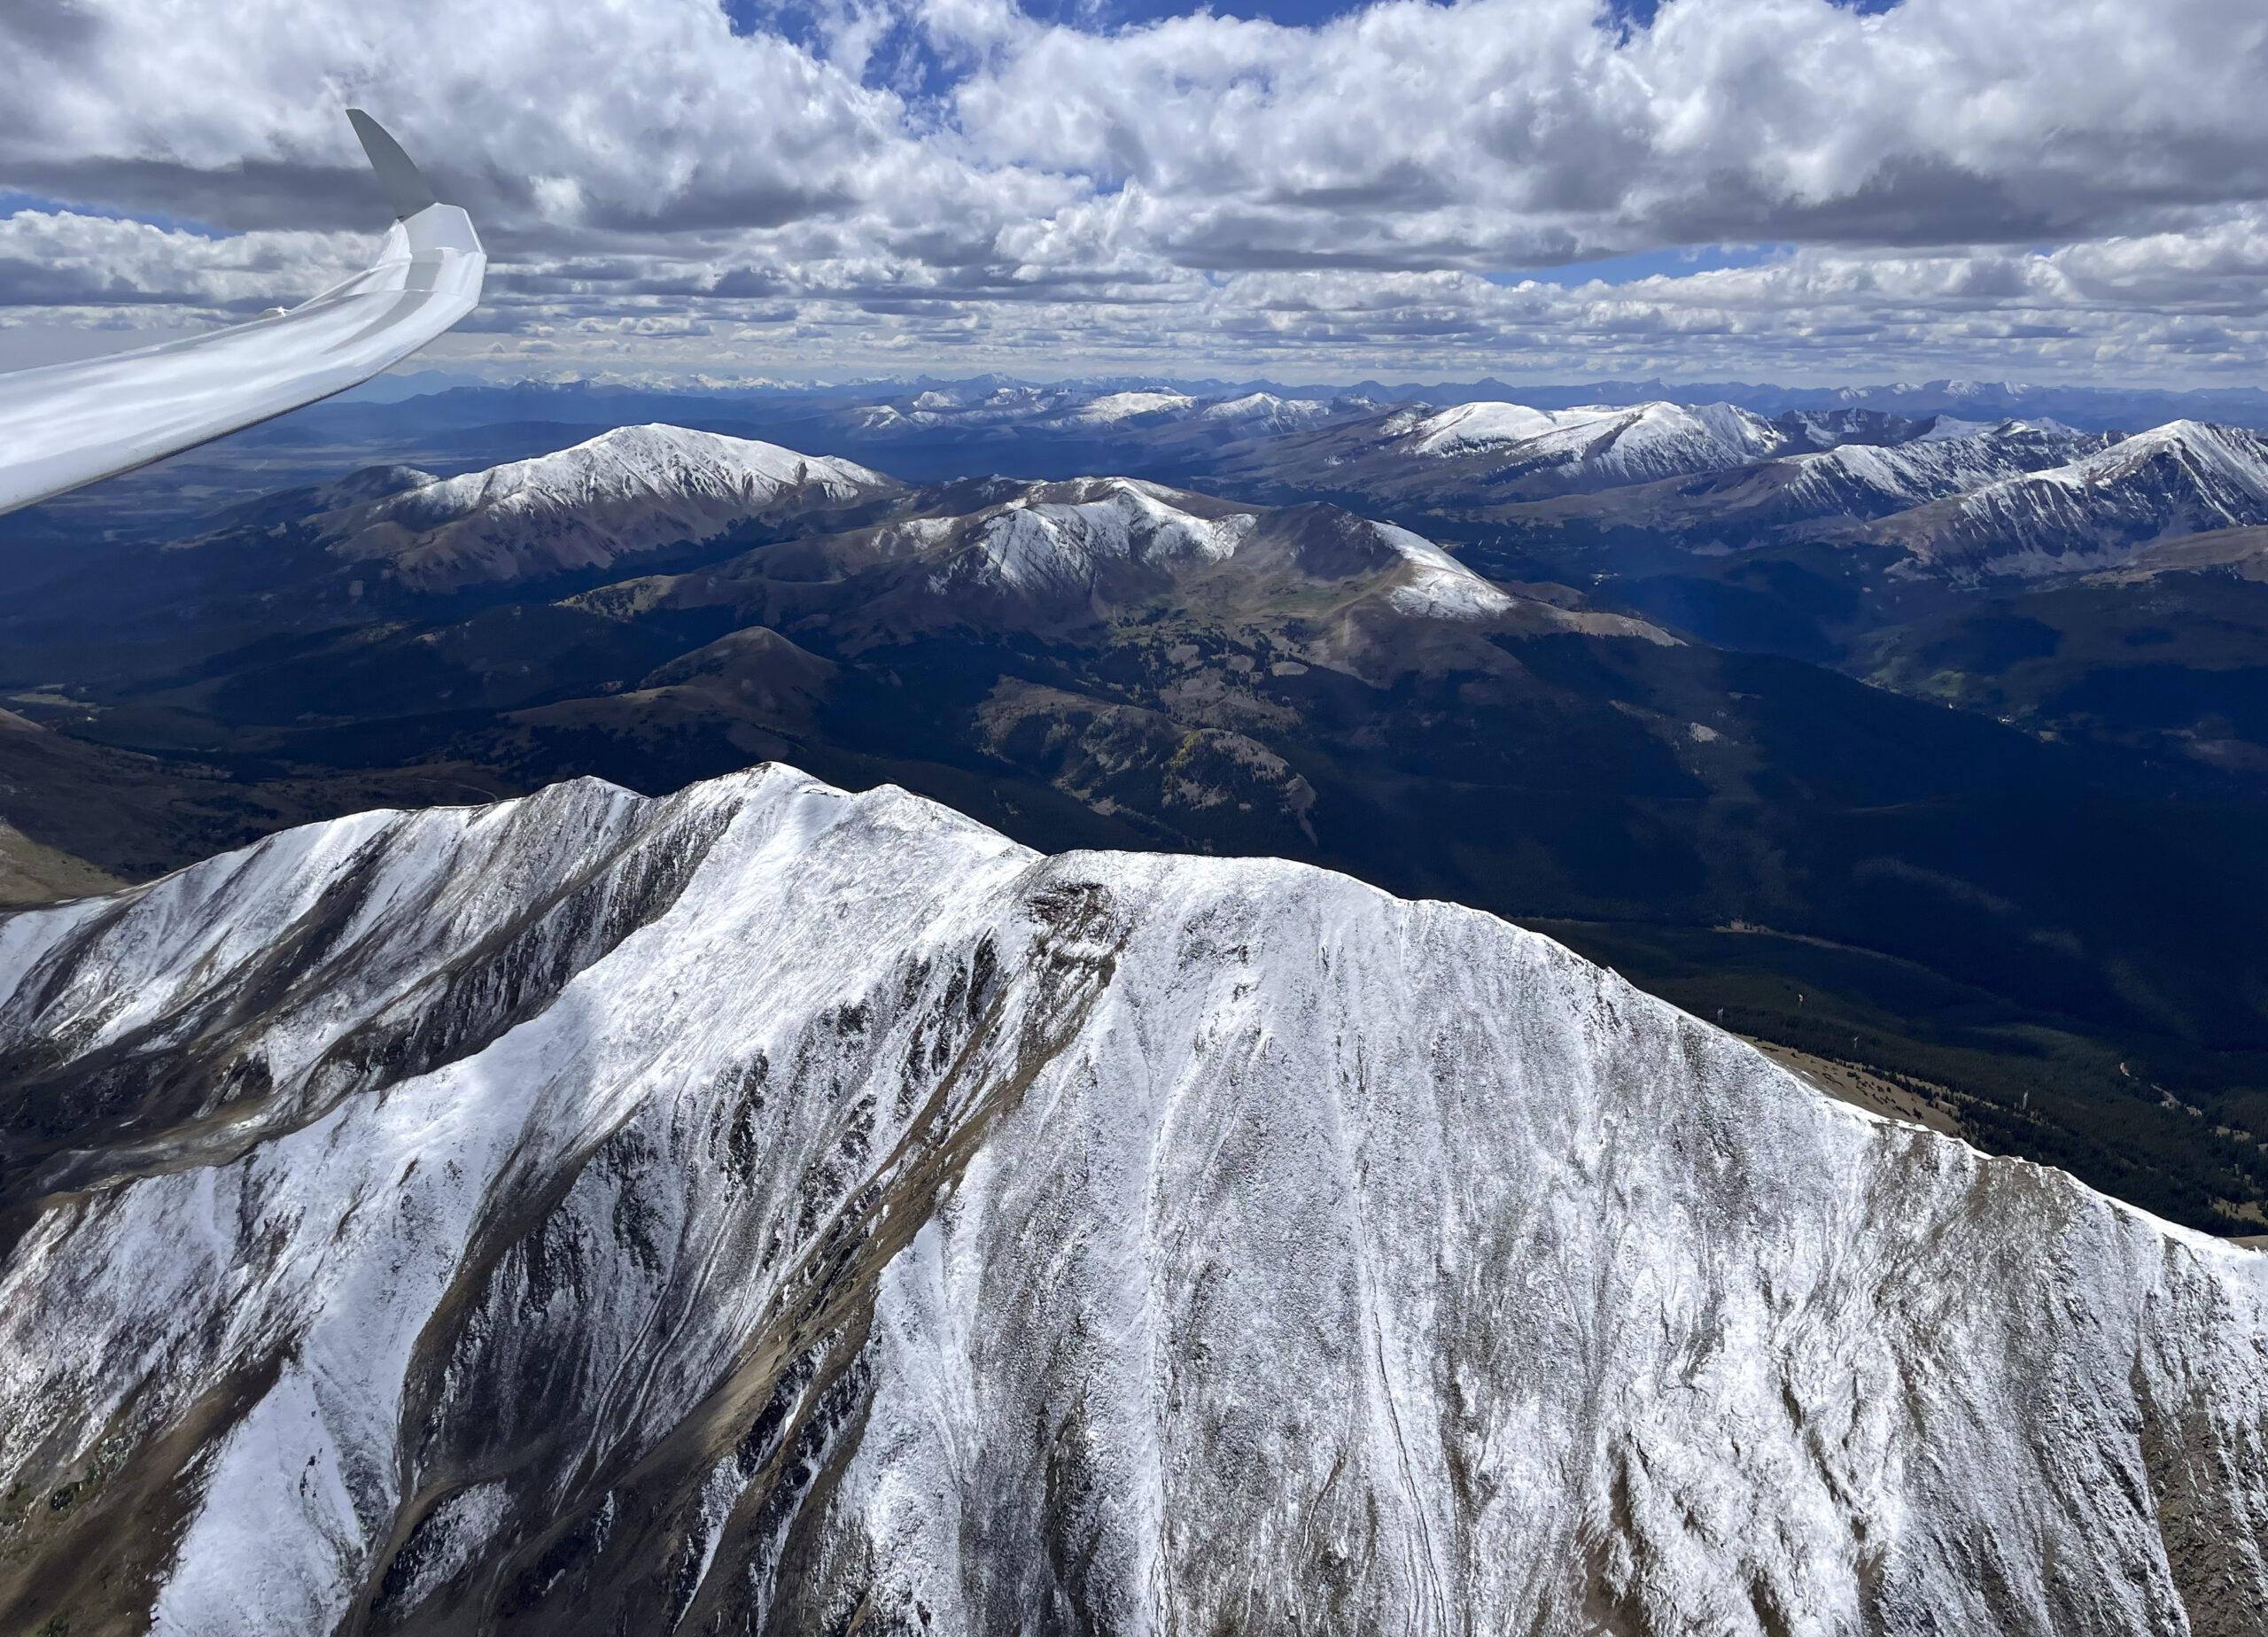
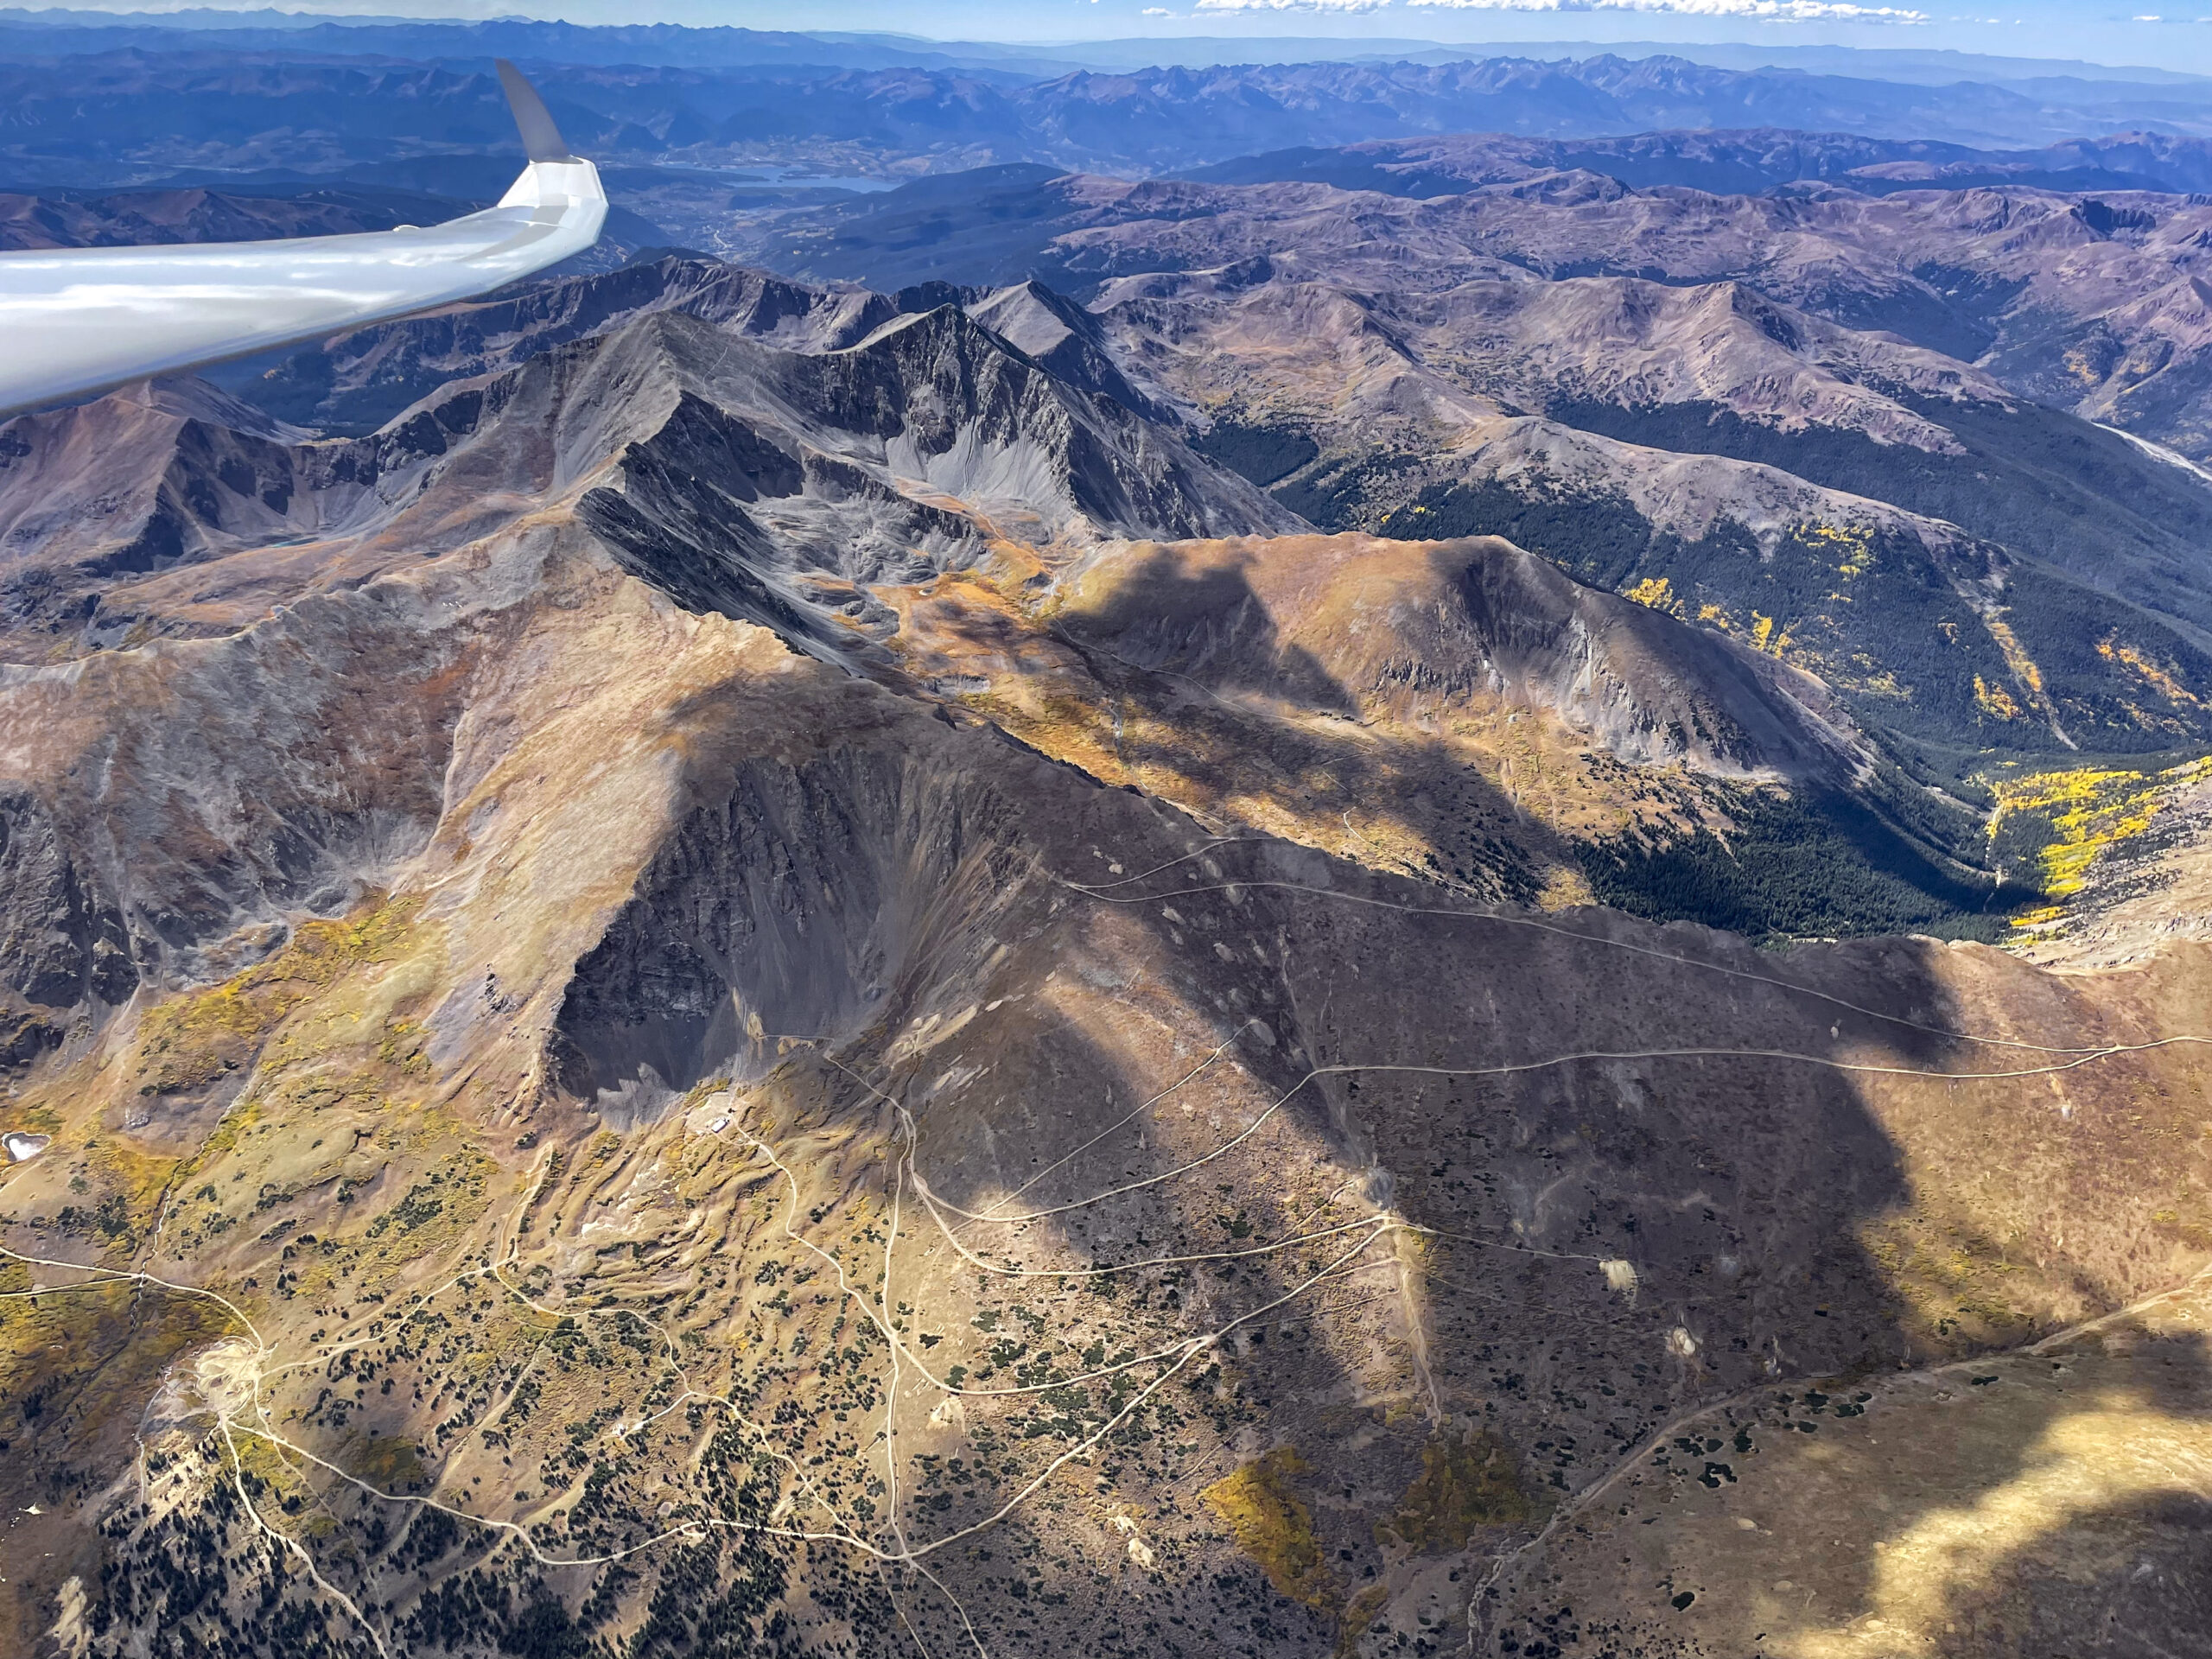
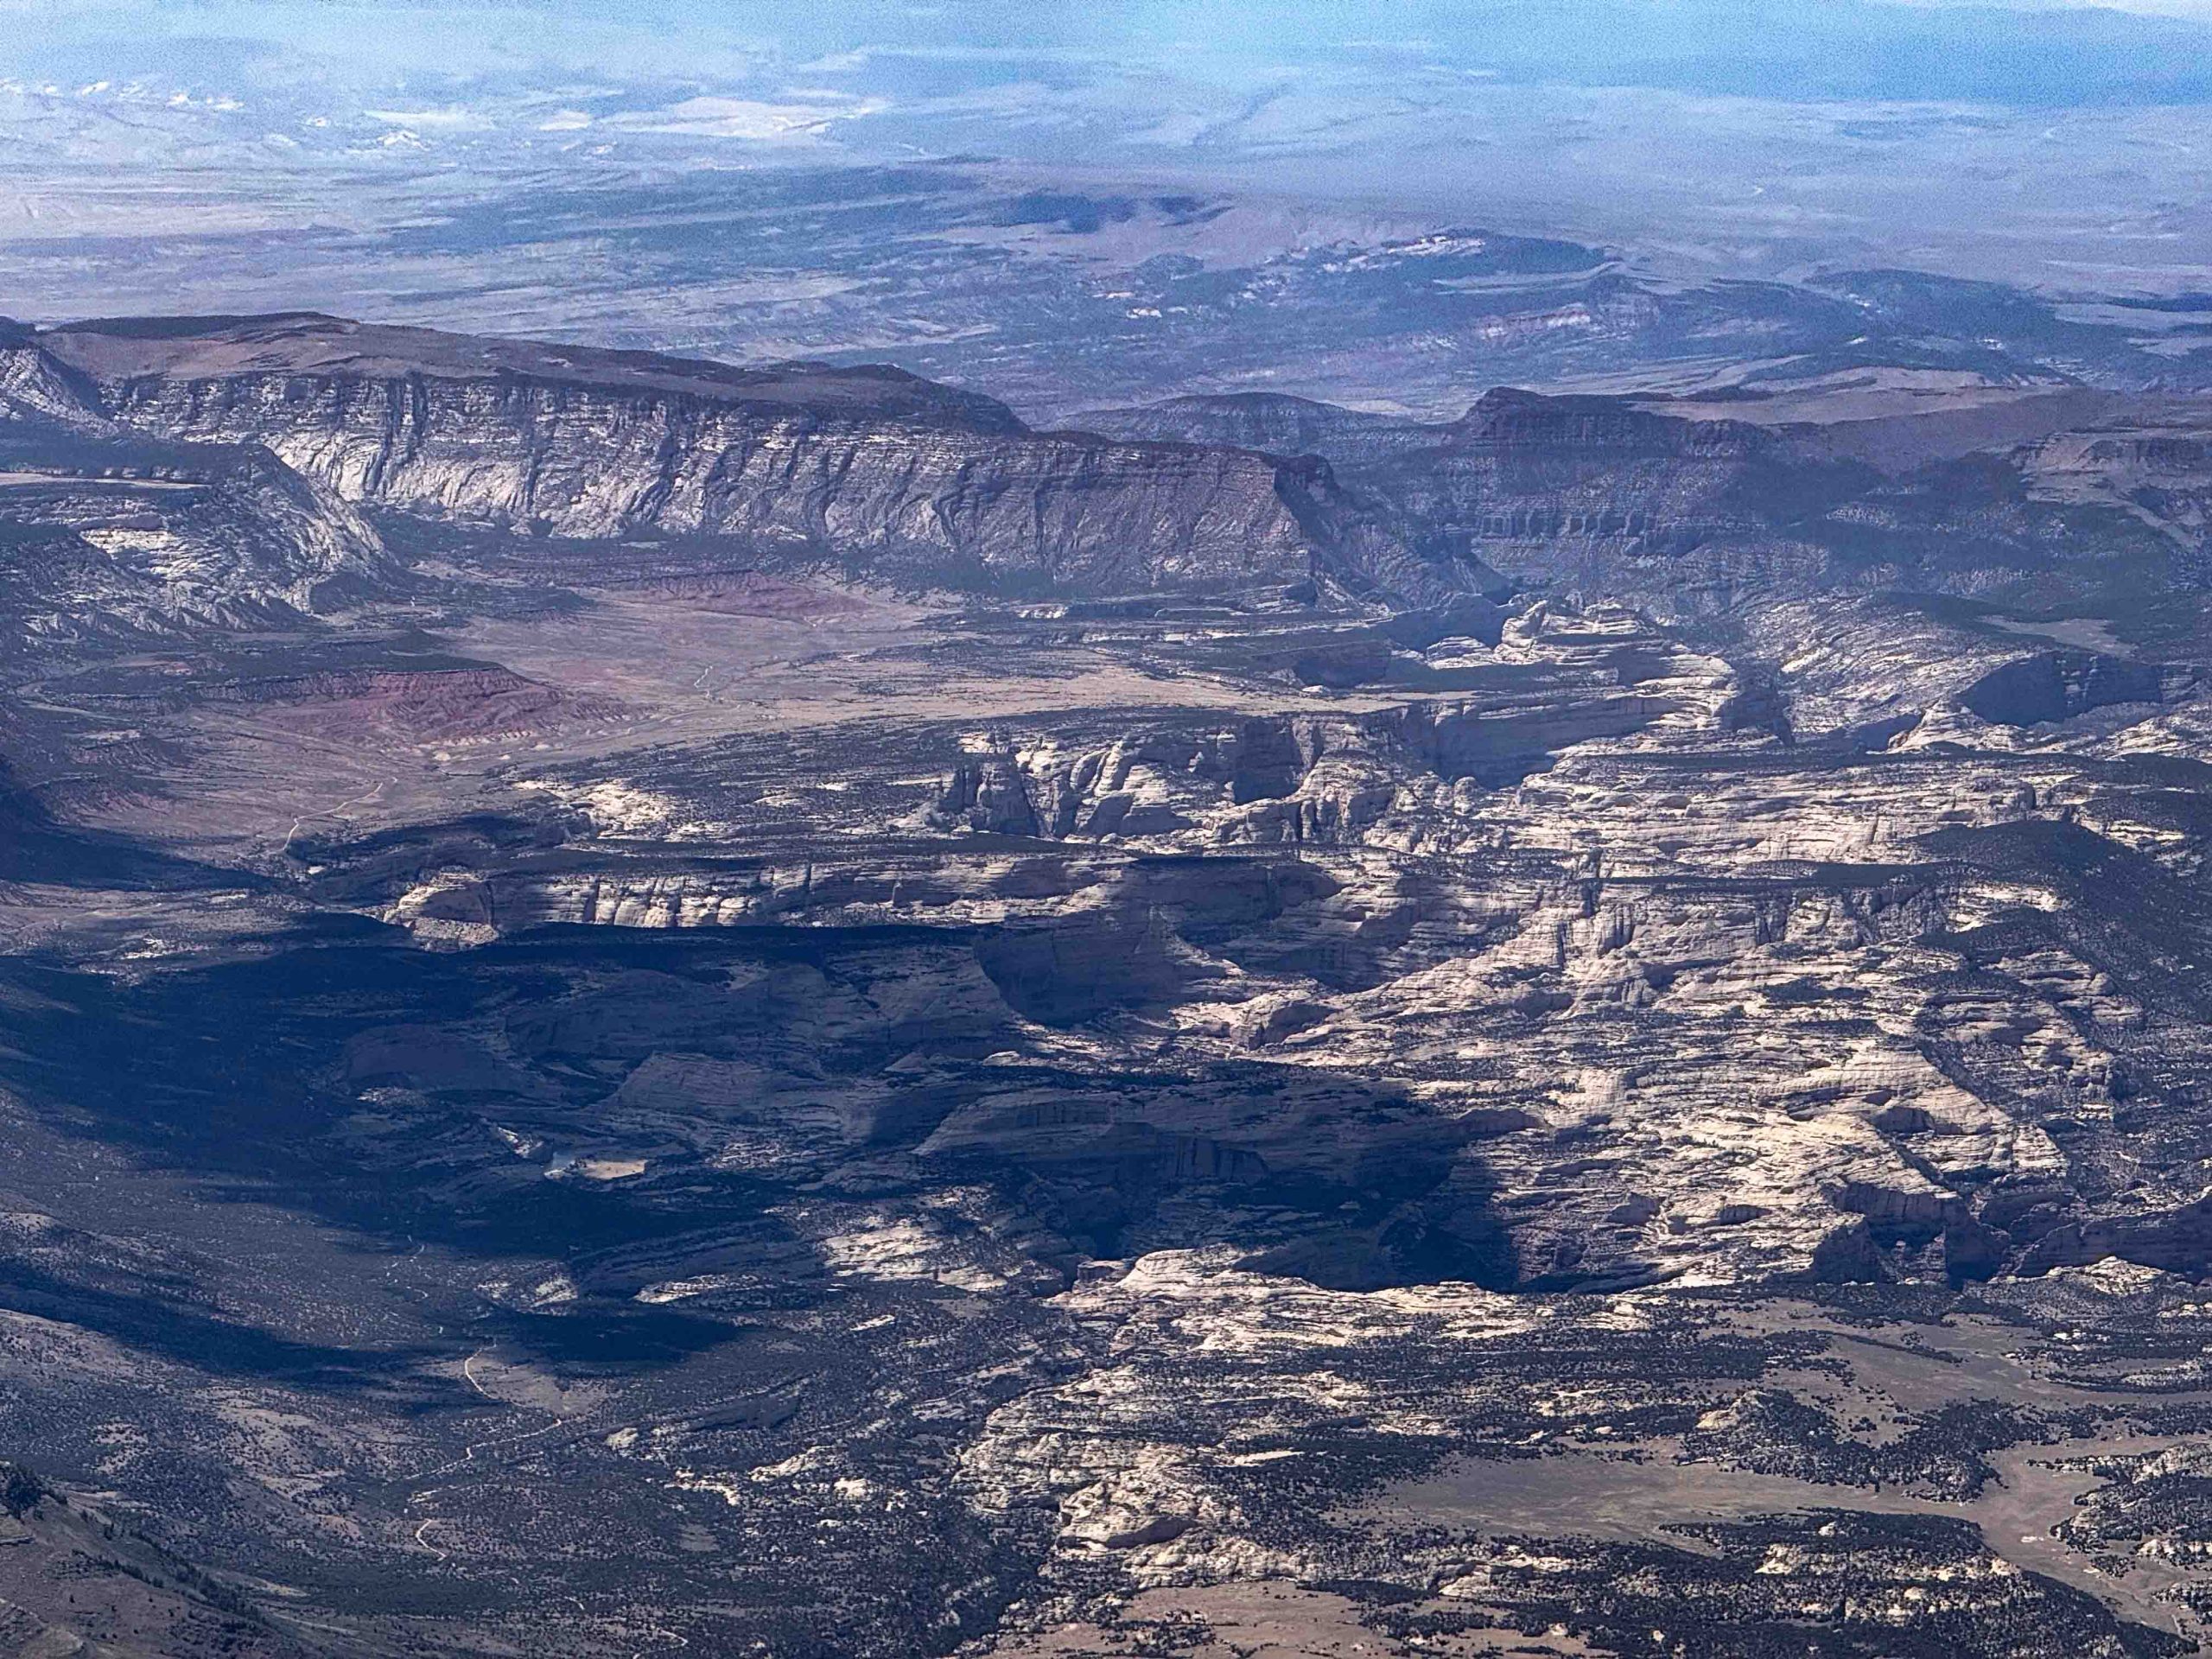
Then things started to look really challenging. Cycle times were extremely short and some of the clouds started to implode as I approached them. I remember a radio call at that time where I told one of my Boulder friends that I wasn’t sure yet whether I would be able to continue on task.
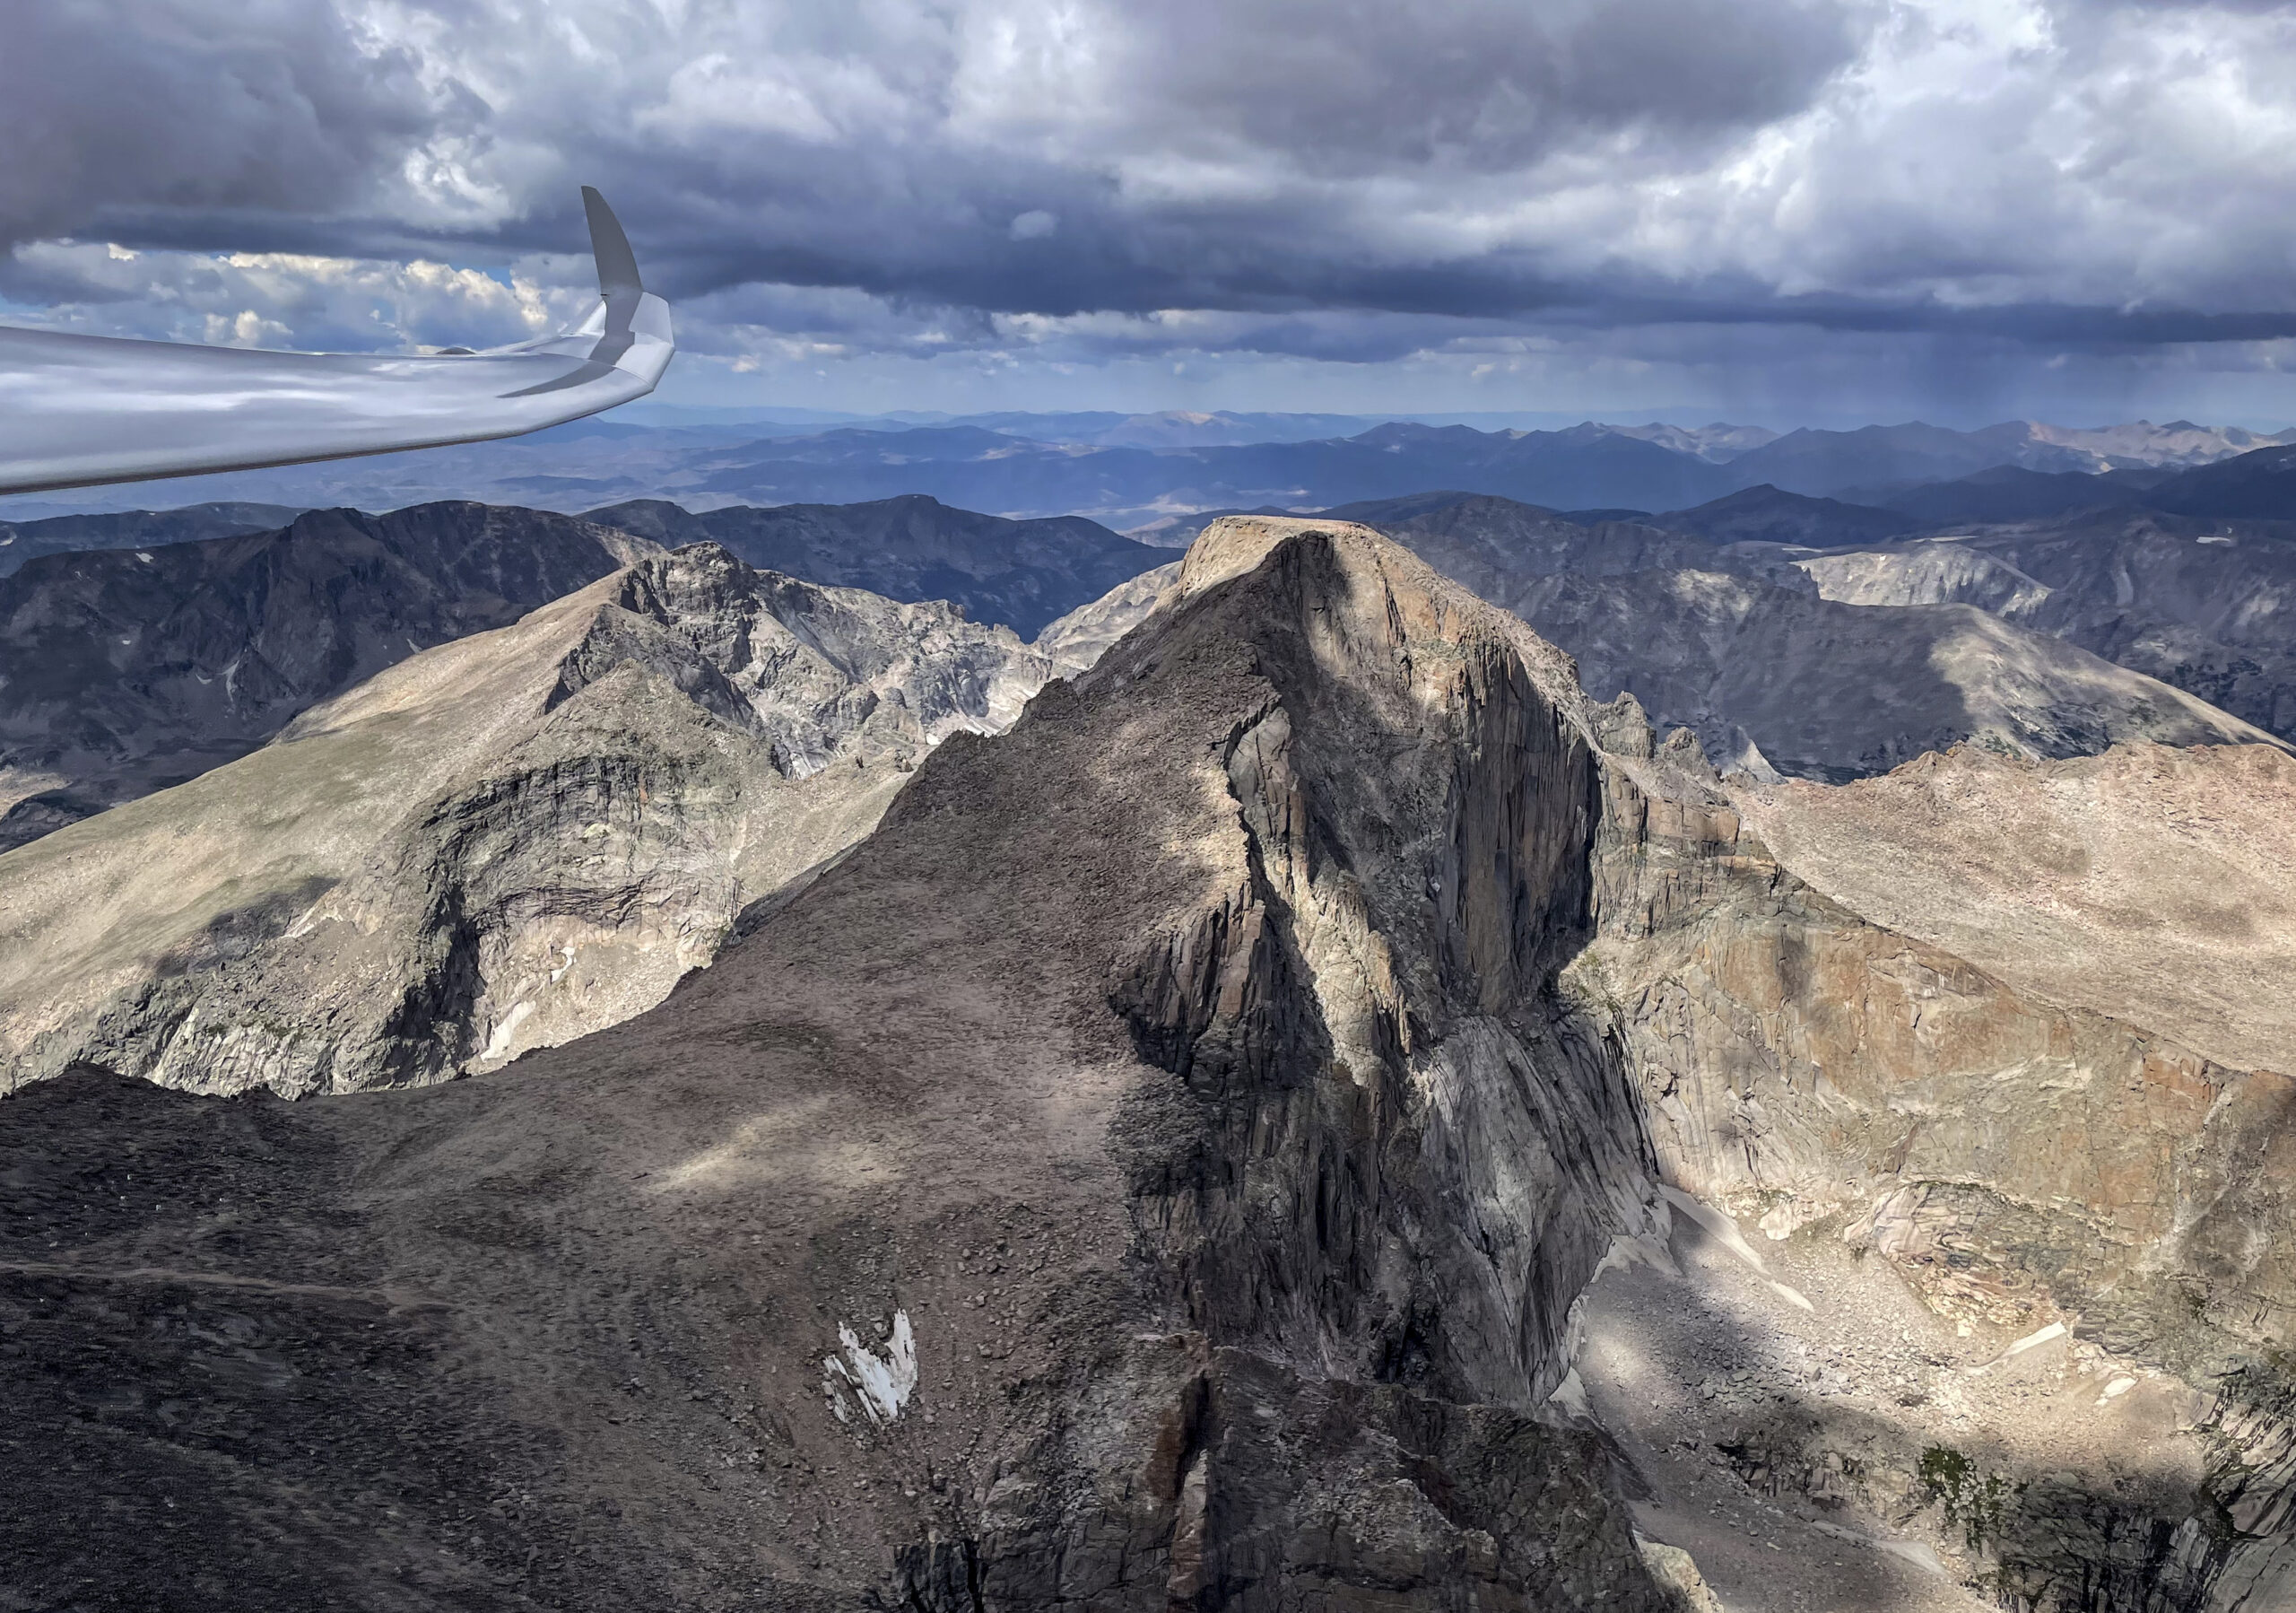
Shortly after this picture was taken I hit sink when crossing the Mosquito Range and the Arkansas Valley. I wish I had another picture from that stage but I was too busy flying. I had dropped to 13,300 ft and a big virga cell was sitting directly over Mount Harvard (14,423 ft). I urgently needed a climb to get over Mount Yale (14,200 ft) and the Sawatch Range.
The situation wasn’t unsafe because I could have easily glided to the south along the Arkansas Valley but my record attempt would probably have been over. Fortunately, the virga outflow triggered a rough thermal in the lee of the Sawatch Range, propelling me back to 16,000 ft and granting me safe passage over the mountains into Taylor Park.
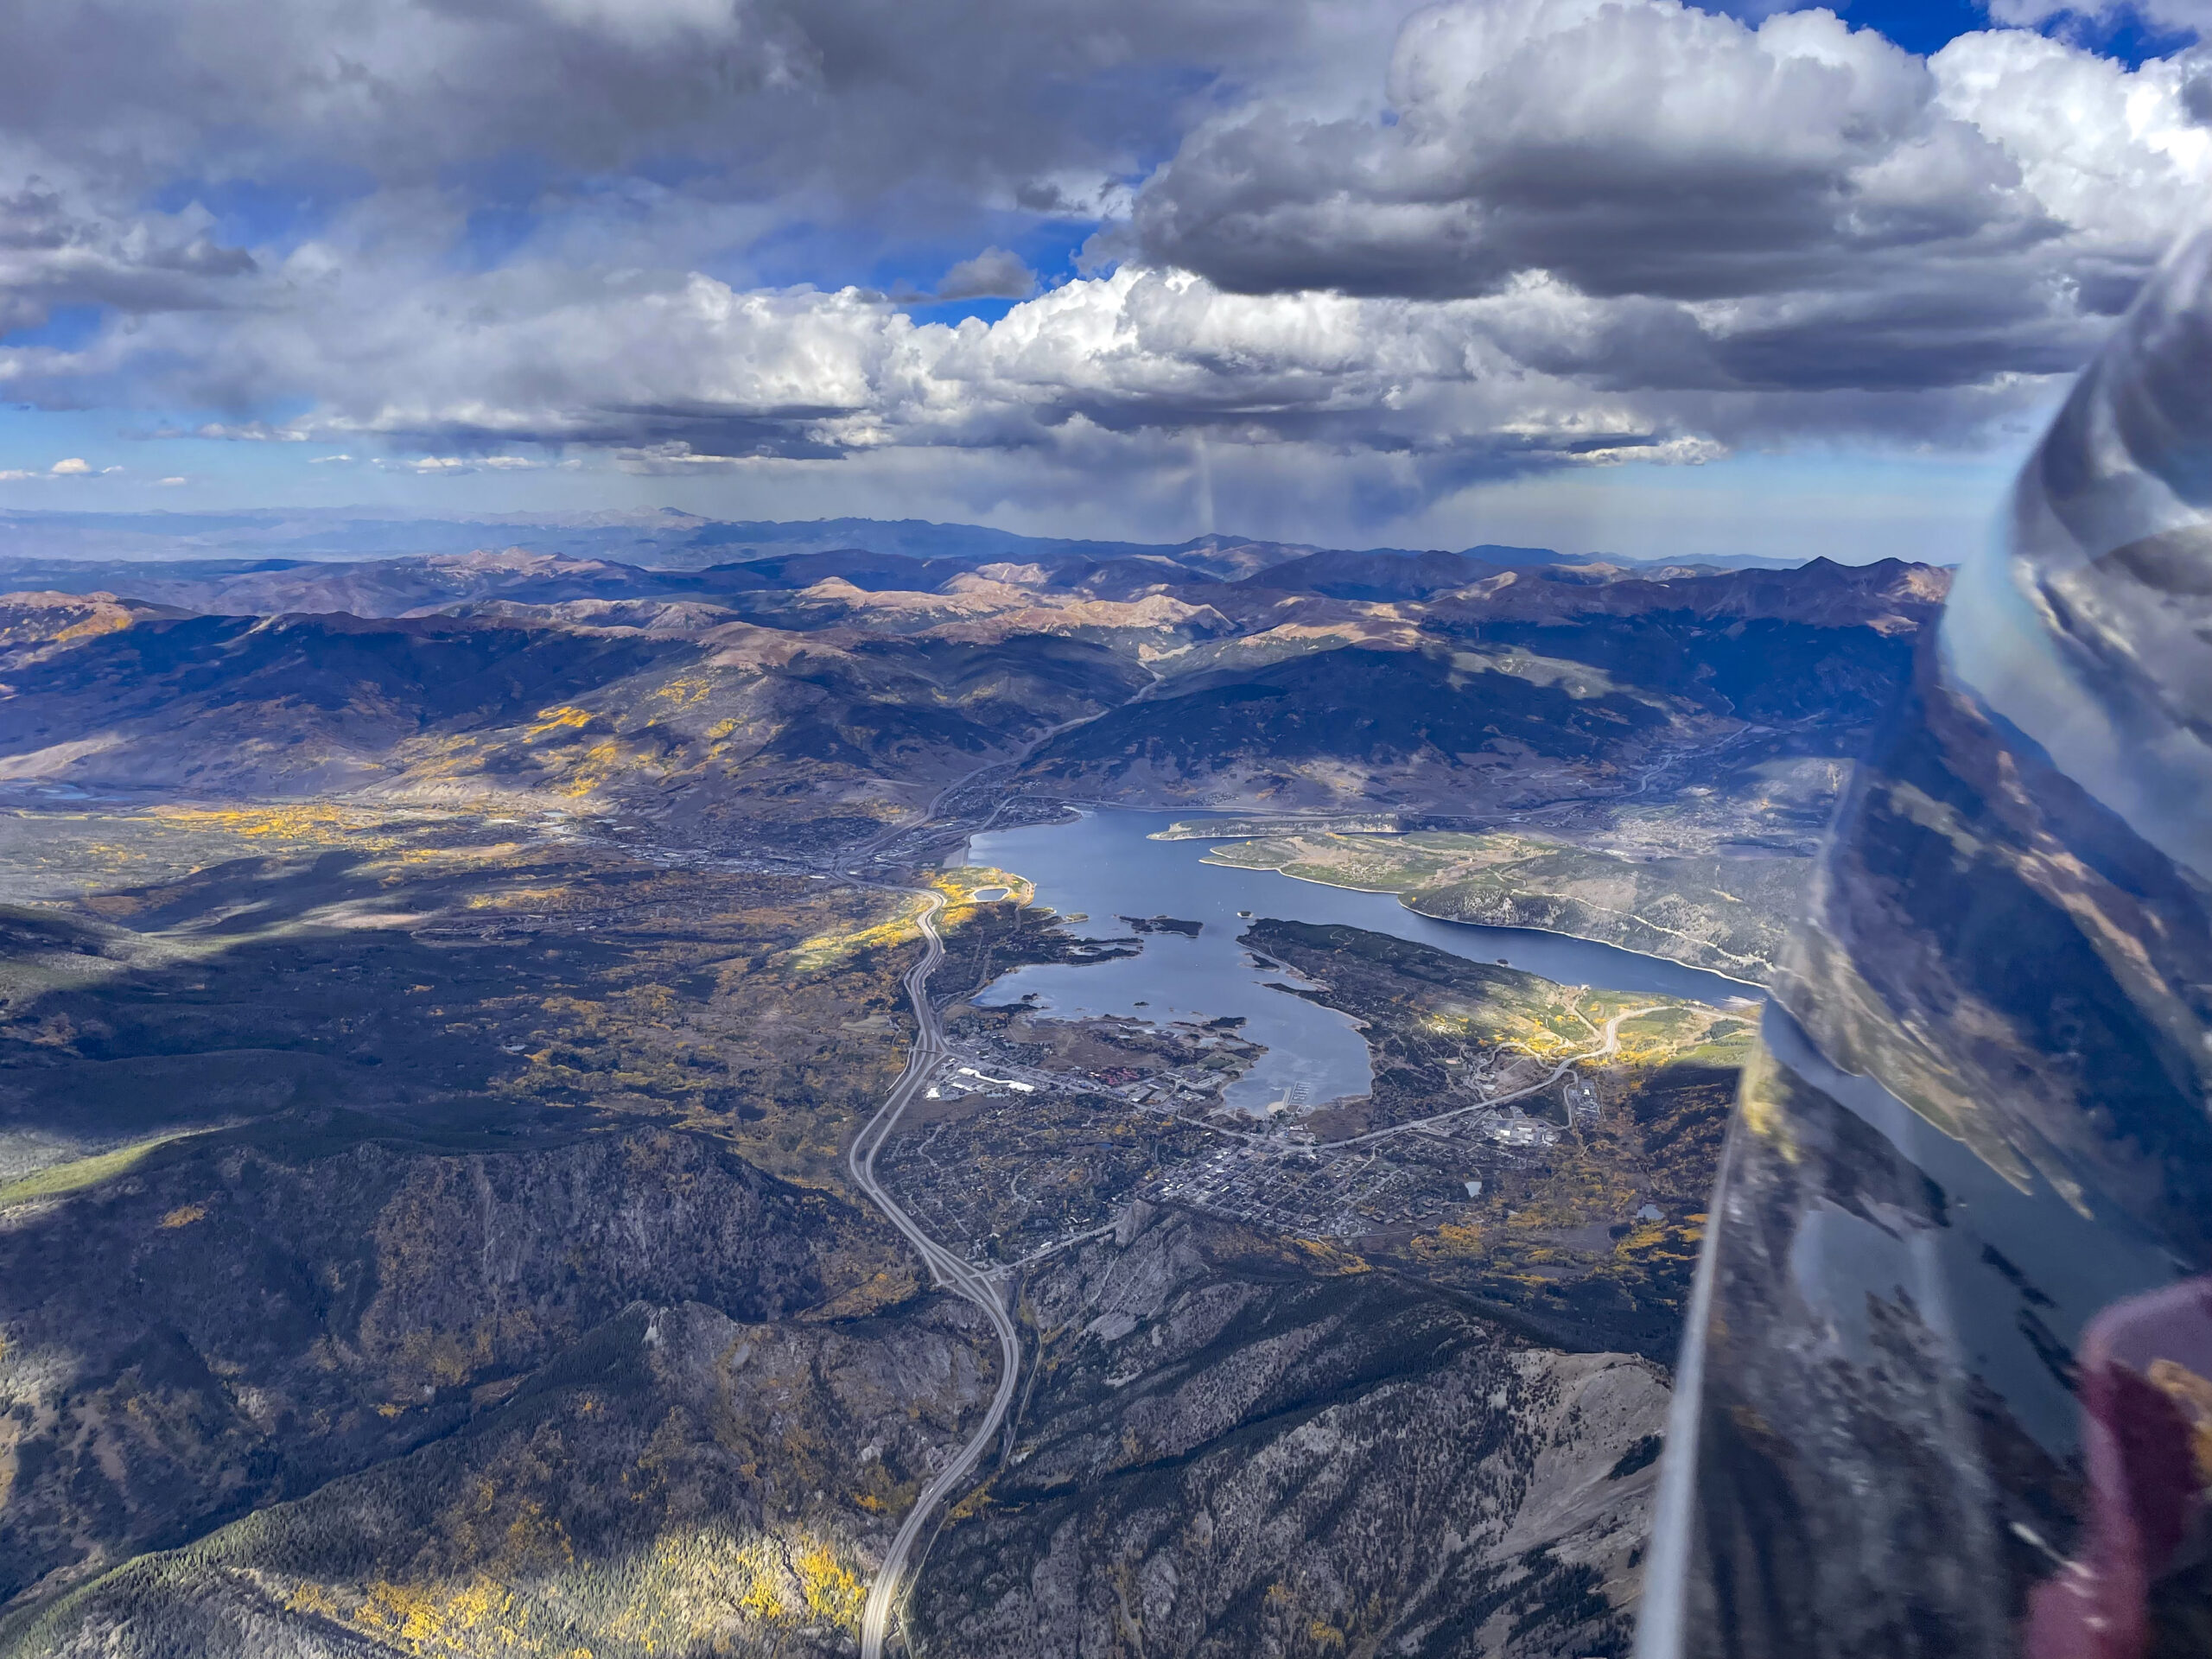
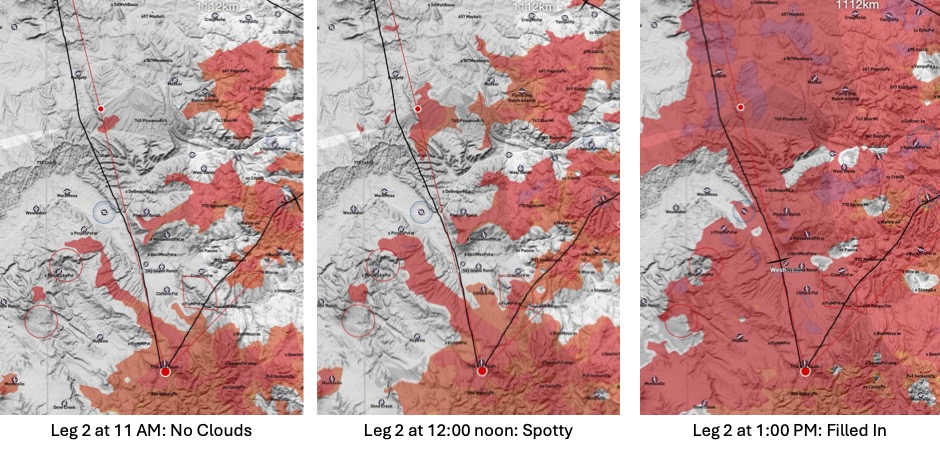
Back in the sun, a good climb to 17,000 ft and the route ahead looked distinctly better. Unsurprisingly the Gunnison Valley was blue but with clouds along the perimeter to the north and the south. The south side looked slightly better but would have been a substantial detour. I decided to stay on the north side. There was still a blue gap across the Gunnison river to the west but I expected this to fill in by the time I would get there, just as the forecast had predicted.
I kept going as the route ahead looked better than anything I had seen so far. There was one last bout of virga near Crested Butte, but the sky towards the west kept improving as the forecast had suggested.
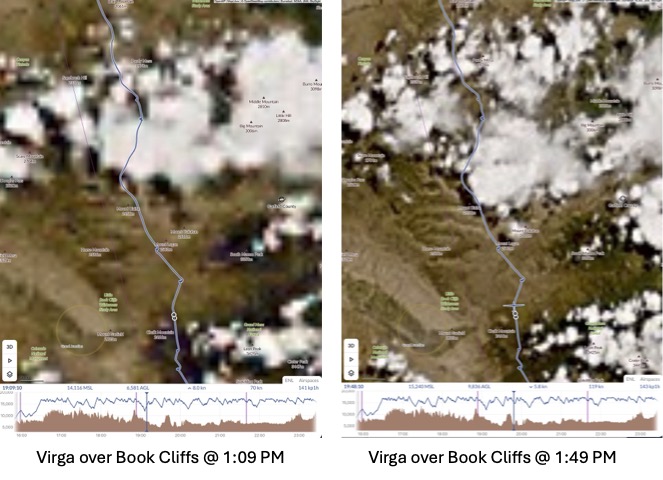
I could now see a clear route to my first turnpoint. It looked easy to reach without a slow down. This gave me the time to start to look ahead towards the second leg. At 12:30 PM there were still big blue gaps. Plus there was another concern: a thick line of virga to north of Grand Junction.
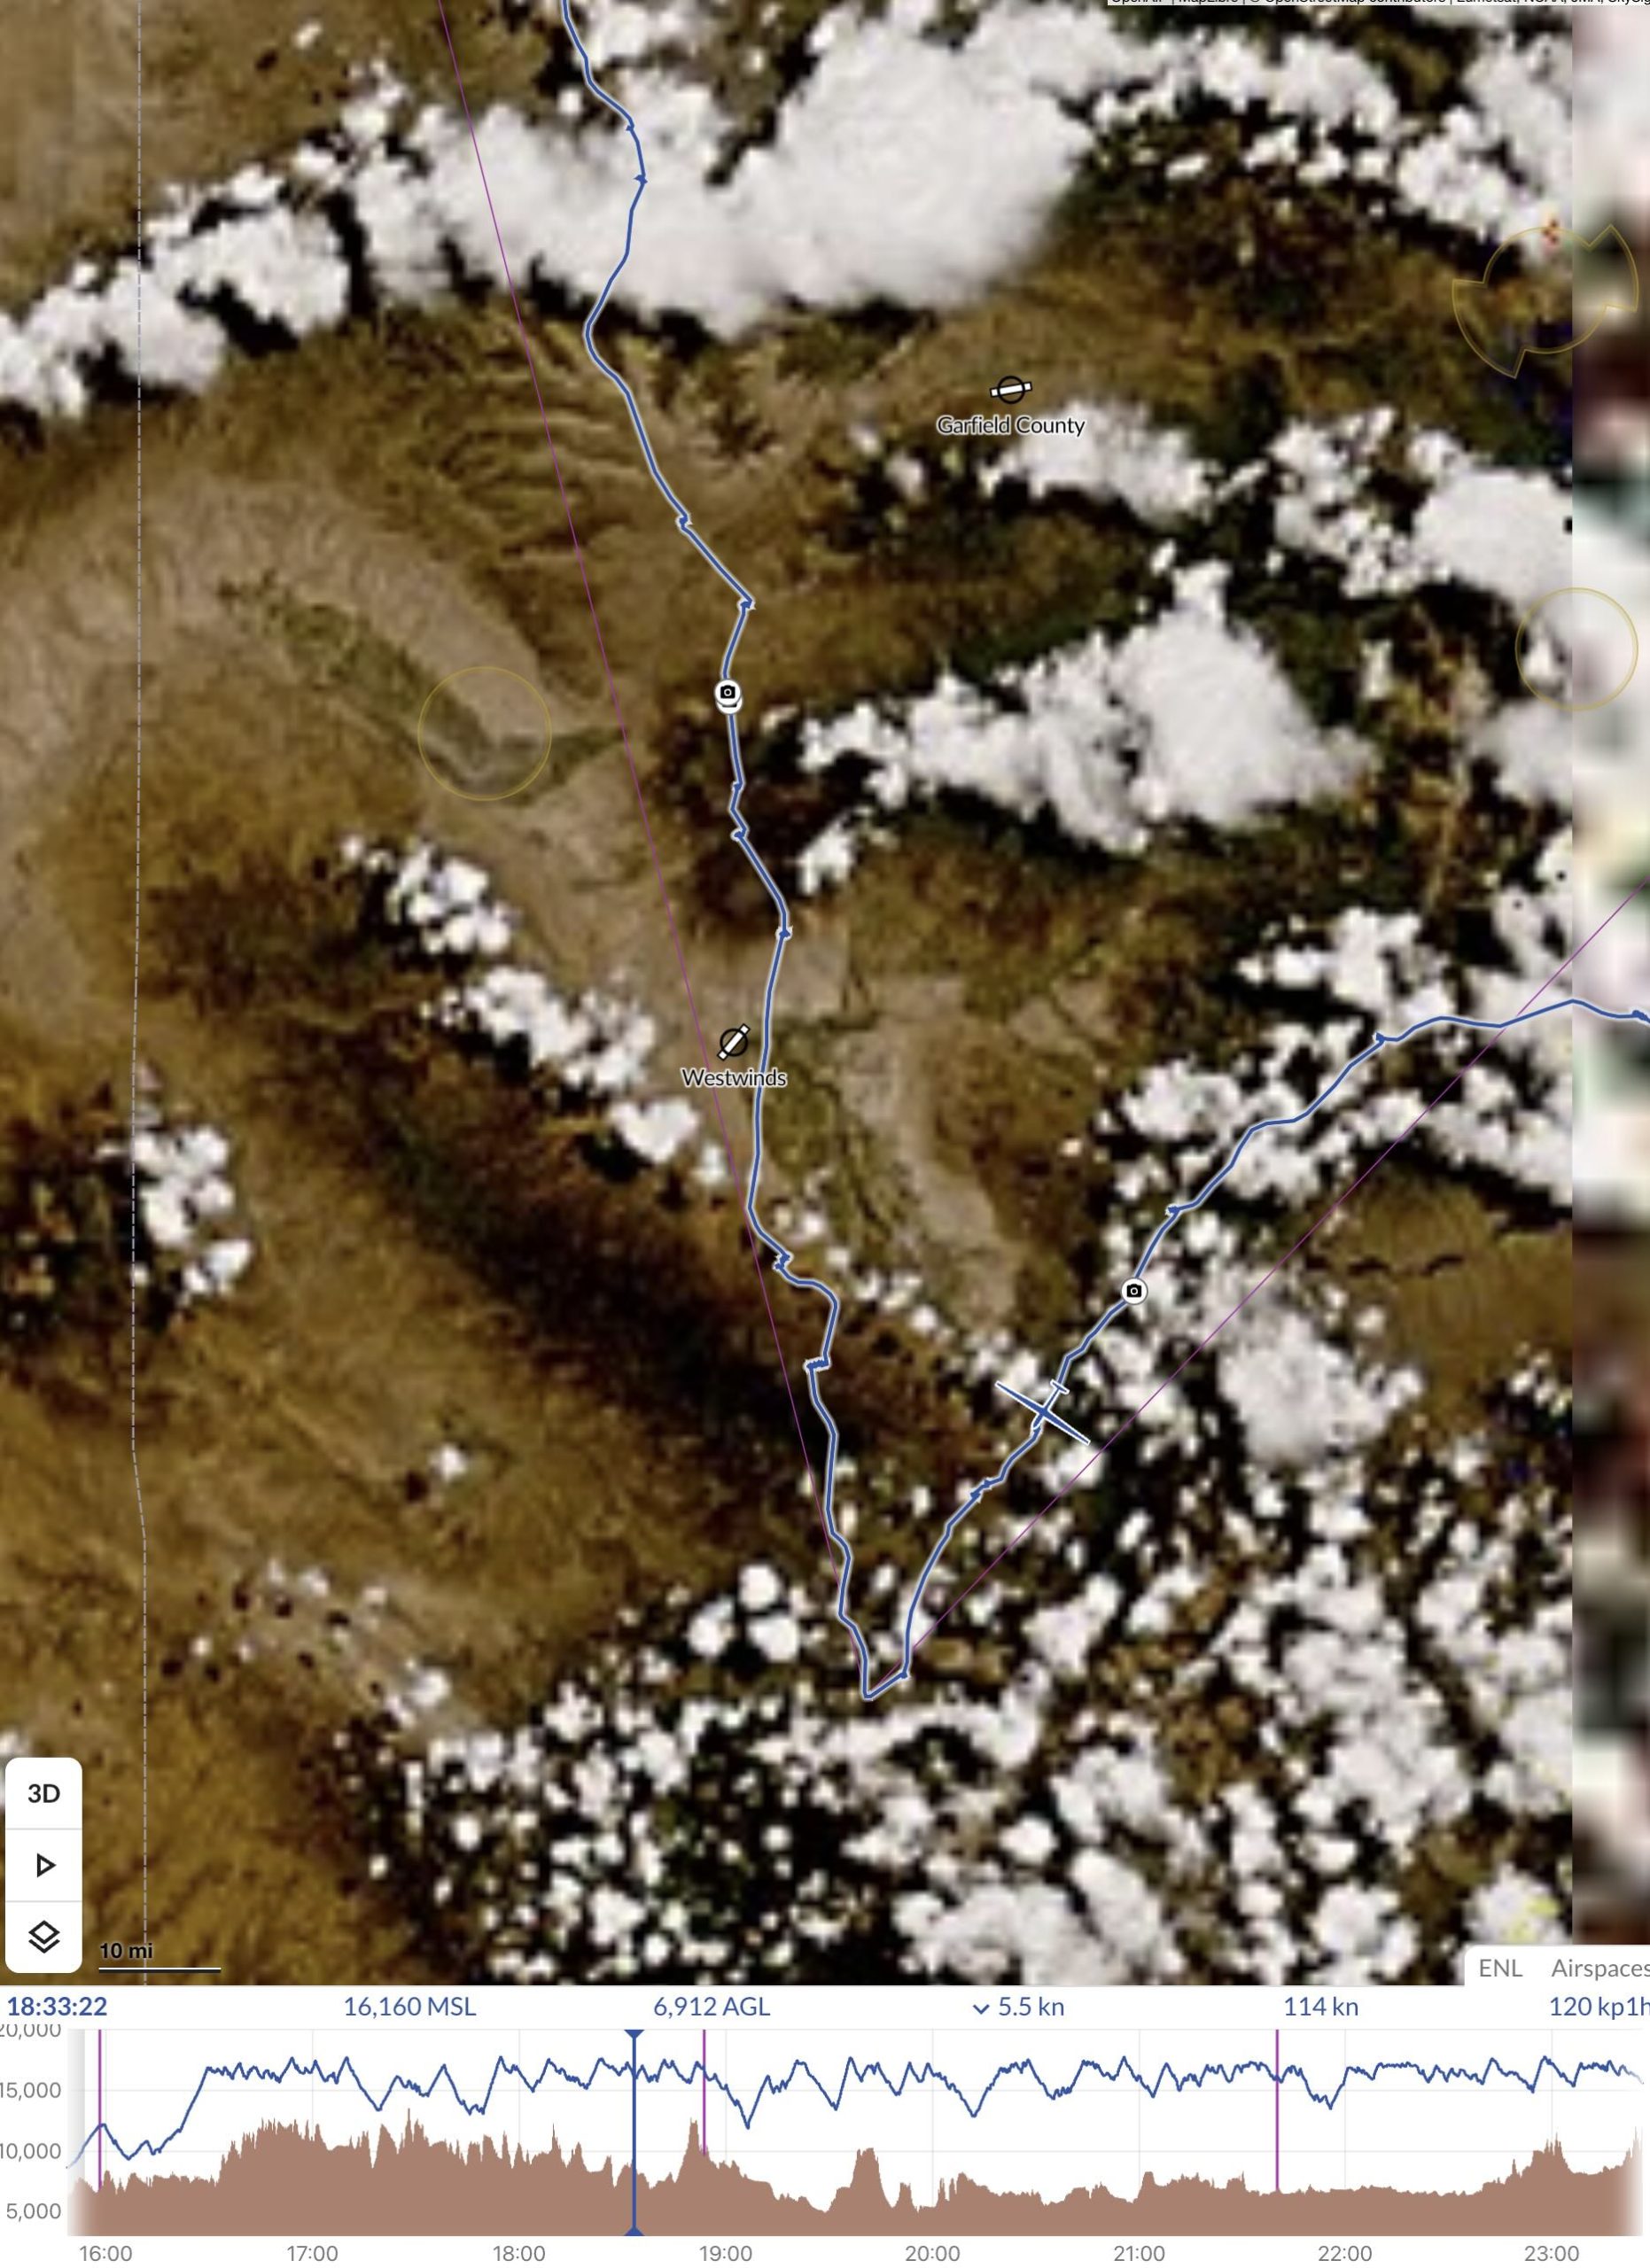
I had hope that the blue gaps would fill in within the next 30 minutes, just per the forecast. With respect to the virga over the Book Cliffs, it was not unexpected either but it looked more formidable than I had anticipated. I decided I would stay on plan for now and assess the situation later as I got closer.
At 12:53 I reached my turnpoint northwest of Telluride. Despite the initial detour on my first leg, I had only lost 7 minutes against my timeline and was still 23 minutes ahead of schedule. My average task speed showed 108 kph despite the headwind, in line with my expectations. So far so good.
Leg 2
There weren’t a lot of clouds as I started my second leg, but there were some. In my experience, clouds tend to be more reliable the fewer there are. Which makes sense: if it takes a particularly strong thermal to form a cloud, my logic goes, then the odds that a cloud has a good thermal underneath must go up. Plus, more clouds would pop soon if the the forecast was right. I reminded myself to be patient because I was still running ahead of schedule.
On my way to the first clouds I primarily noticed a lot of sink. 12 minutes after rounding TP1, I found myself down at 12,100 ft, the lowest I had been on the entire flight since the start. Fortunately, a solid 7 kt climb under the first cloud took me back to 16,000 feet within 5 minutes.
A second climb over the Uncompahgre Plateau took me to 17,500. Now there was a decision to make. Should I follow the strong line of clouds along the plateau to the northwest or transition through a wide blue hole and stay closer to the course line?
The line to the NW promised much faster progress but I concluded that it might end nowhere: with a 50-60 mile gap to the north that’s simply too wide to cross.
I decided to better take the gaps in junks, head directly north, and transition to two newly building clouds above the Grand Mesa, north of Delta. That worked great: I was rewarded with my first 11 kt average climb of the day, taking me back to 17,600 ft. Then another blue gap across the Colorado towards the Book Cliffs.
By now I could also see to my delight that the wall of virga over the Book Cliffs had started to crumble and that a promising sea of nice cumulus clouds lay behind. With that, my prior apprehension about this obstacle faded away.
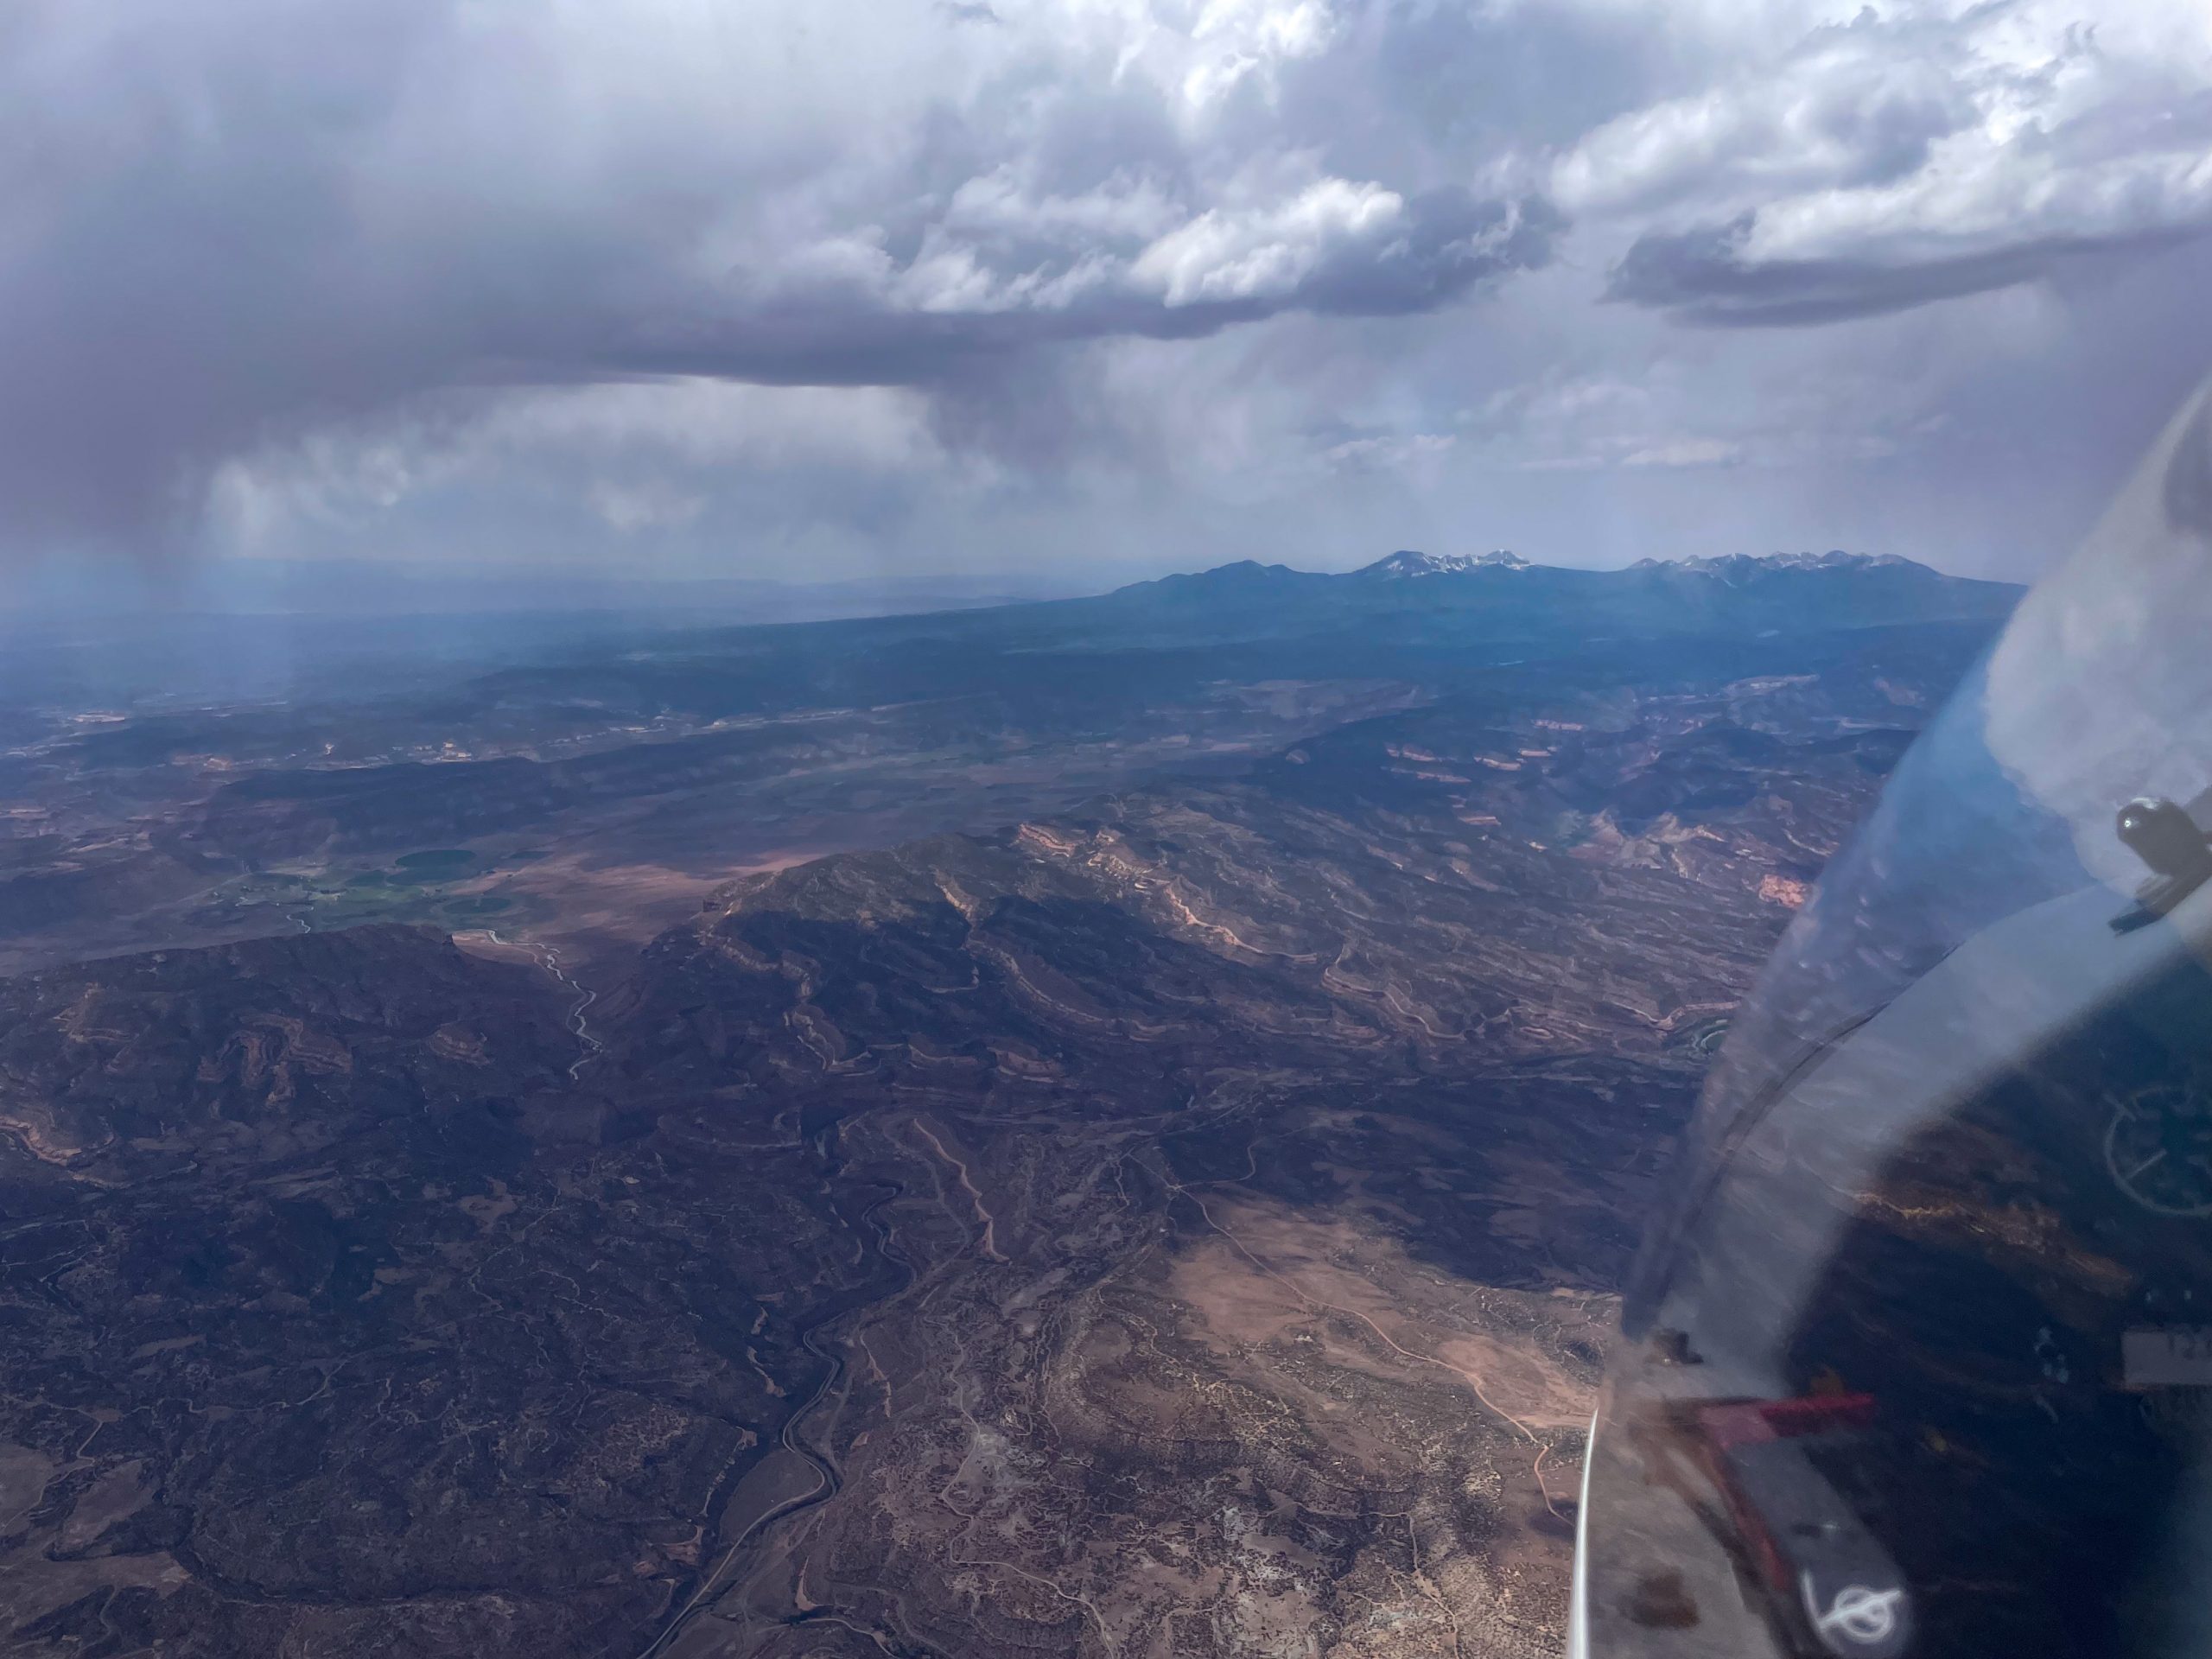
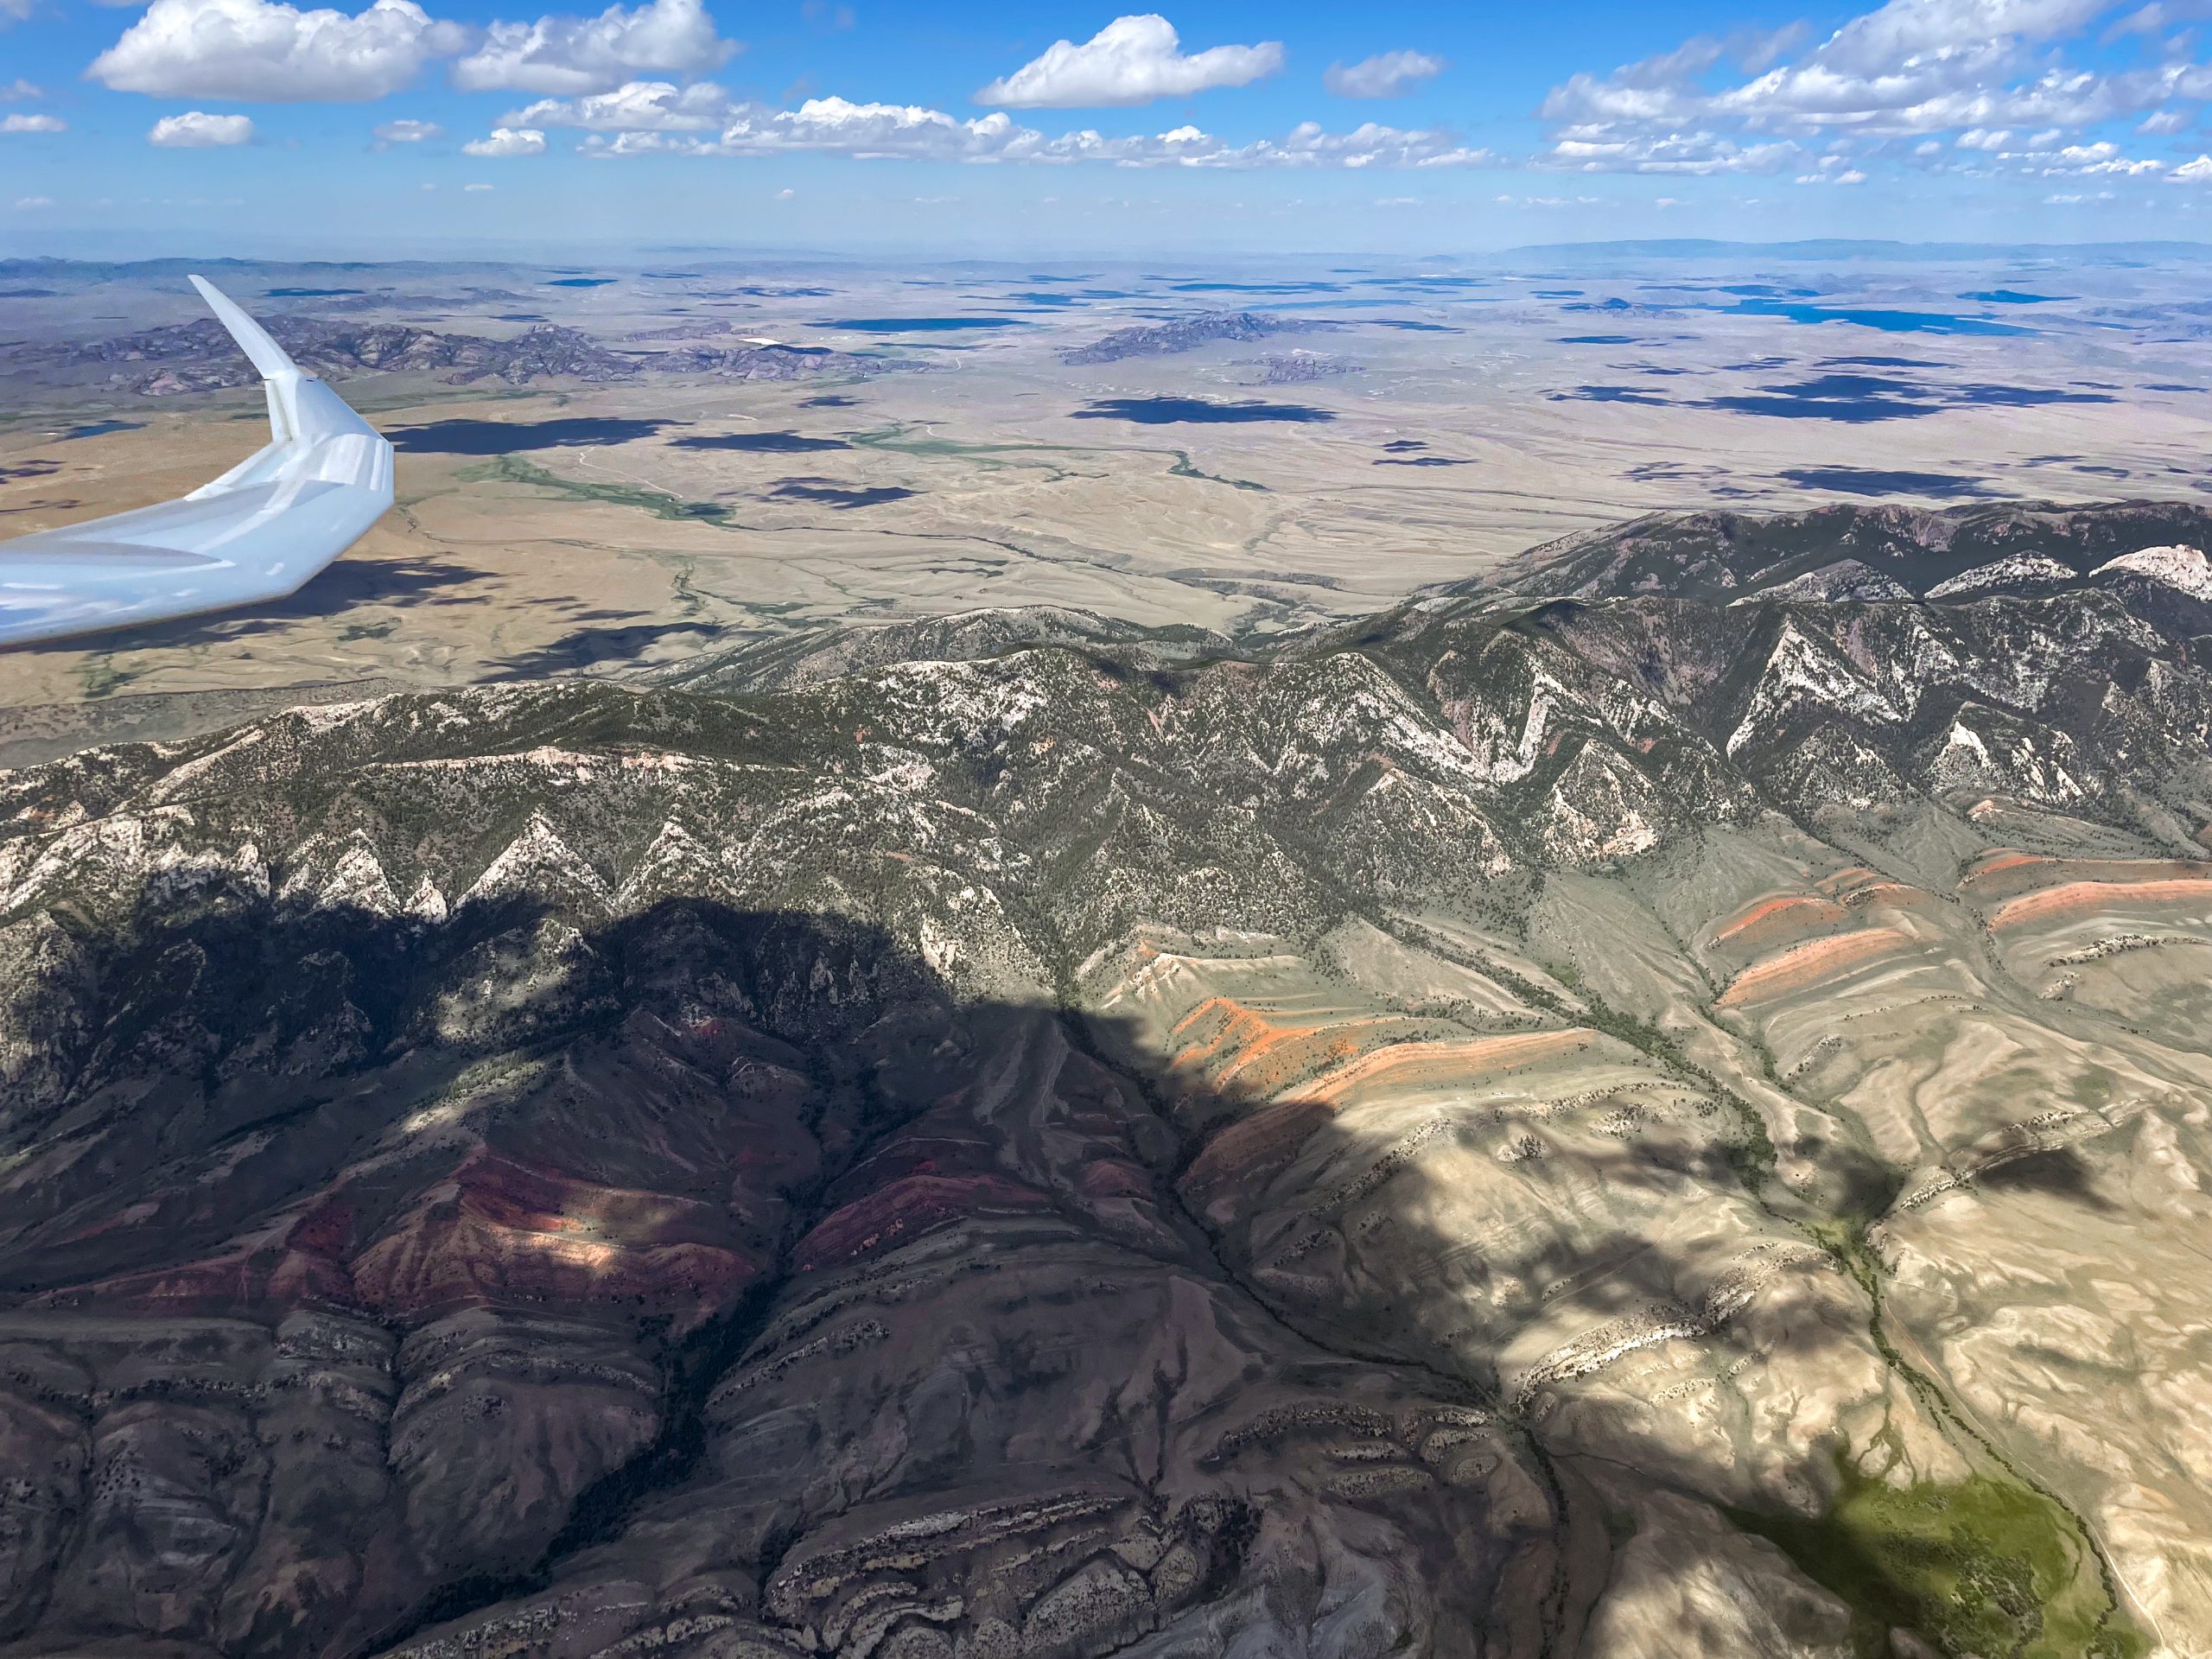
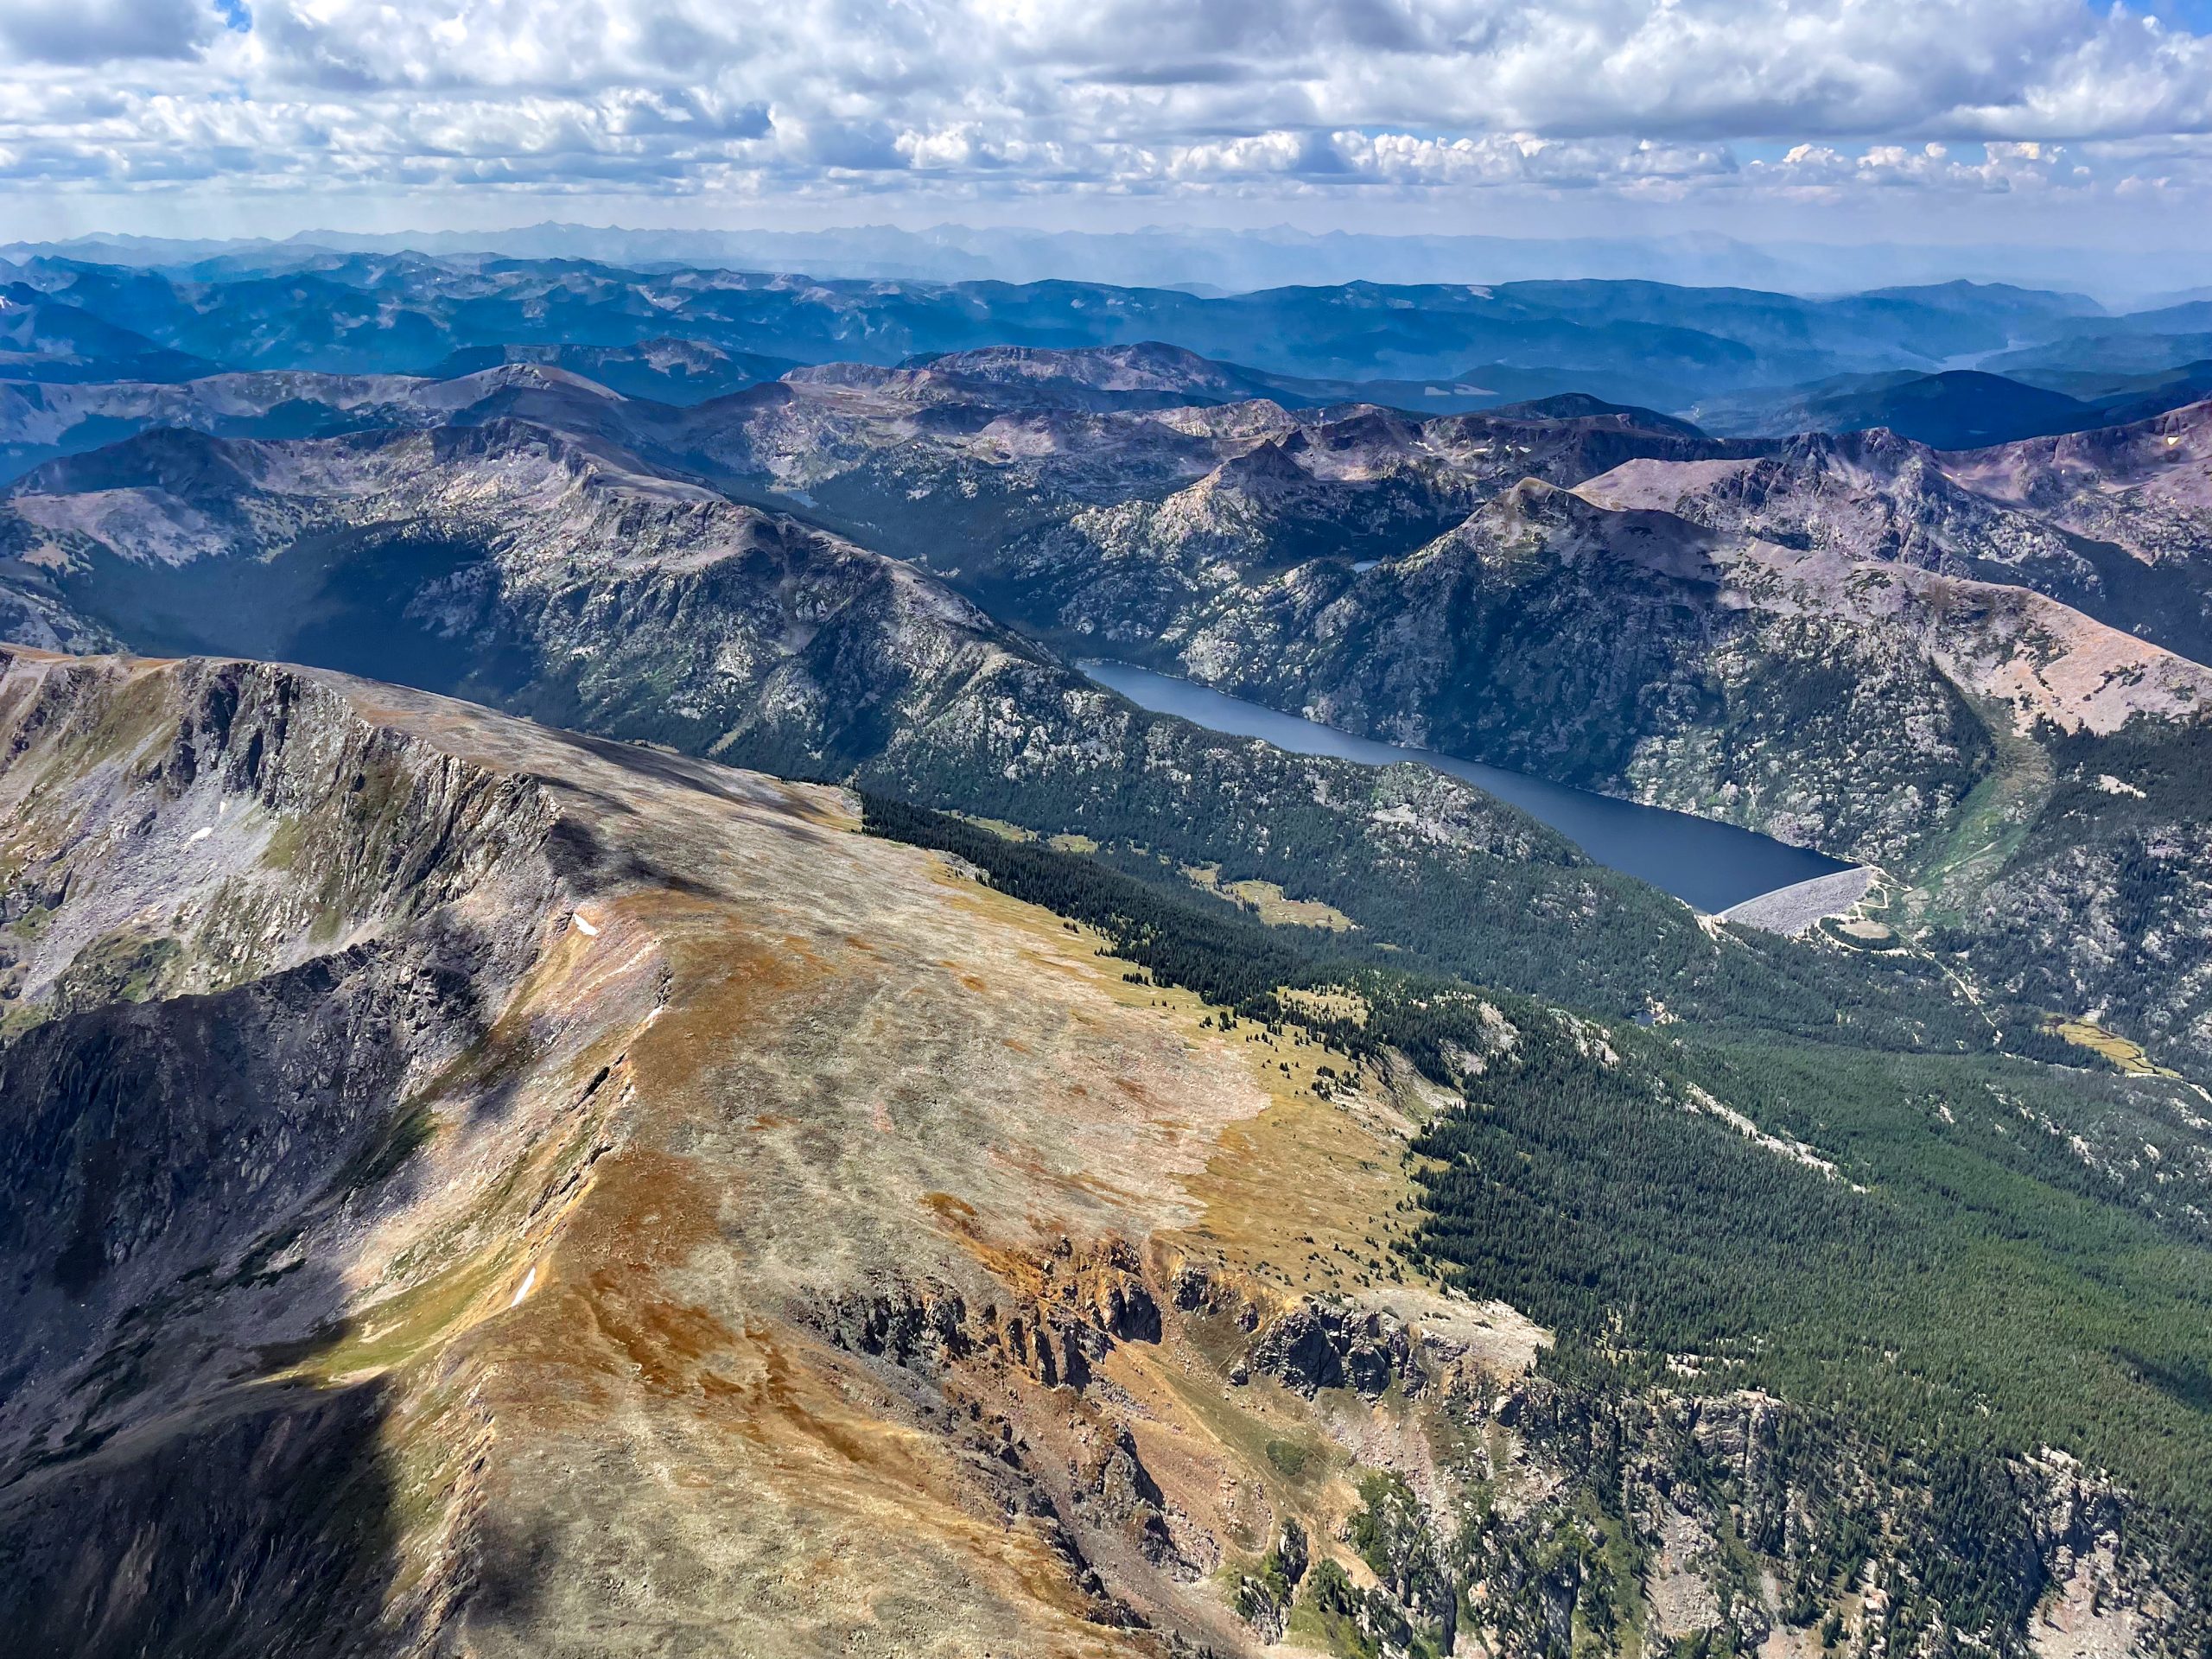
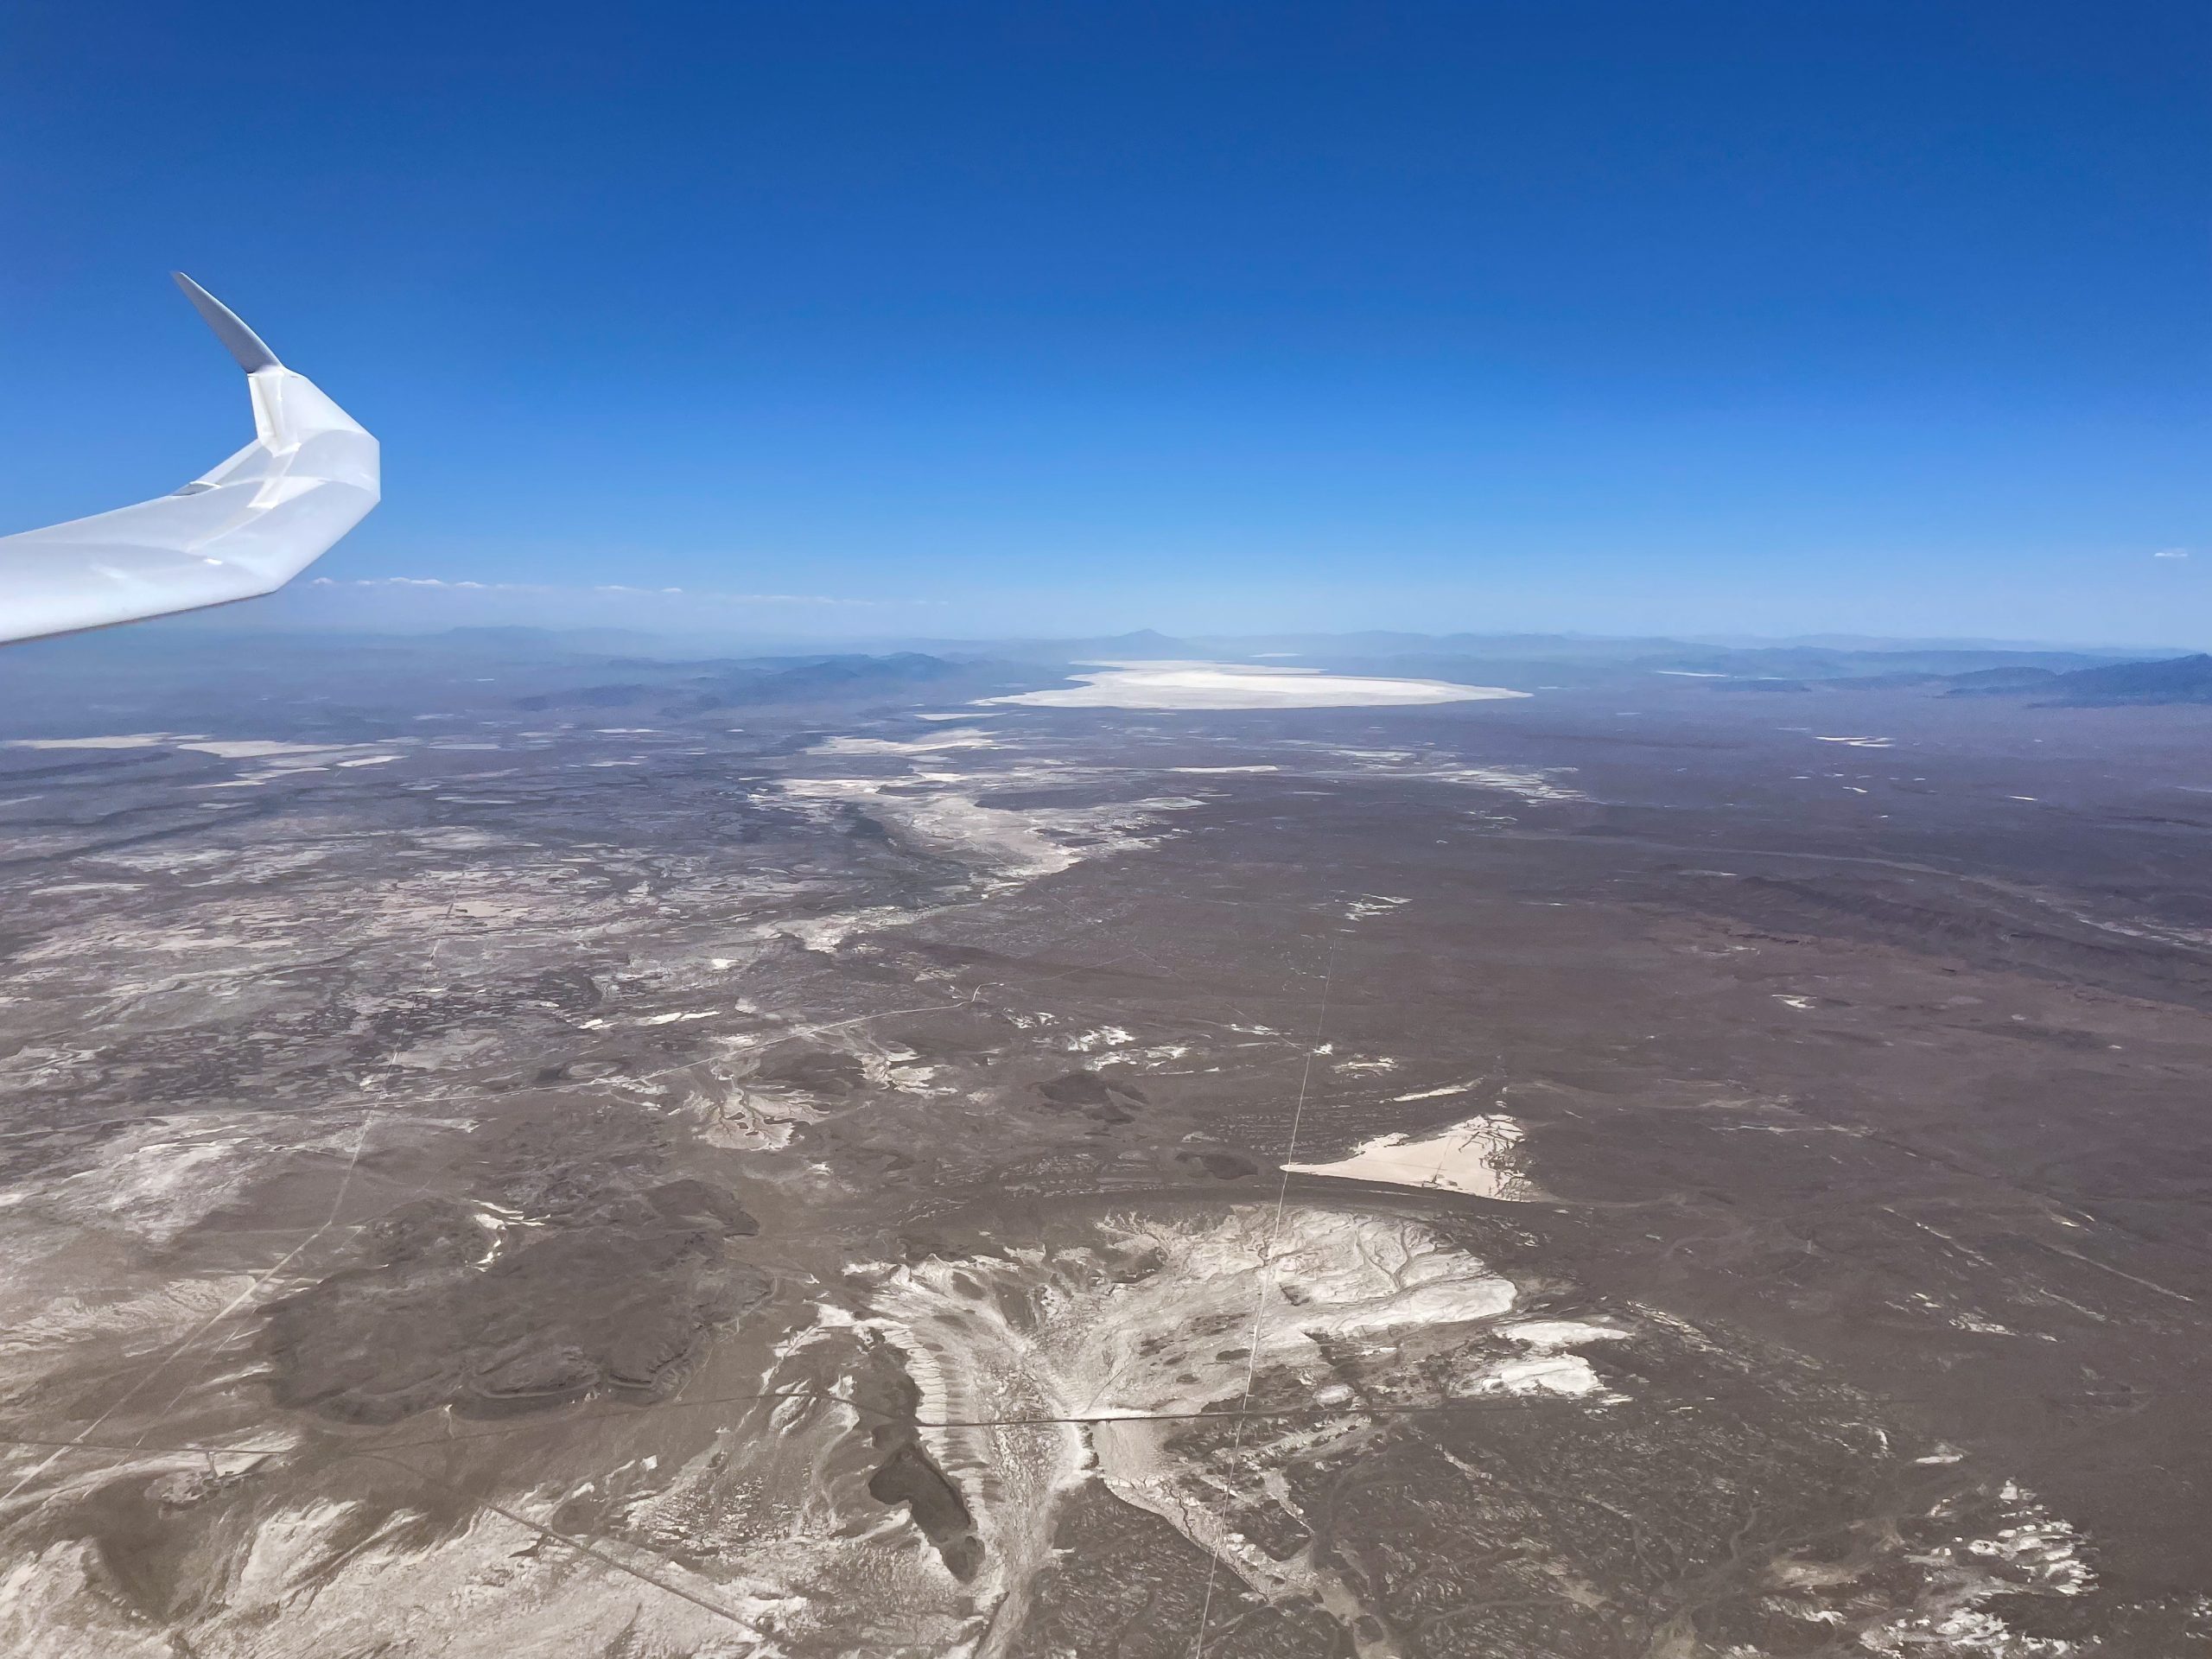
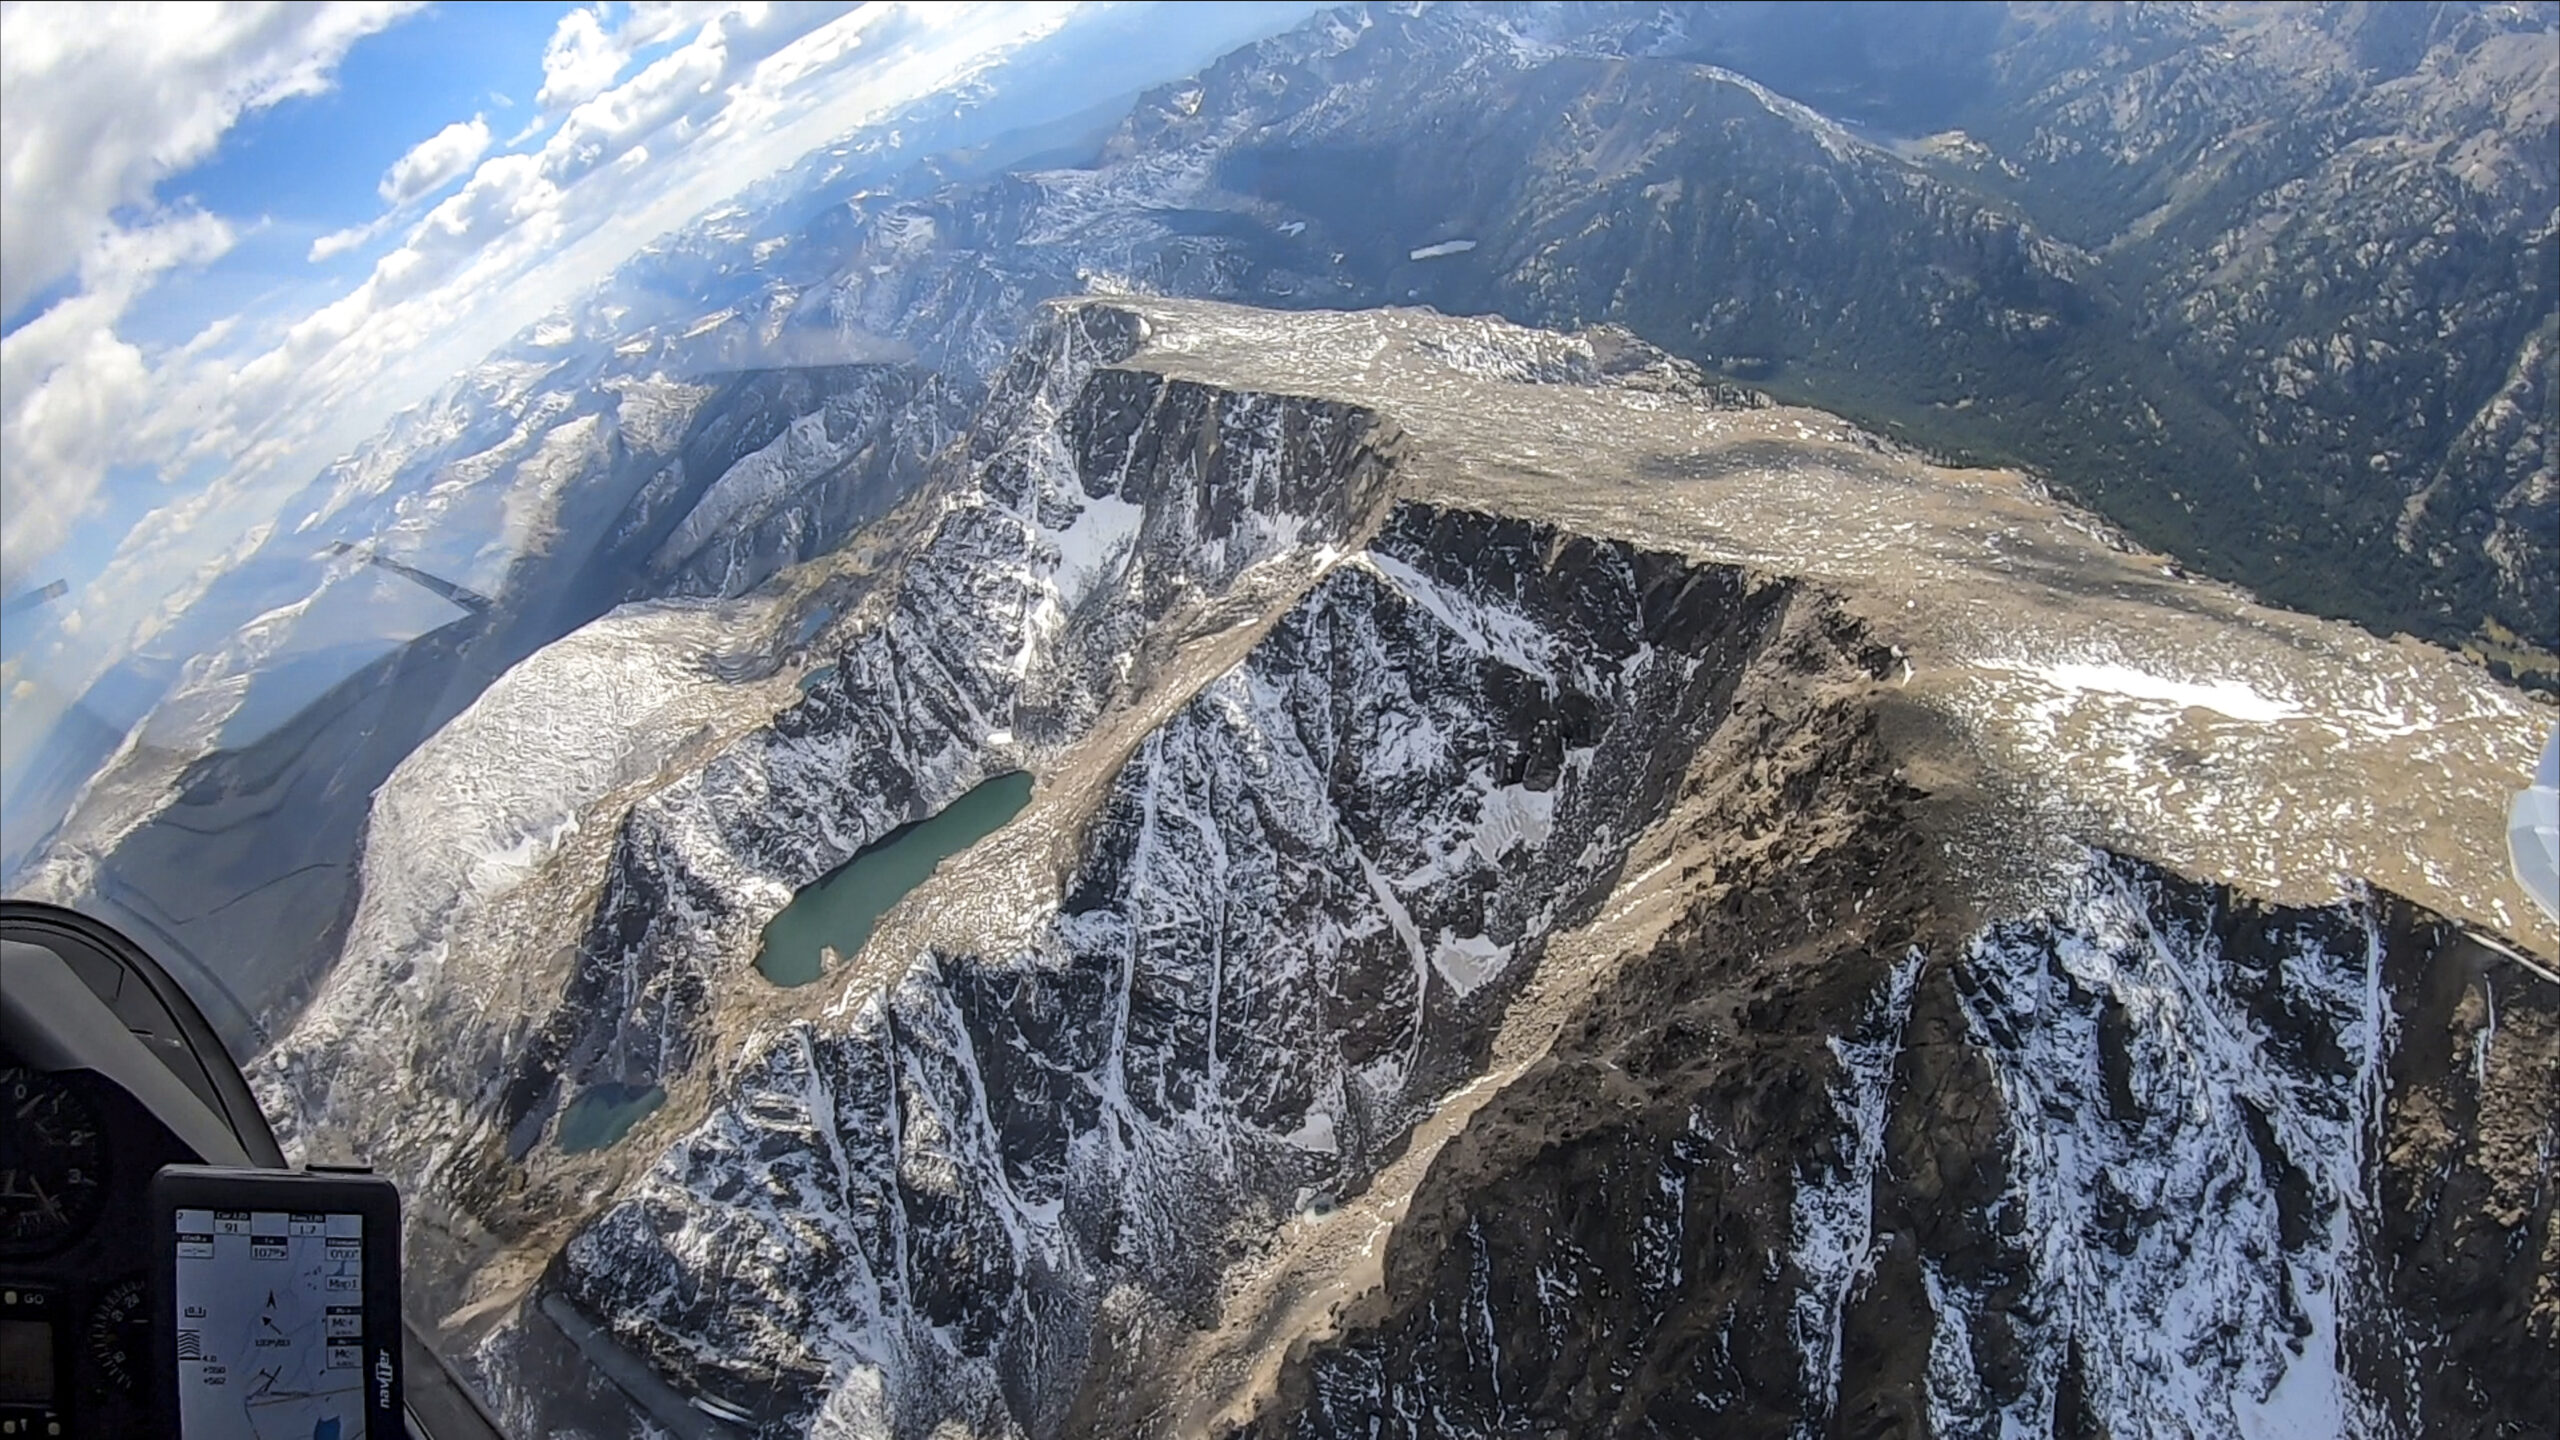
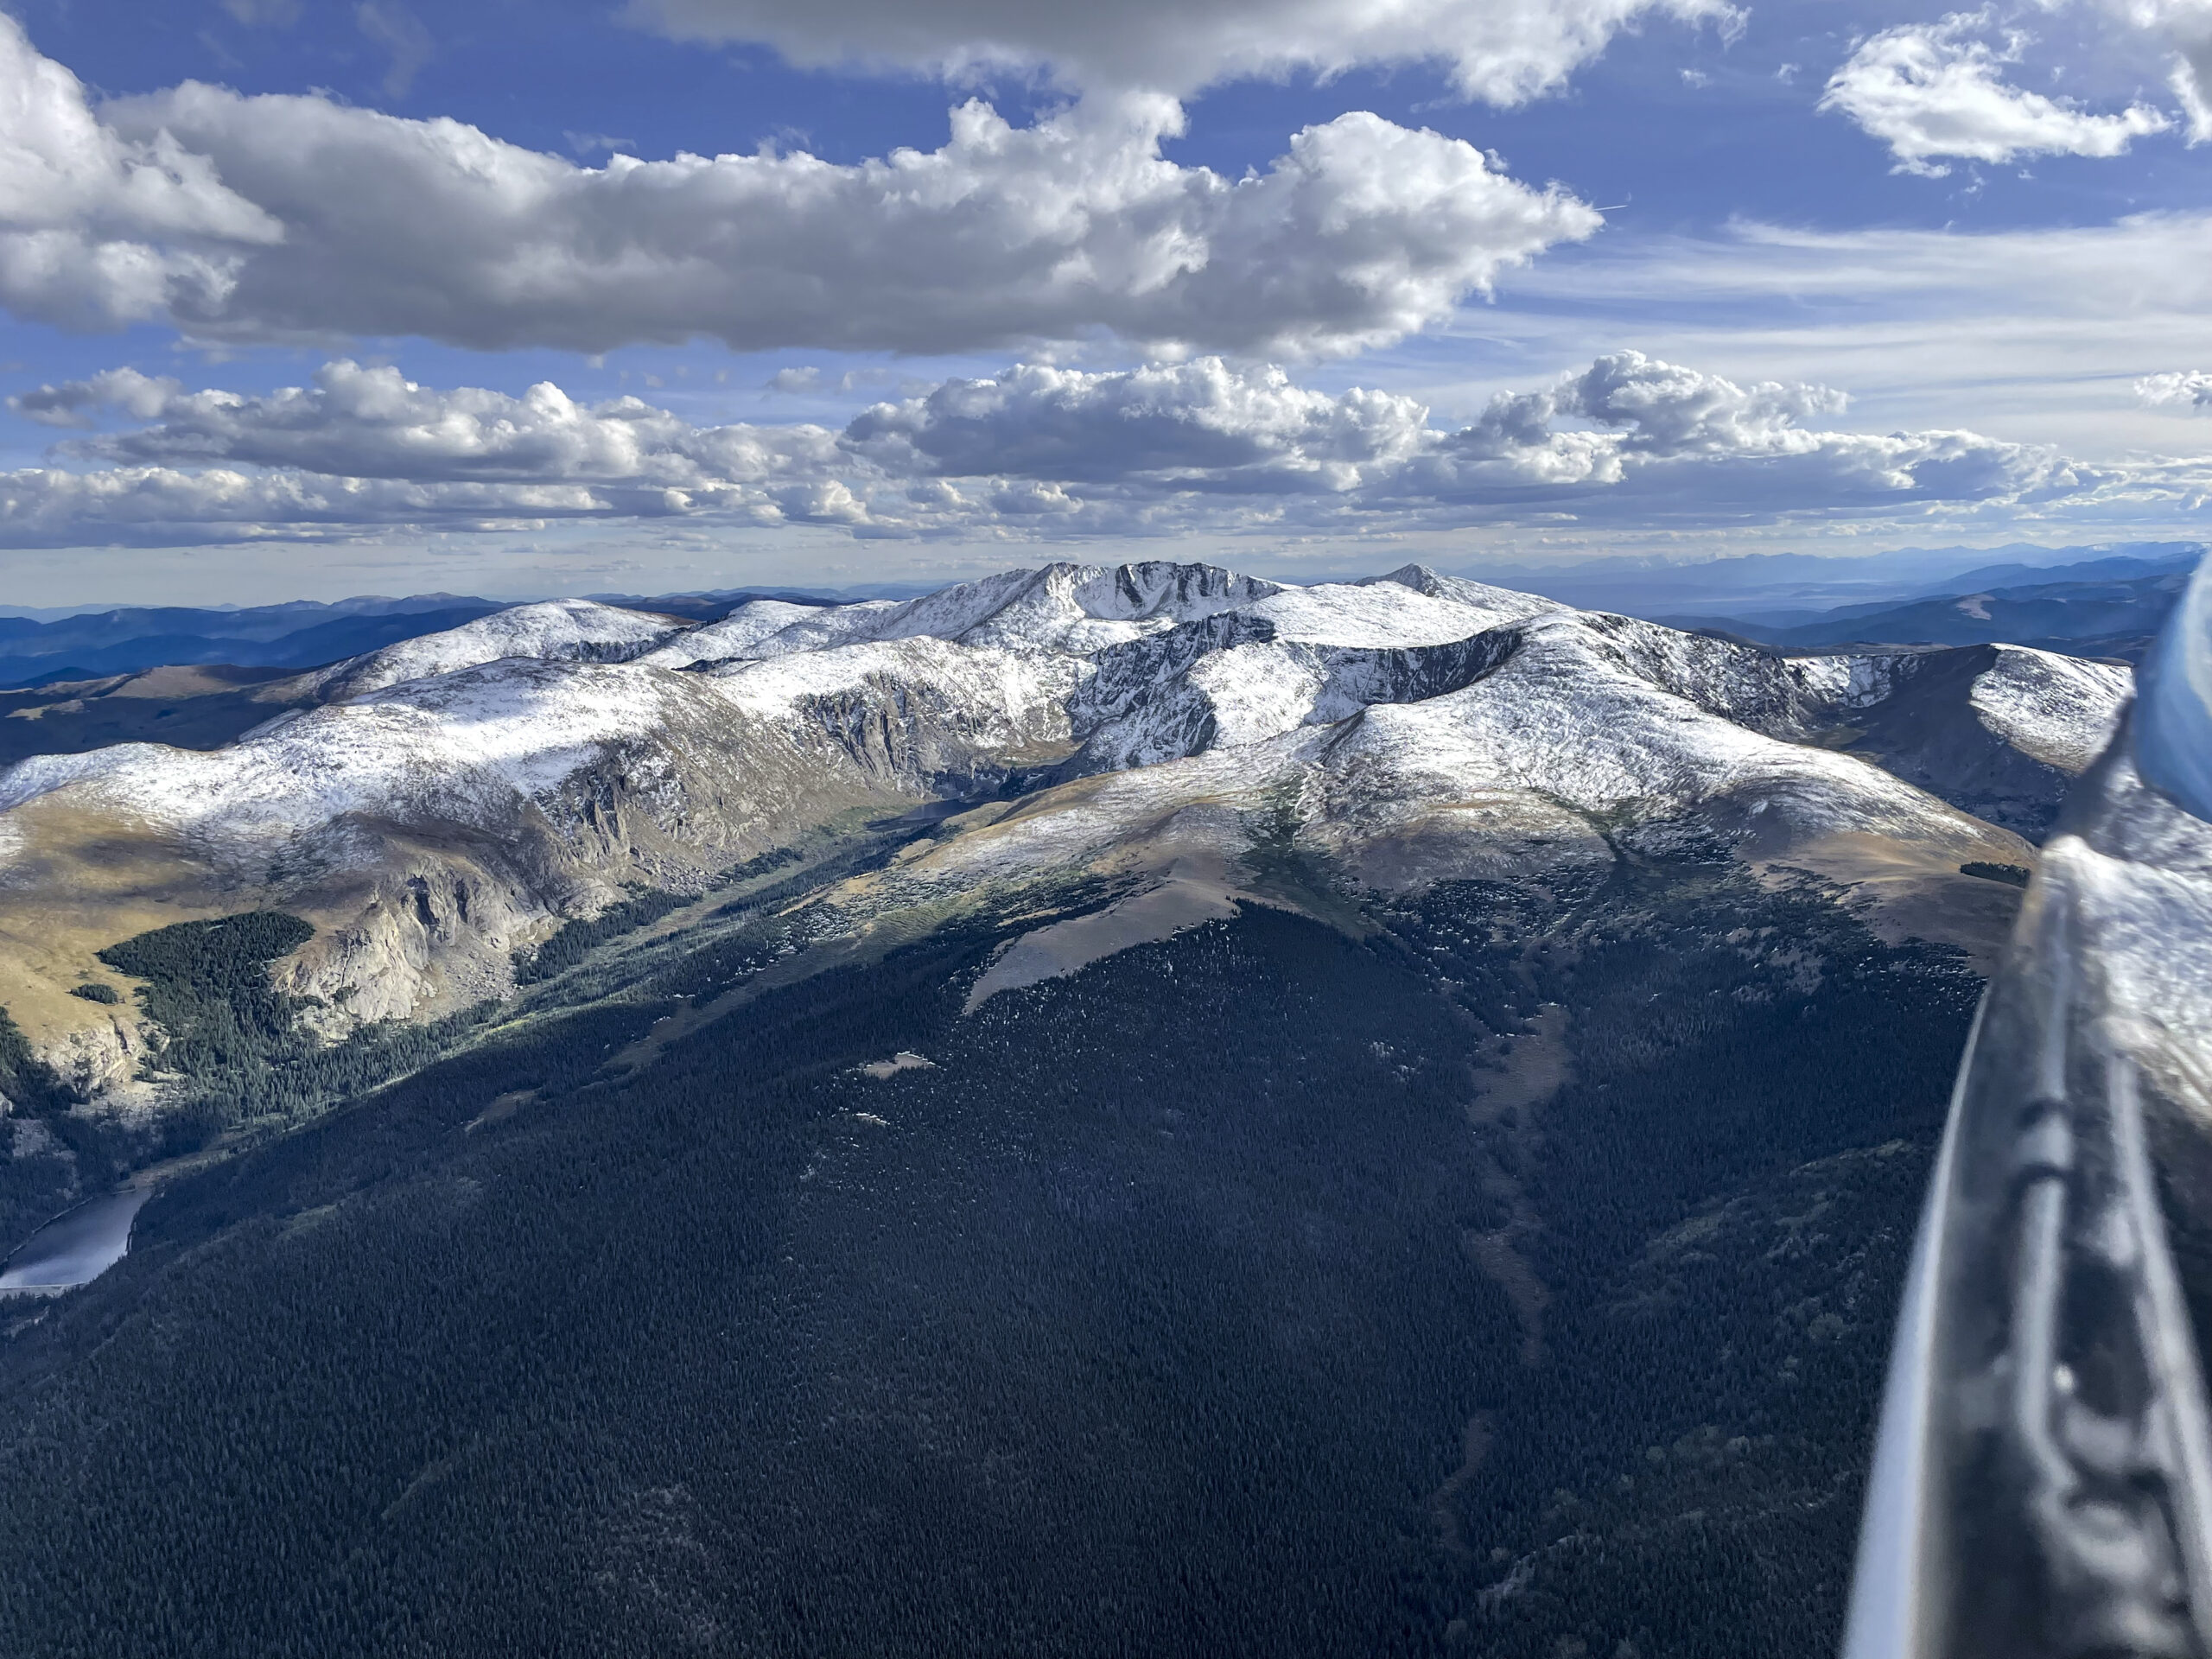
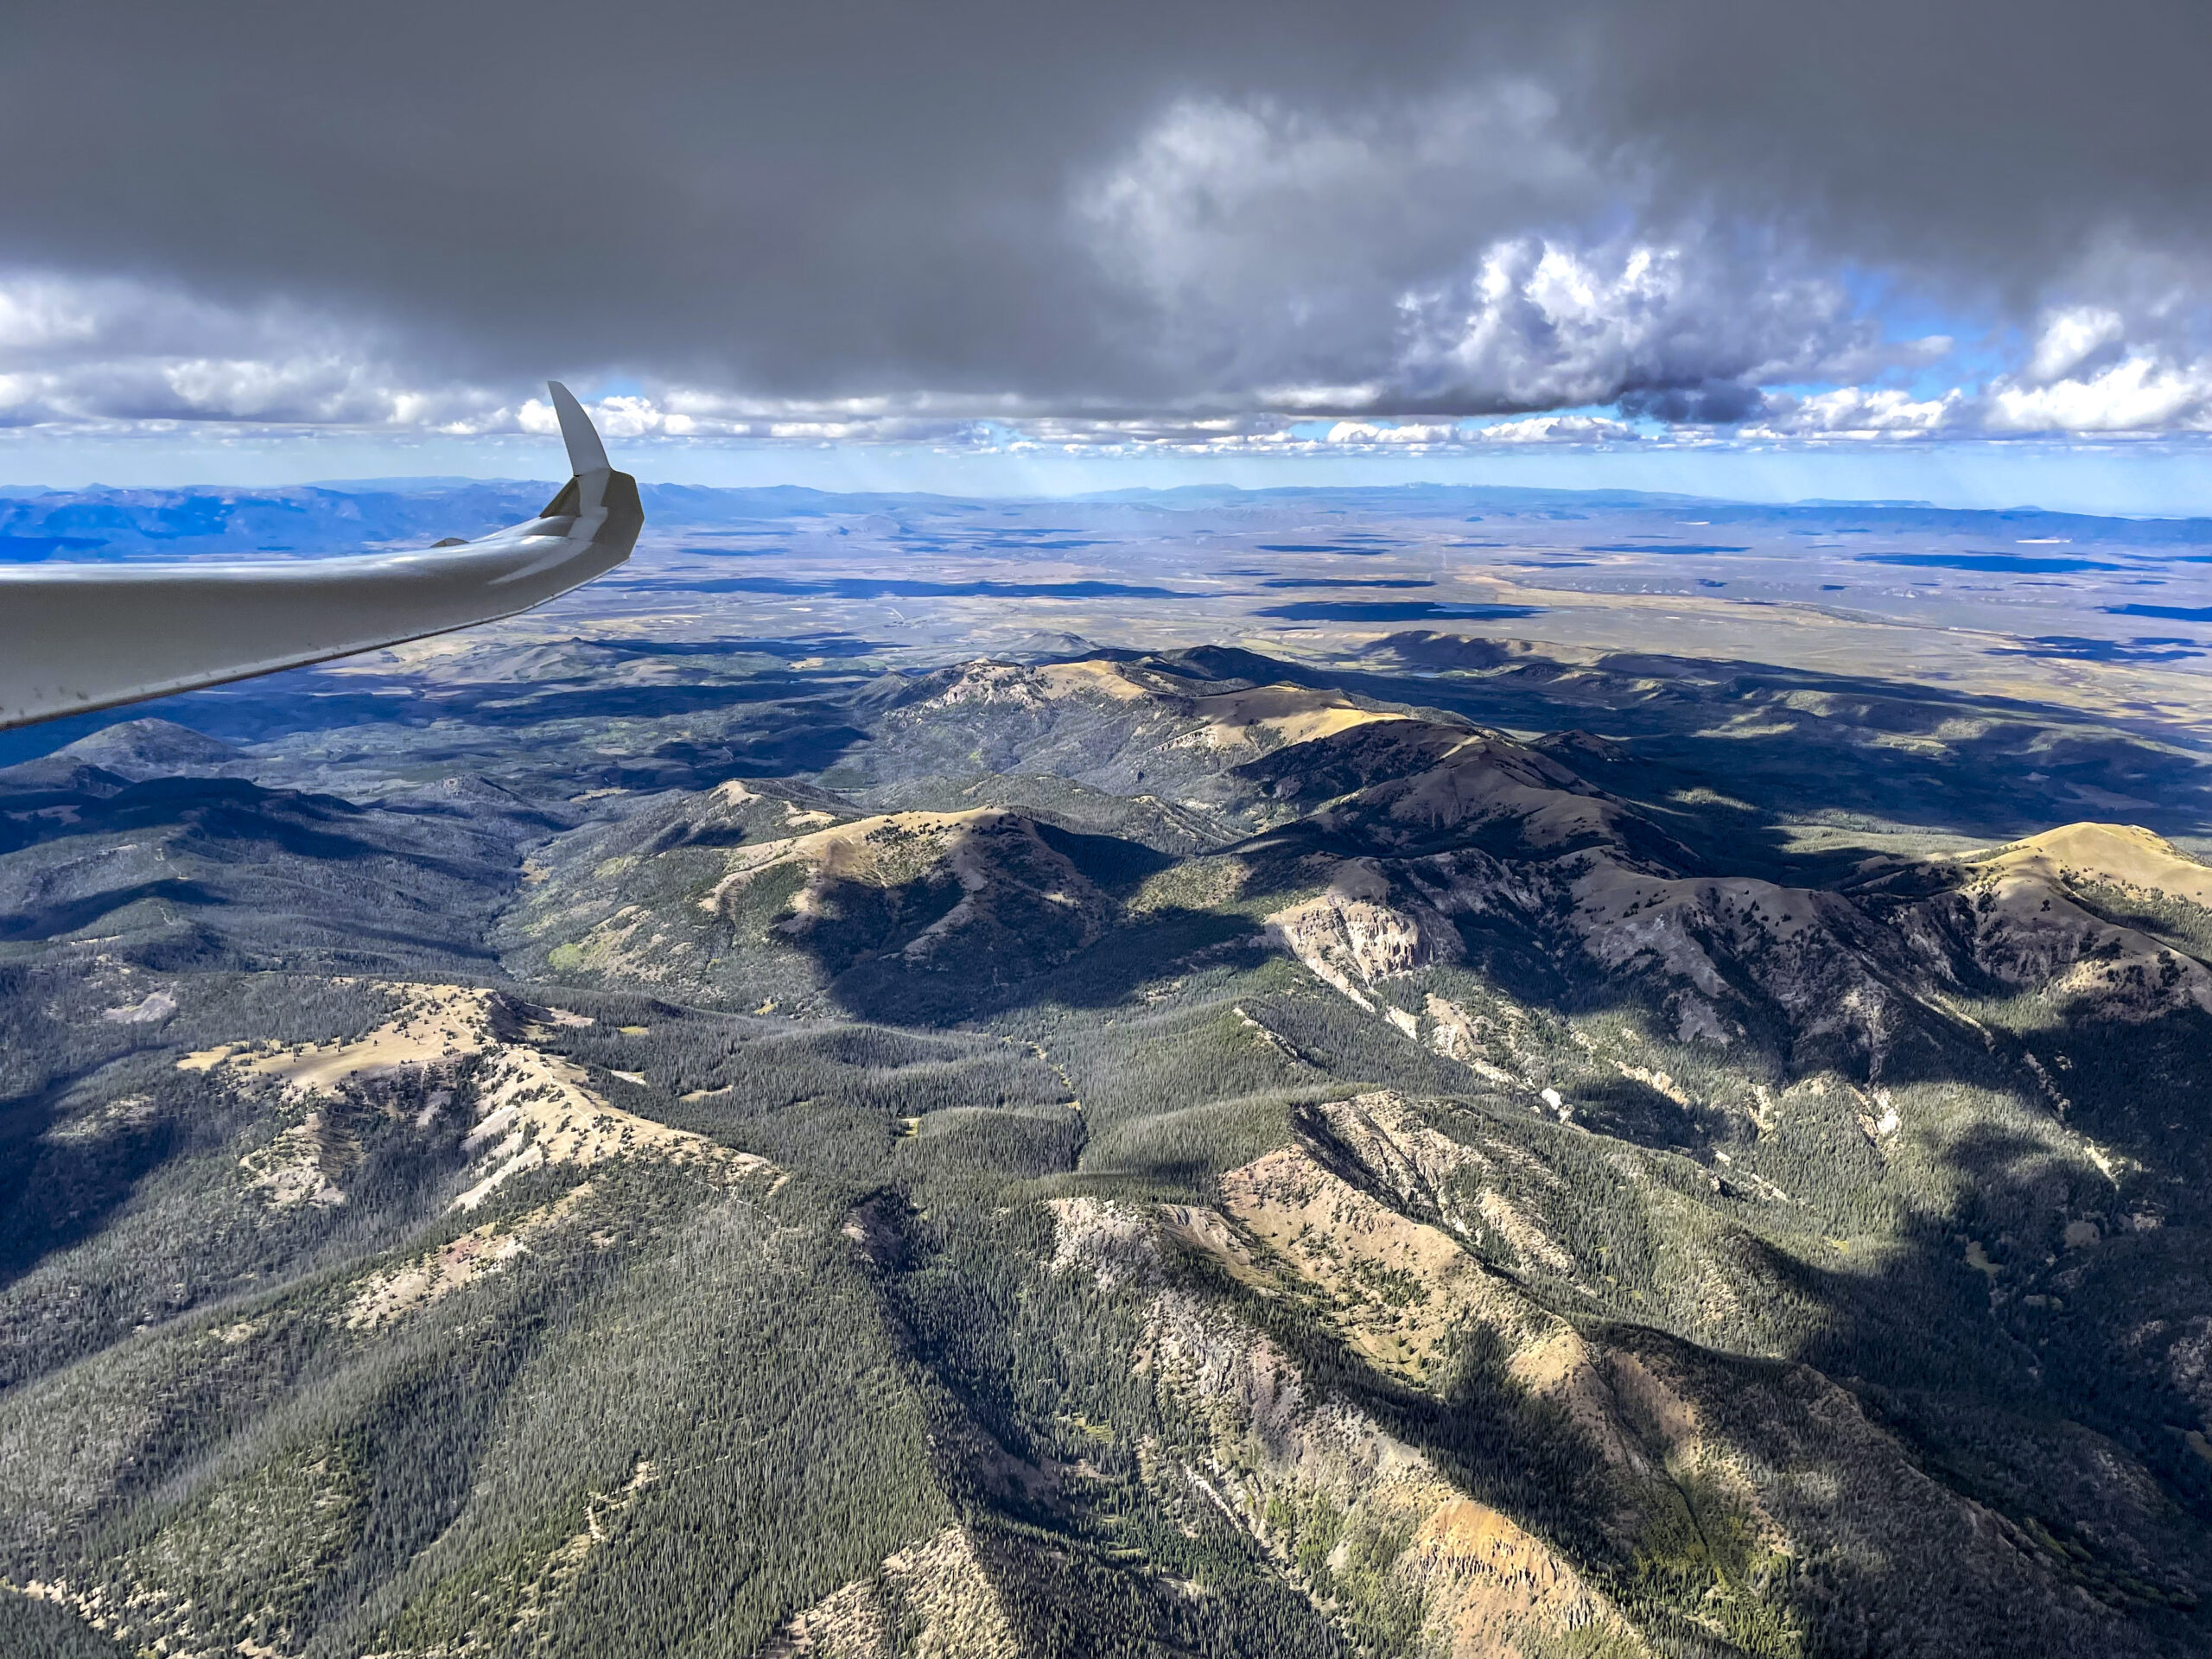
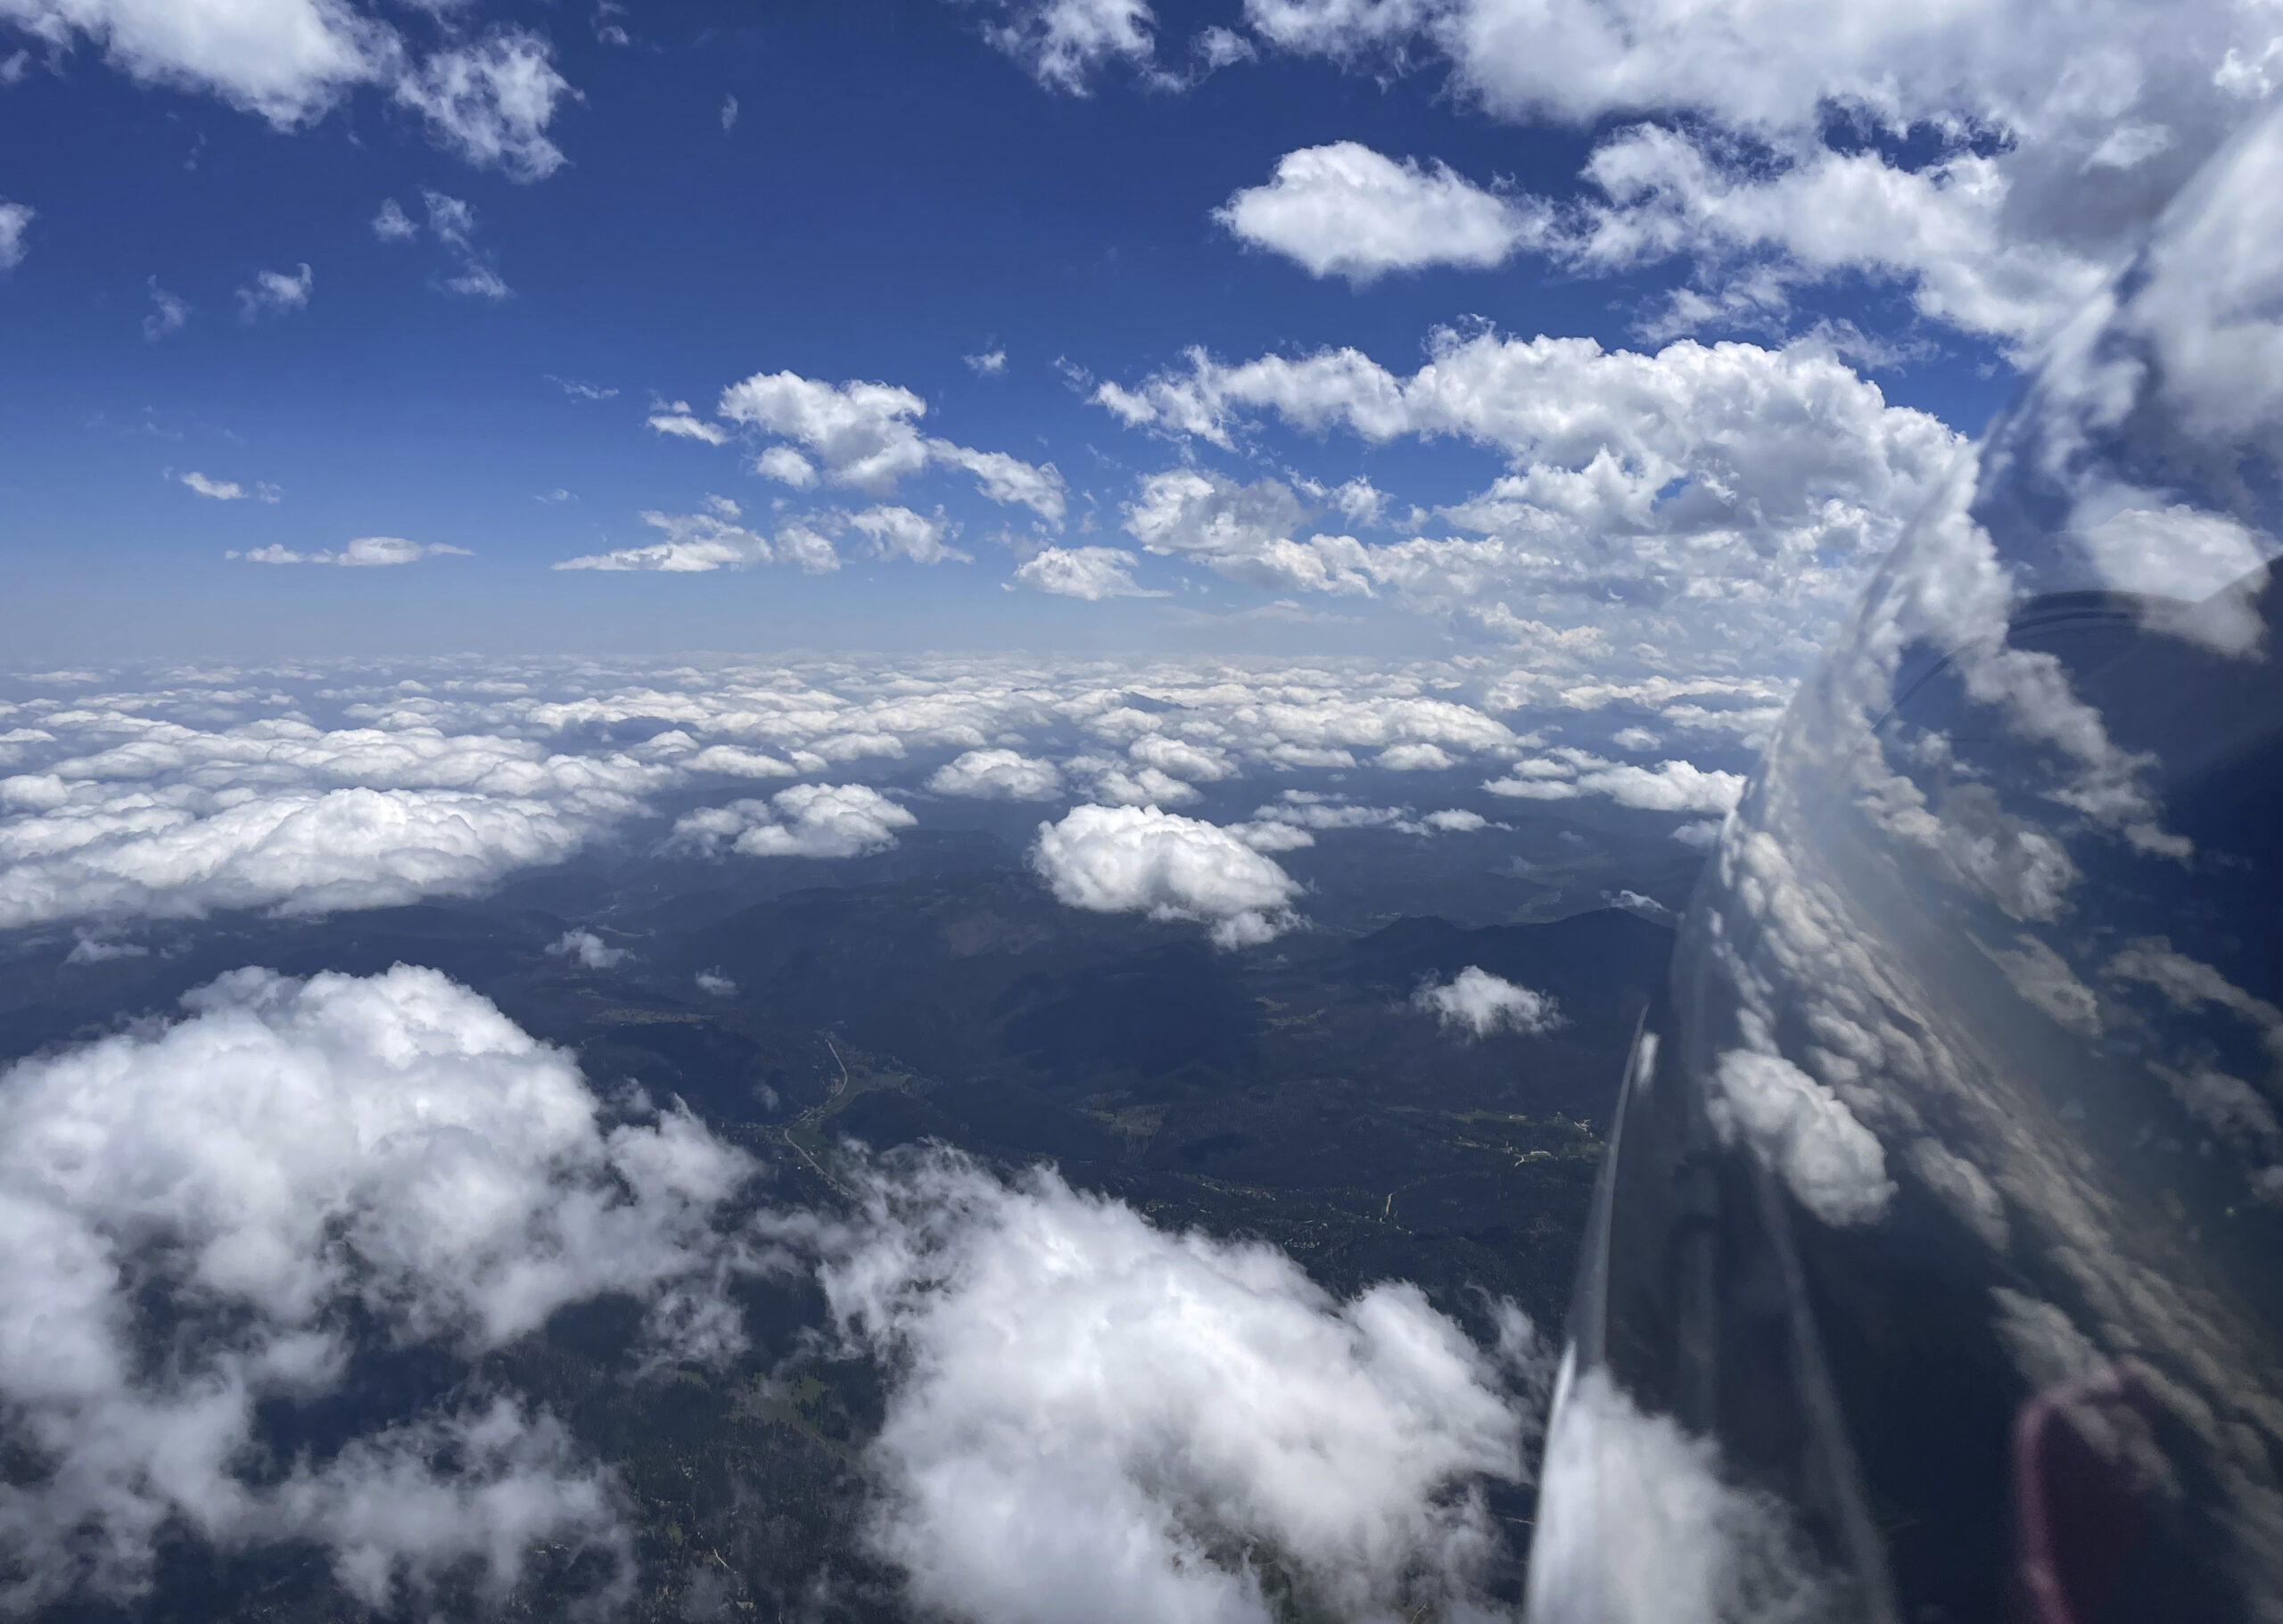
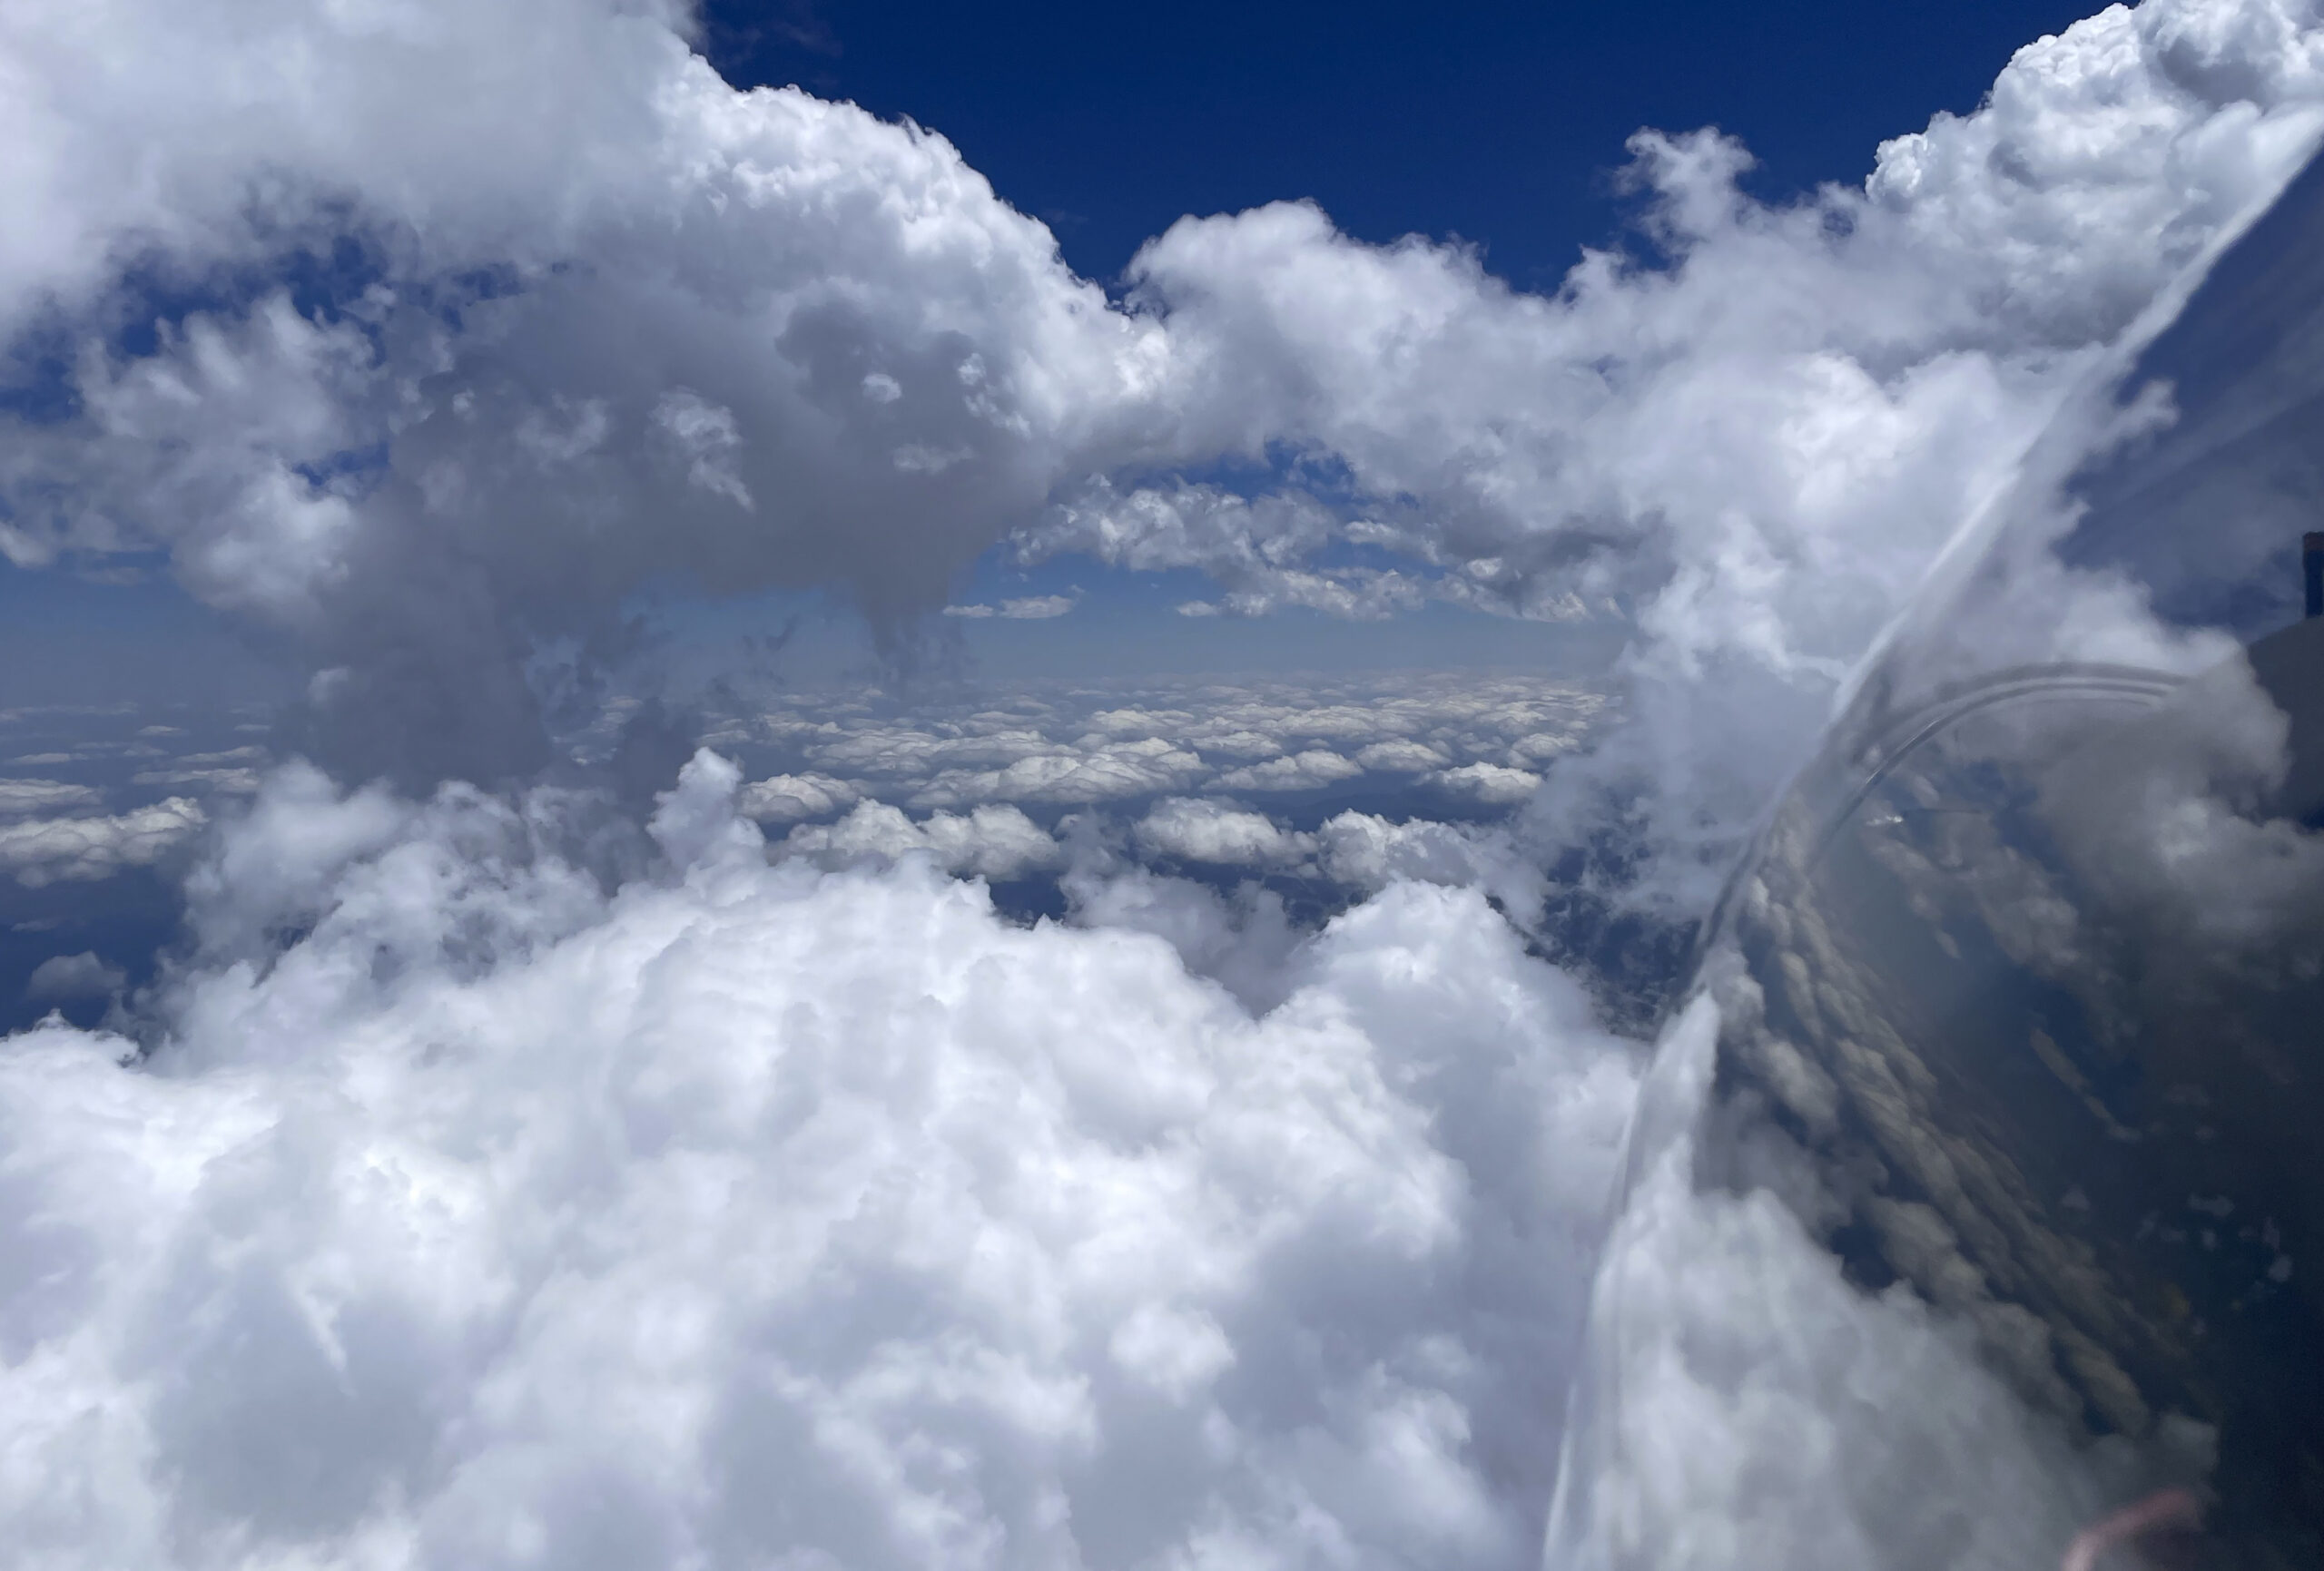
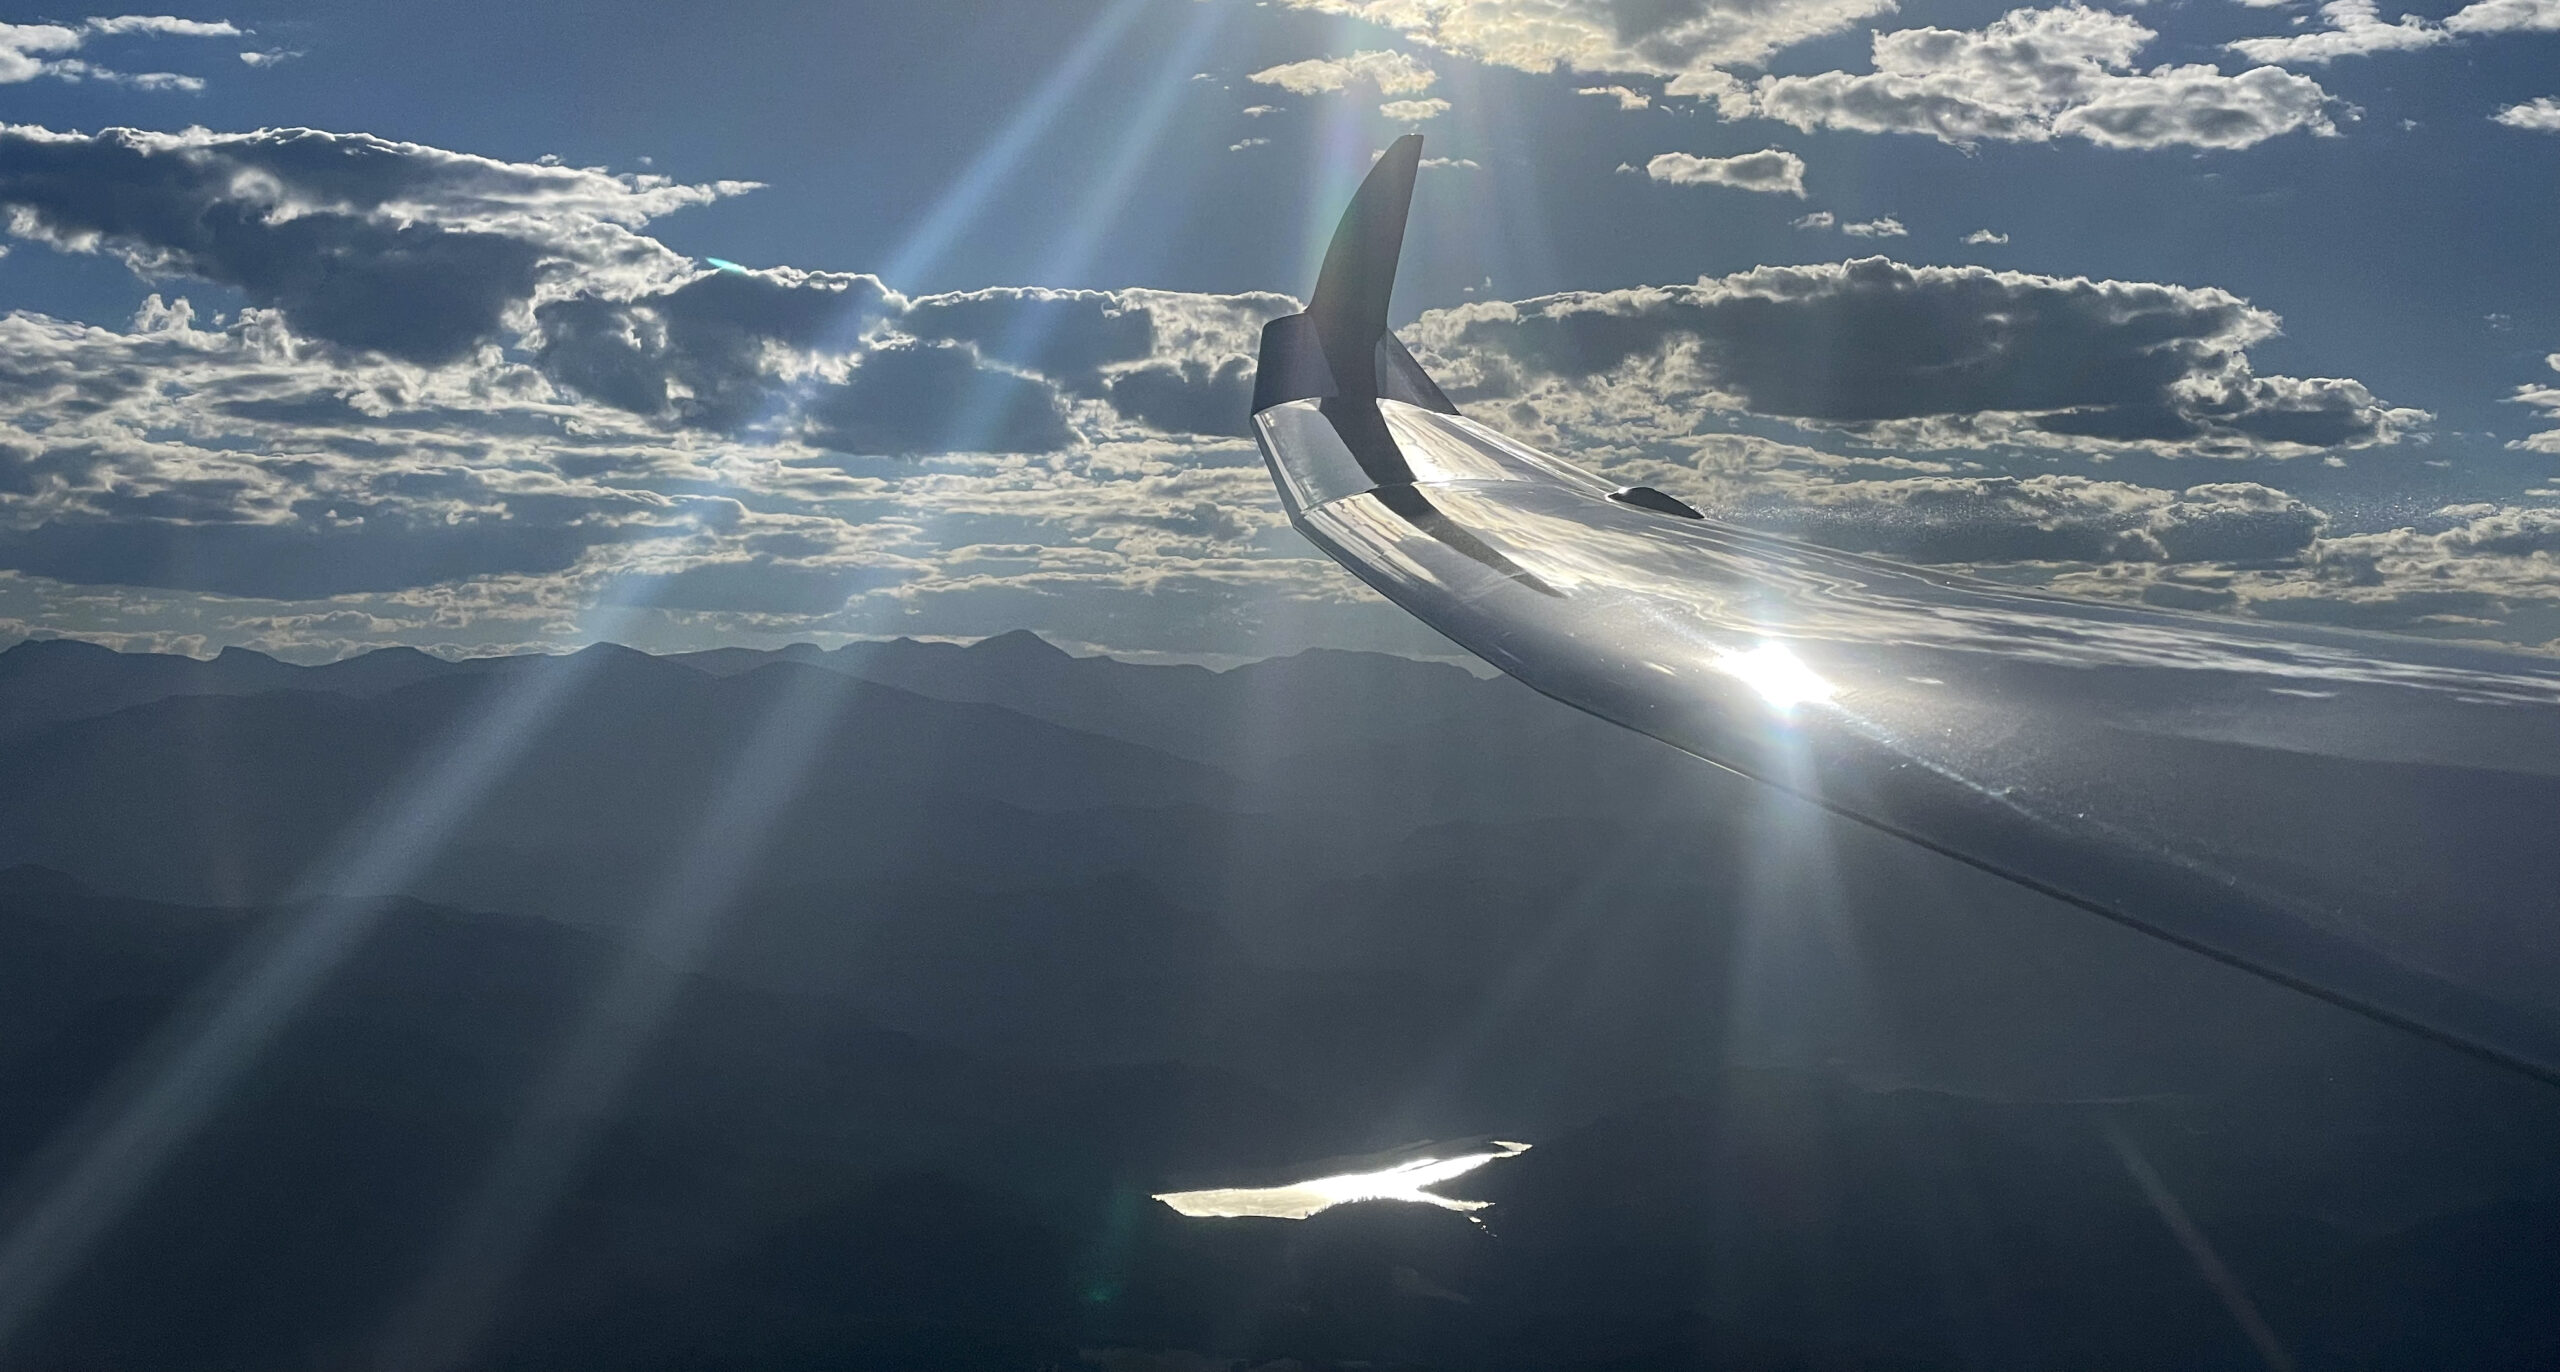
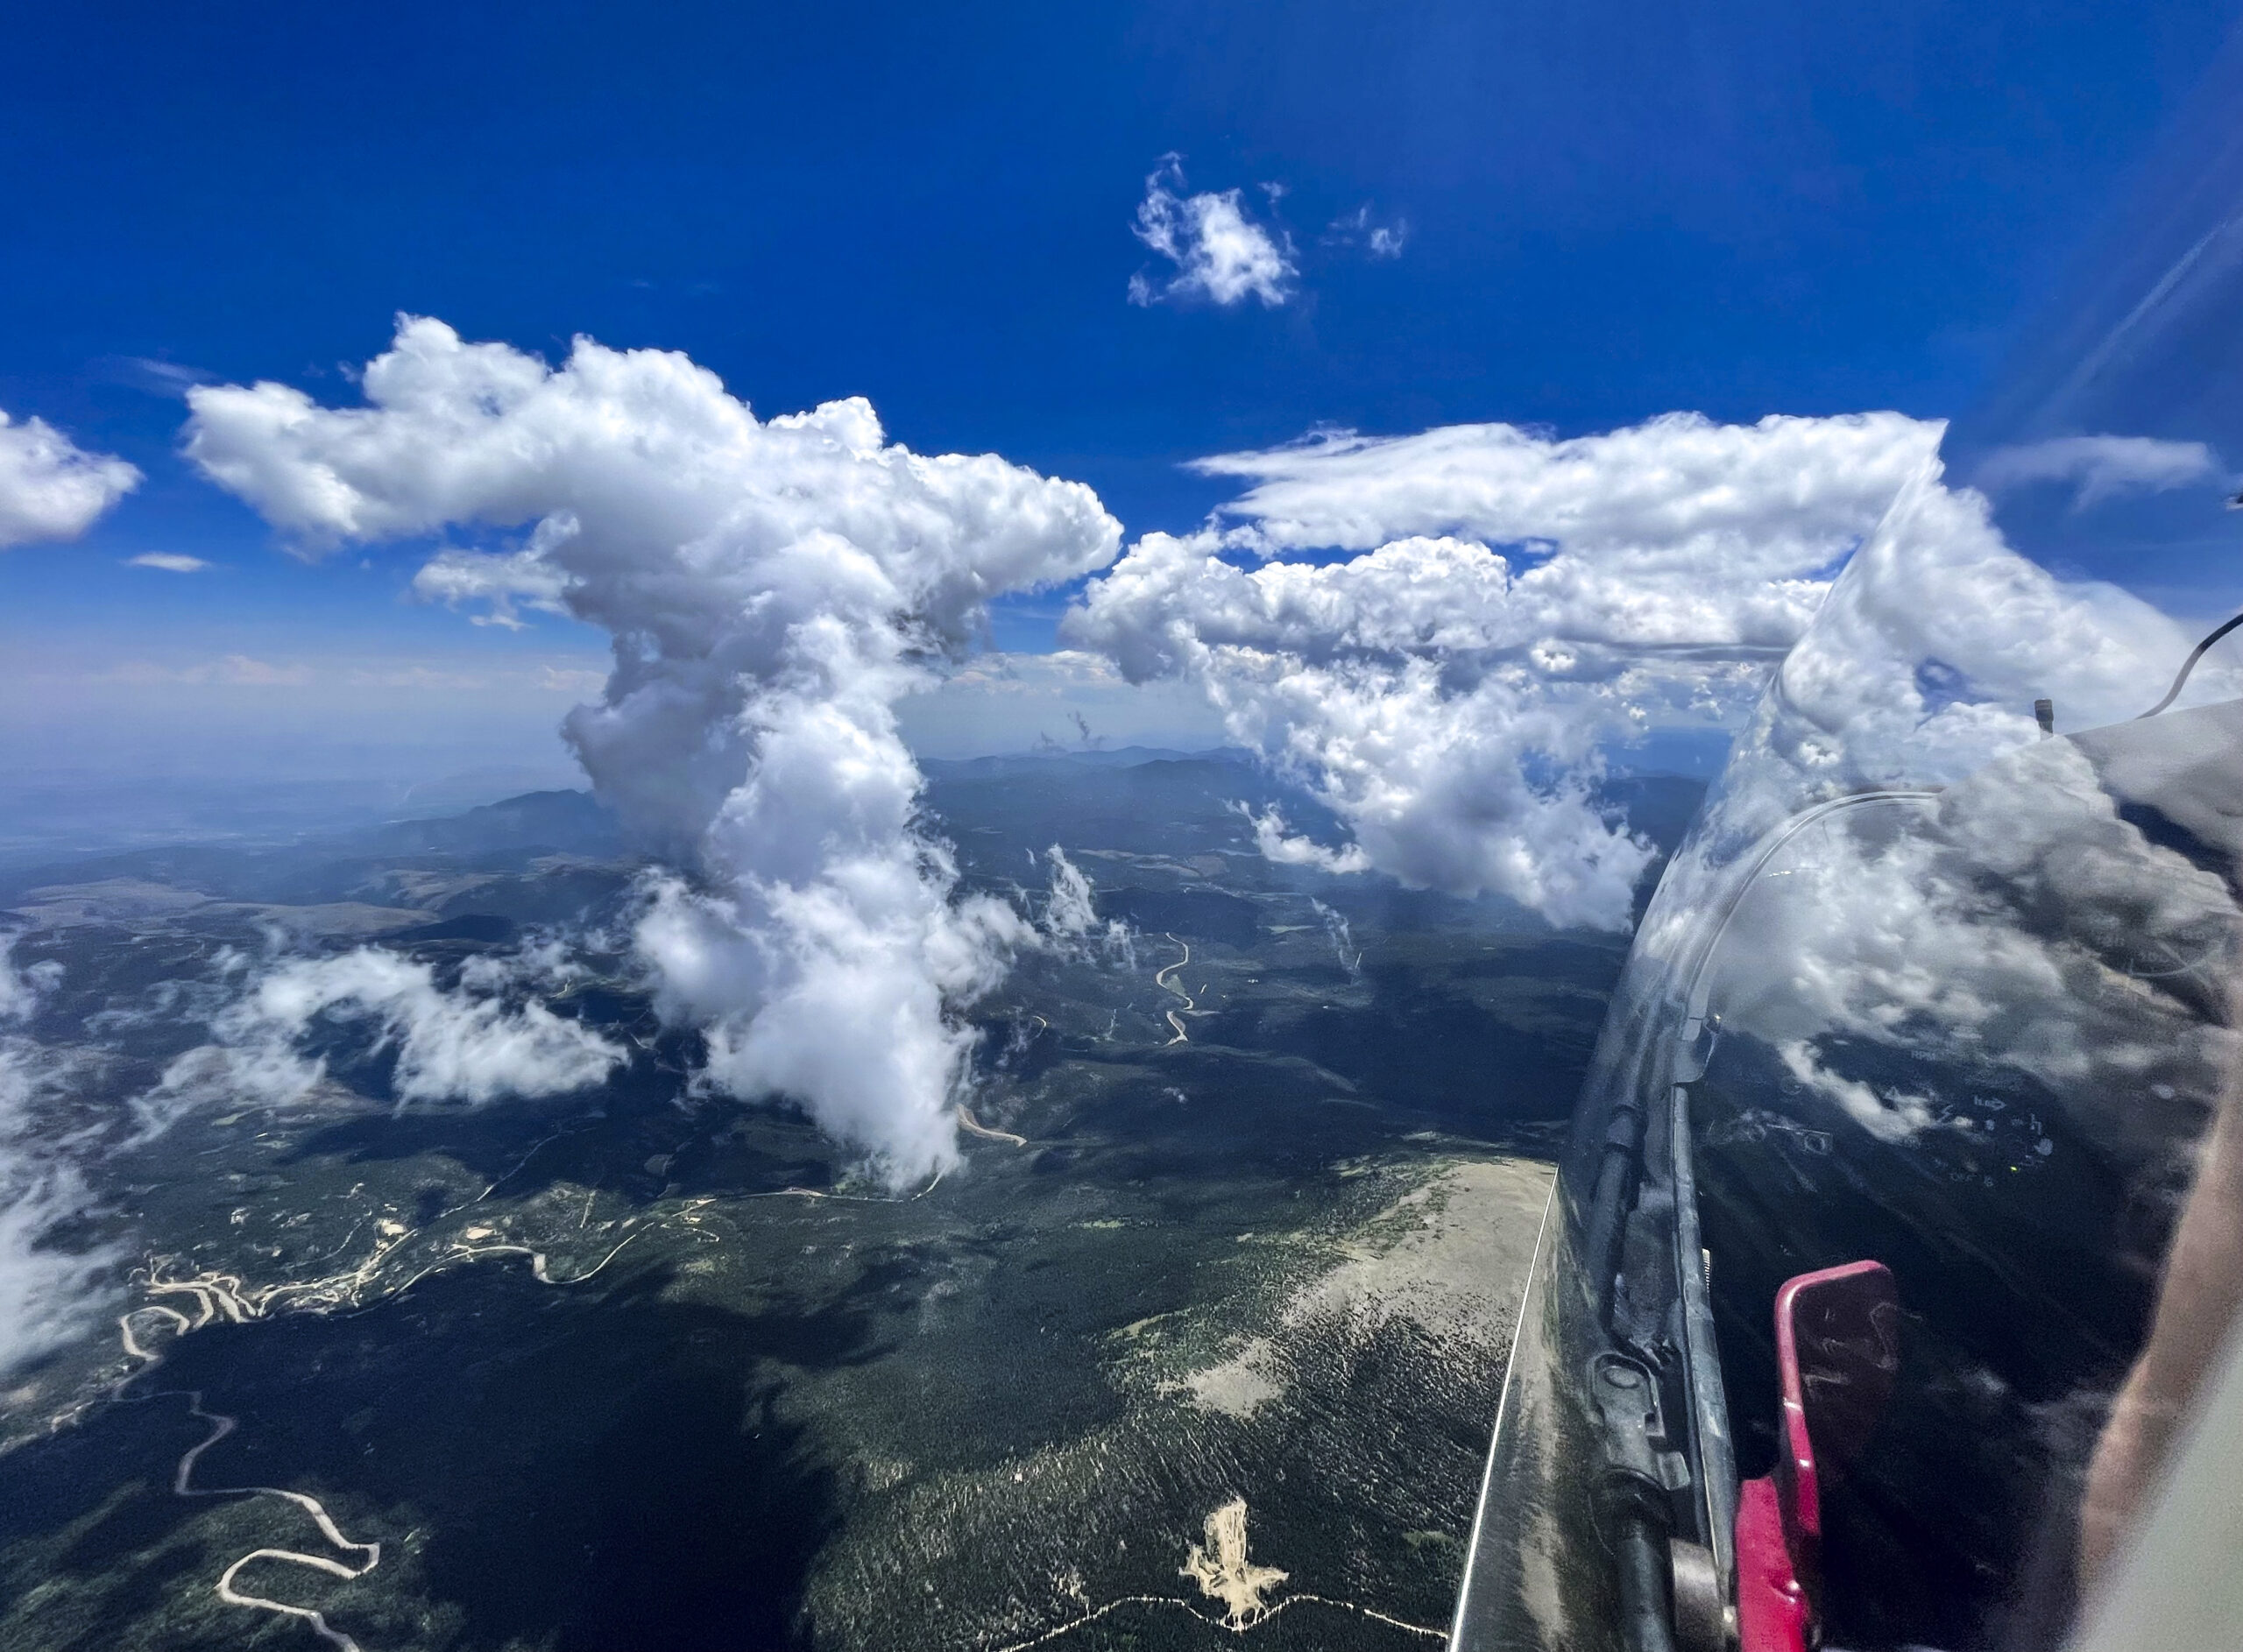
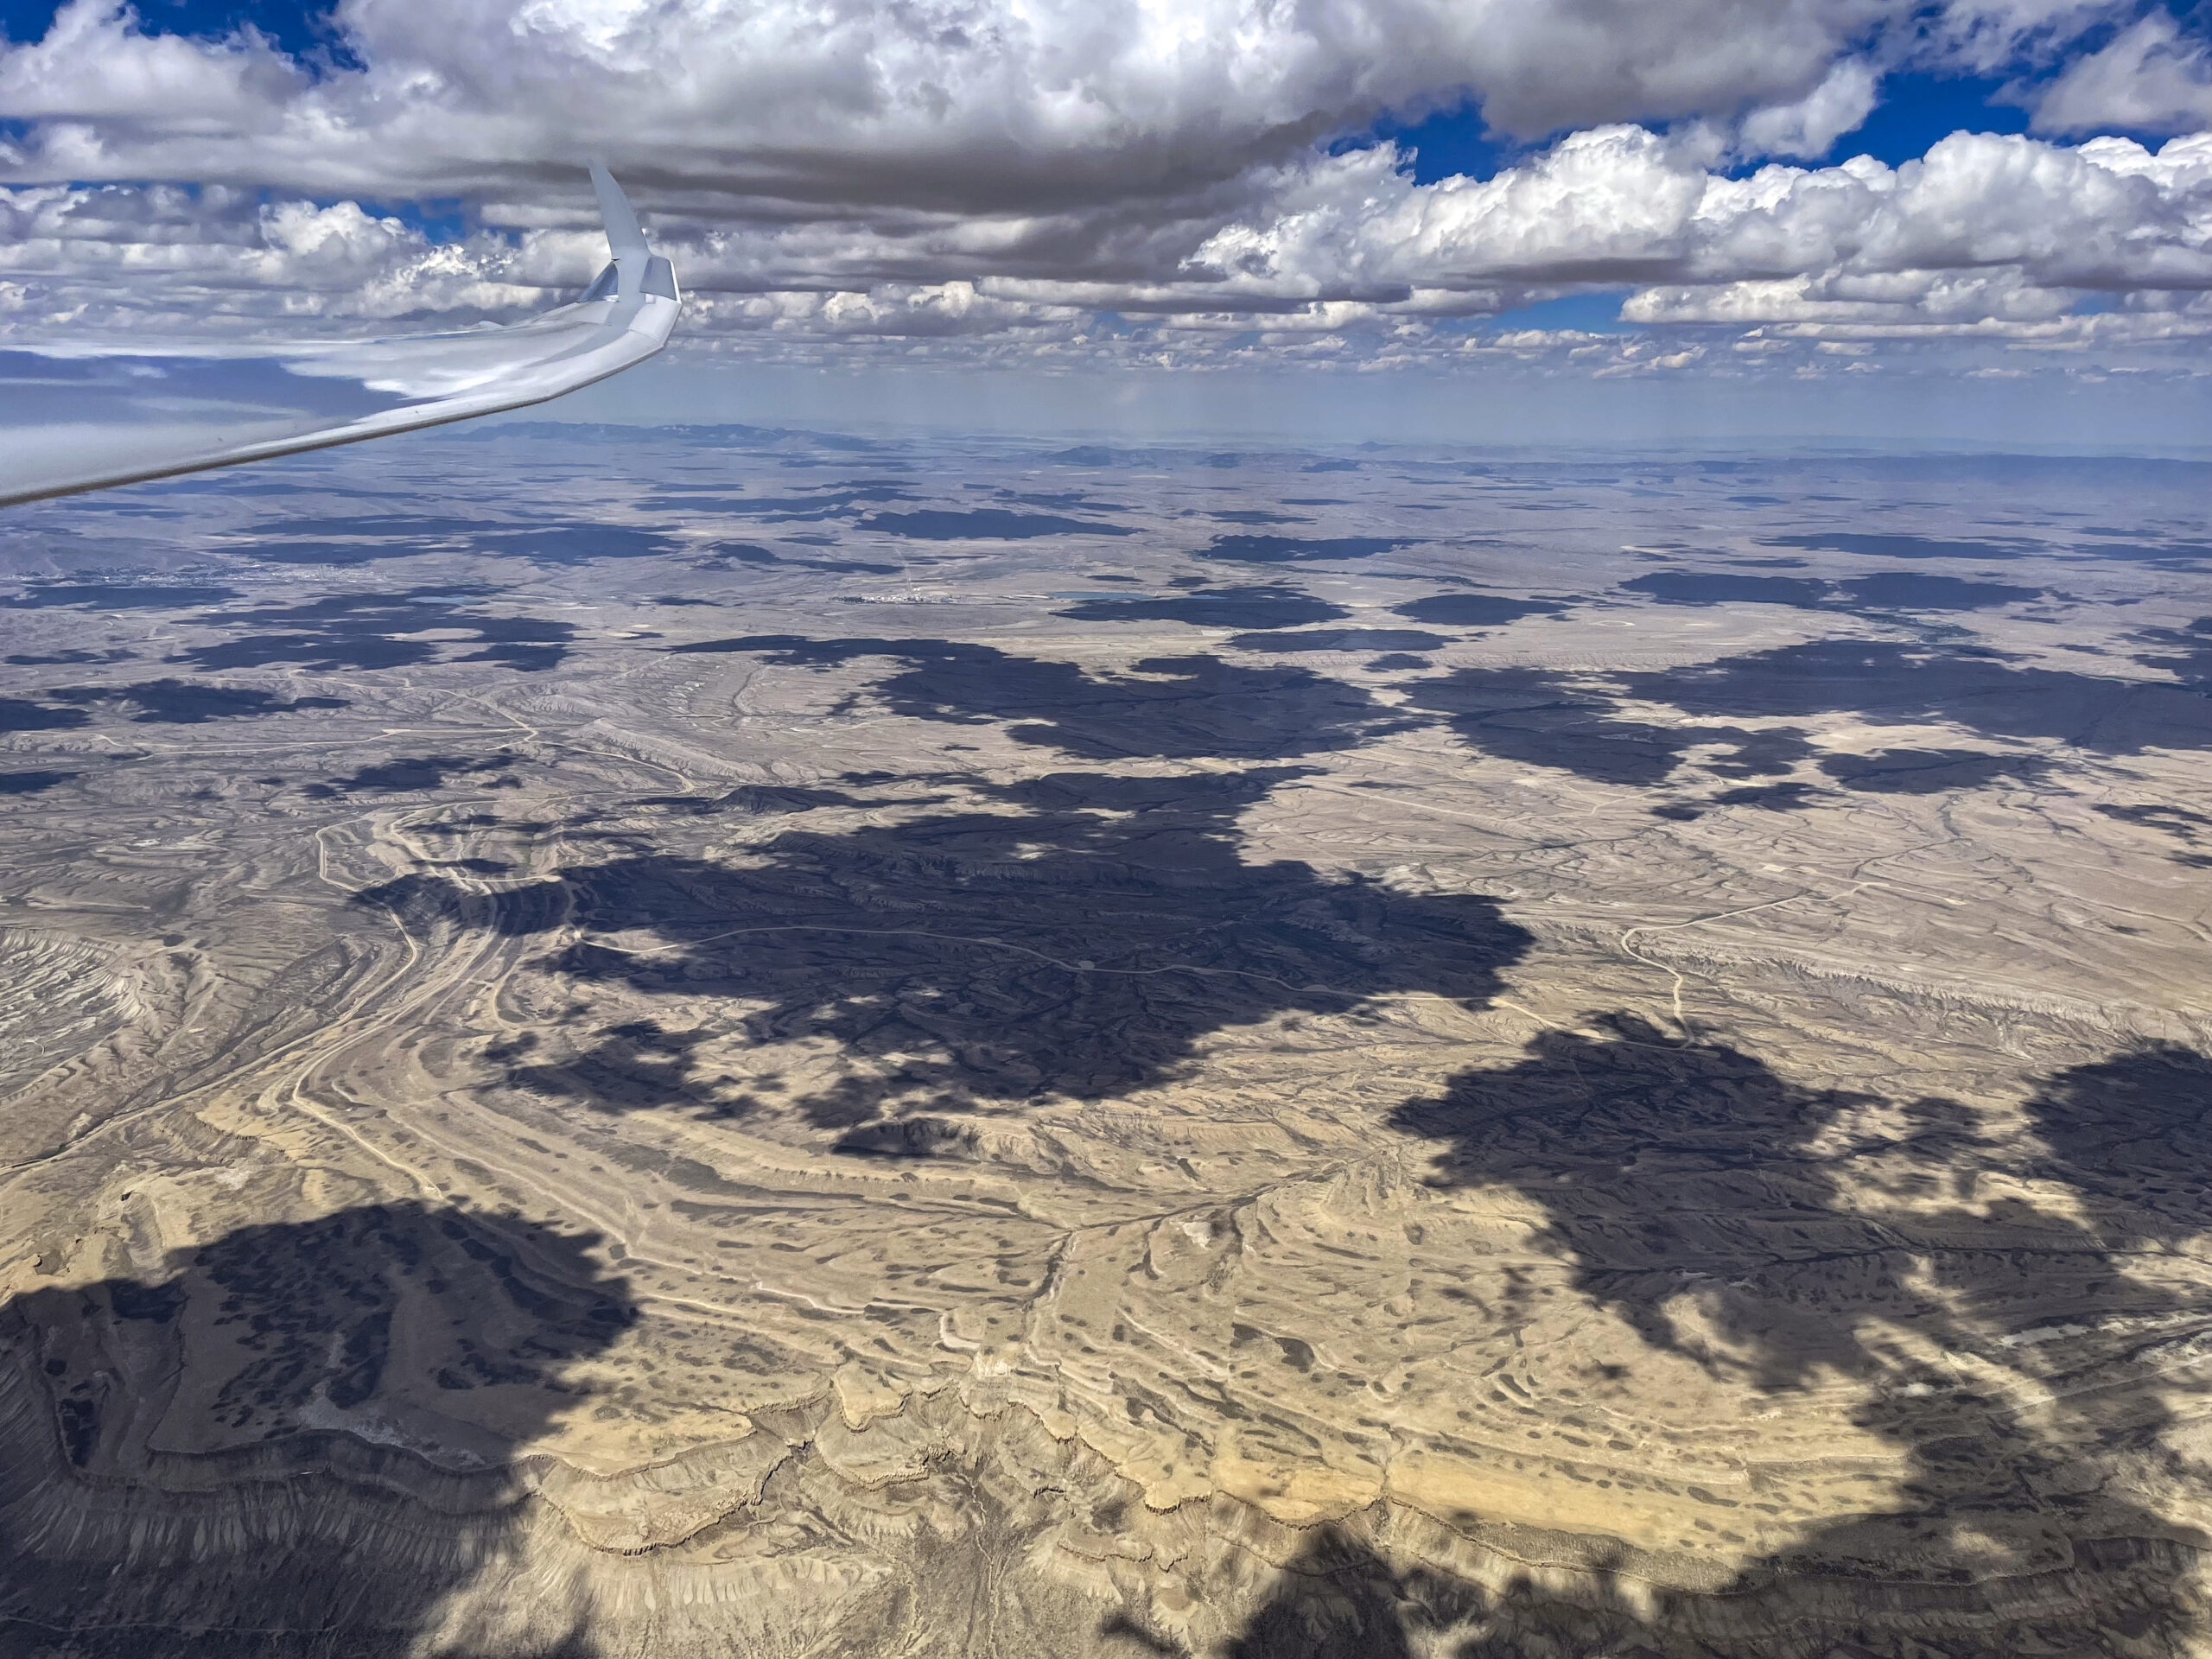
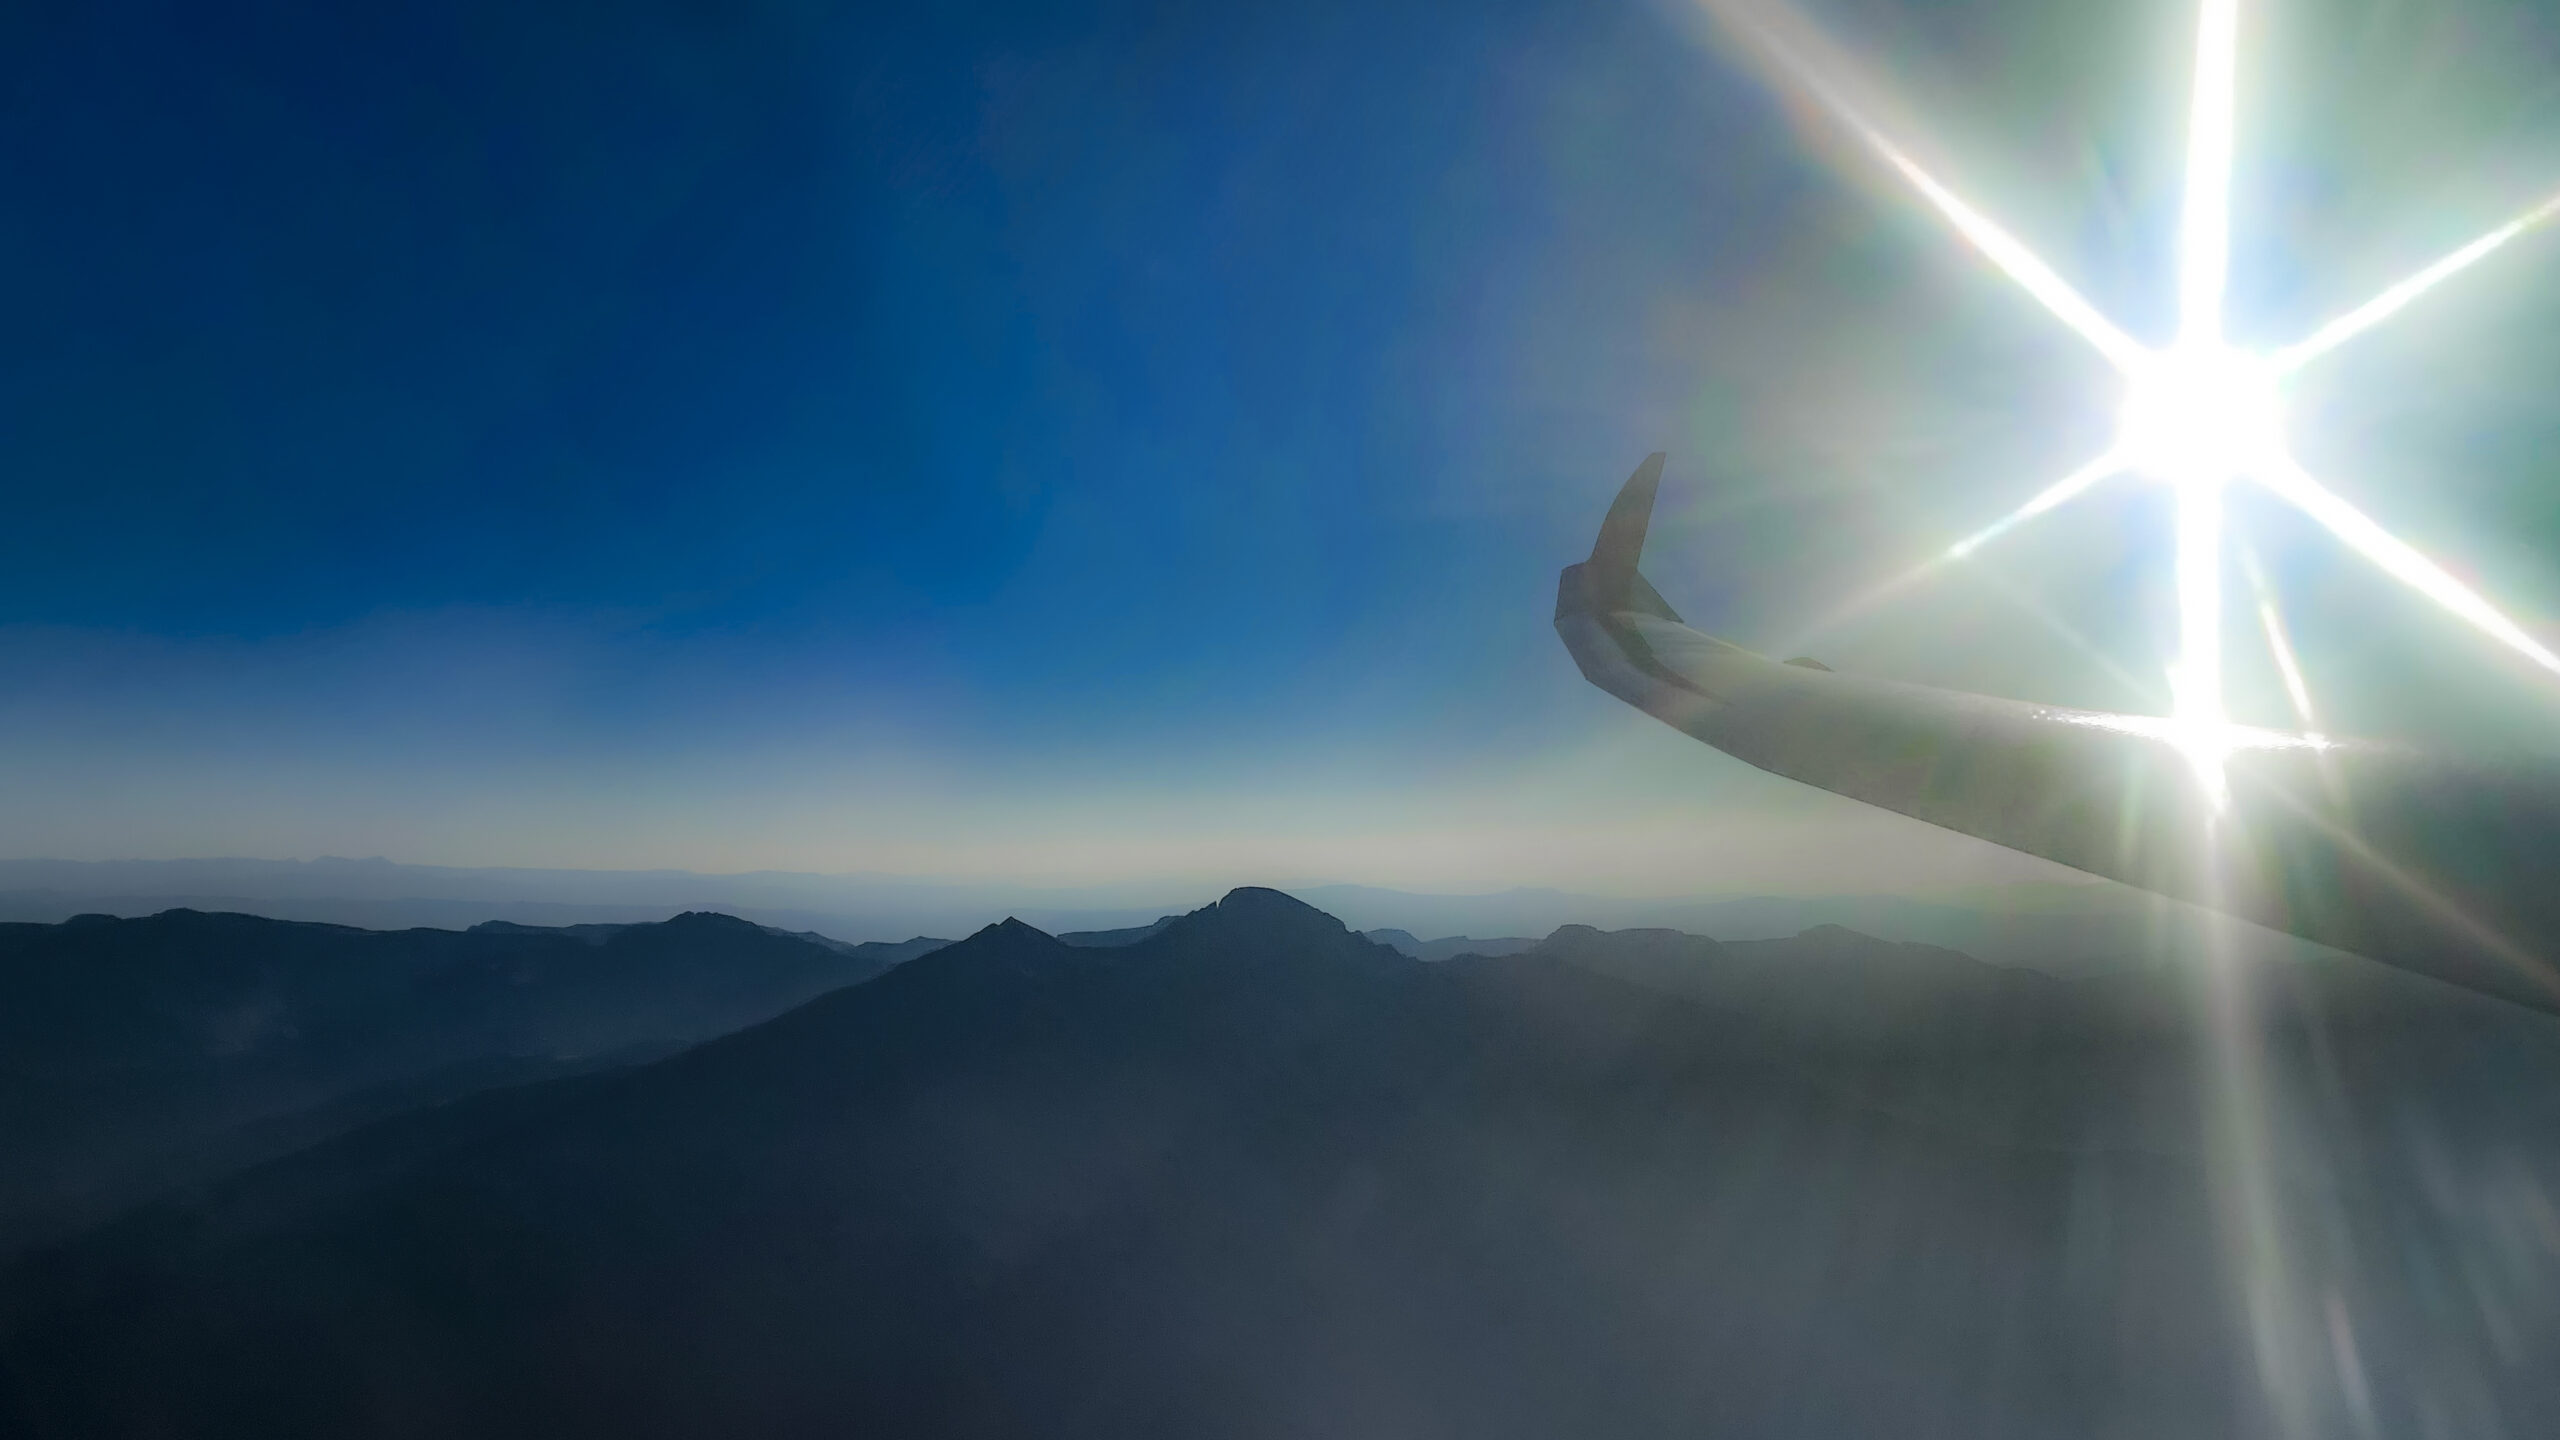
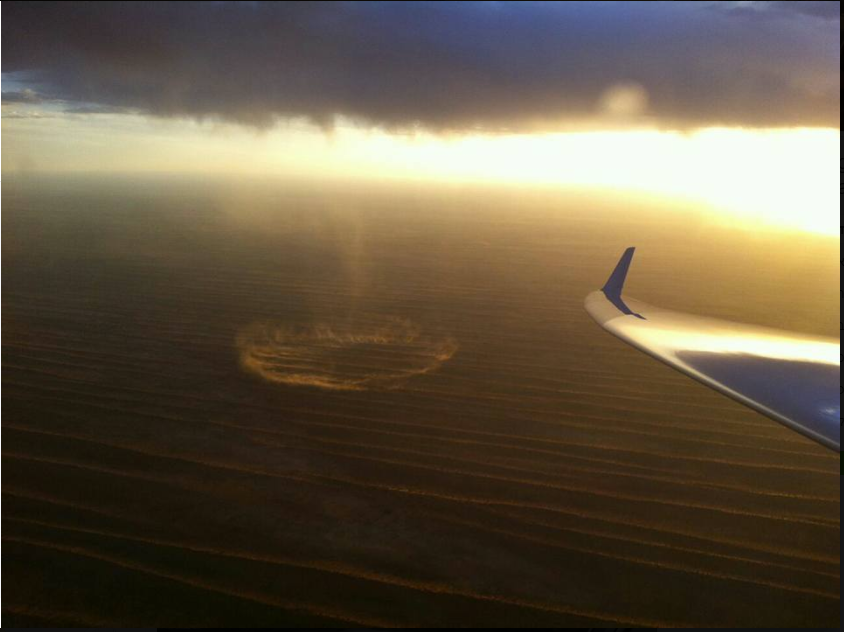
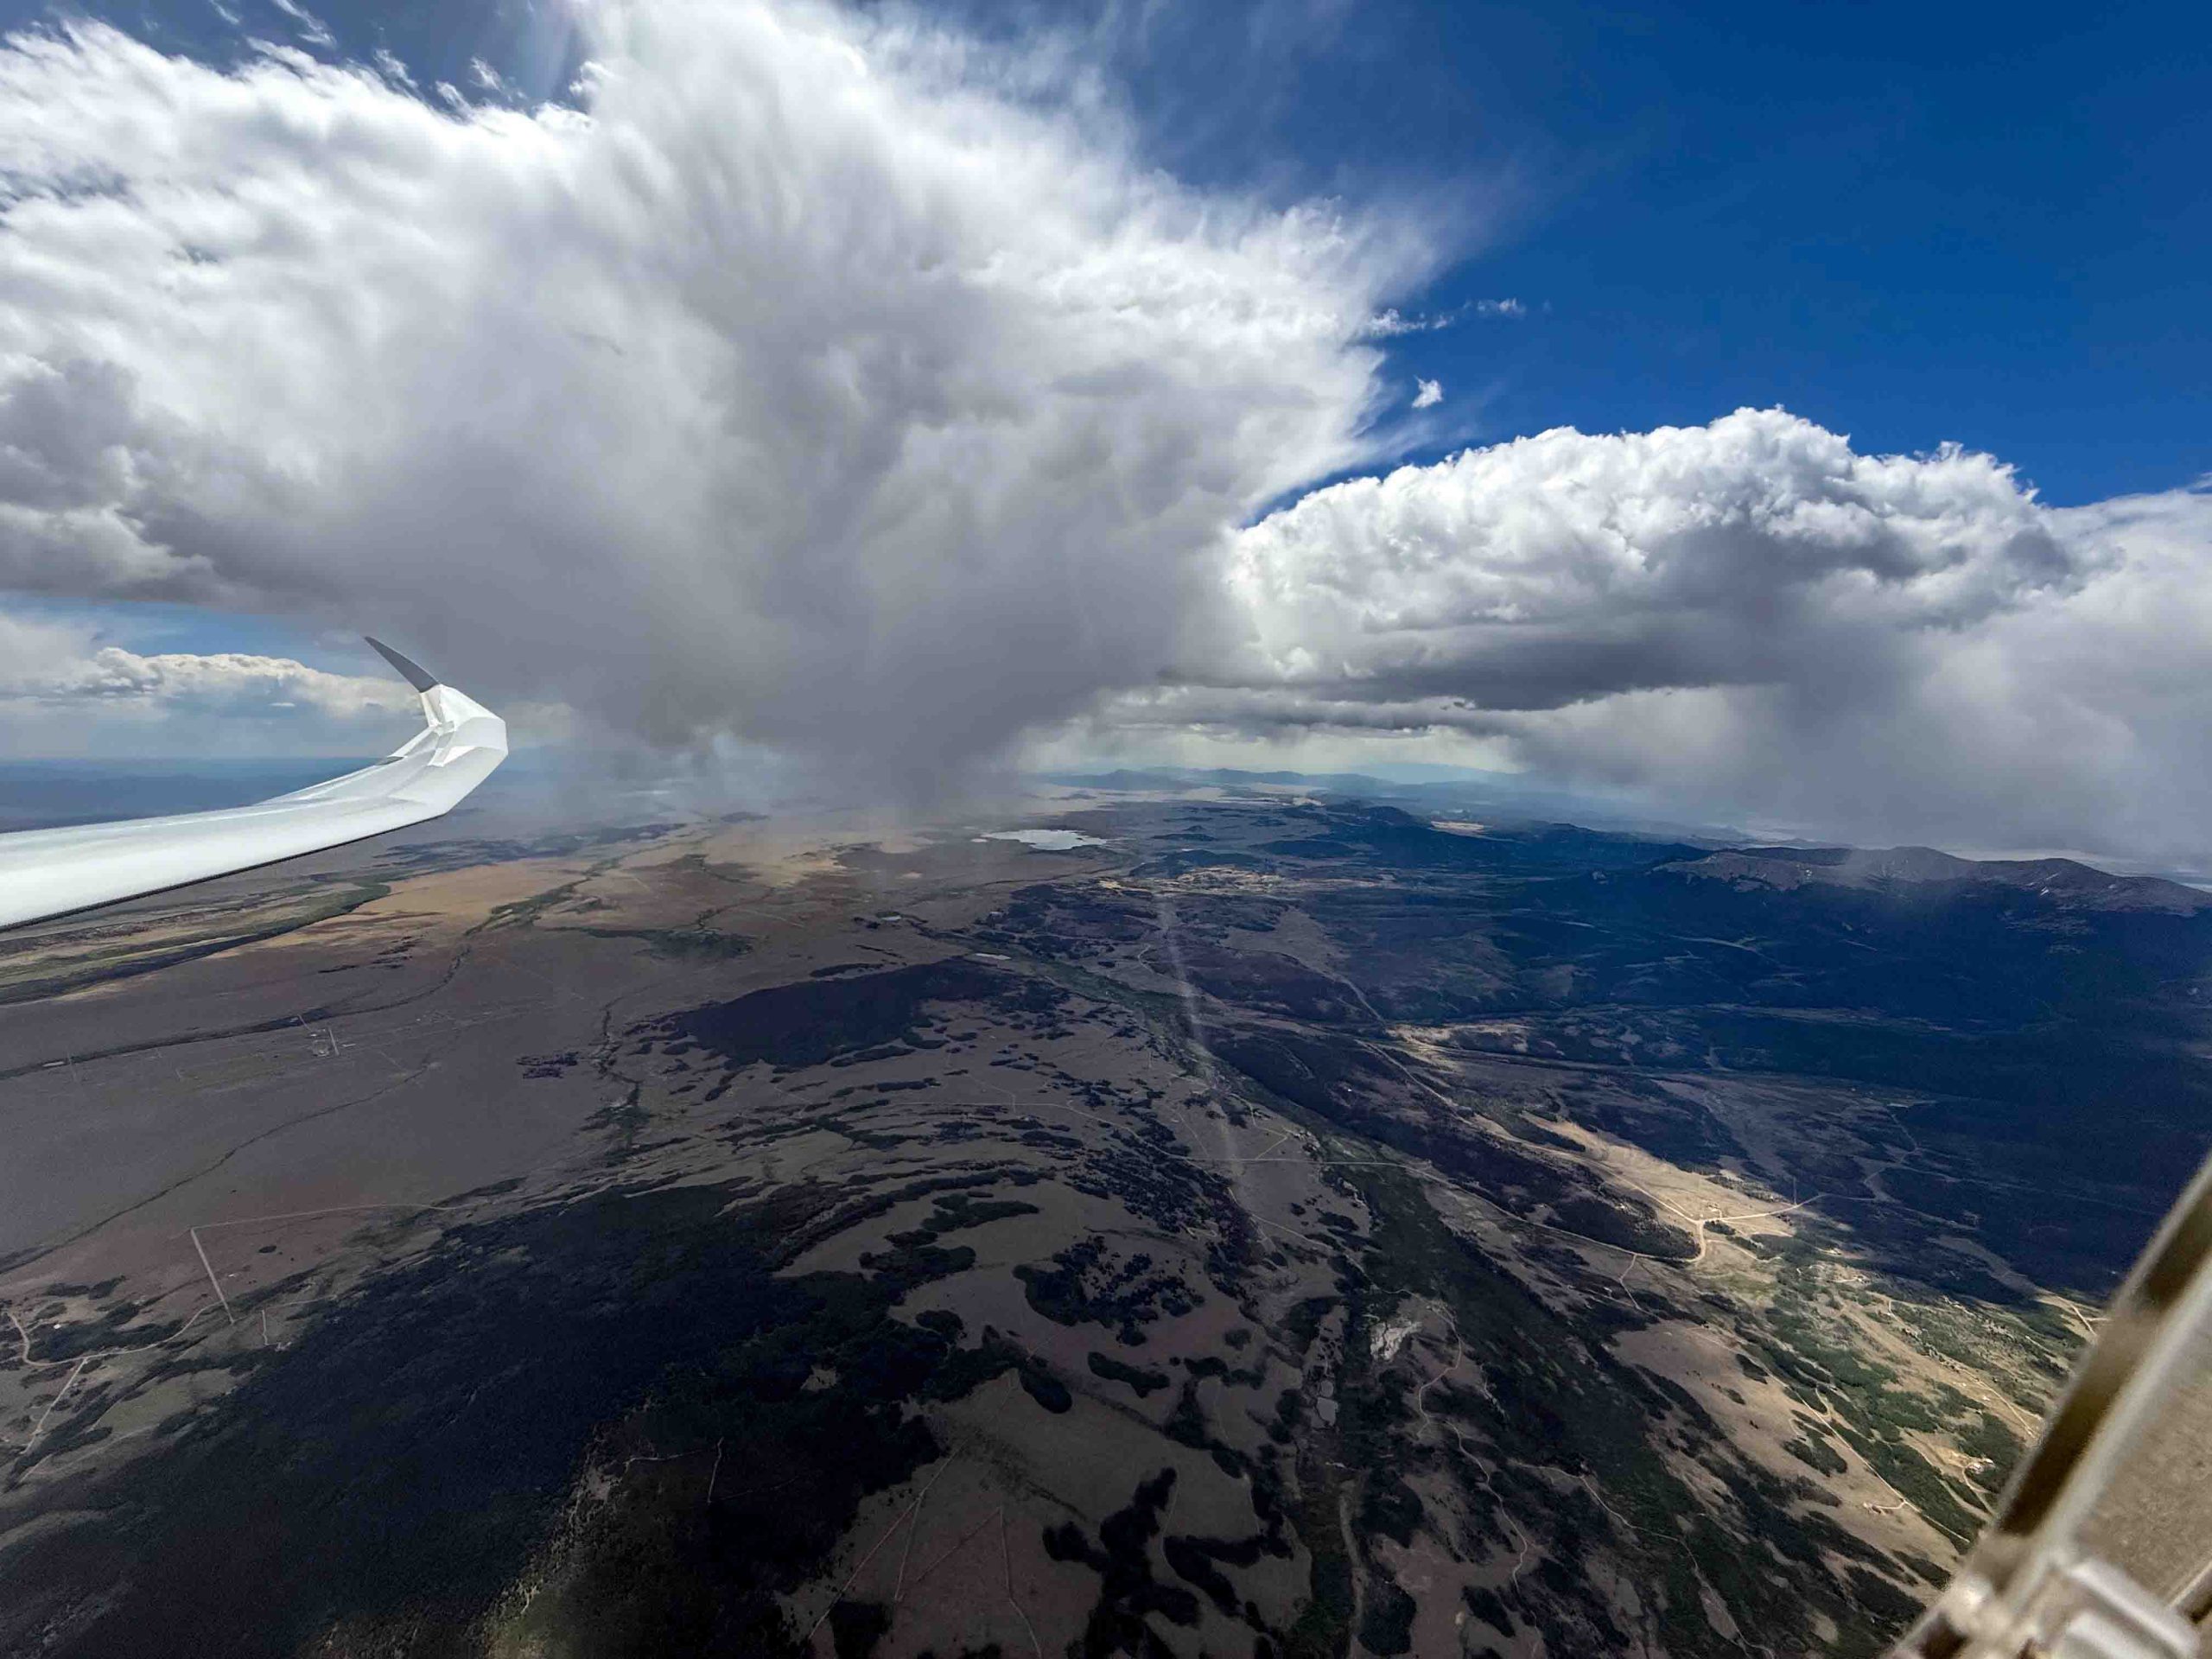
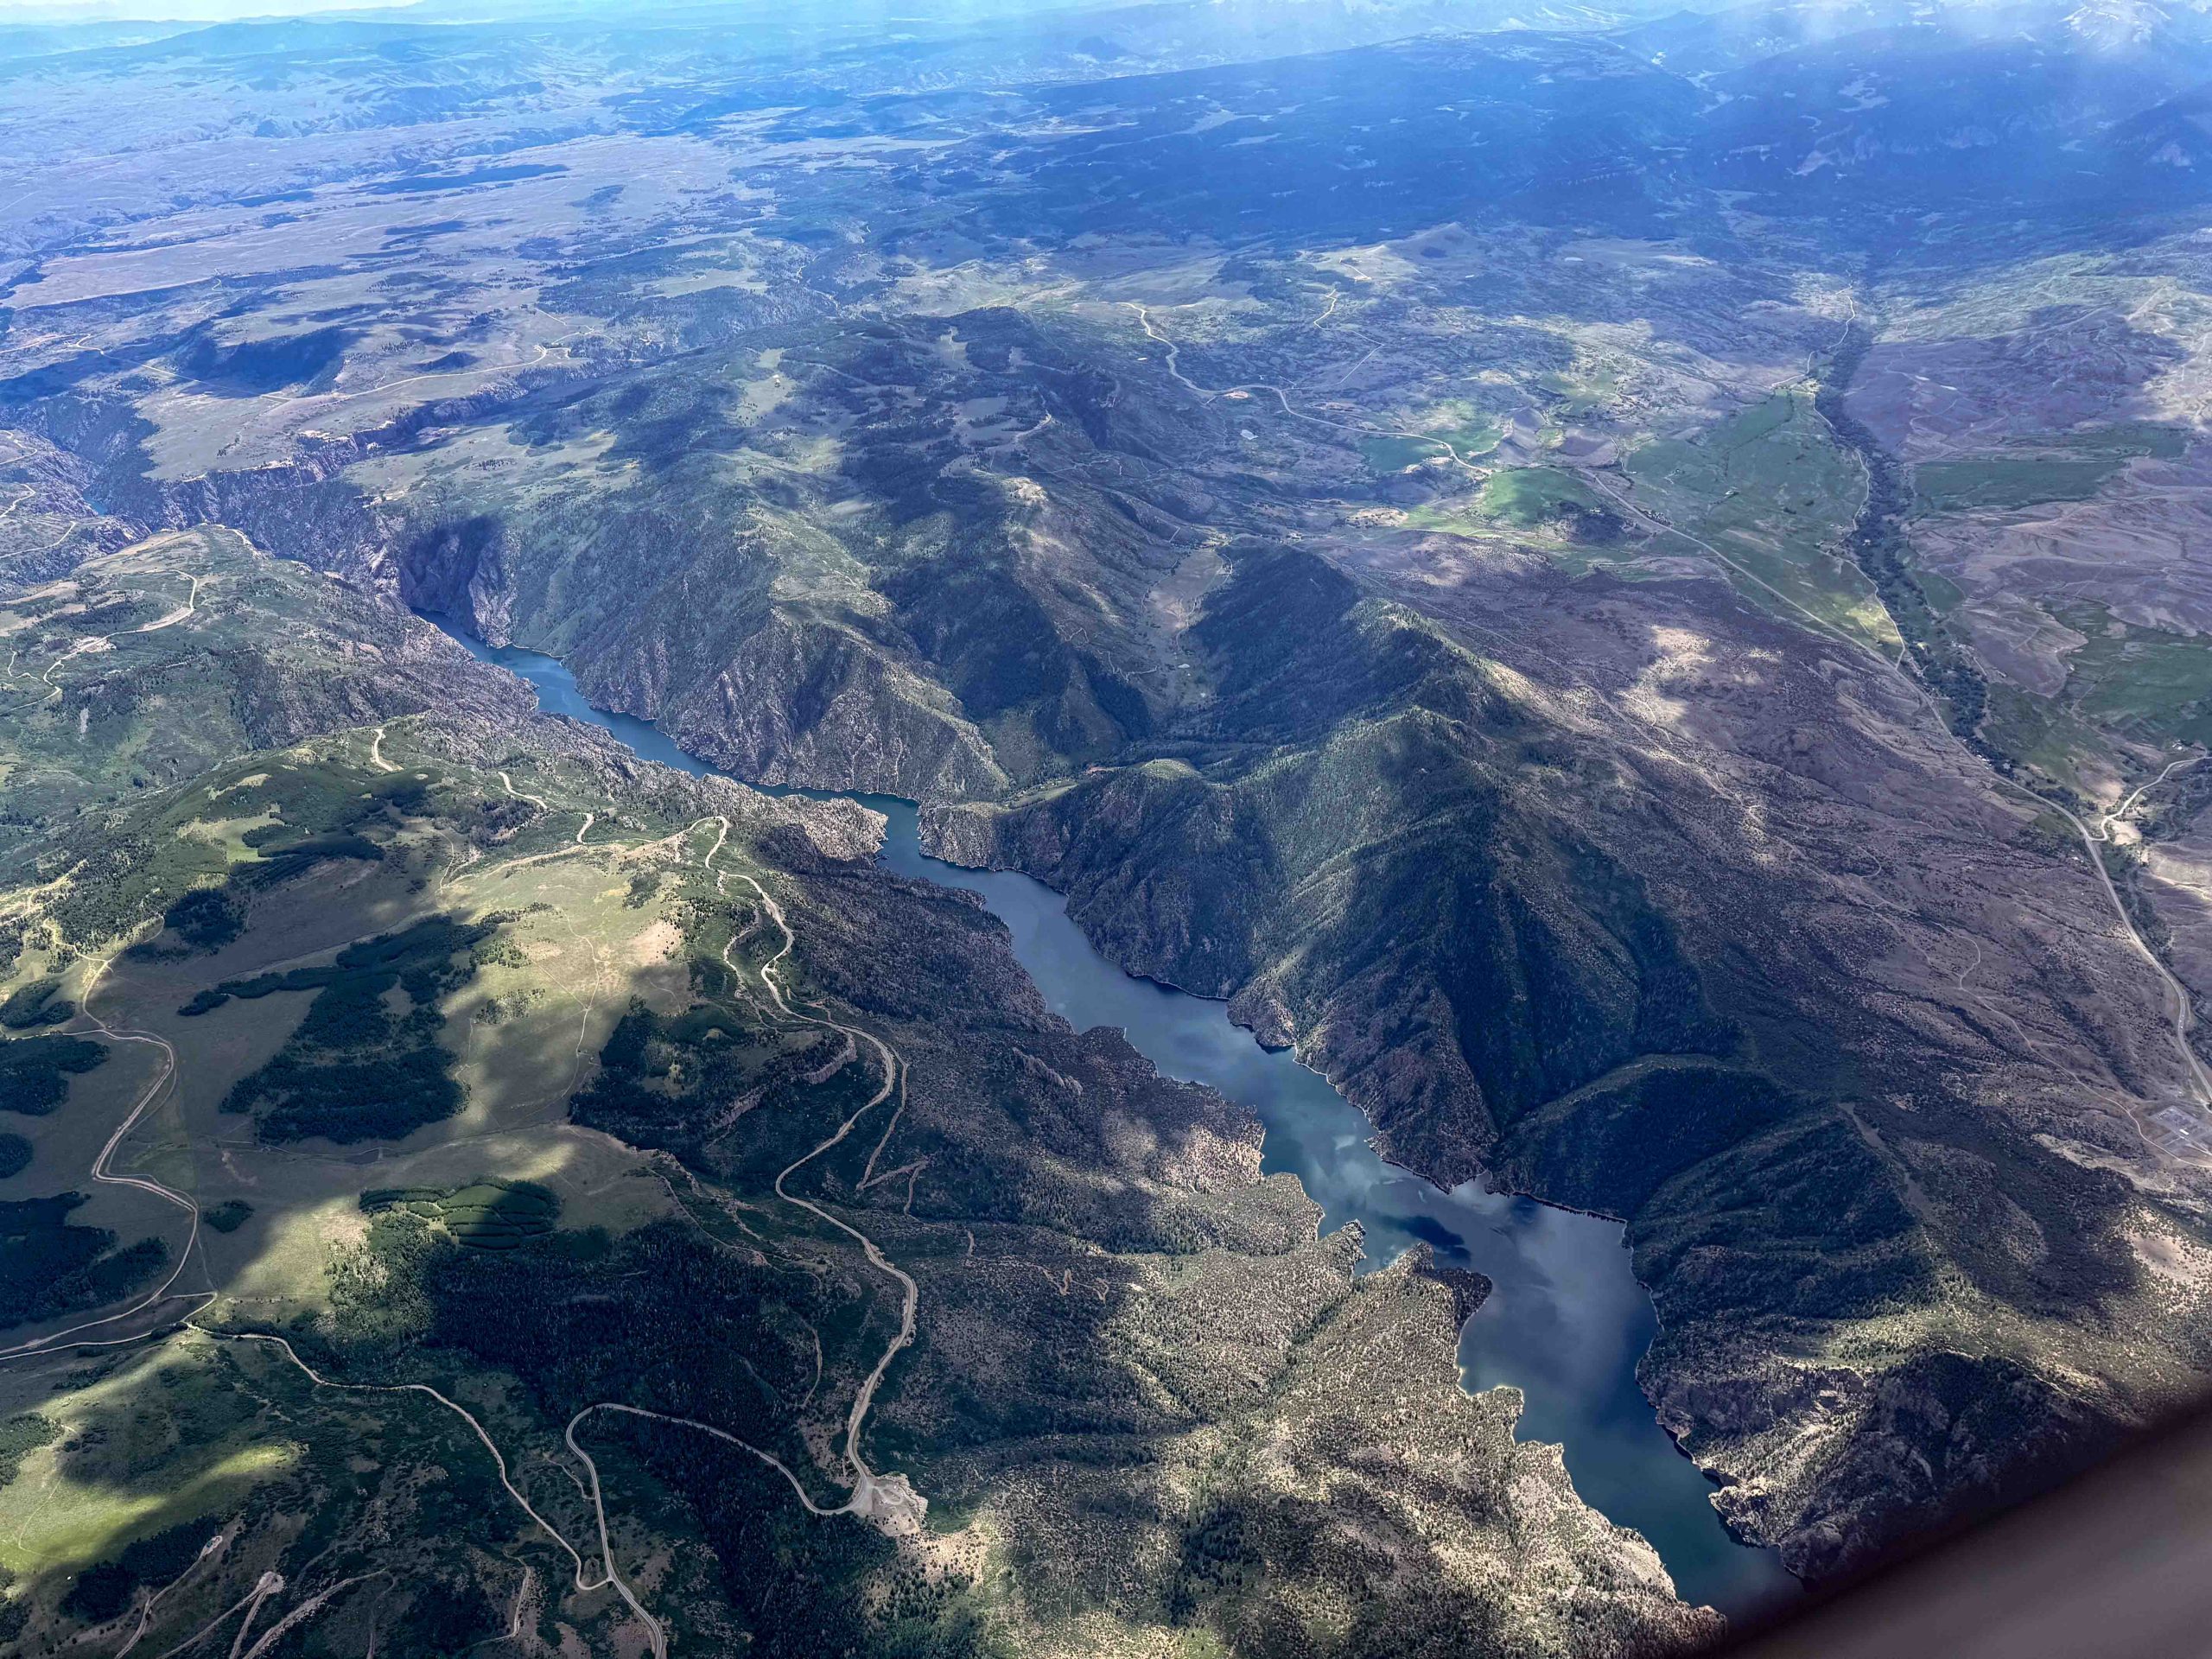
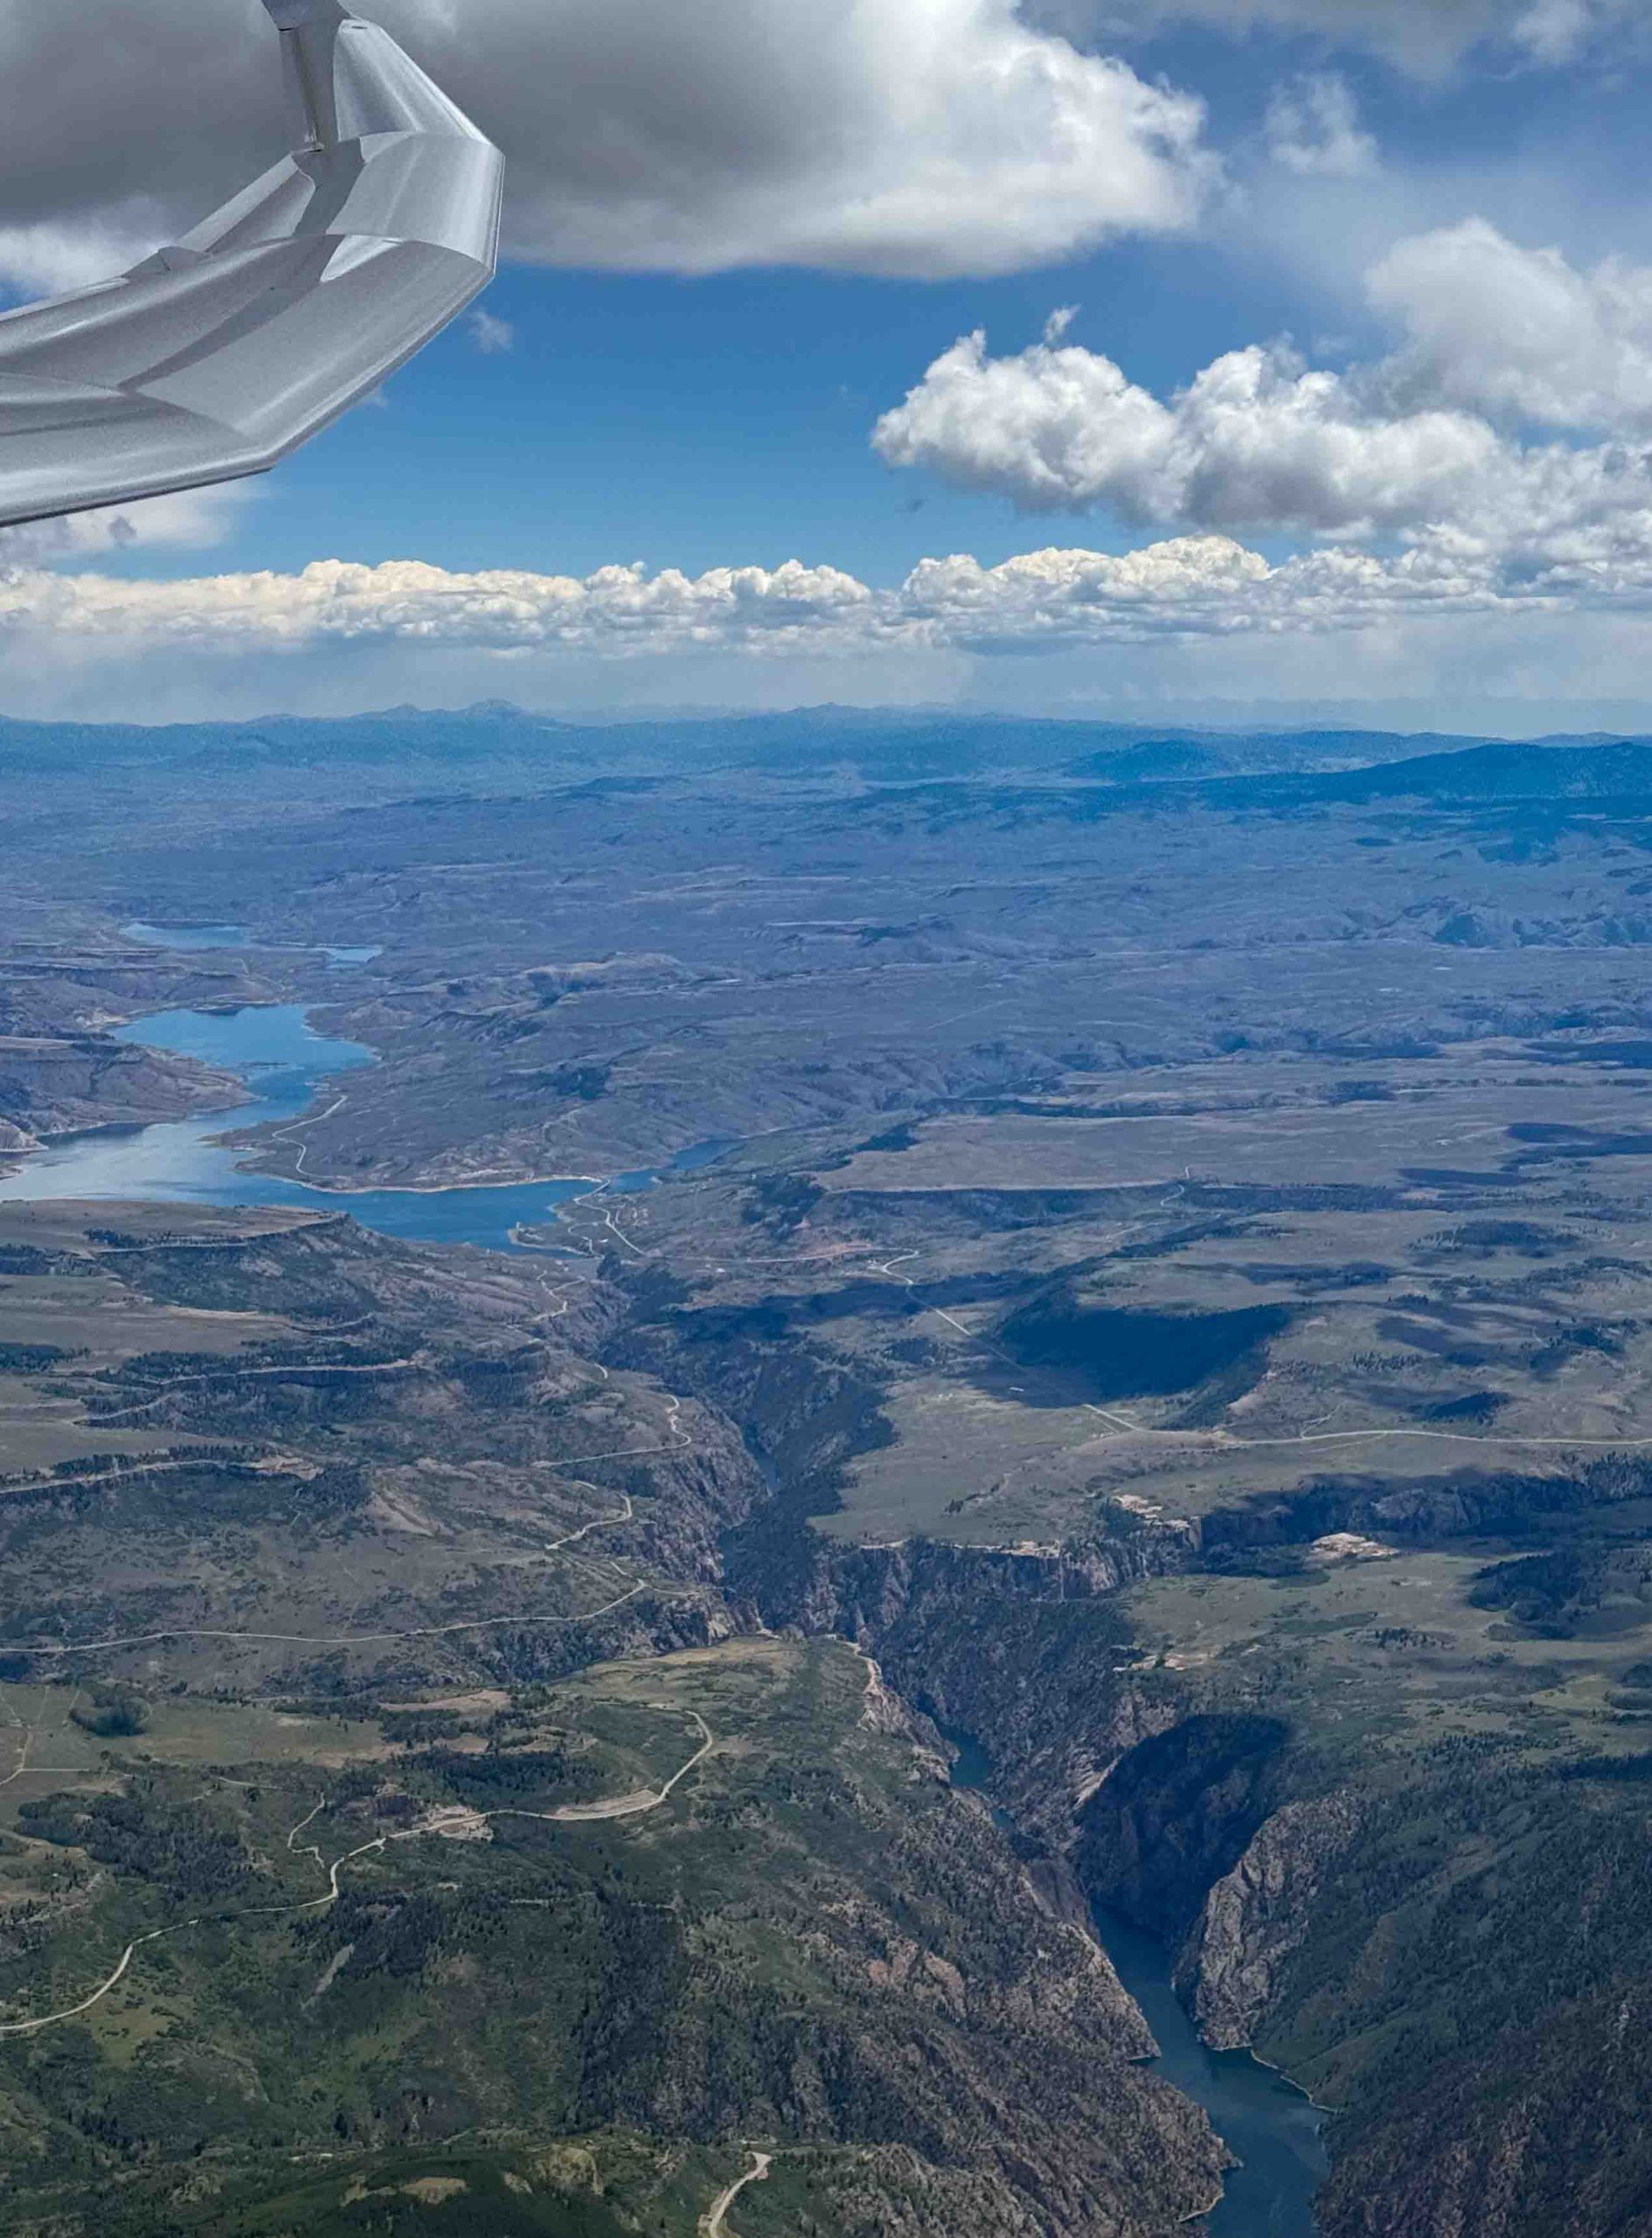
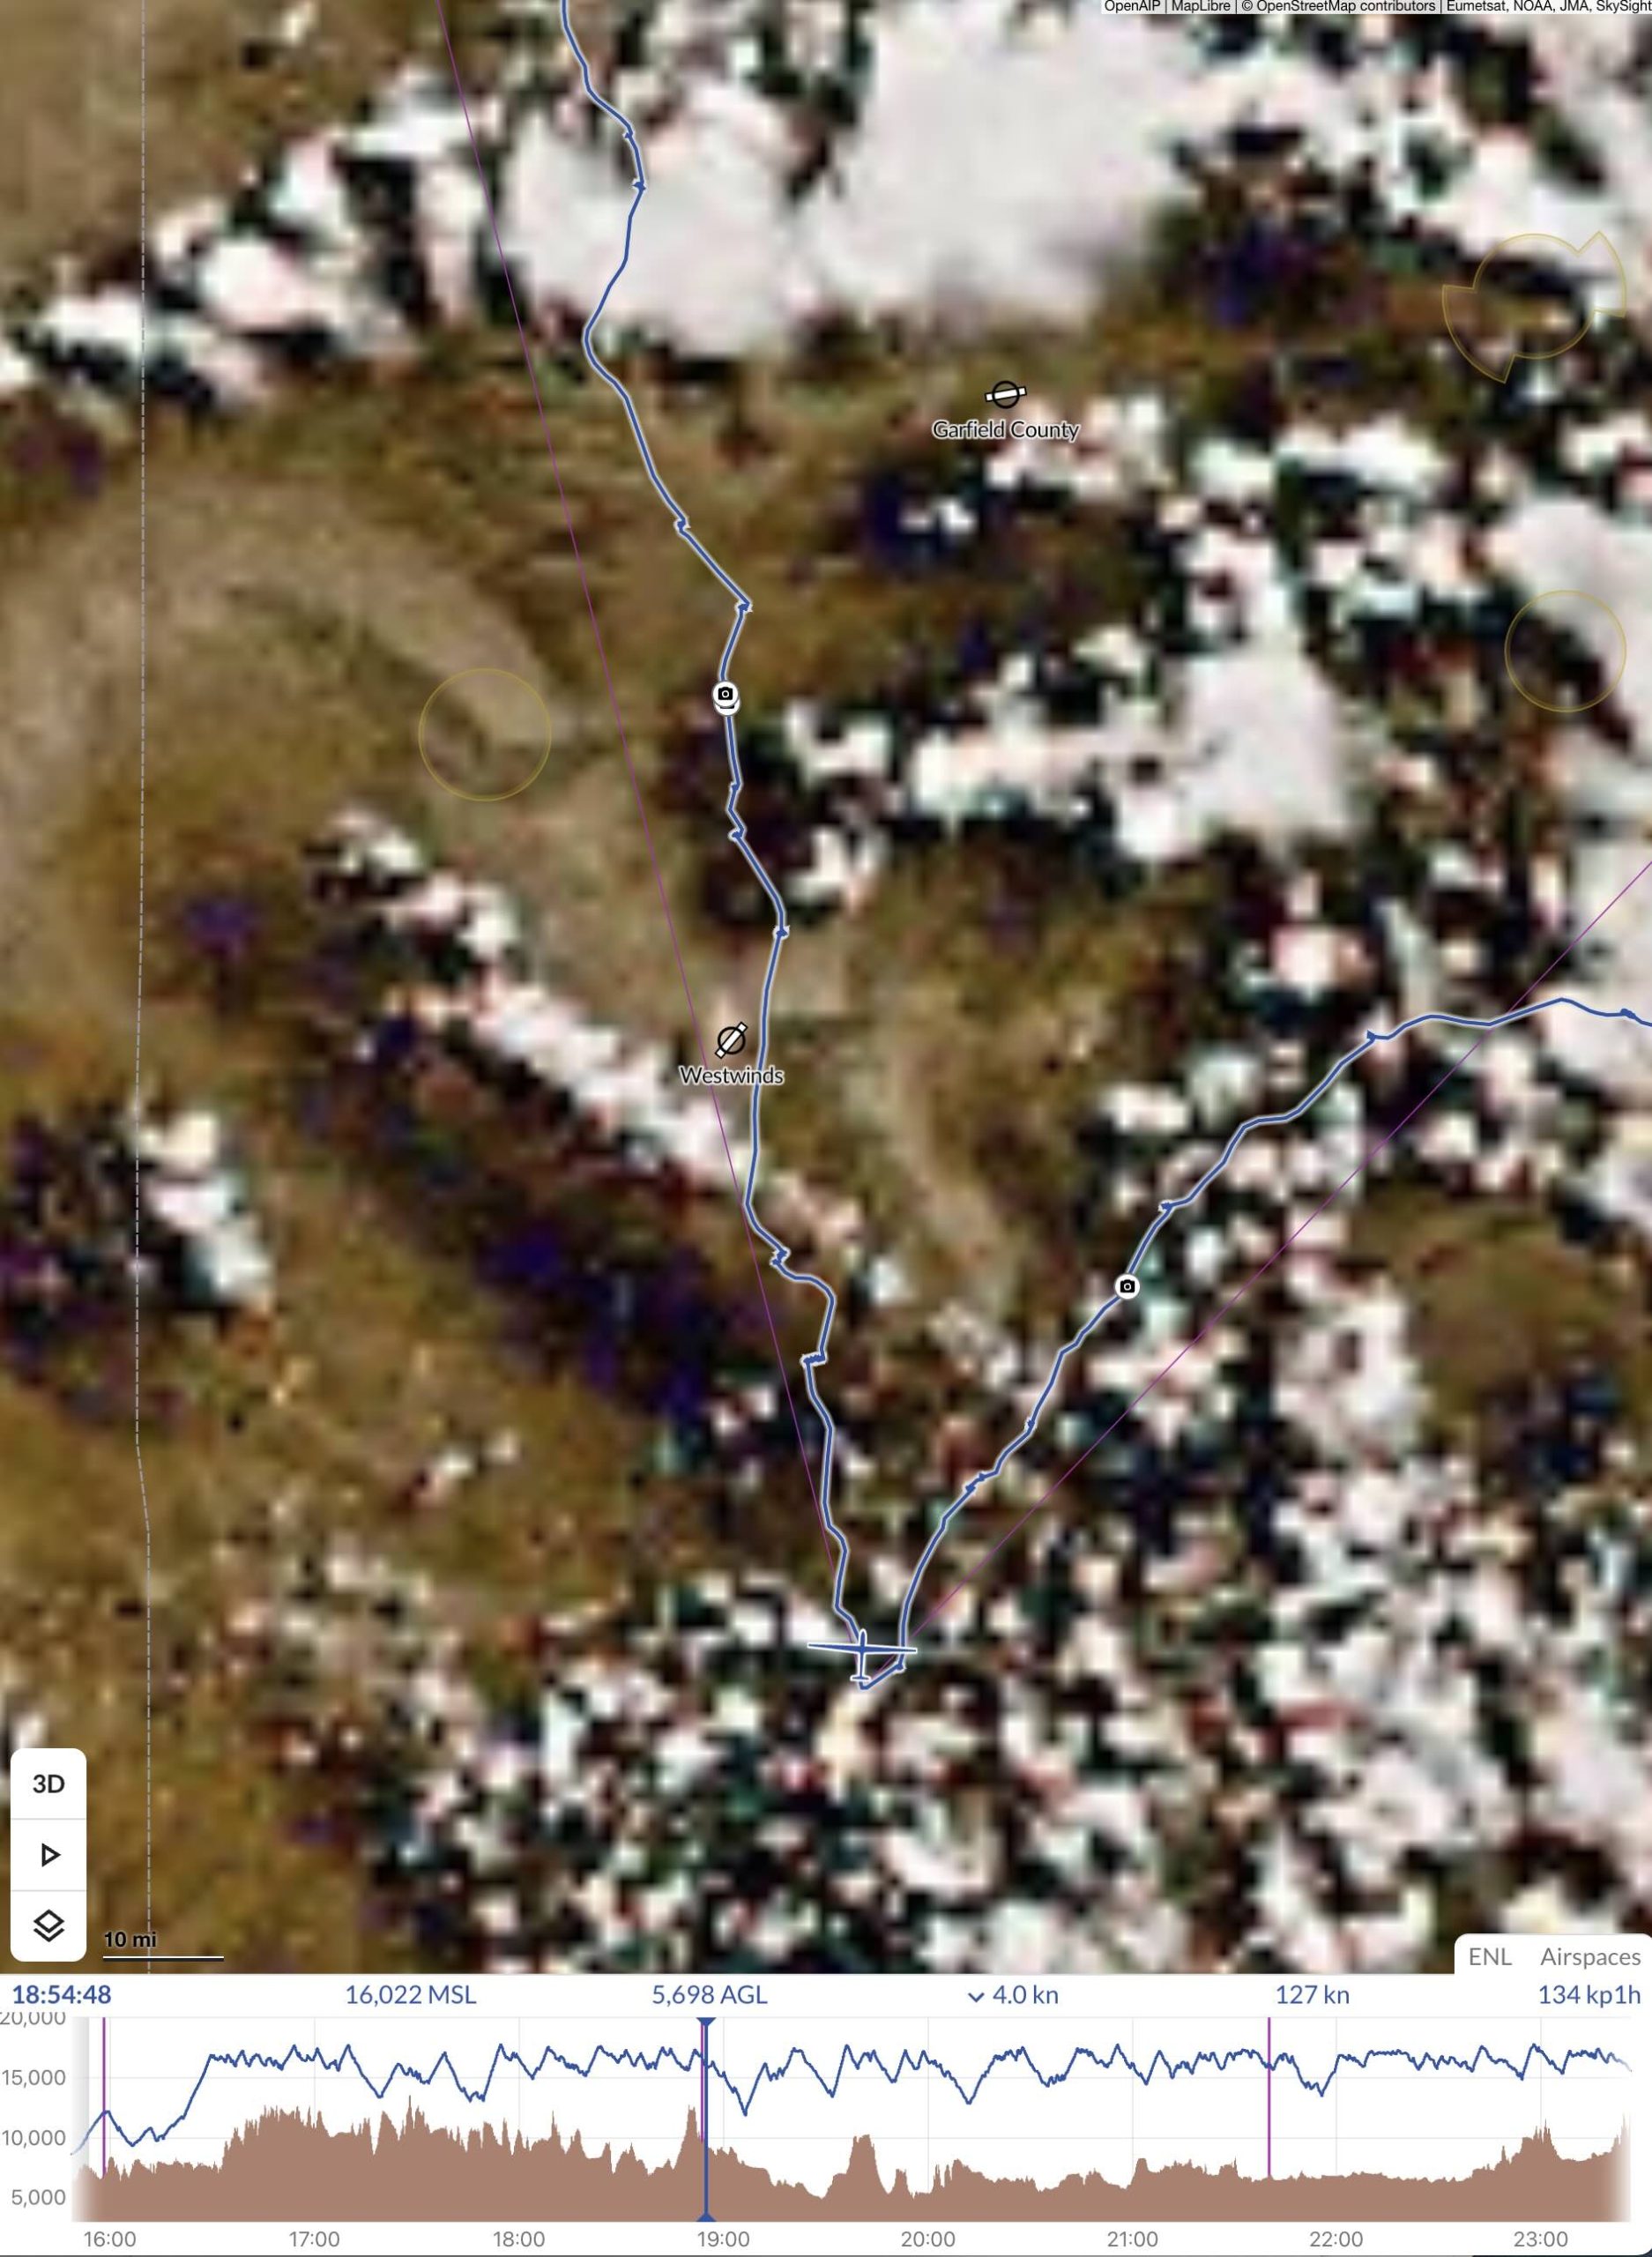
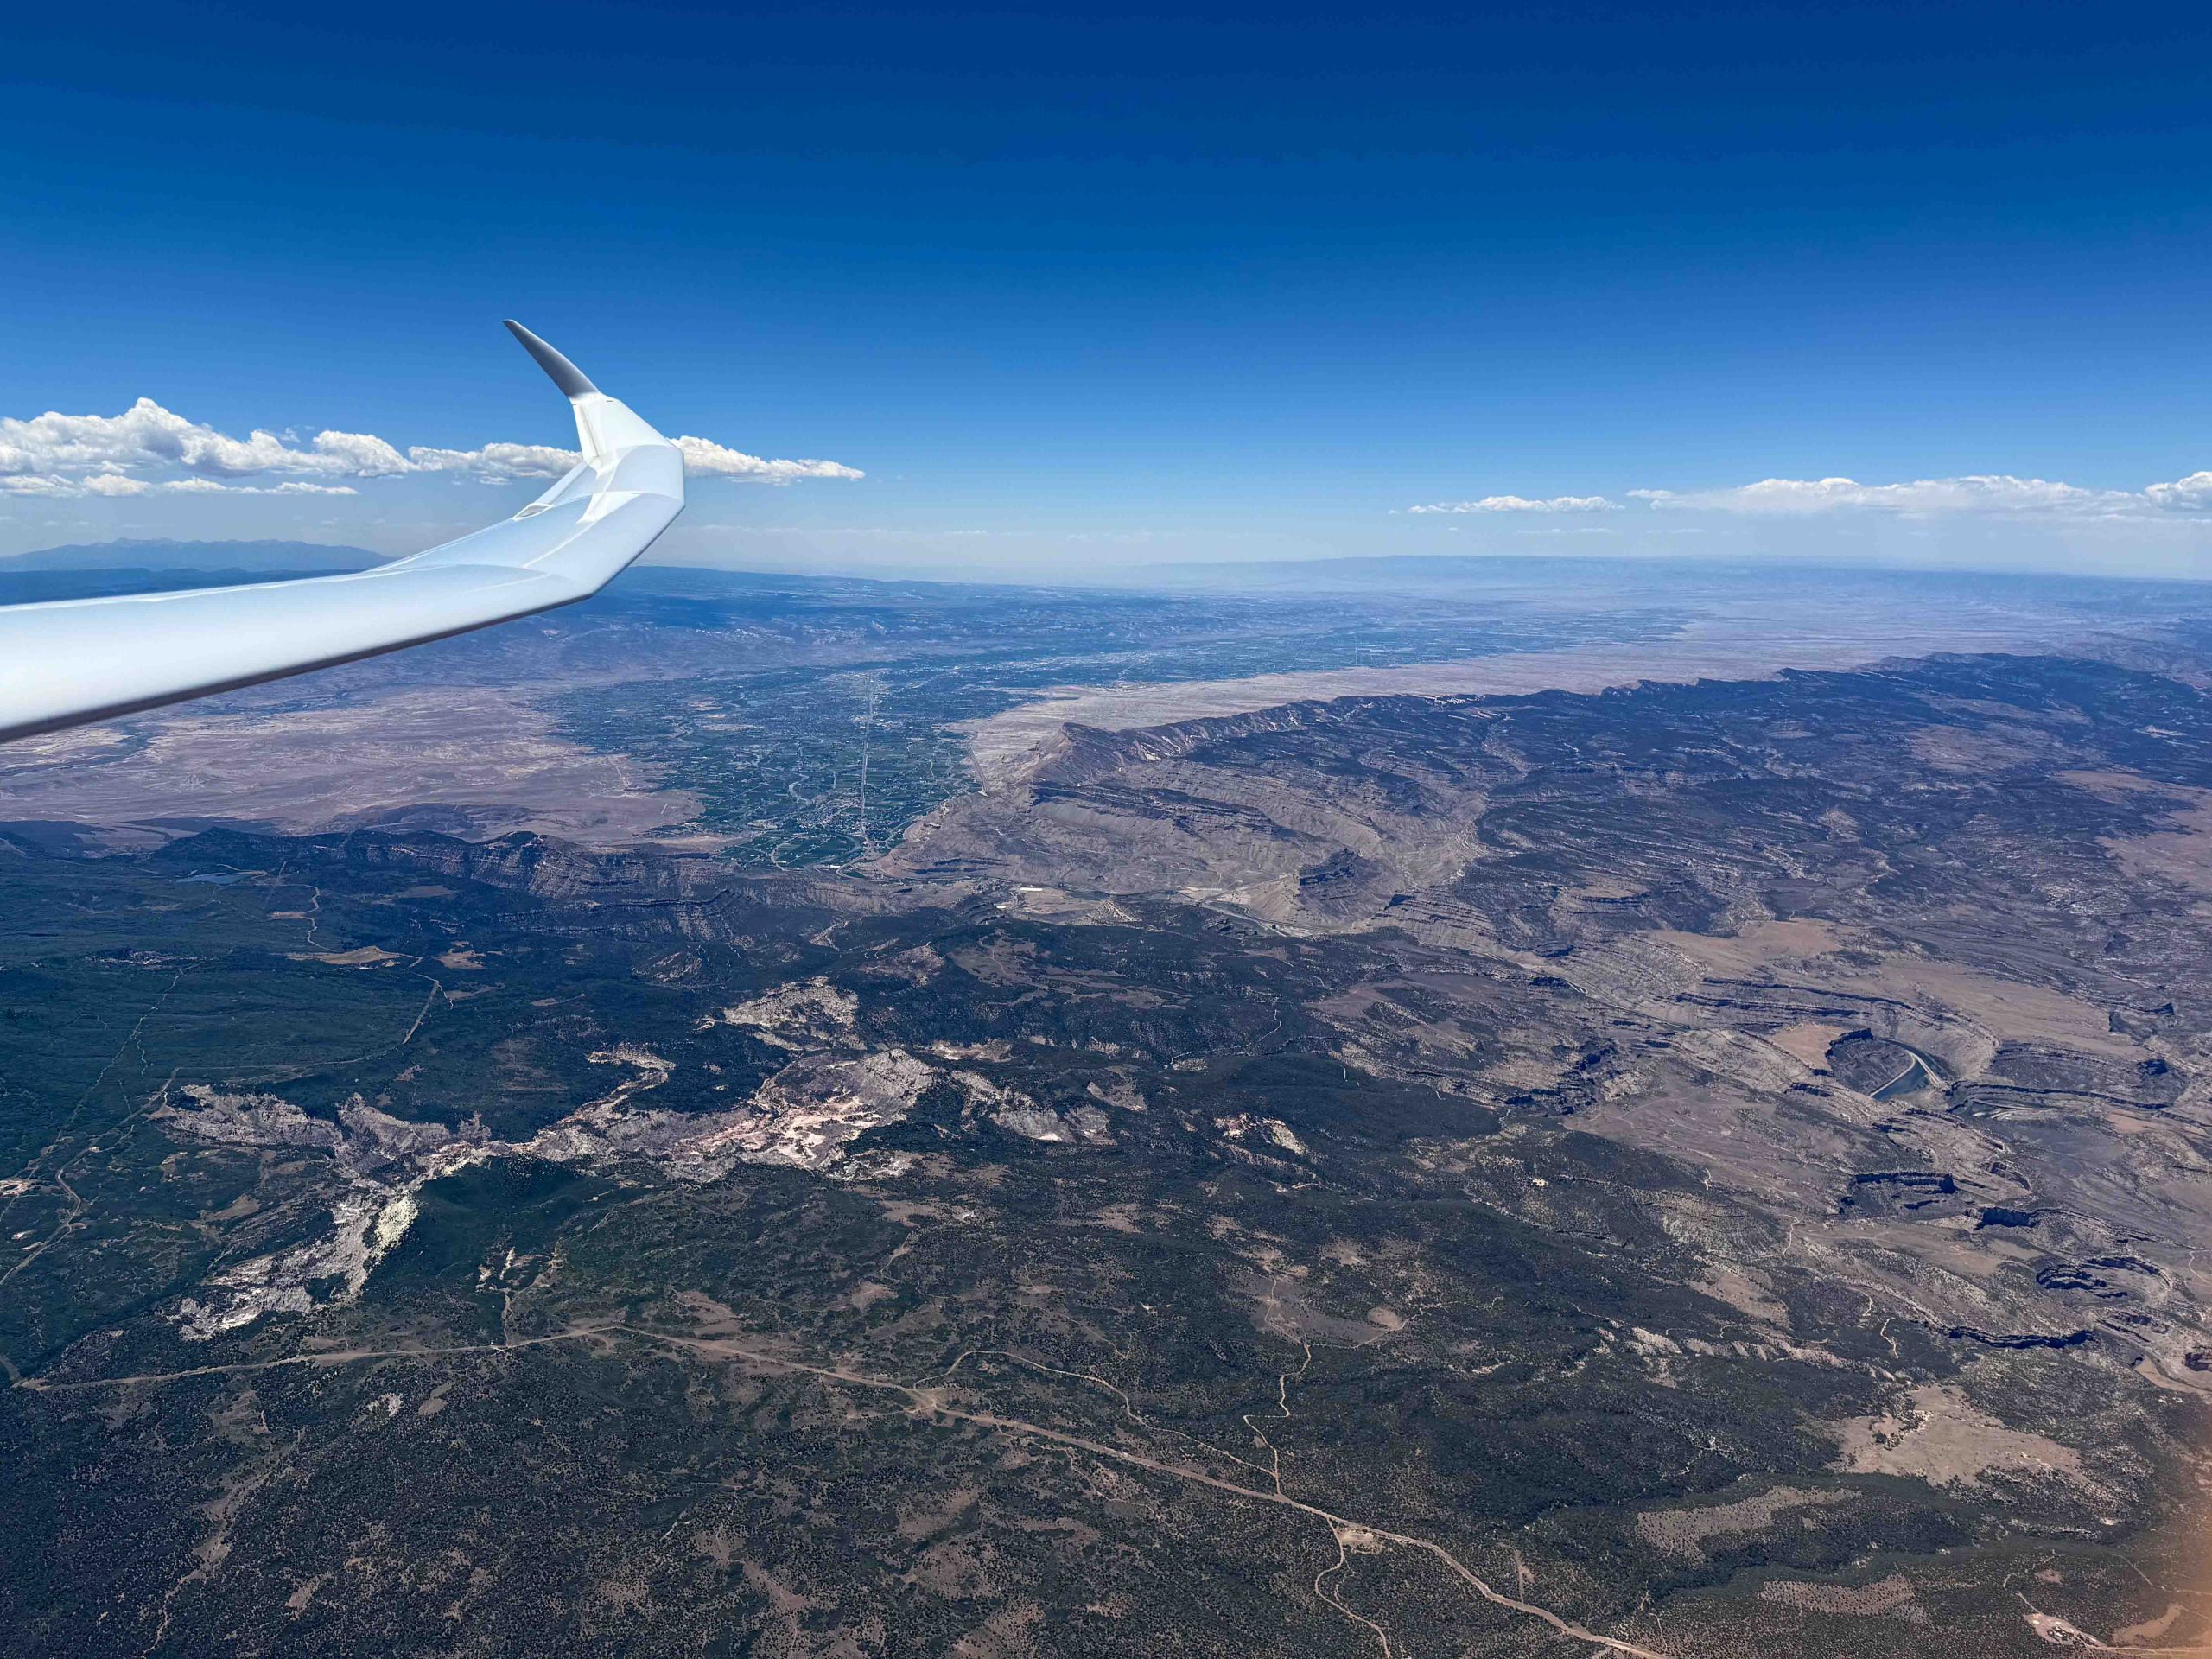
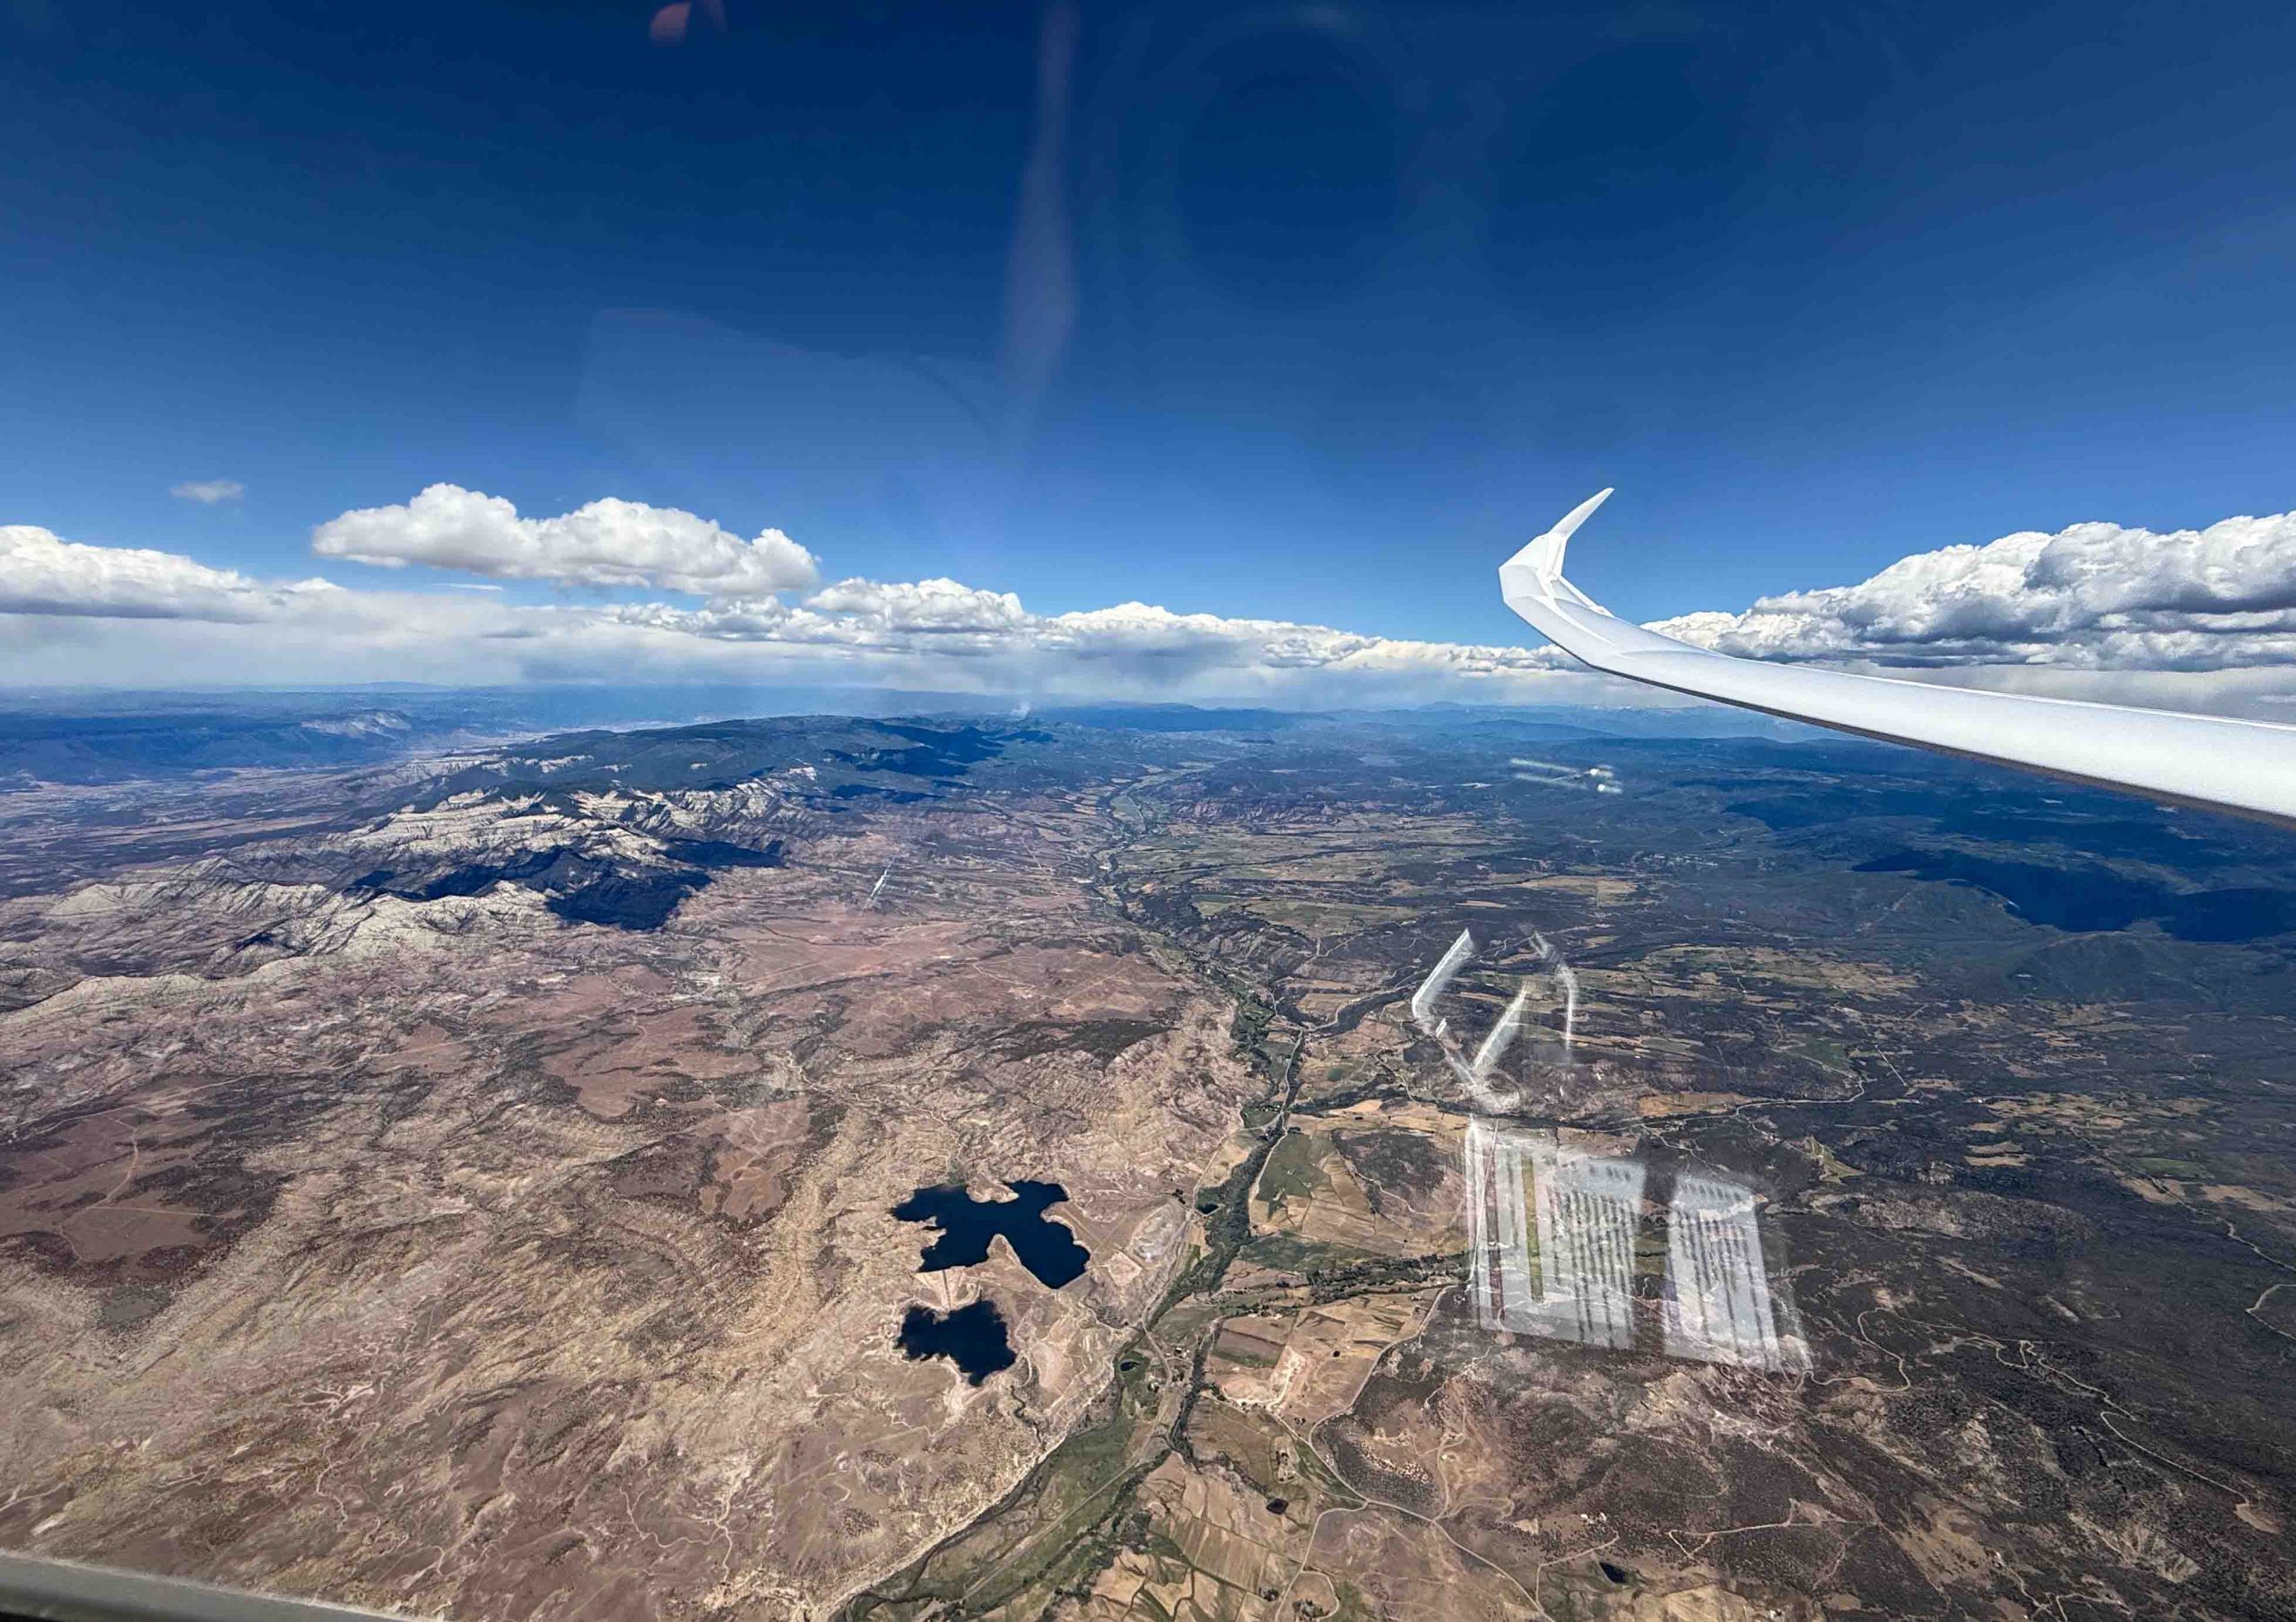
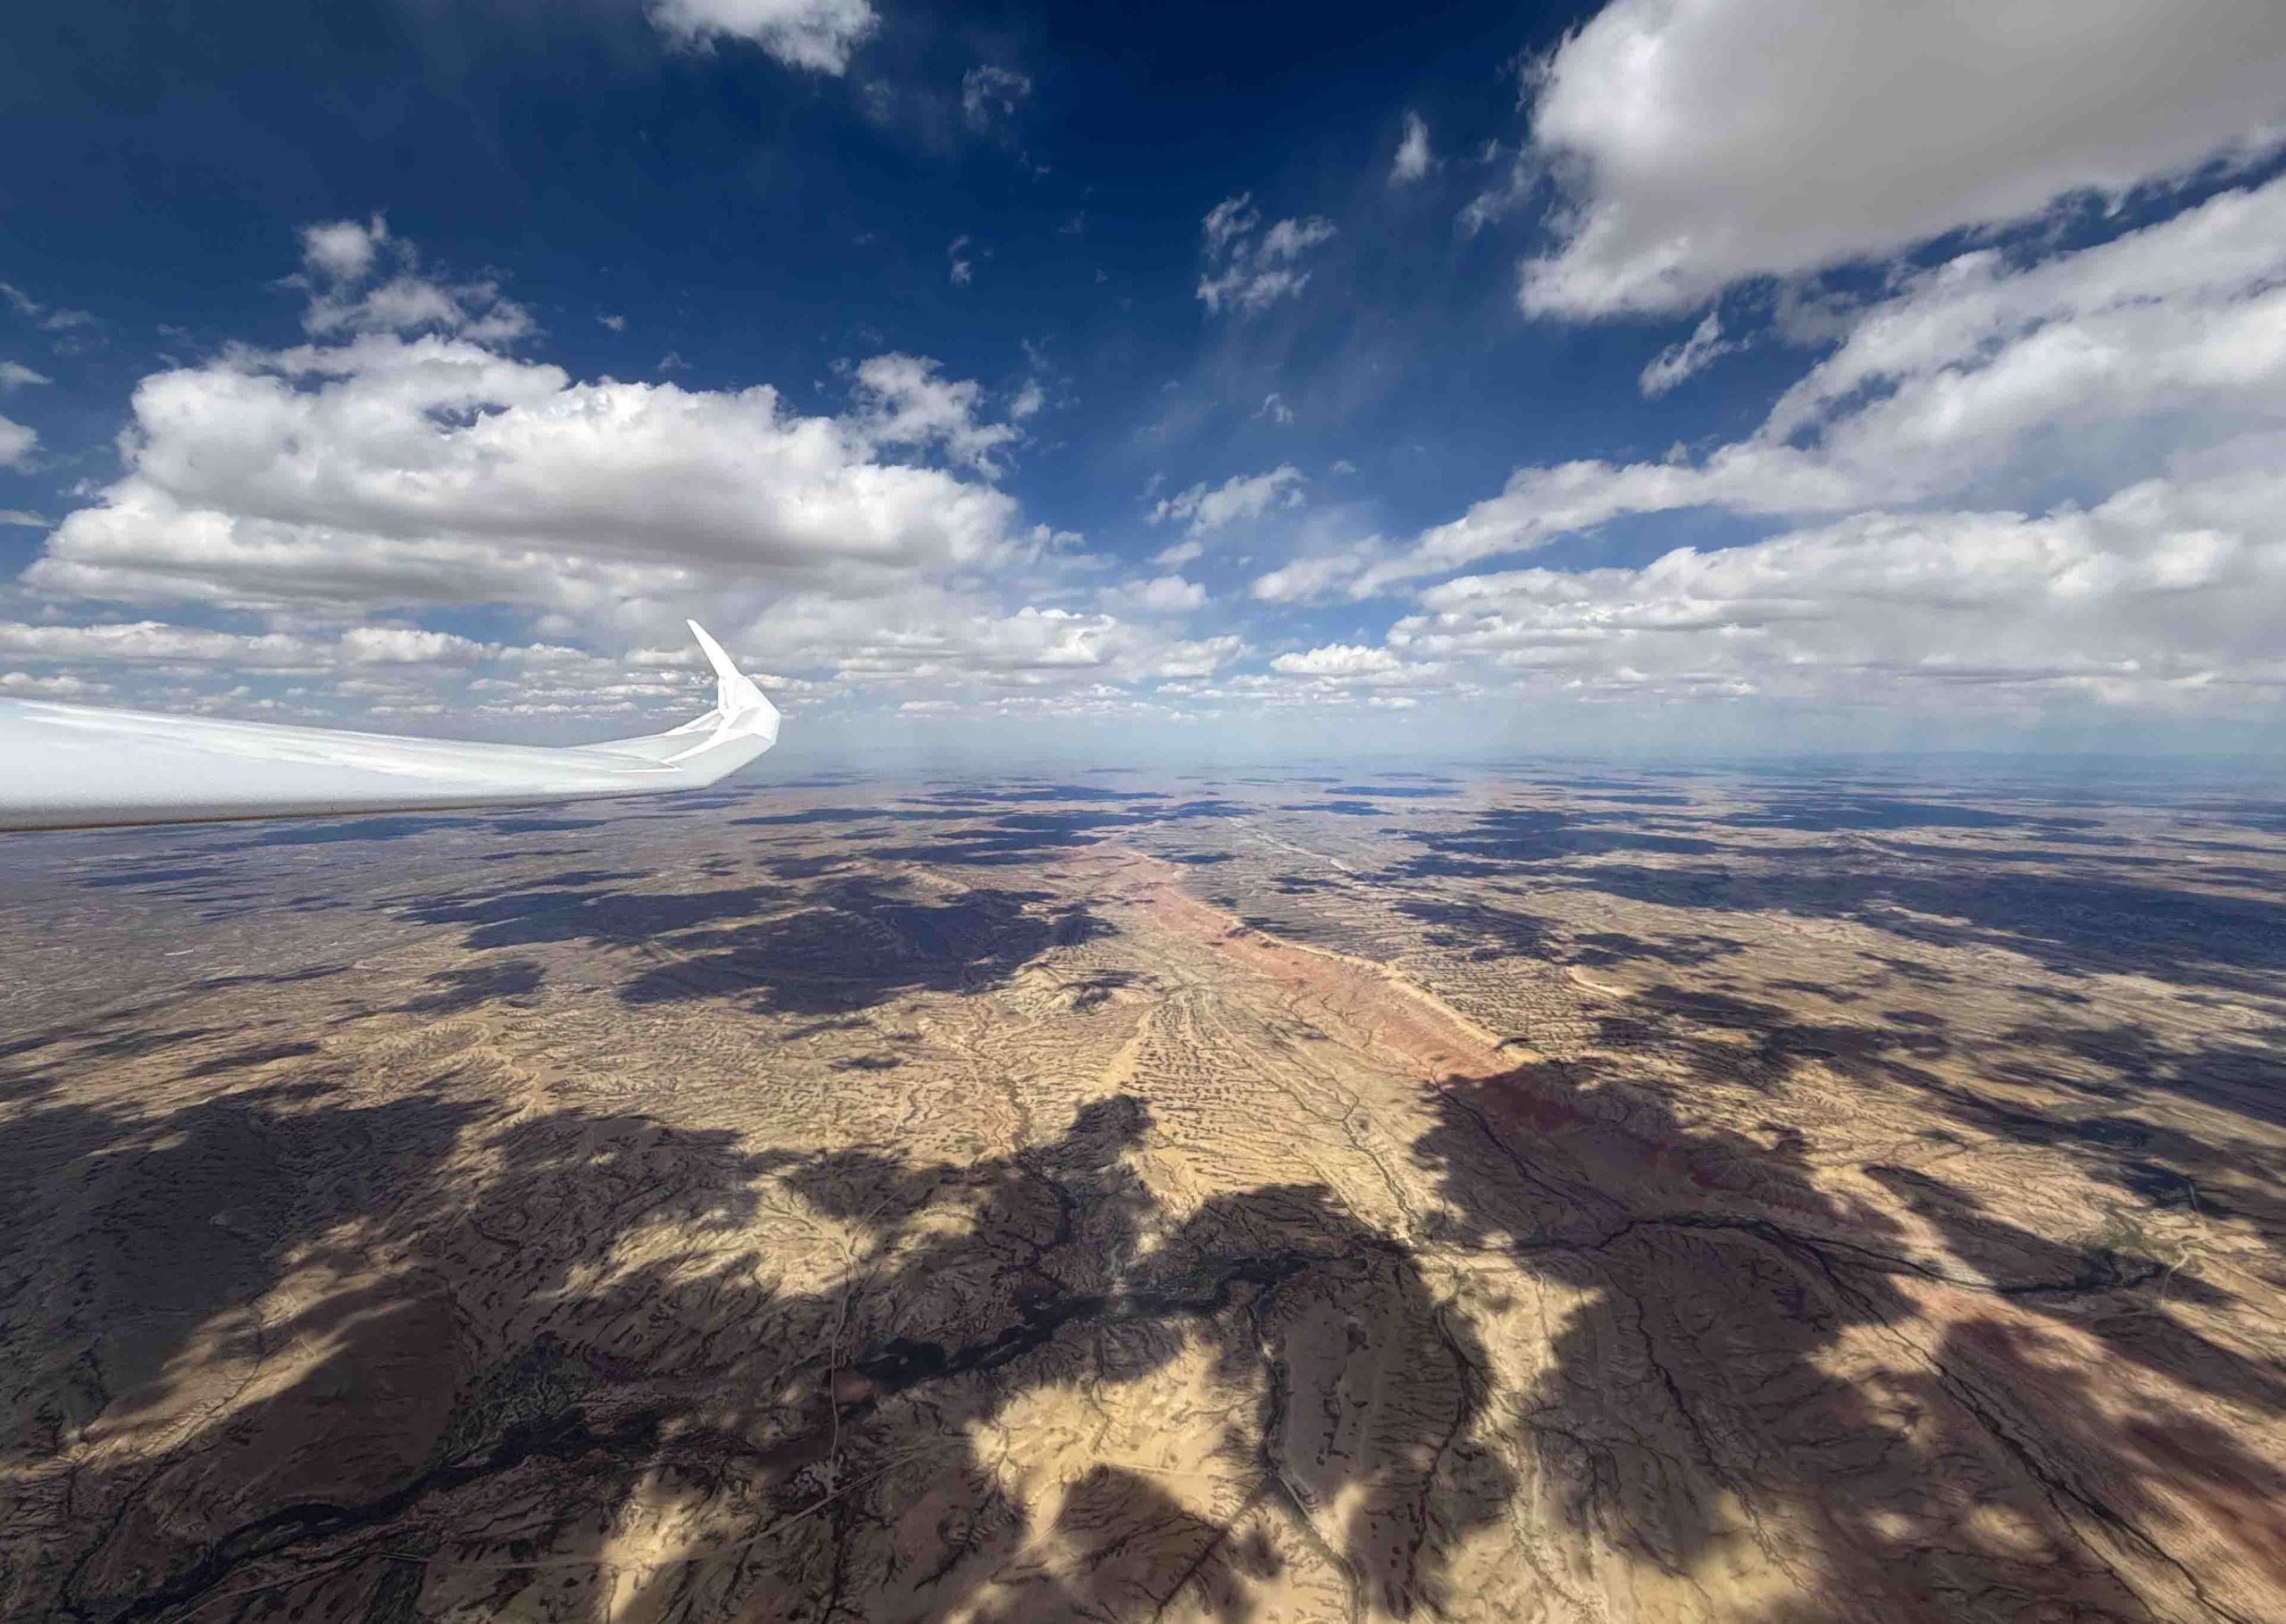
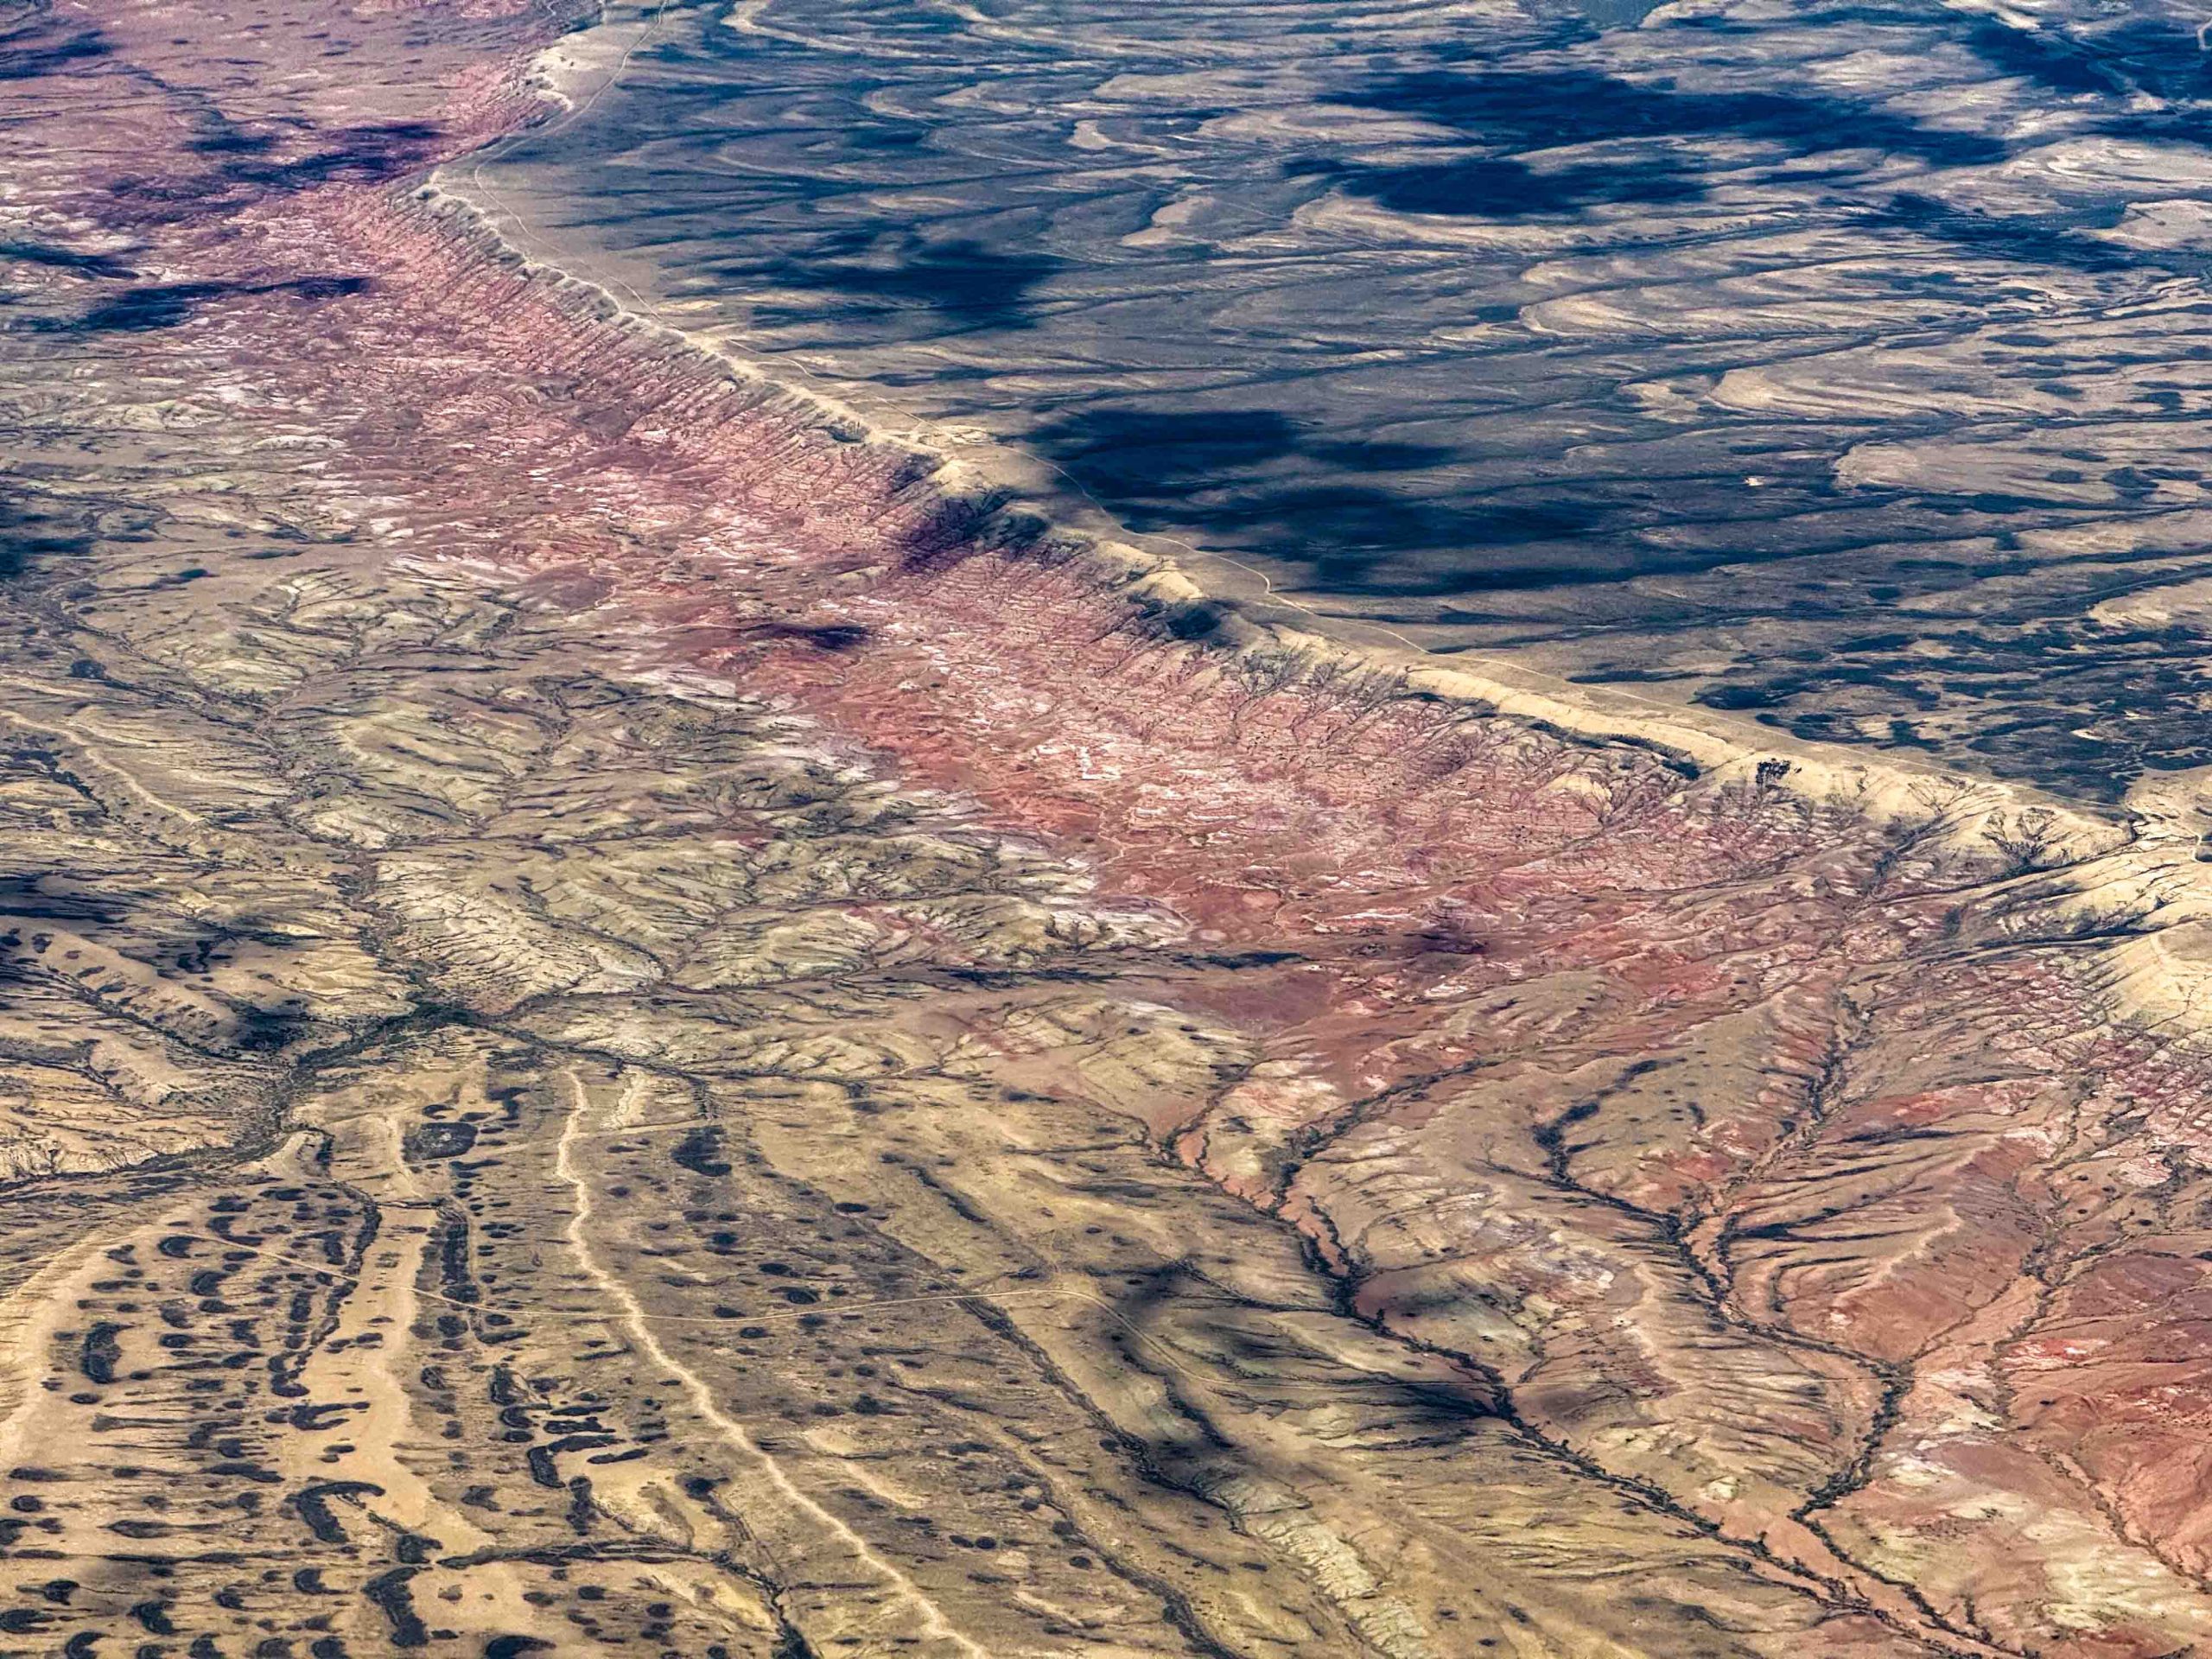
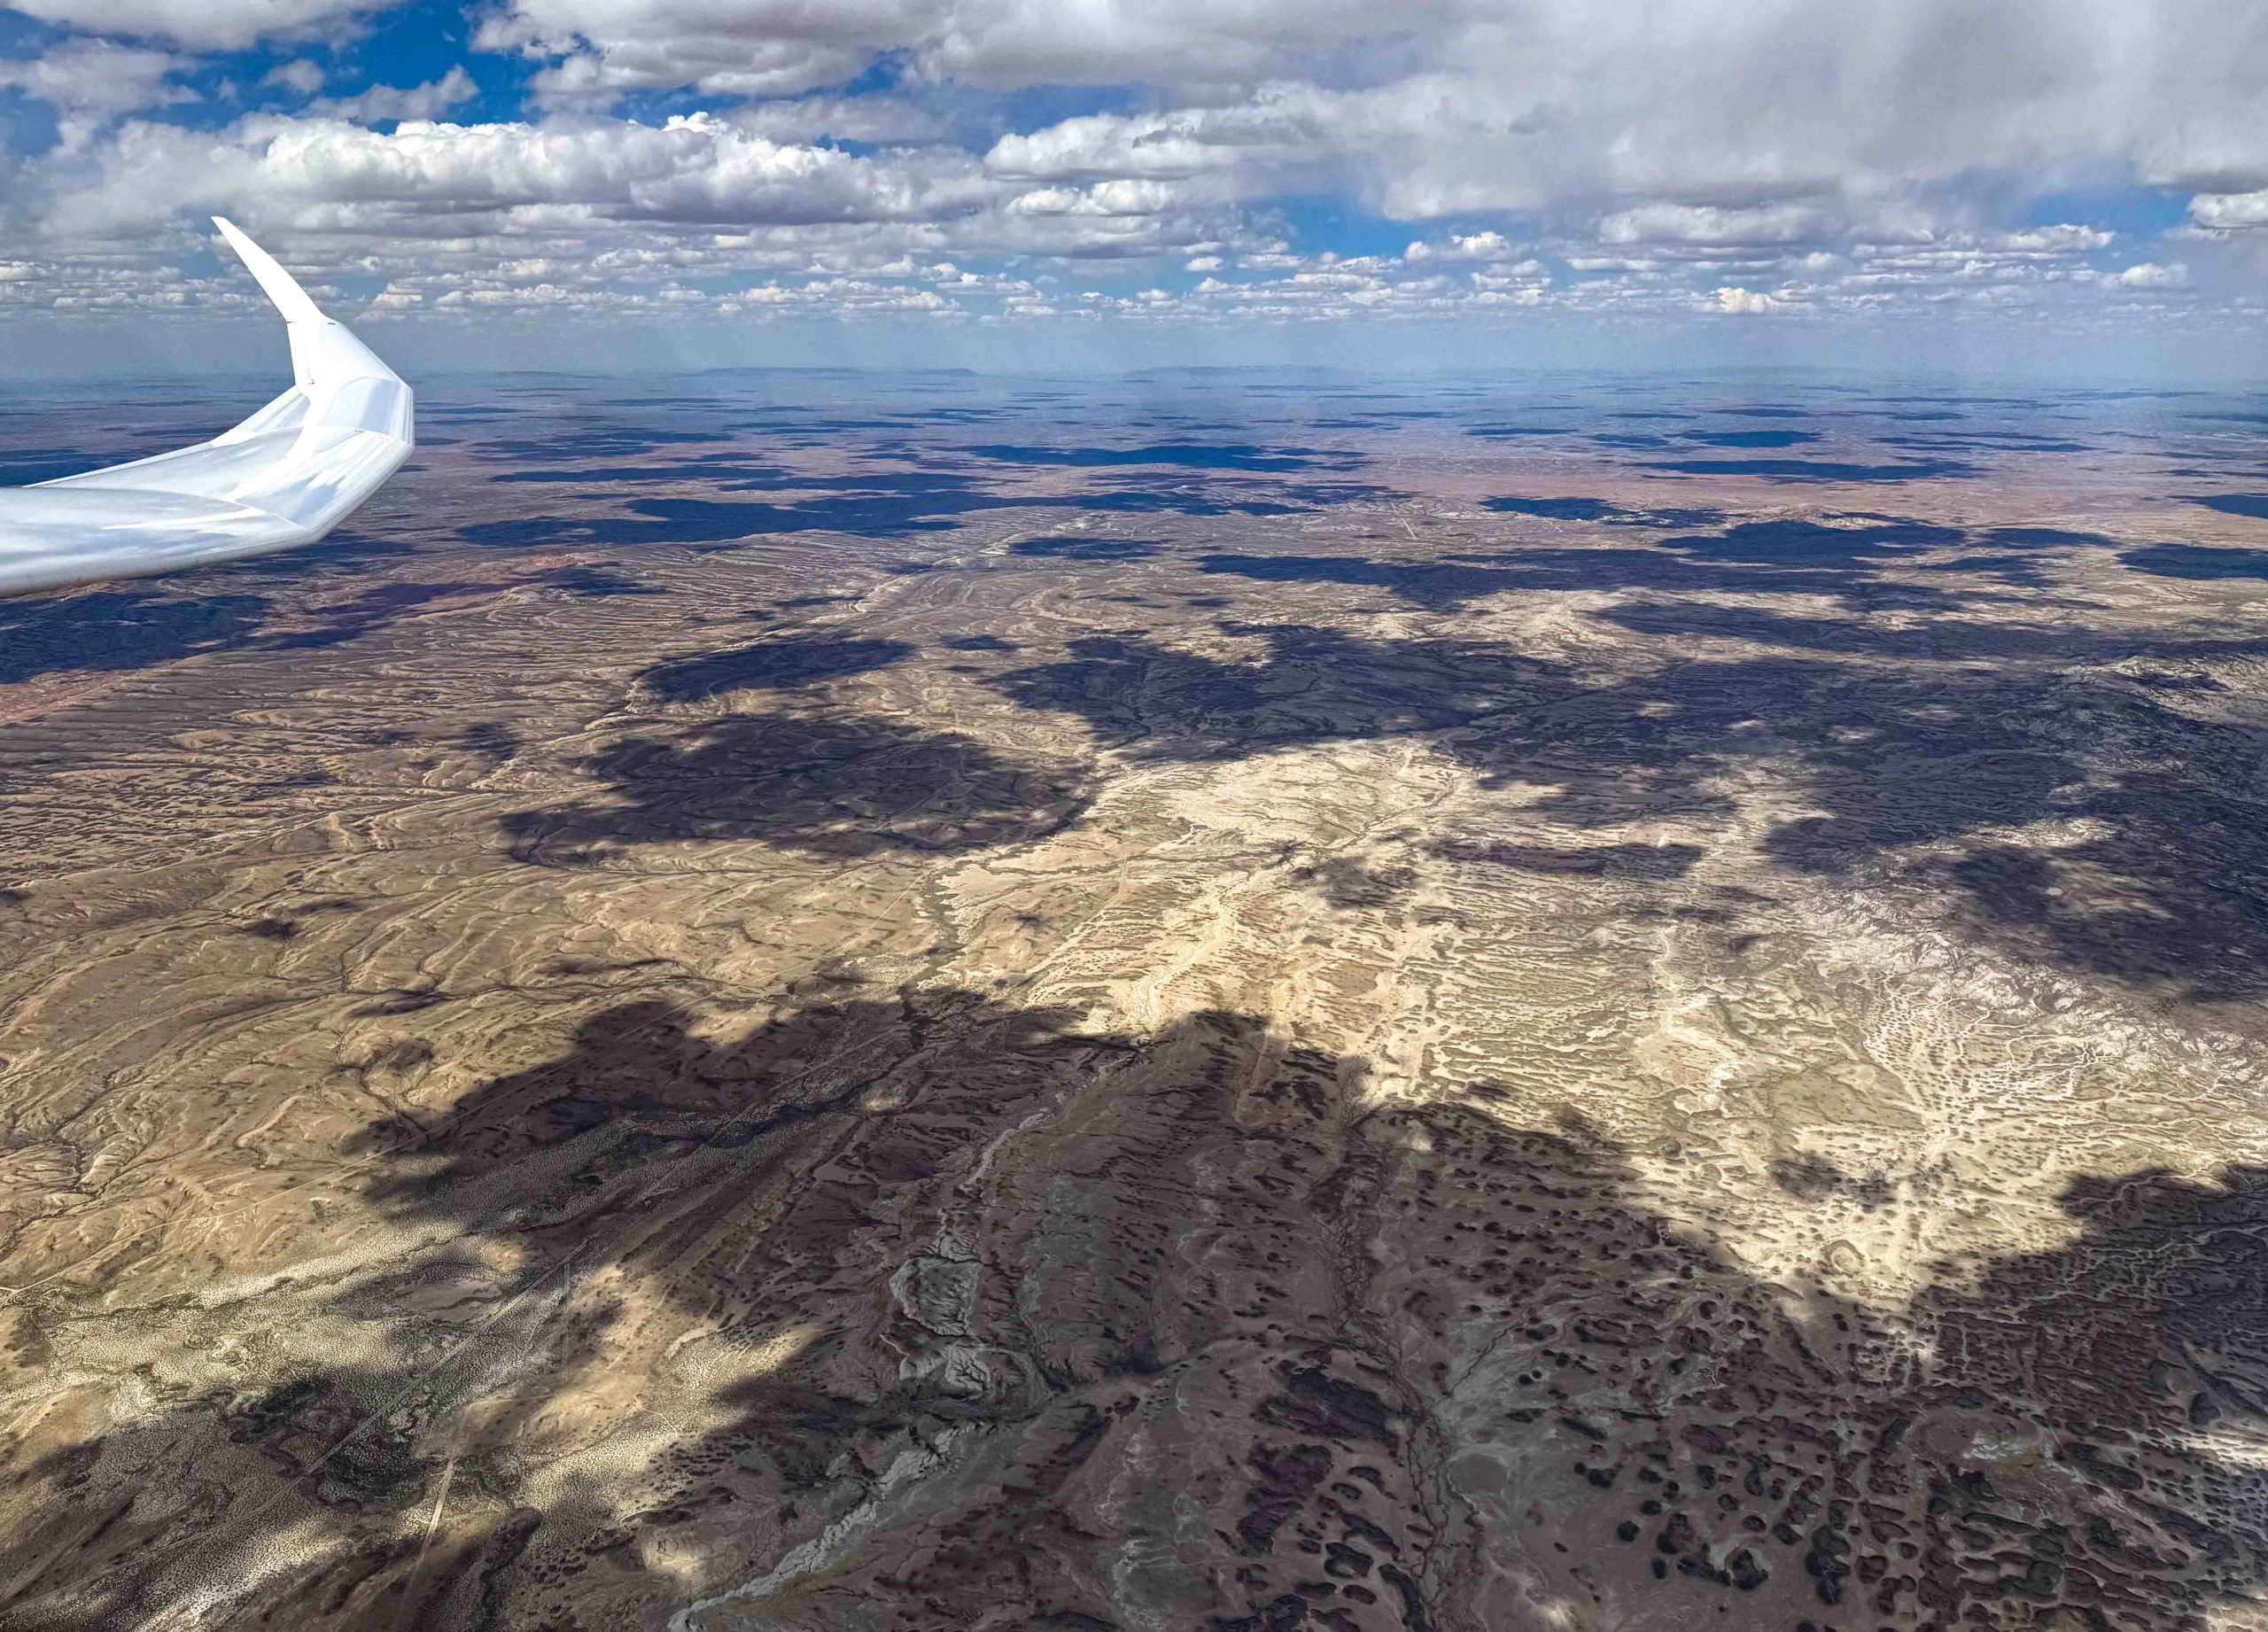
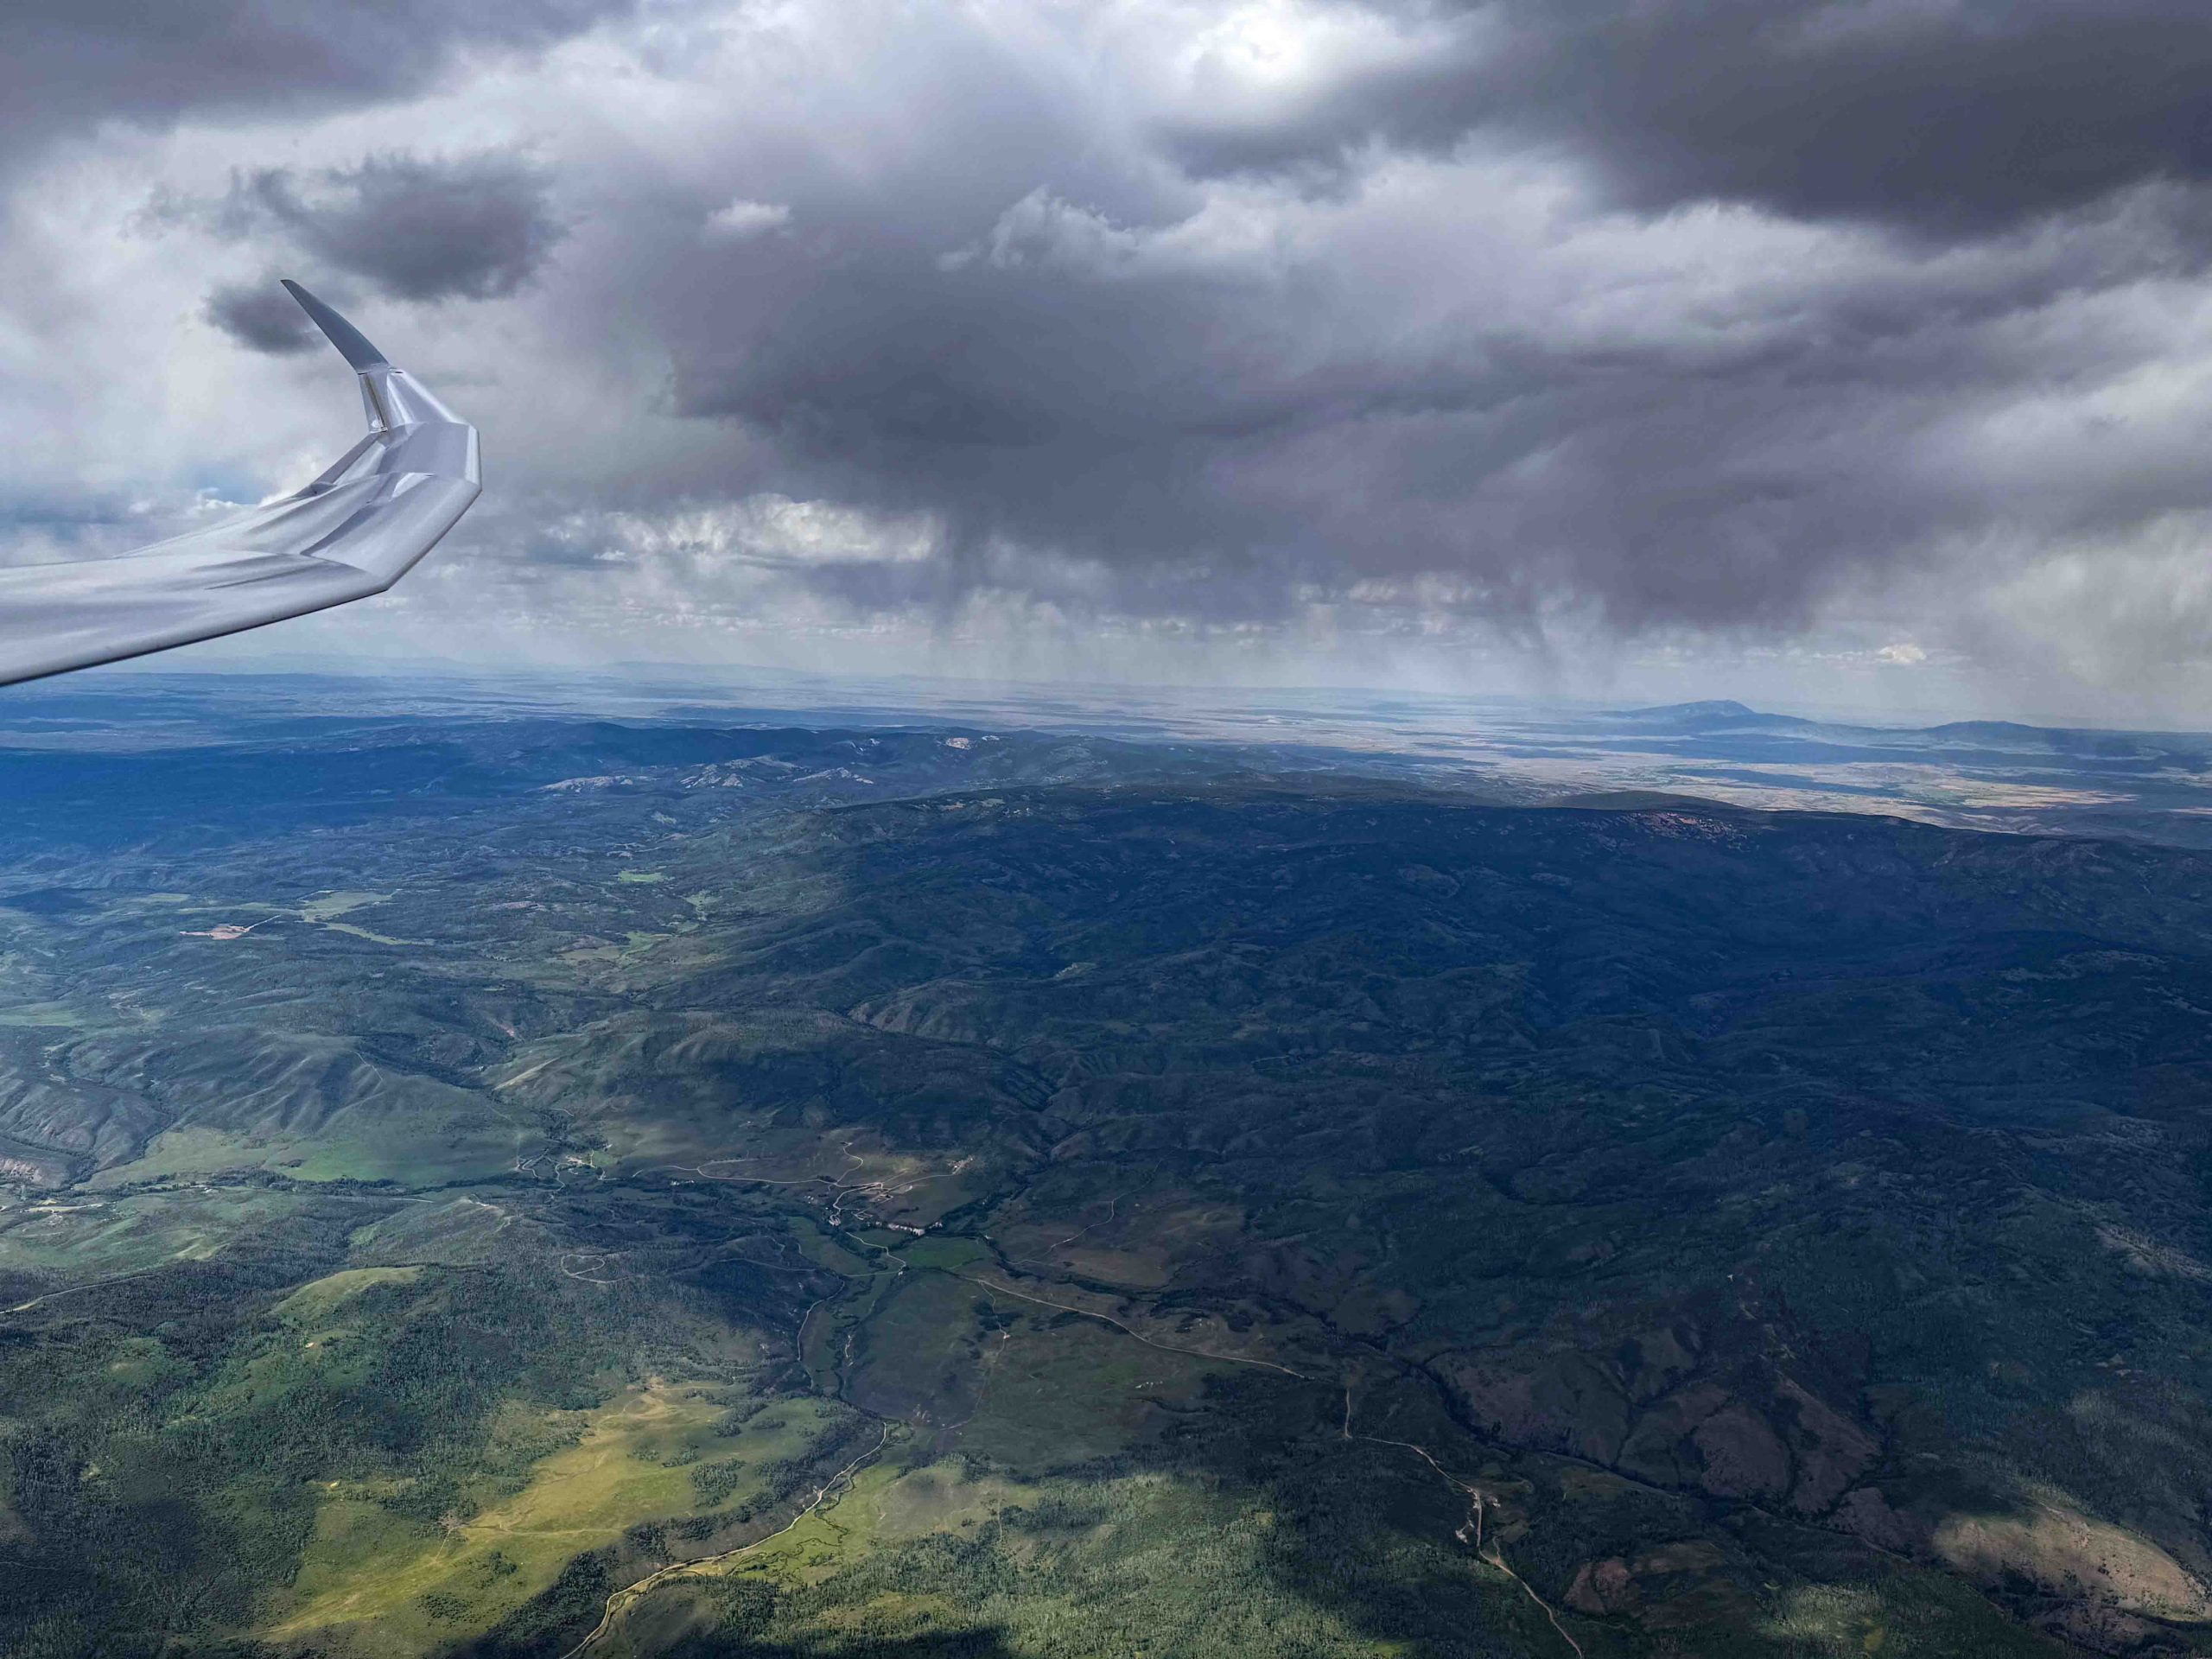
No longer concerned about the virga ahead, I took scenic pictures to the west and the east, which tell different stories.
Transitioning through the virga line turned out to be a non issue. This was also a moment to take note of the time. As discussed earlier, the Book Cliffs were my cut off location in case I would fall behind schedule. I chose it because from there I am very familiar with the route back towards Boulder with good airports along the way should I run into weather issue. As I arrived over the cliffs, my watch showed 2:00 PM and my cut off time was 2:20 PM, which meant I was still on schedule. The sky behind the virga looked good and I saw no reason to waver.
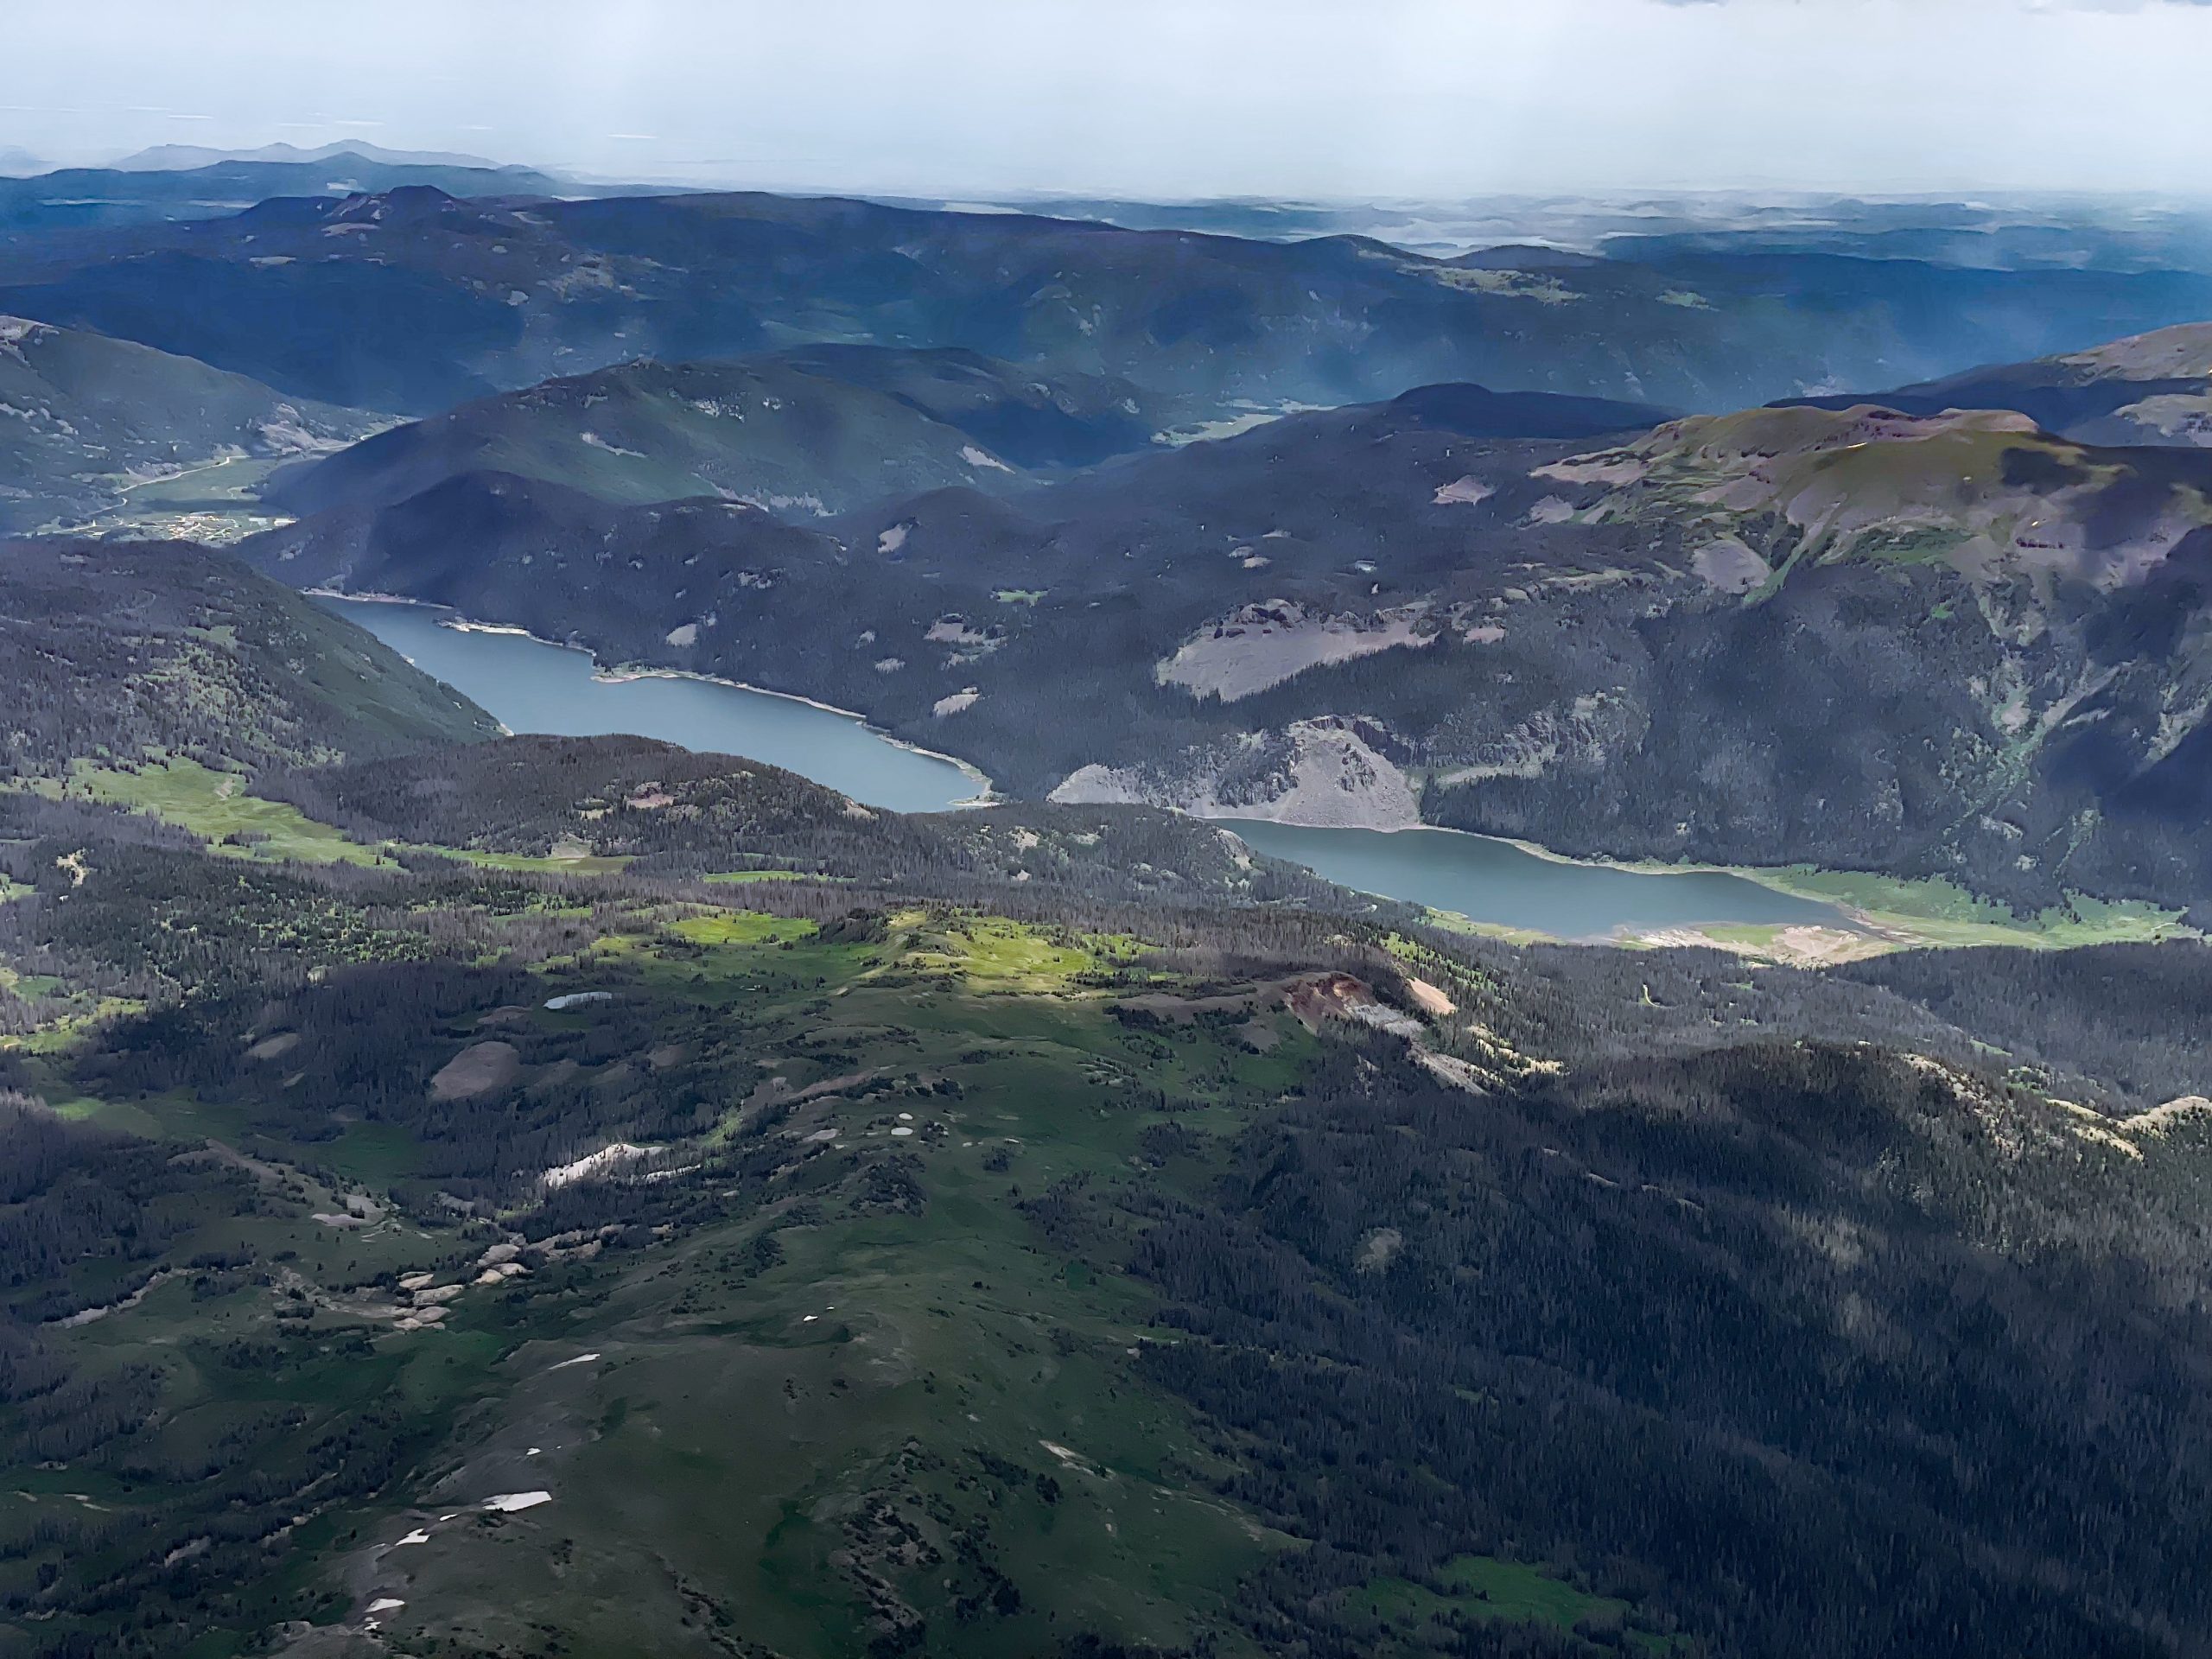
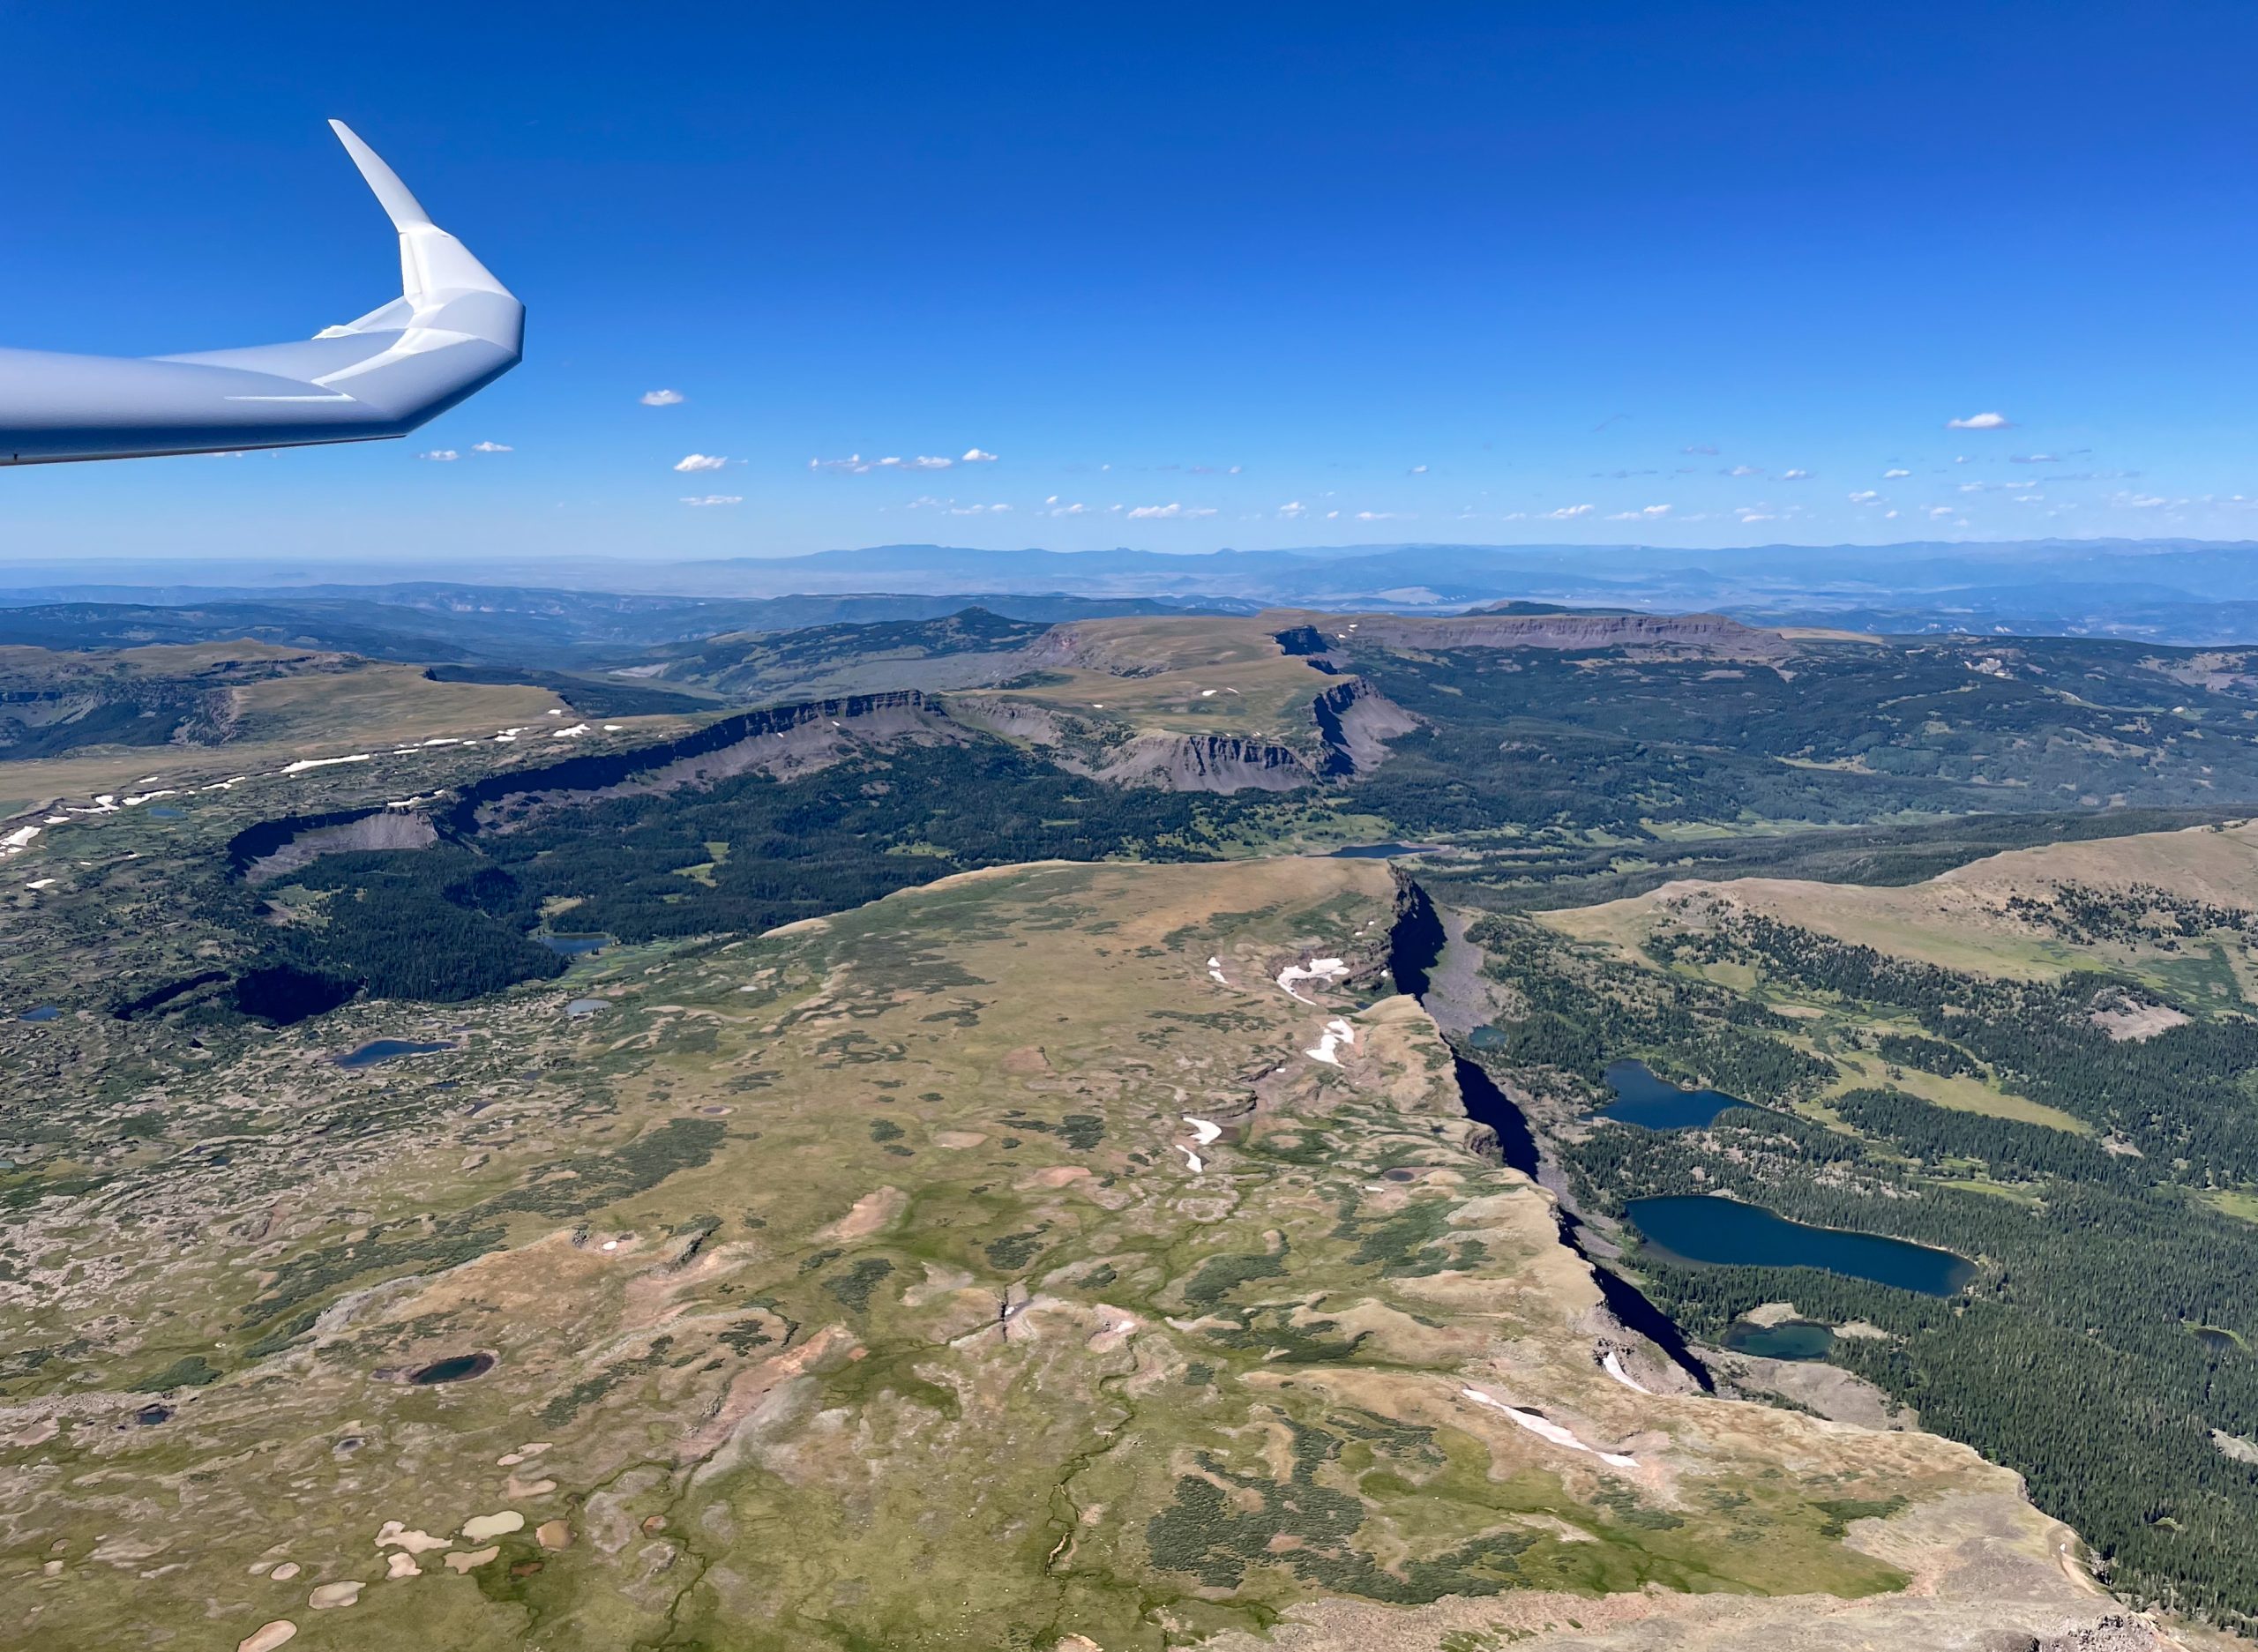
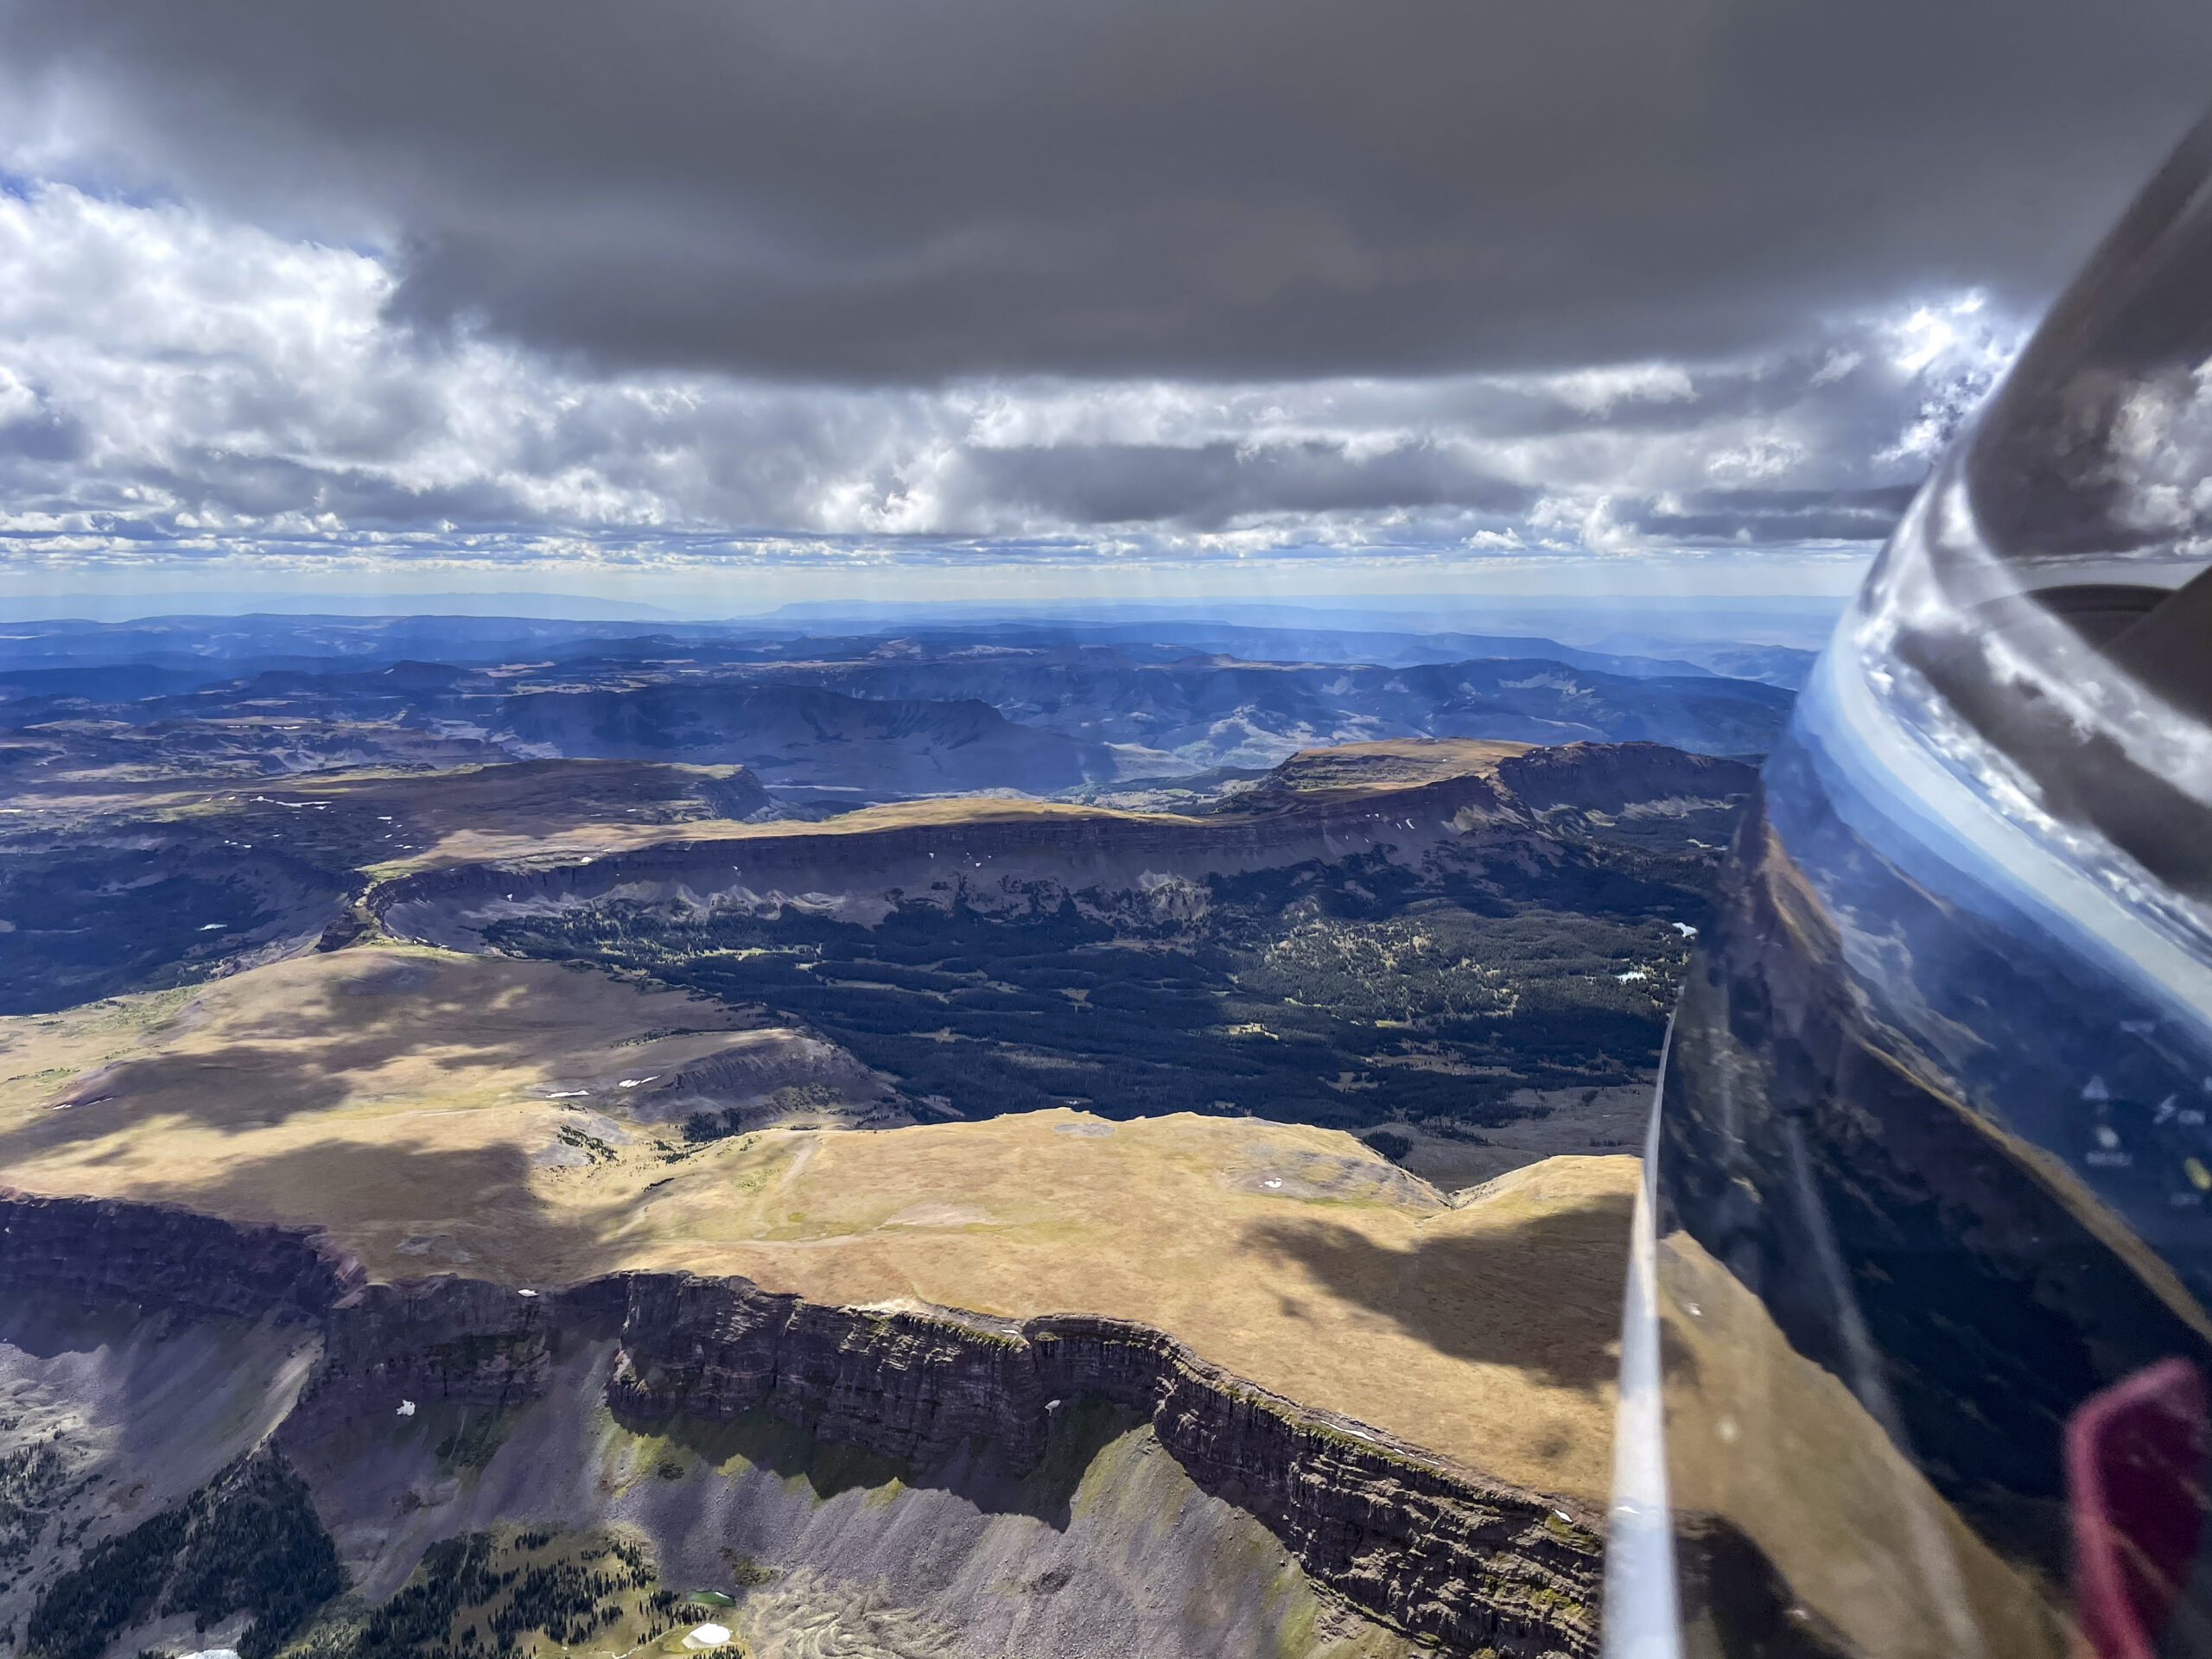
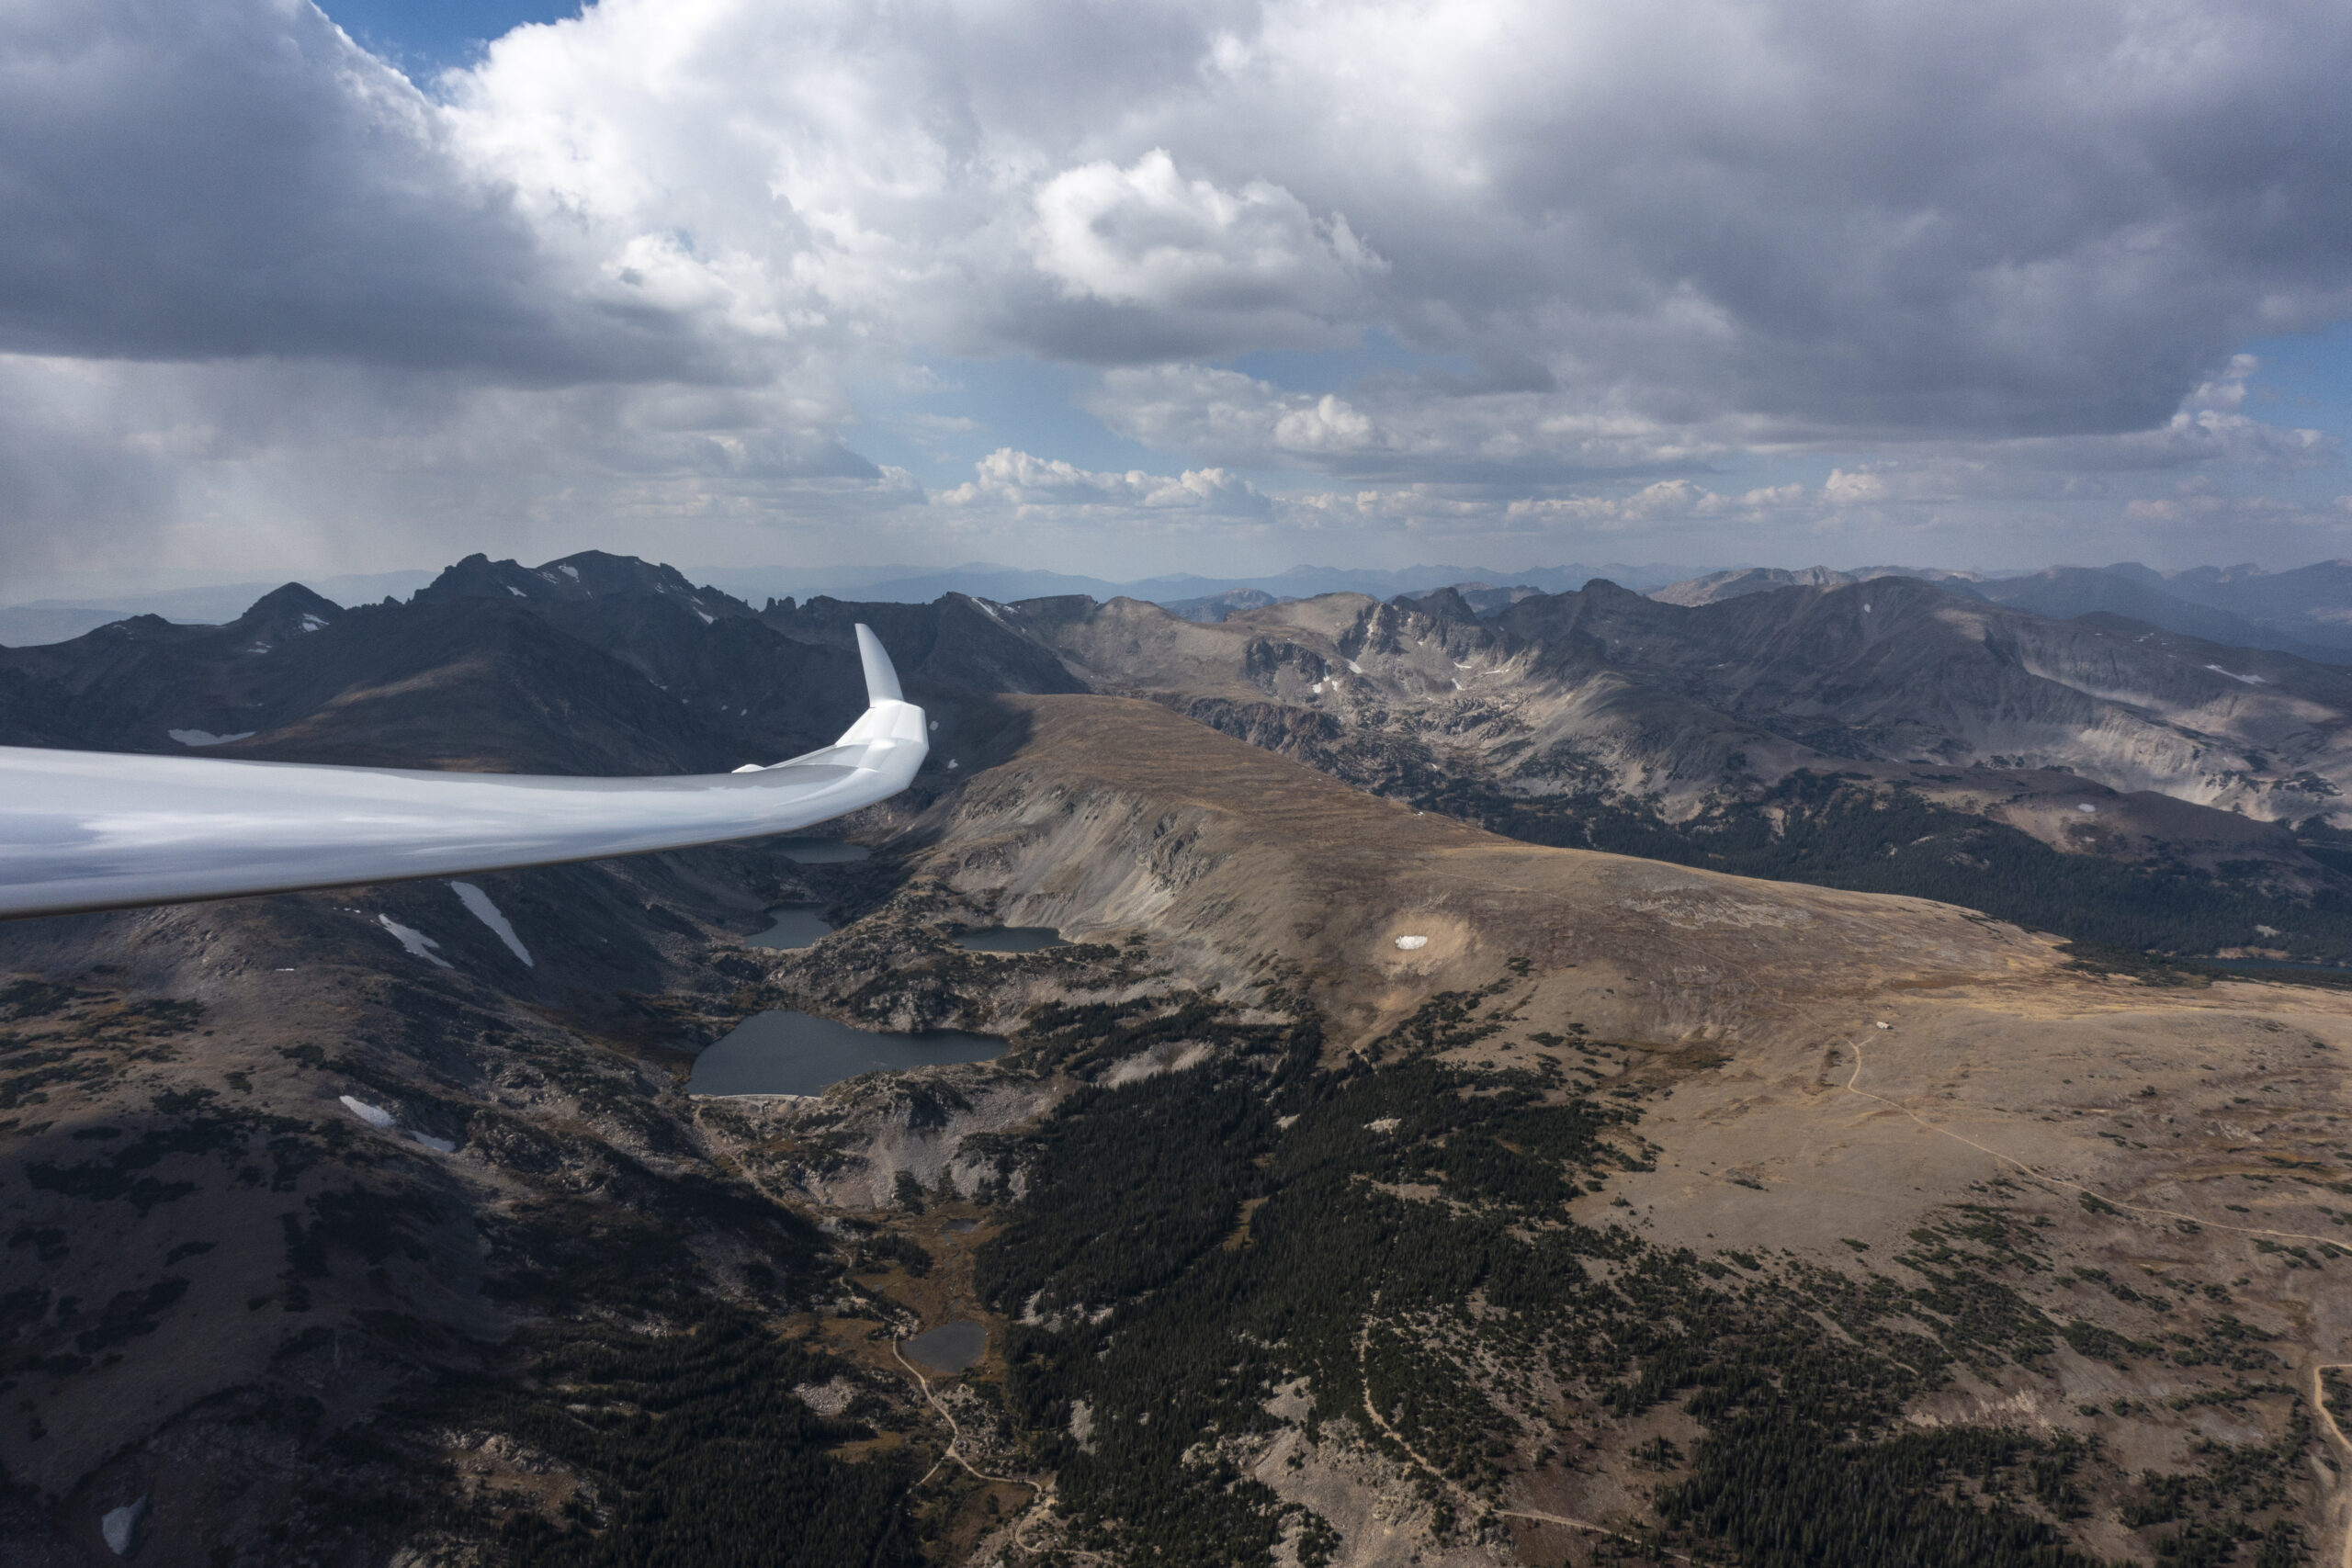
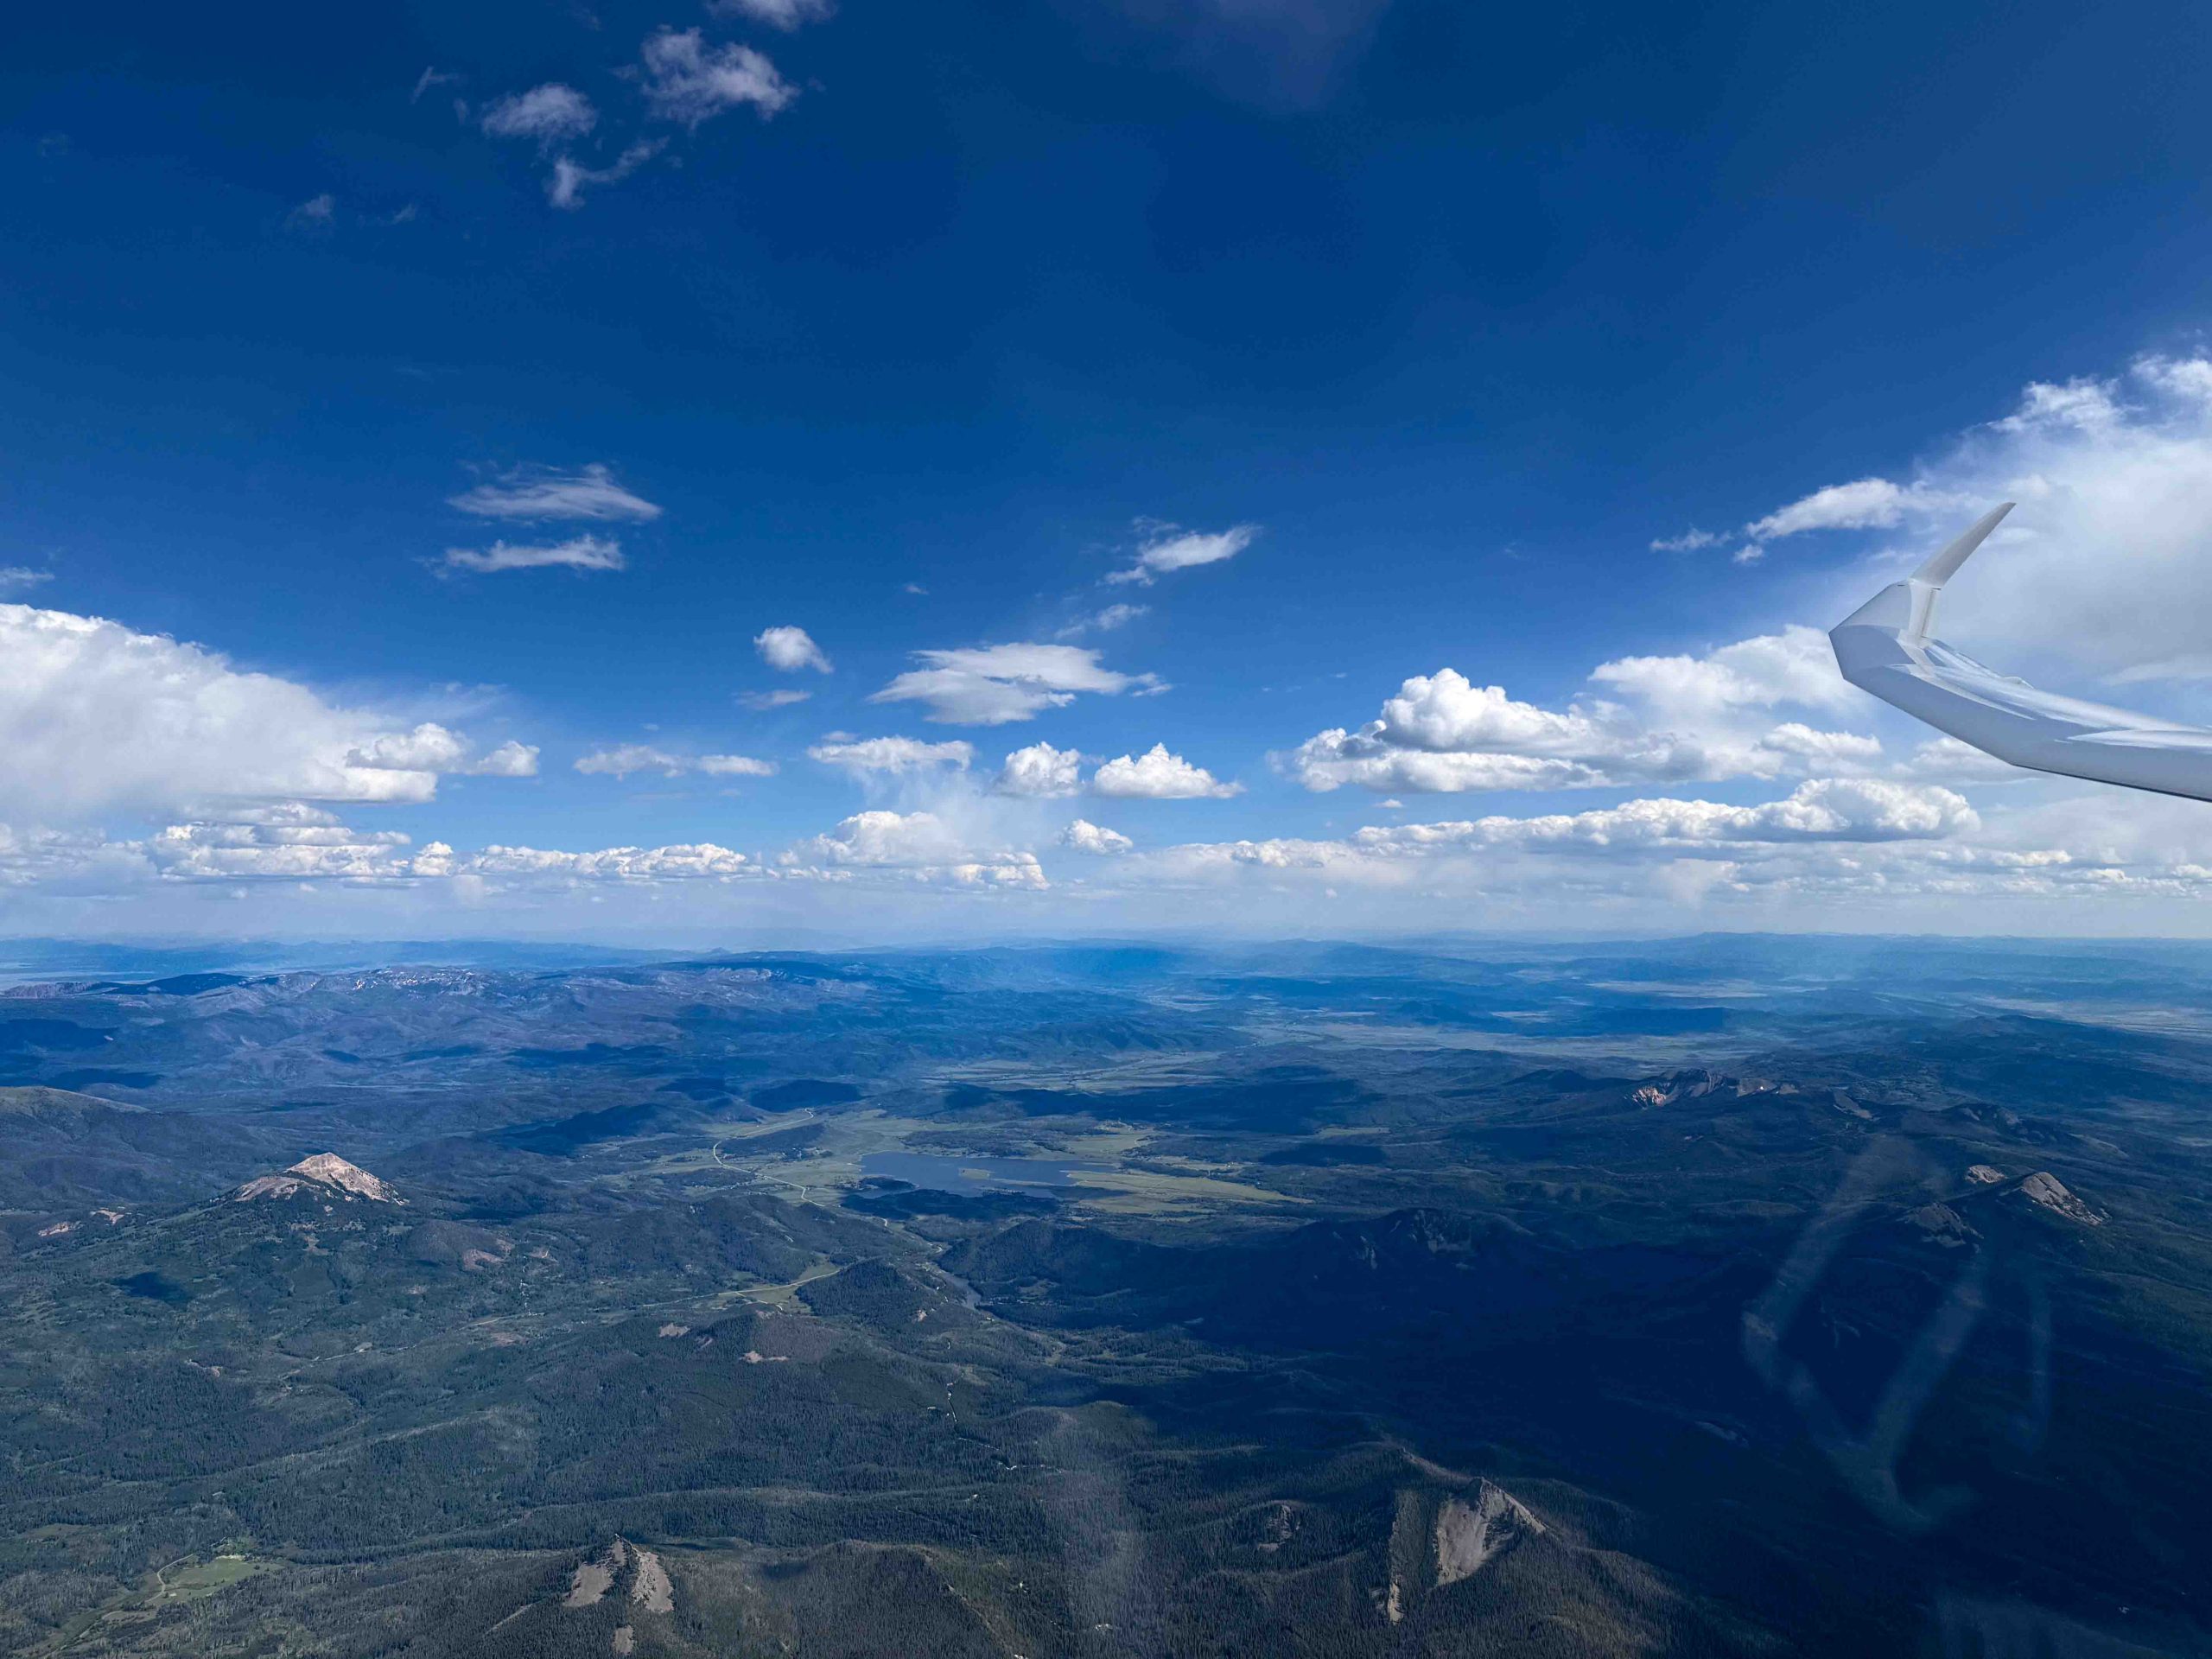
As I continued north, the clouds were well-formed and well-spaced (albeit with two or three blue holes in between), allowing me to also pay attention to the dramatic scenery below.
Considering the wild landscape, I also had to keep landable airports in mind. After Mack Mesa, I considered Meeker to the northeast, than Rangely to the north-west. North of the Uintas, Dutch John was my best option until SW Wyoming Regional came in glide. Having planned the task around this airport avoided a lot of potential stress. But generally things were going well and thoughts of landing out were just a theoretical concern, rather than a real, practical worry.
As I approached the second turn point I noticed another one of the task planning parameters to come true: the wind (which had been light out of the southwest) started to pick up and became increasingly westerly. I was excited about that as it promised the hoped-for tailwind on the last leg. As the wind increased I paid close attention in the thermals. Fortunately I did not notice any centering problems or a degradation in thermal strength – a potential consequence of the increasing wind.
Leg 3
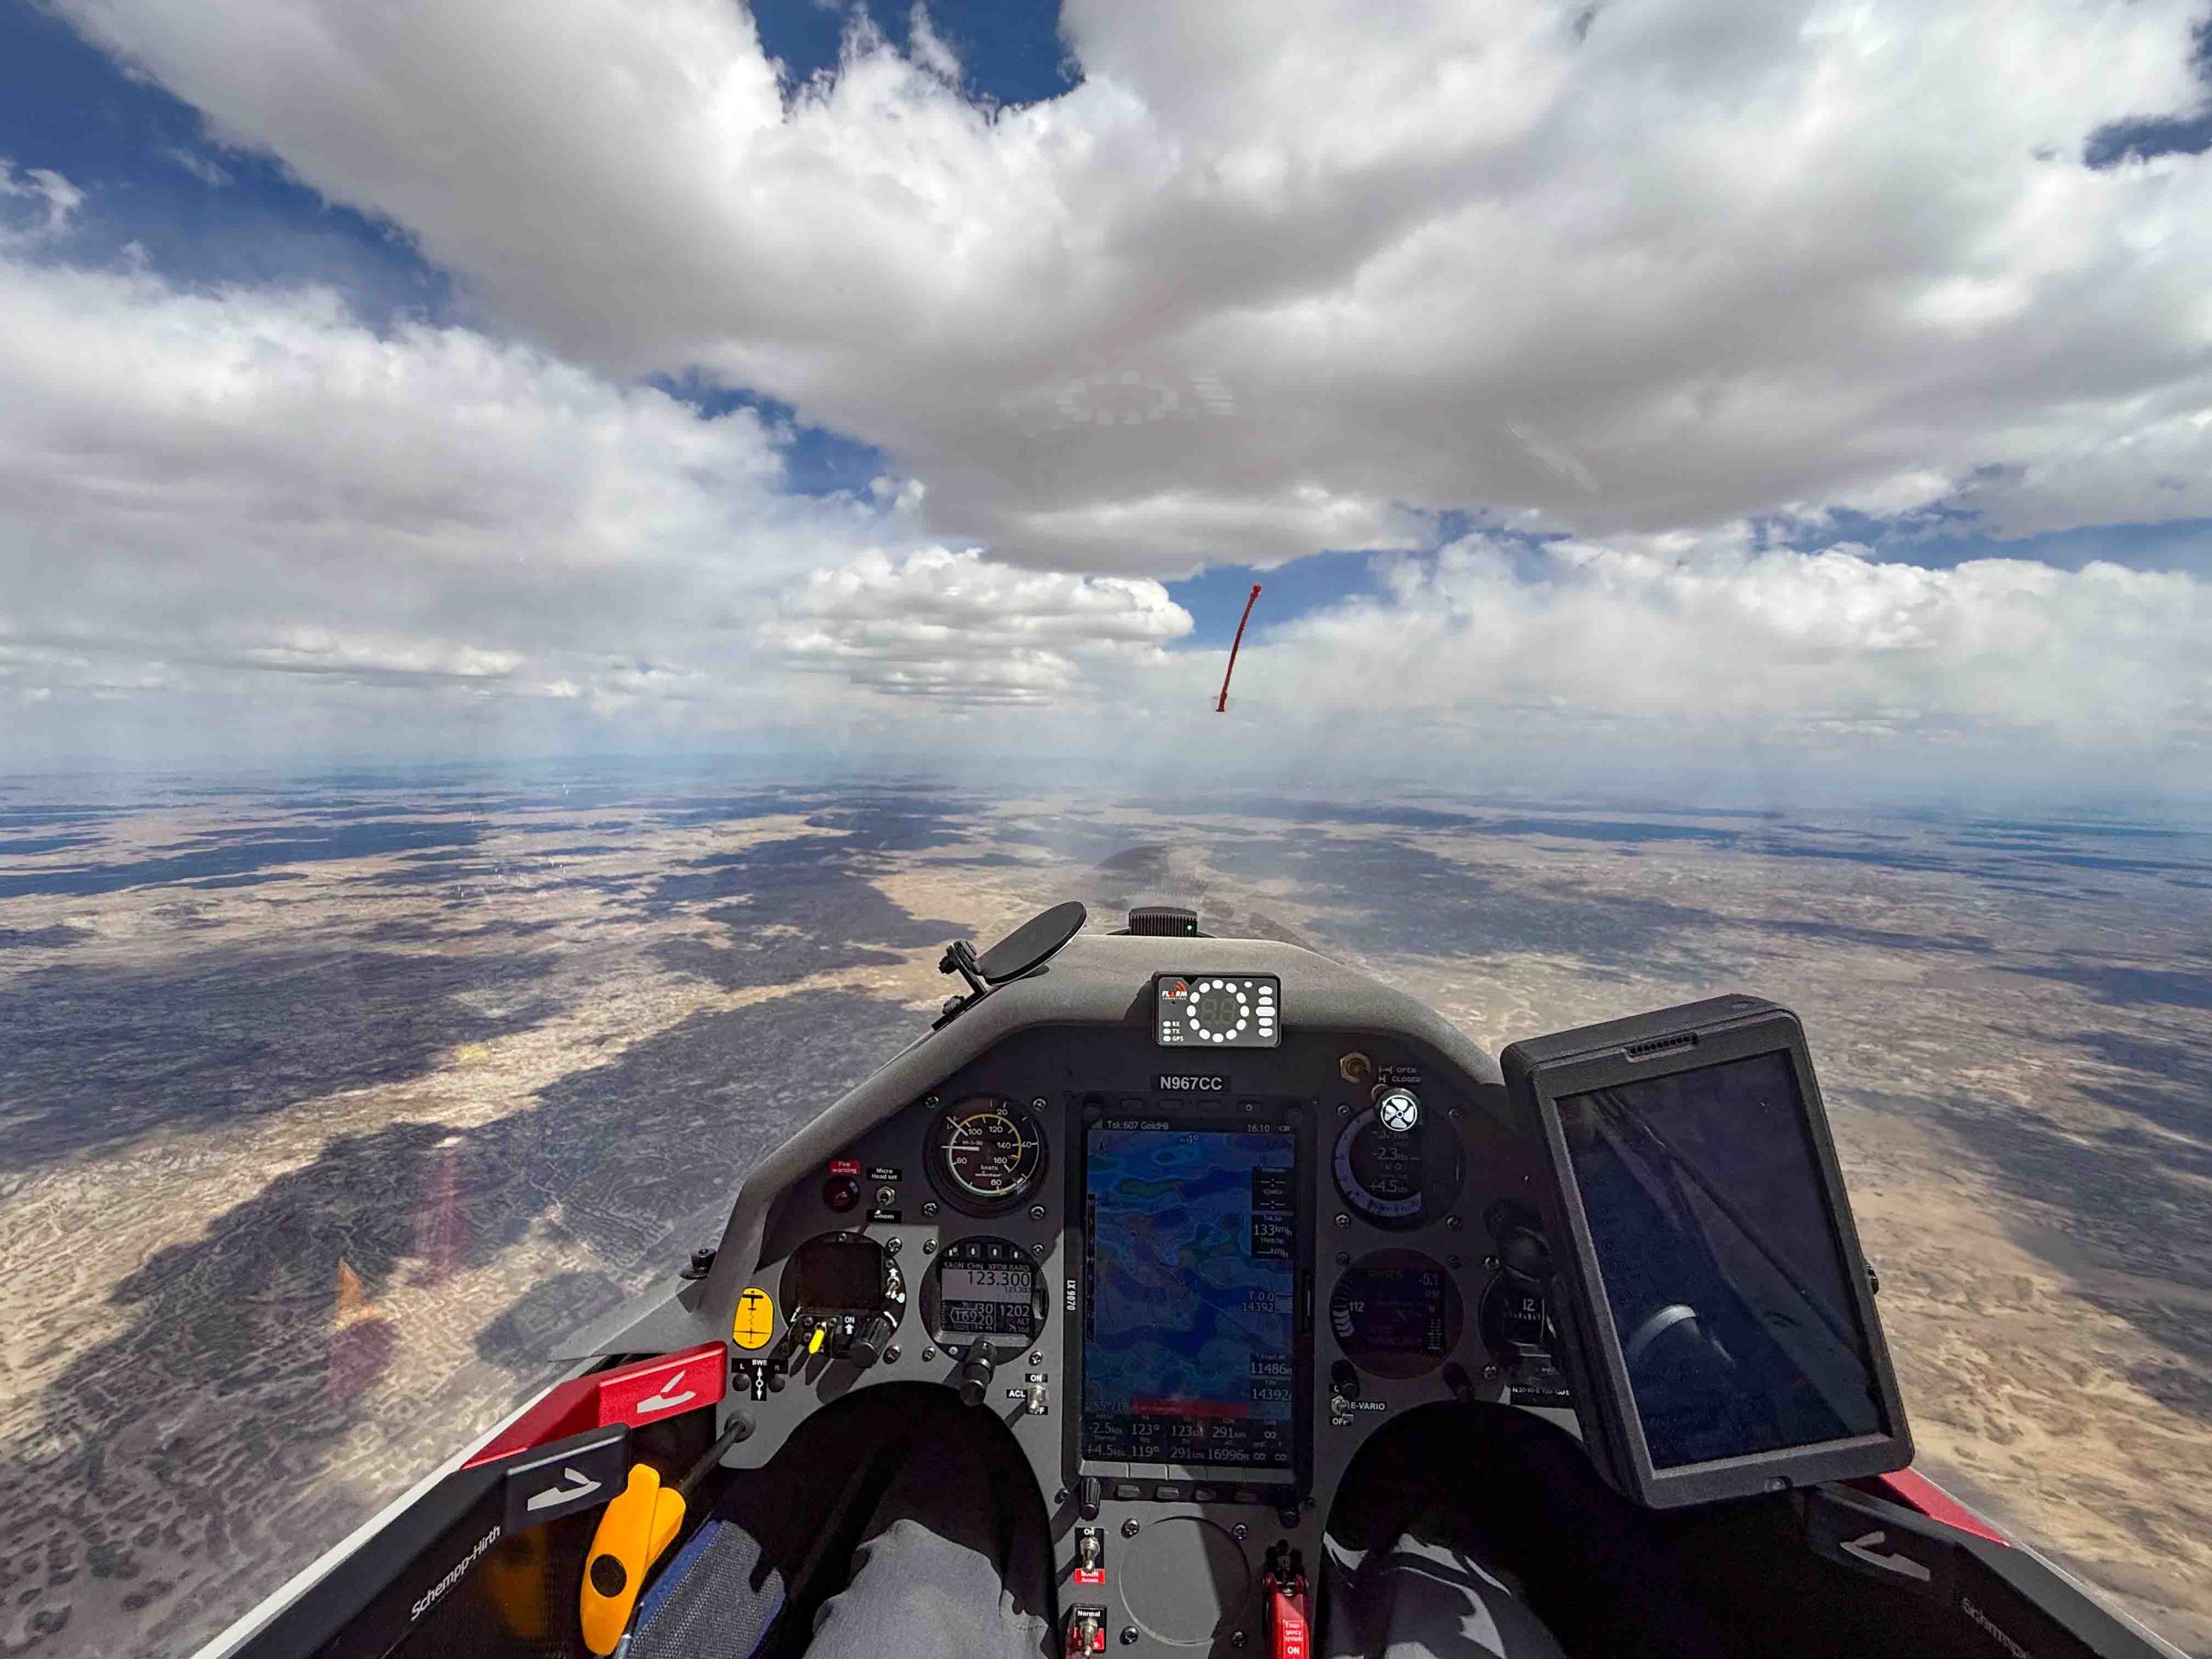
It was 3:40 PM when I reached my northern turn point, 20 minutes ahead of my targeted schedule and 35 min before my cut off time of 4:15 PM. It was an exciting moment. The sky ahead look fantastic, even better than on Leg 2. The wind was now solidly at my tail and – even better – it helped arrange the lift lines in the direction of the wind: two or three nice cloud streets were beckoning in my general direction and it was just a question of which one to follow. I had another 360km to go and had to suppress the sense that it was already time to celebrate success.
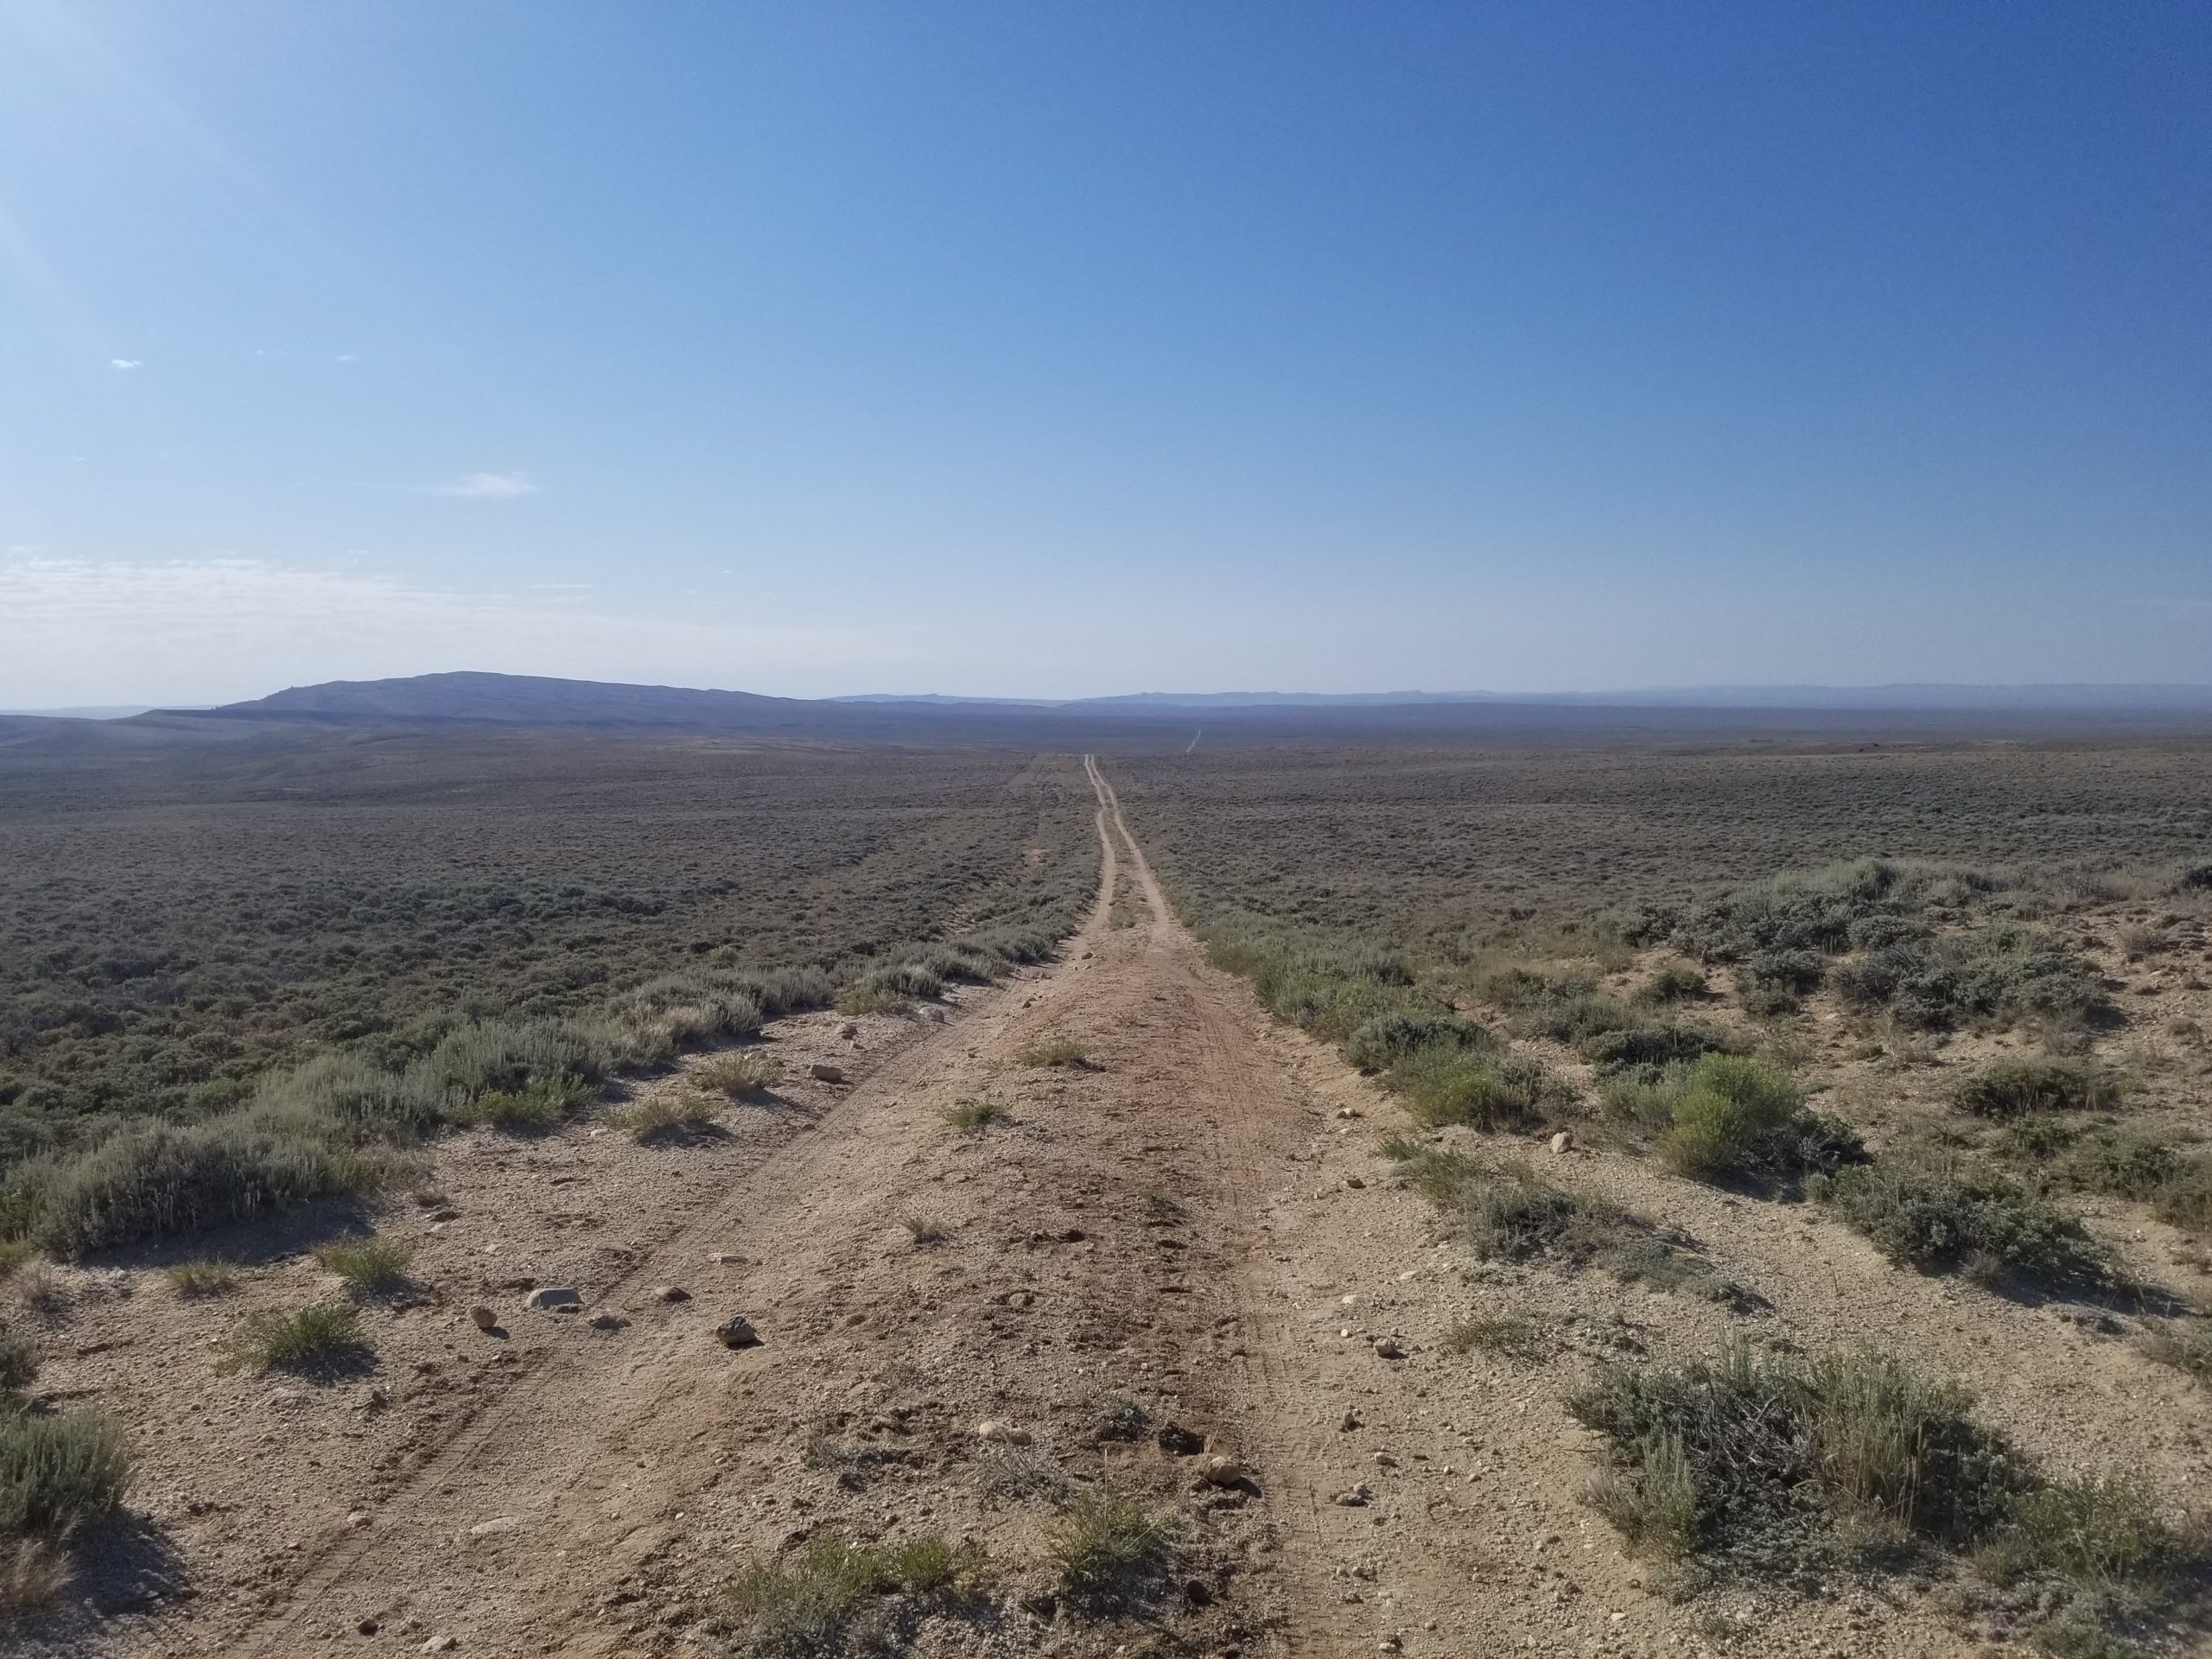
Then, for a minute or two I could not make up my mind and found myself wavering between two lift lines, which caused a drop in altitude to 13,700 ft. This caught my attention because the next 90 miles were without any possible place to land. I was also quickly getting out of glide from SW Wyoming Regional (getting there would require backtracking into the wind). This made me determined to take the next climb, even if it was weak.
The next cloud worked and within 5 minutes I was back at 16,000 ft. The next airport, Dixon, was still 70 miles in the distance but I now wasn’t concerned at all: the line I picked worked great: from here until Dixon I would only briefly stop twice to top up altitude. My ground speed on this stretch reached close to 200 kph.
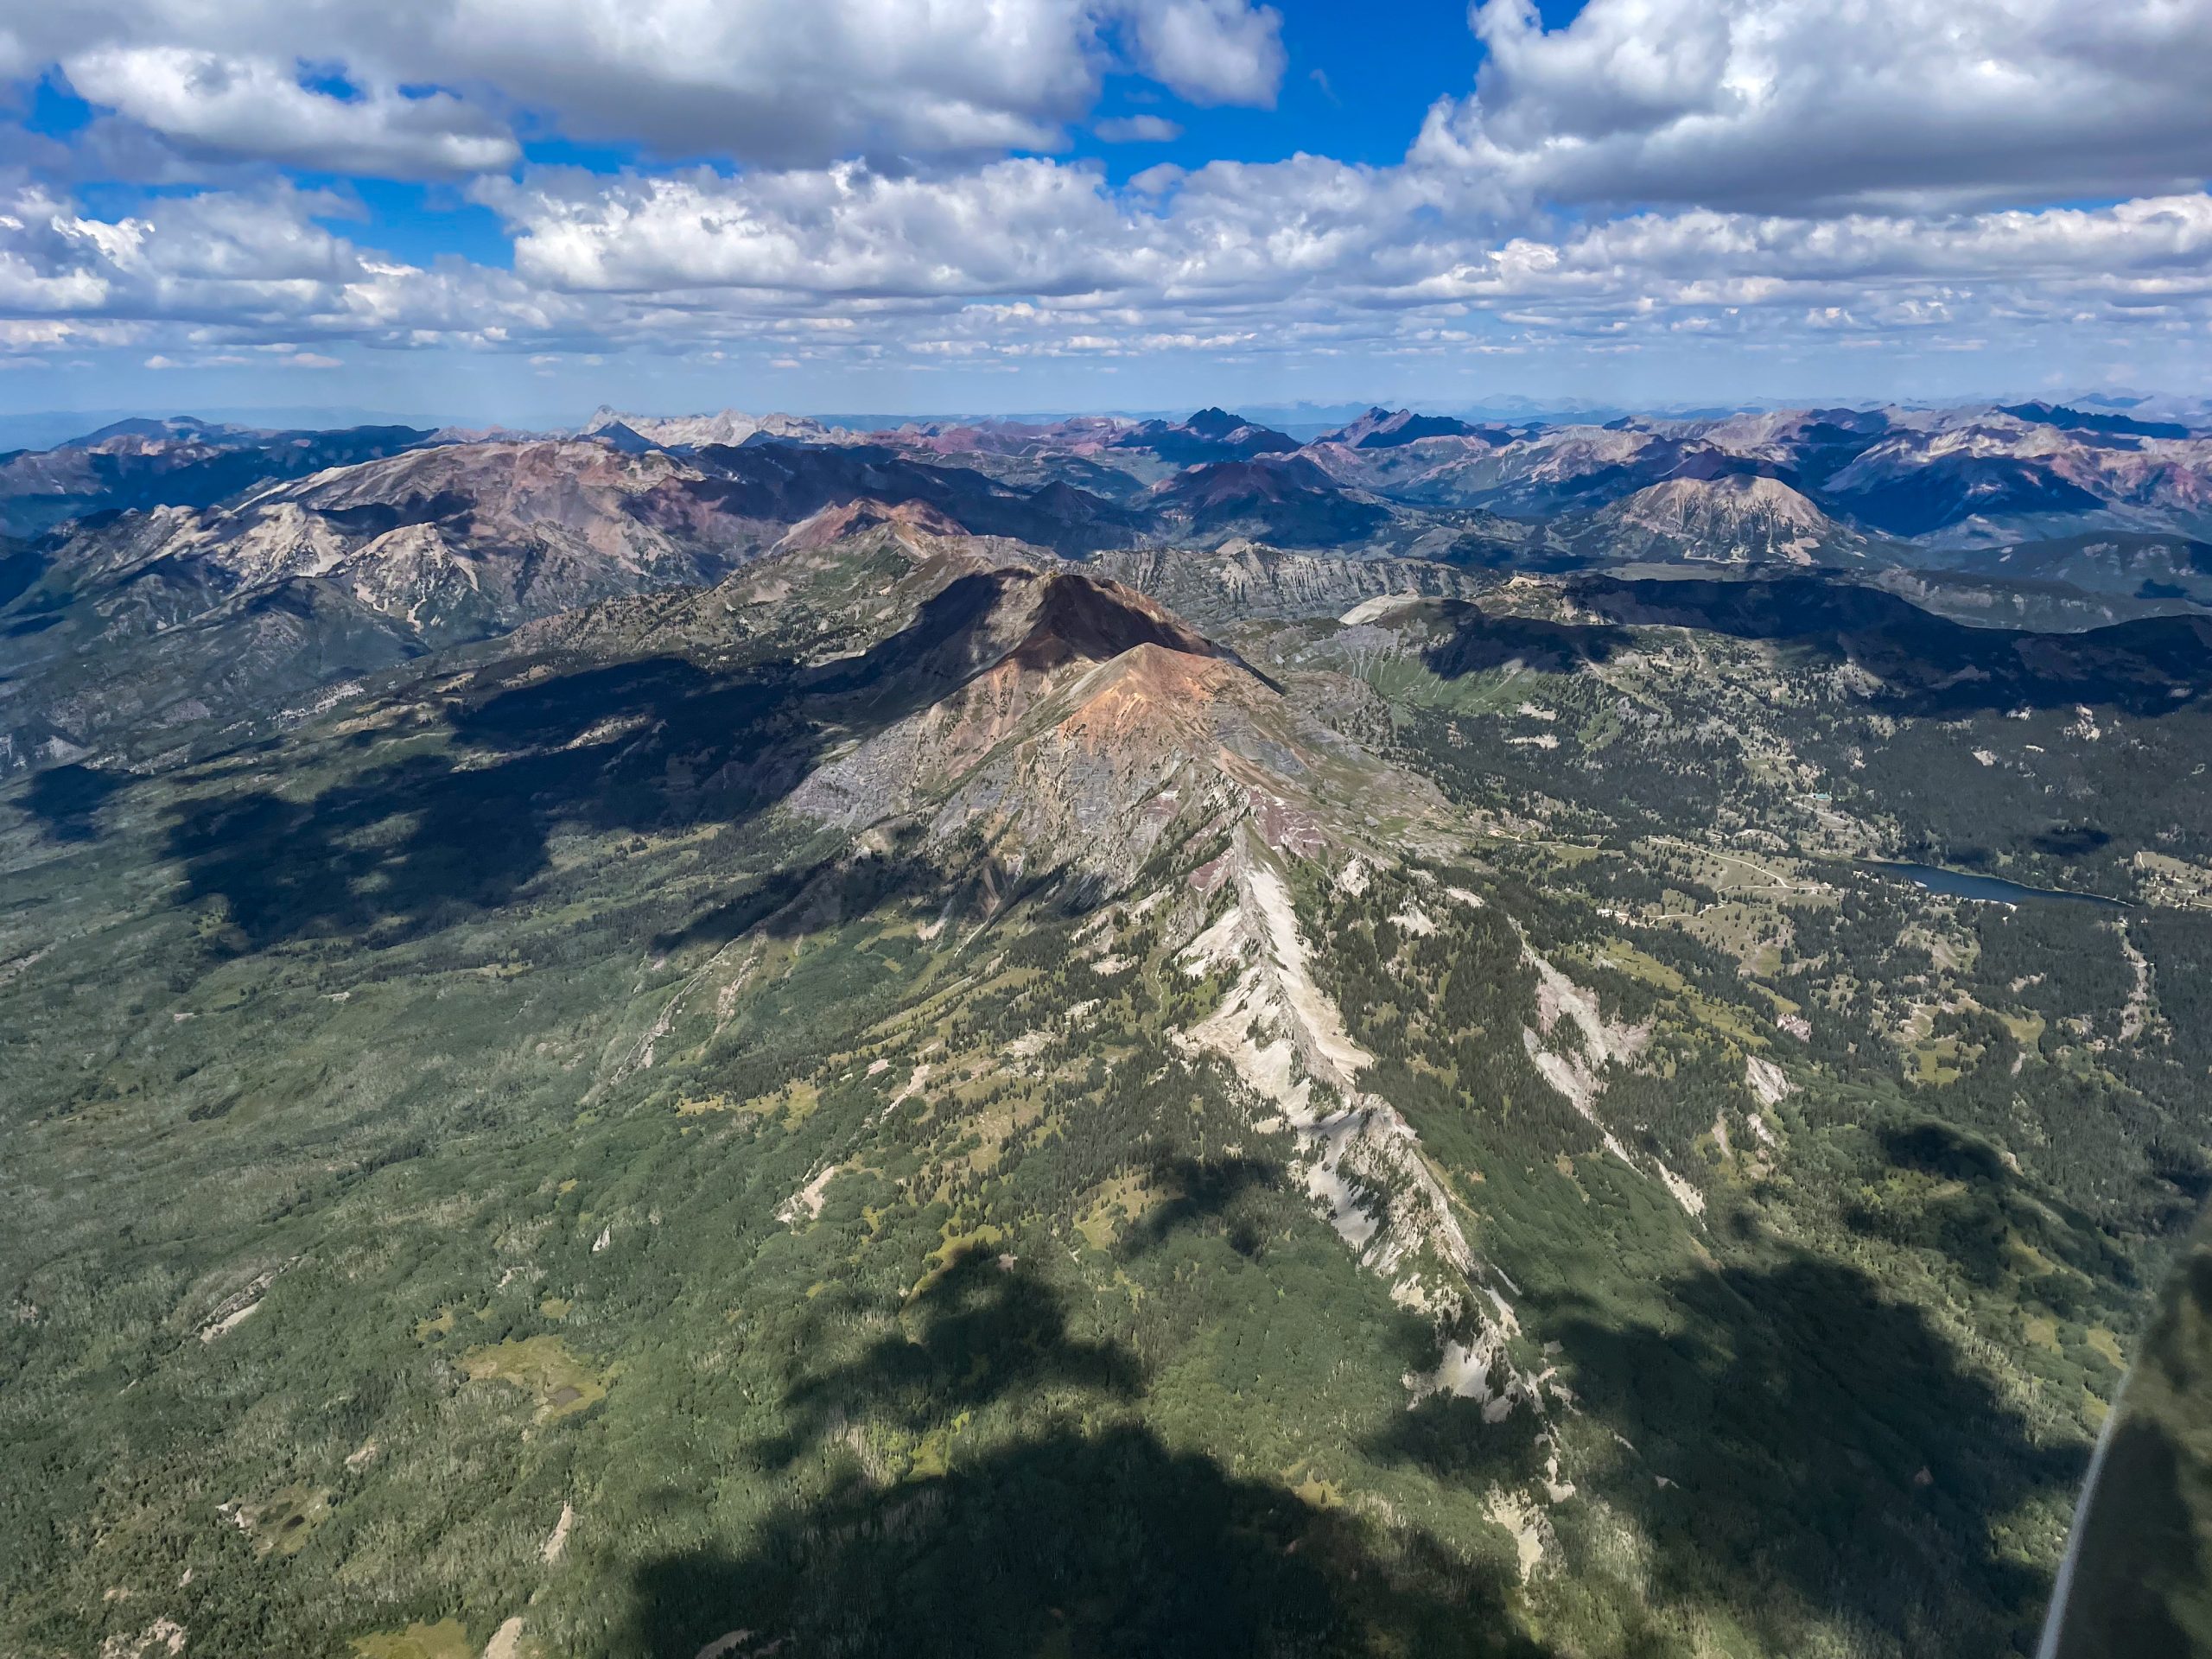
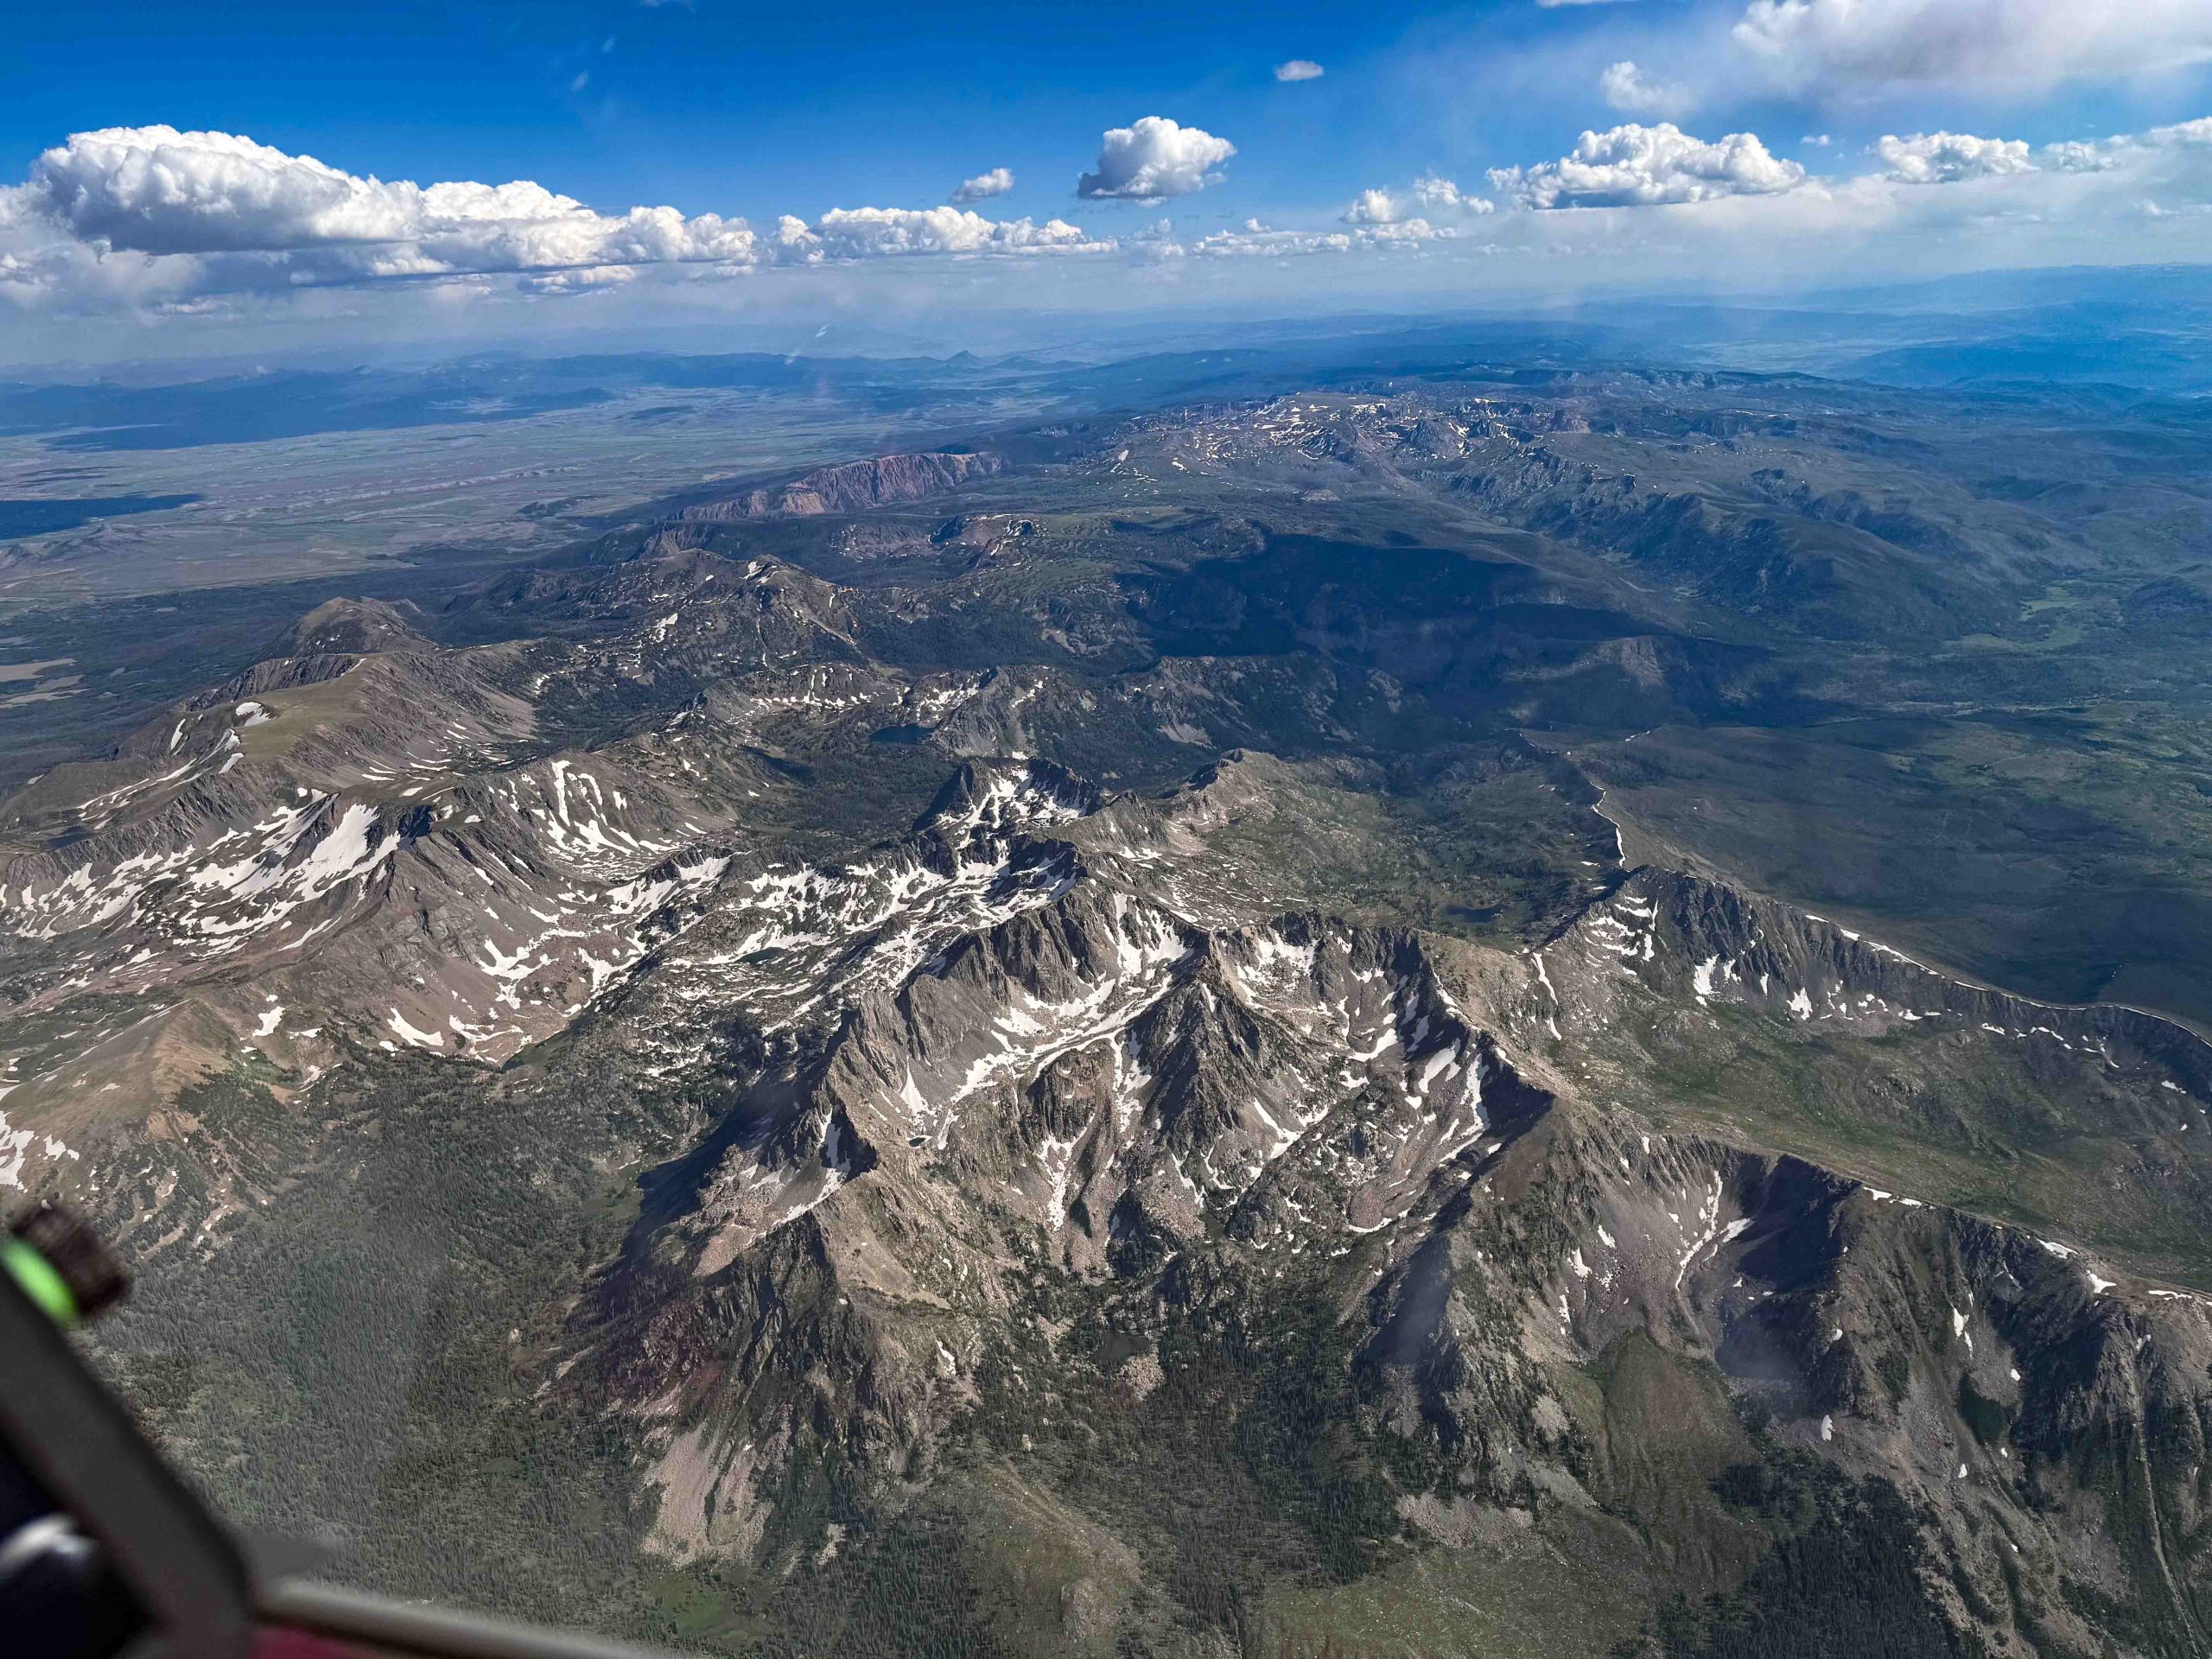
Not only the scenery, also the character of the flight changed when I passed Dixon and got back into Colorado.
There was more overdevelopment over the mountains and more blue sky over the valleys. This meant I had to pay more attention to picking the right lines.
As I reached the Zirkel Mountains in the northern Park Range I had to make up my mind: the northern half of North Park was devoid of clouds. Should I go around North Park or veer south-east and cut across? Showers over the Poudre and along the Northern Front Range made me opt for the southern route.
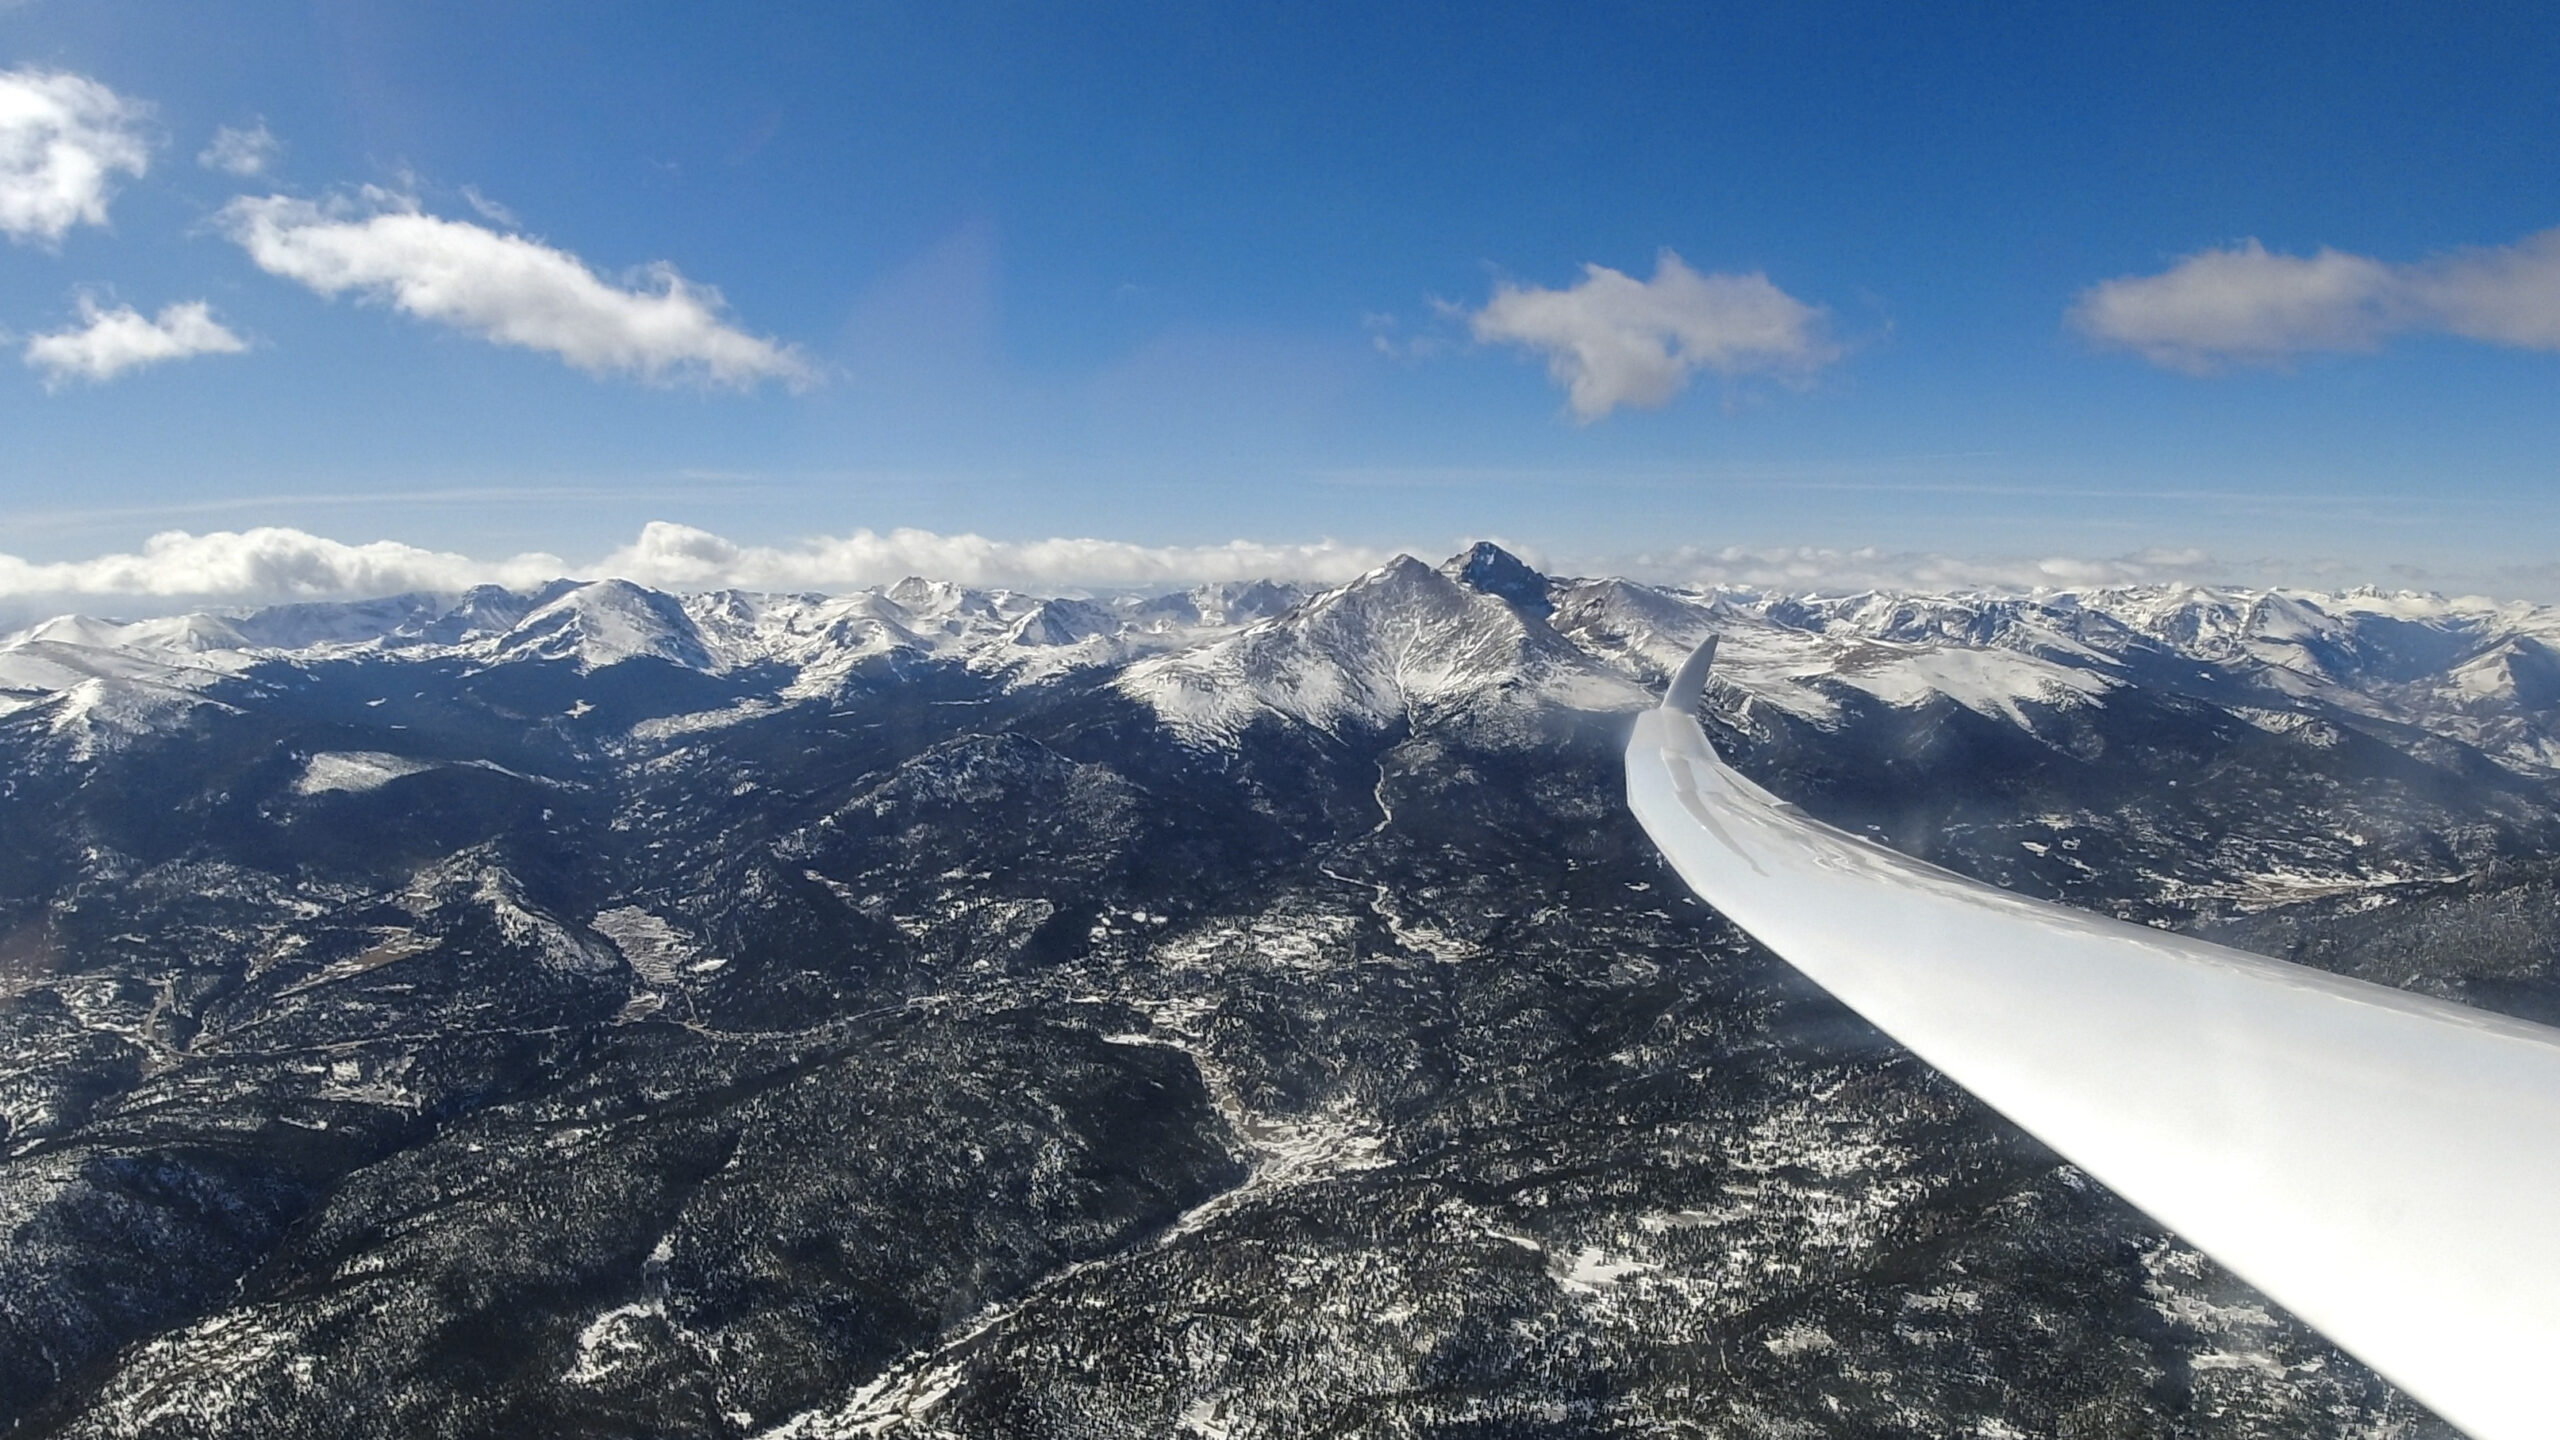
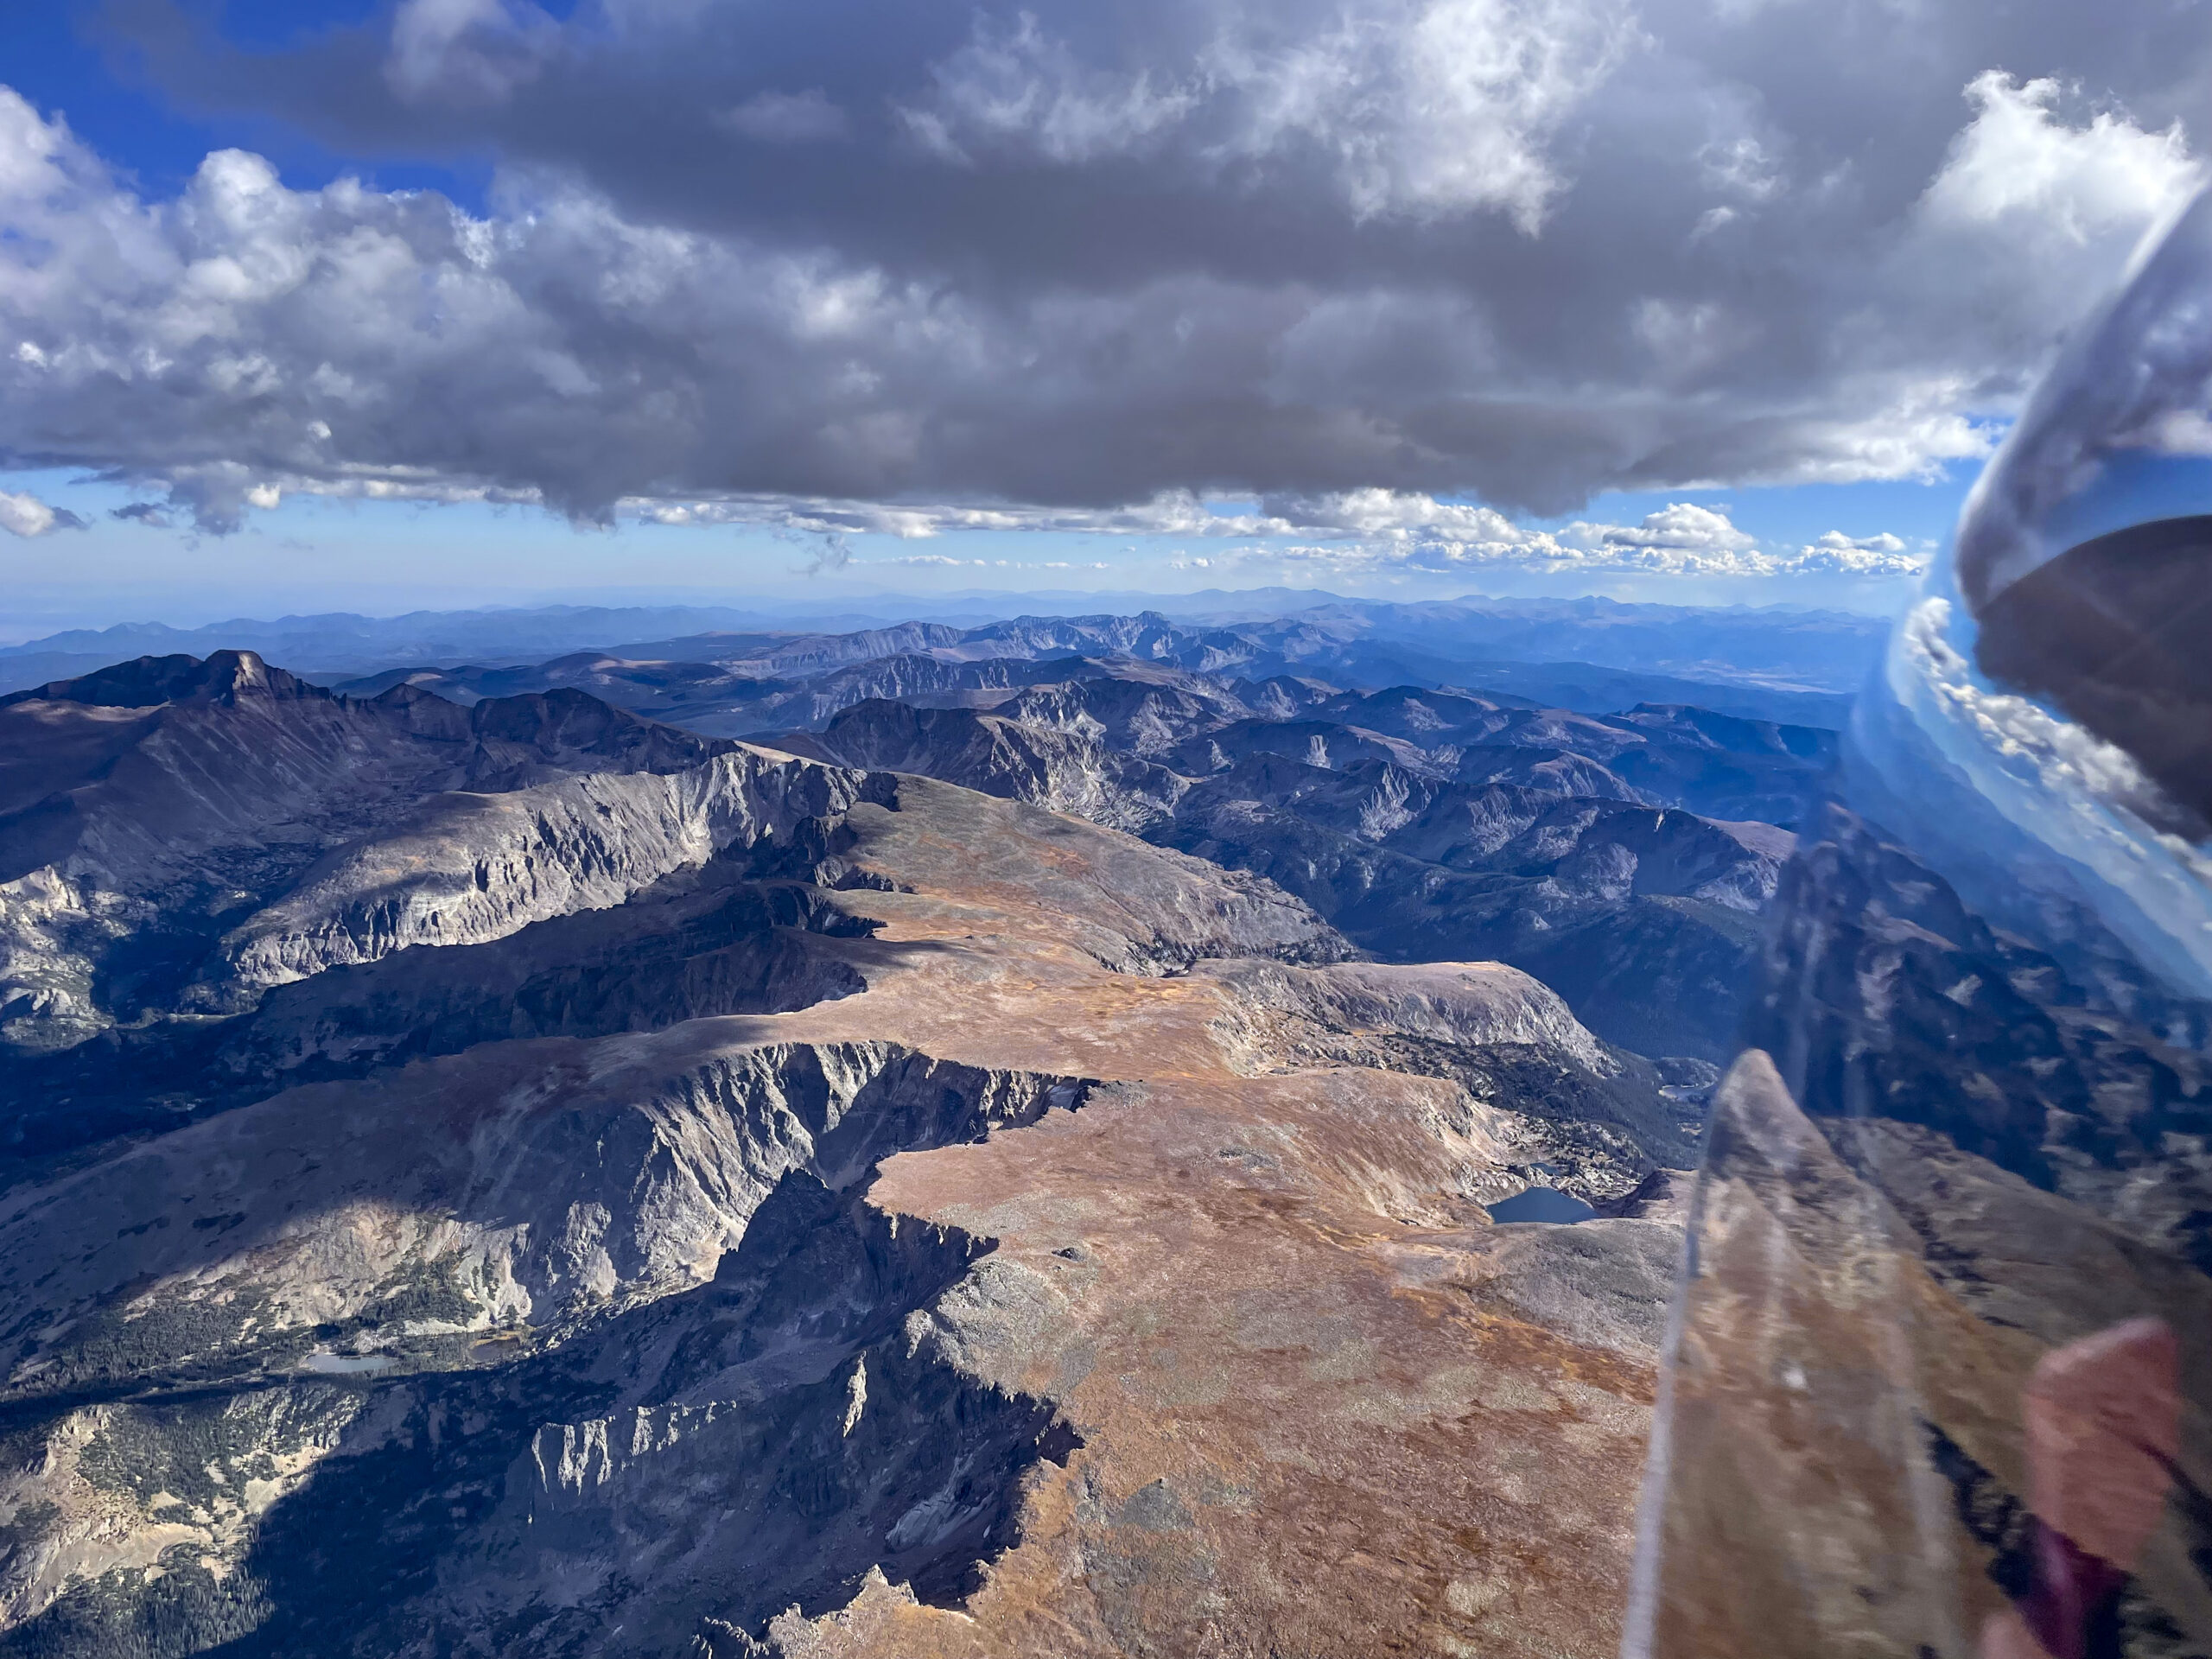
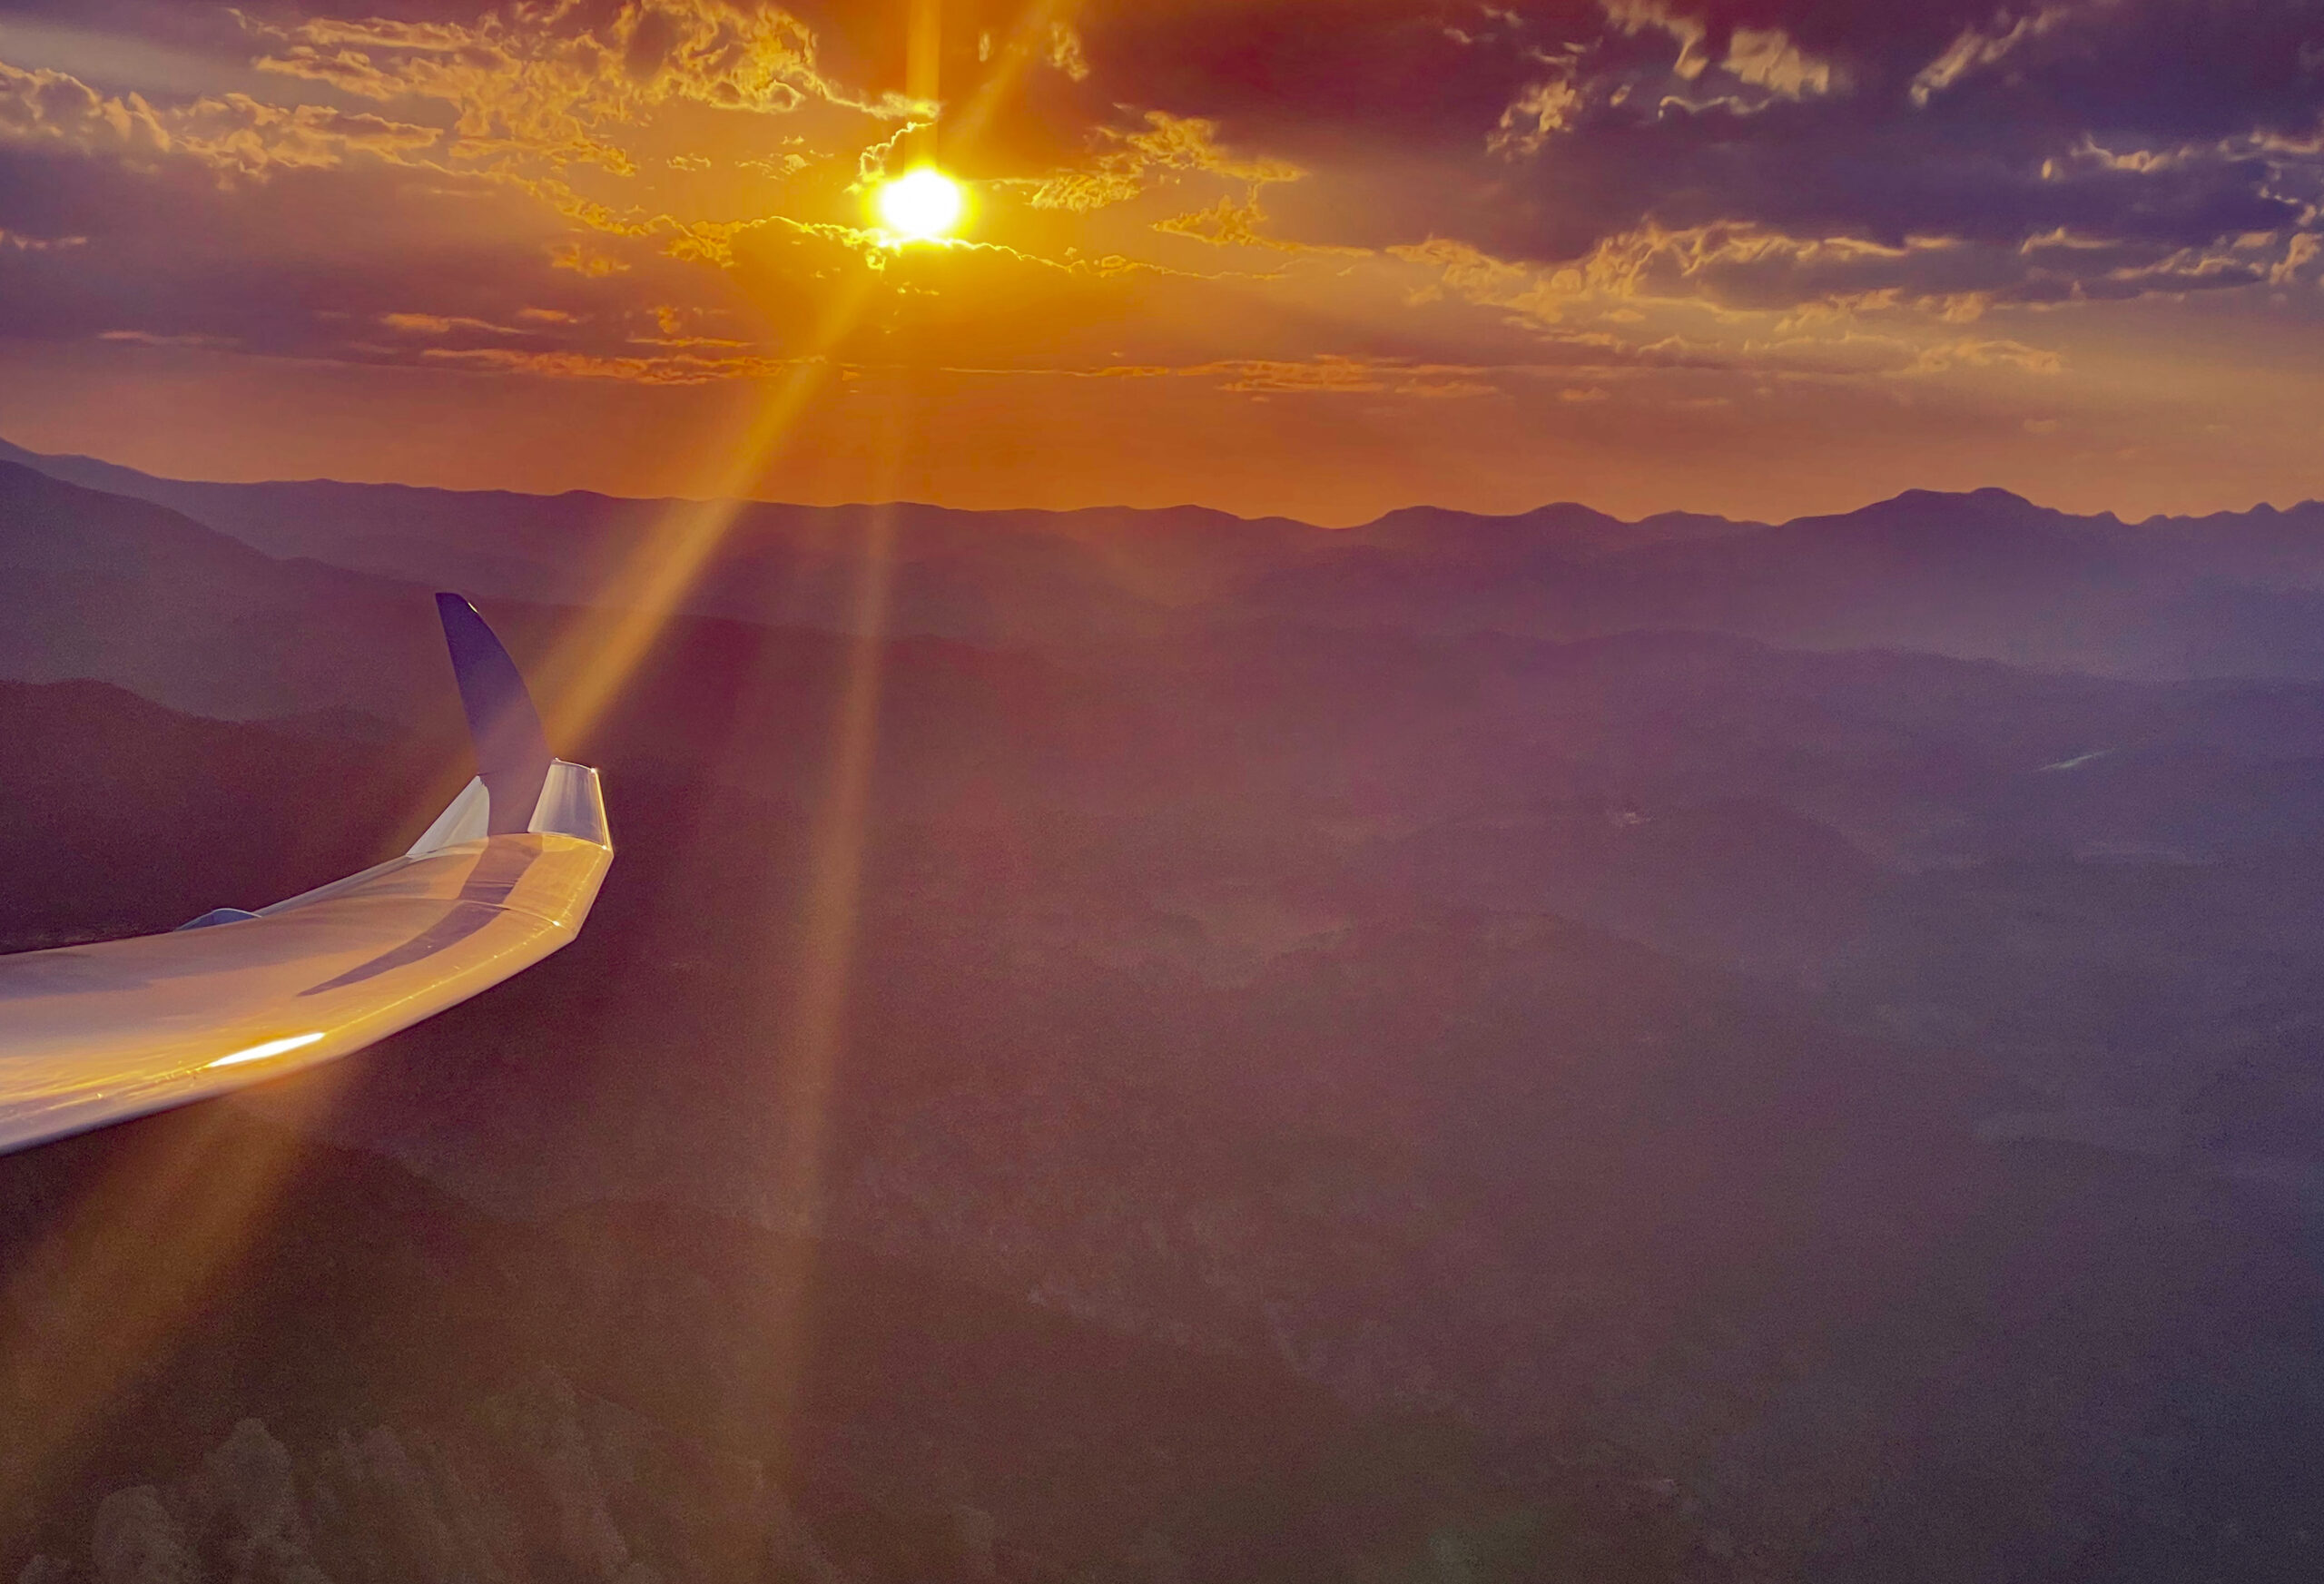
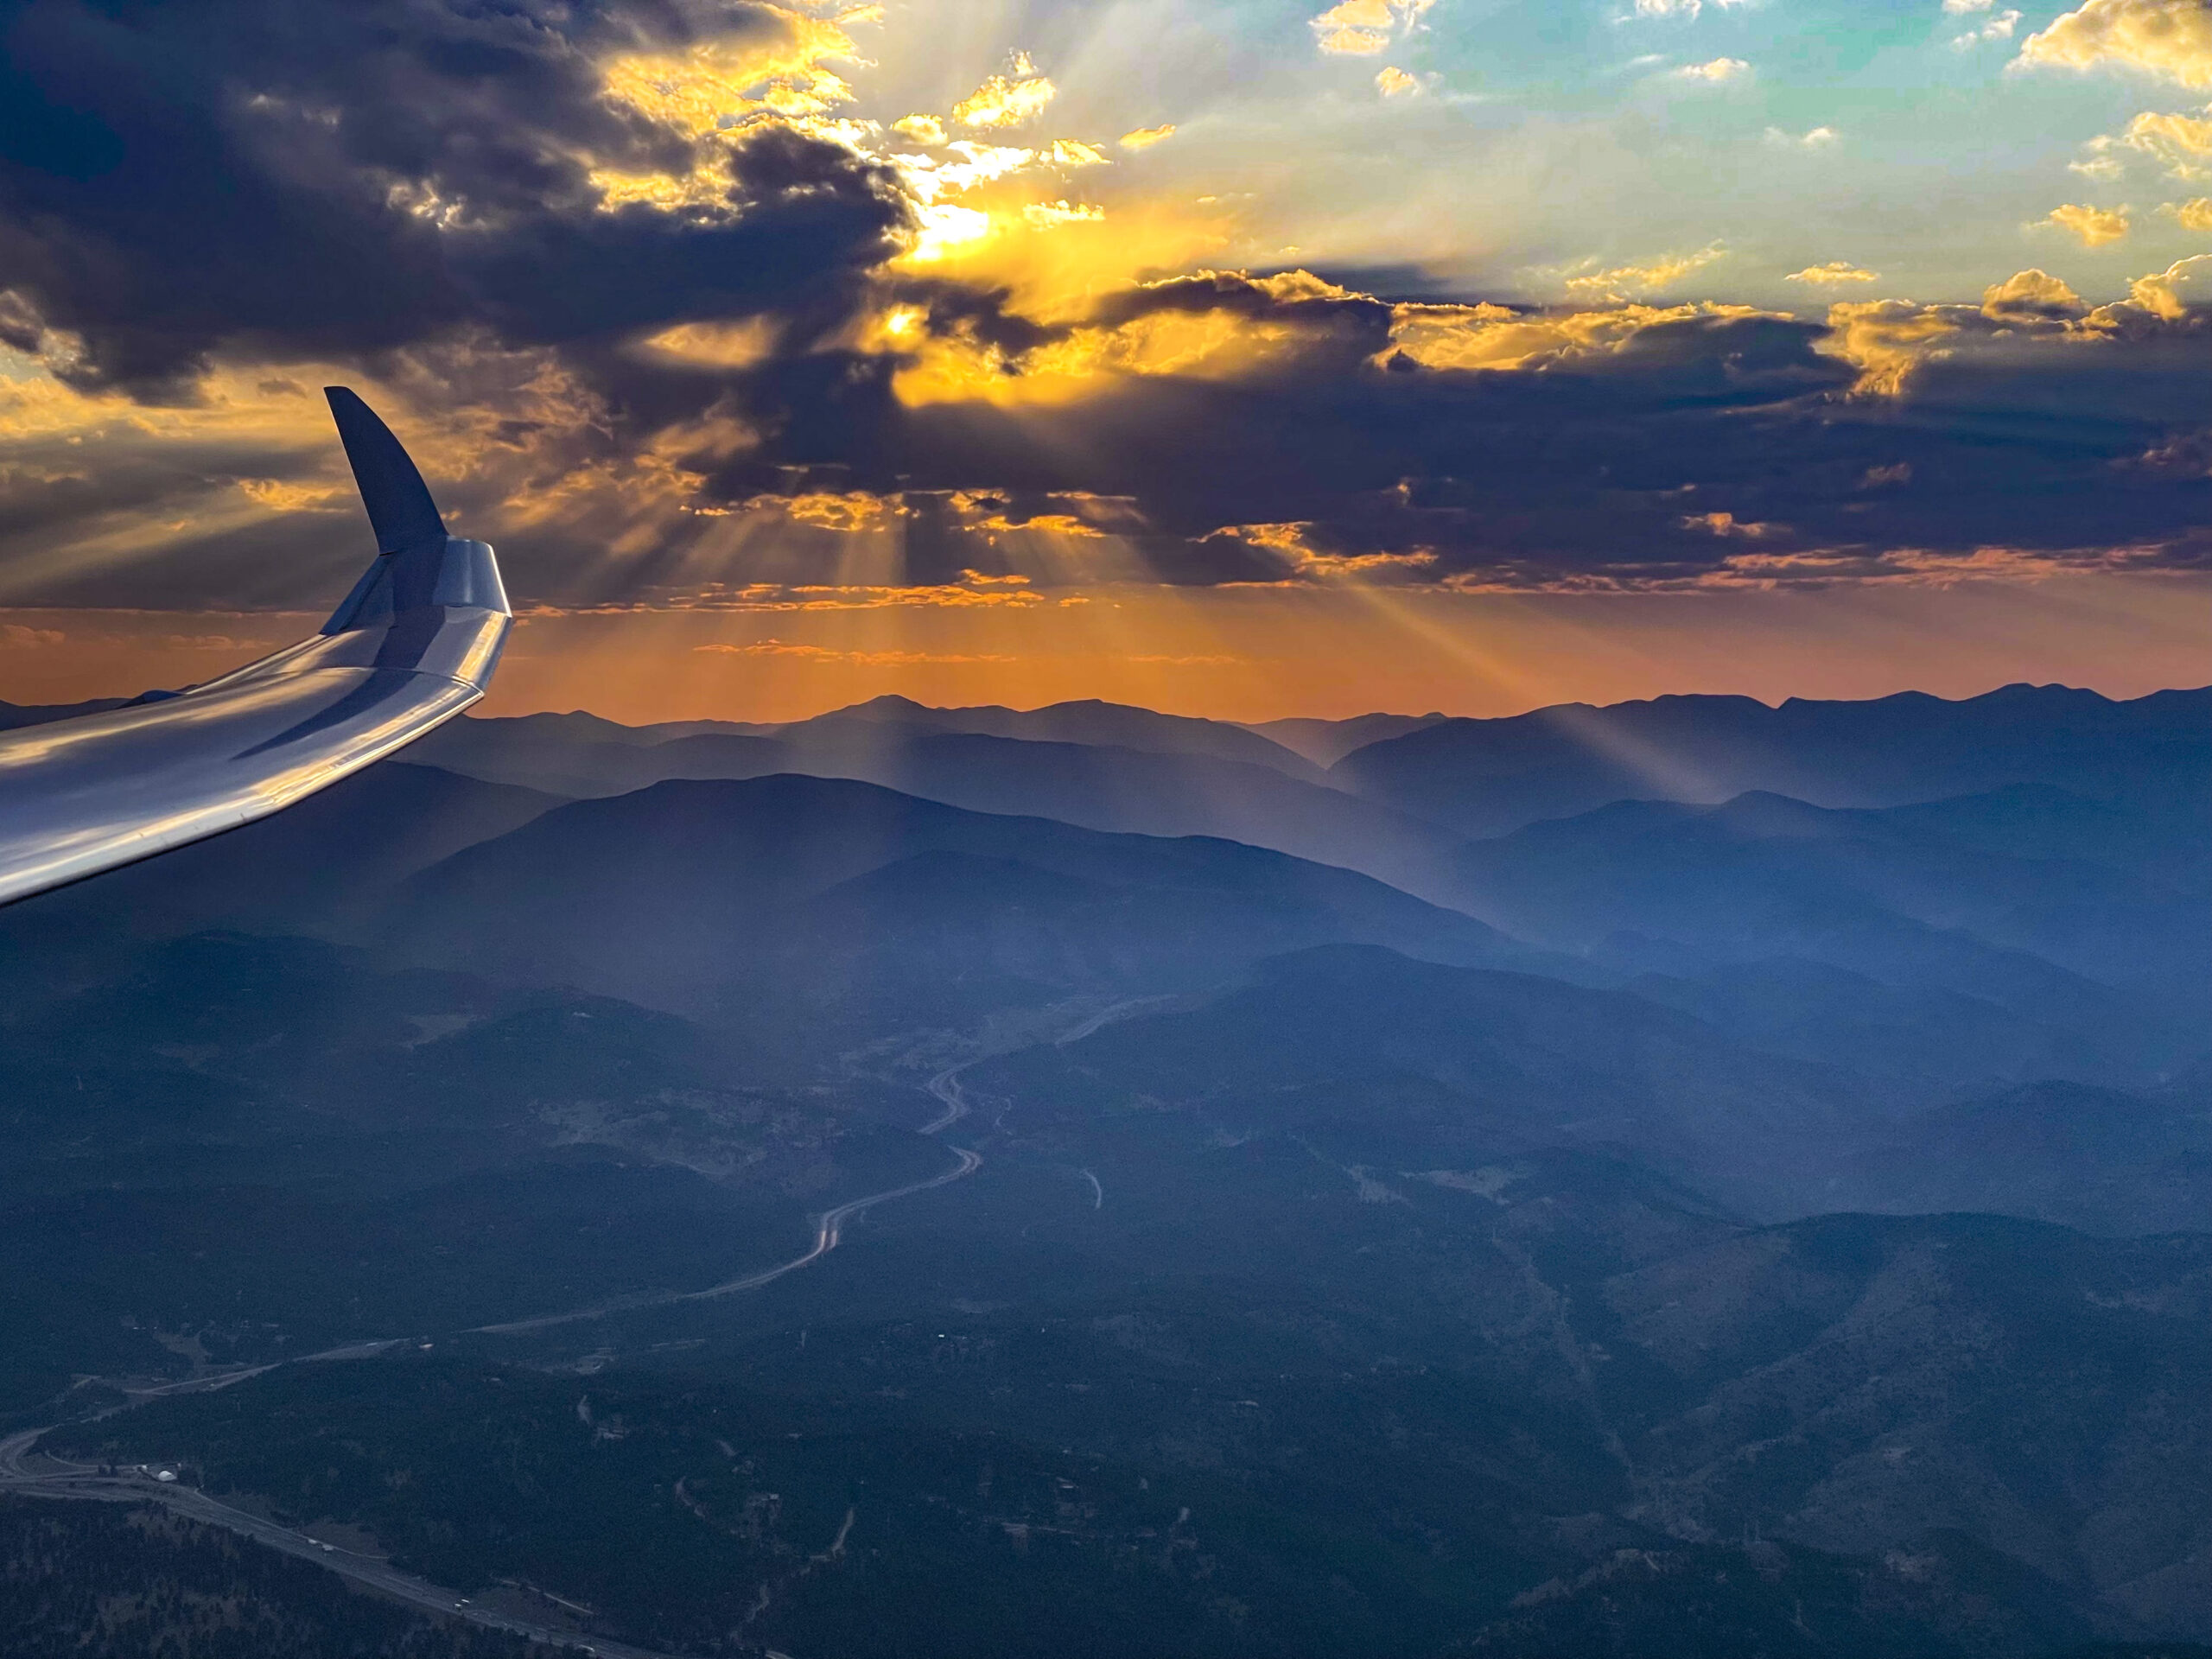
This turned out to be an excellent choice. The cloud I picked allowed me to climb to 17,500 ft and from there it was just one 100 km long final glide across the Continental Divide and towards the finish line. All stars aligned. Near Trail Ridge Road even the clouds parted, giving me clear passage while showers fell on Longs Peak and over Mummy Mountain.
I watched my task speed inch up as I approached the finish line, which I crossed, uneventfully, at 5:42 PM. It felt incredible! I had been counting on making my final climb around 7 PM to make it across the divide and here I was with time to spare!
I thought about adding a yoyo to the south but then decided to just find another climb to fly out over the prairie towards the Denver Class B airspace to make a free triangle that was a little bit bigger that the one I had declared. This was a little more tricky than I had anticipated as lift was increasingly difficult to find east of the divide (which was now in unfavorable light). But work it did and so I returned to land at just 6:23PM with more than two hours of daylight left.
Final Reflections
By most measures the flight went even better than the plan: I got an early start, a full 30 minutes earlier than Skysight suggested possible. I stayed ahead of schedule throughout the flight, and I finished well ahead of my target time. My average task speed of 145kph came very close to Skysight’s suggested maximum of 151 kph.
In hindsight, I asked myself why I did not plan a 1250 km Triangle. I had at least another 1 1/2 hours of active thermals left to cover an additional 140 km. There were no hard constraints. Even 1300 km may have been possible: 190 additional km in 90 minutes – that’s 126 kph.
Plus, I probably could have launched successfully even 15-20 minutes earlier. The initial leg clearly supported it. With all the OD after the start I was actually somewhat late, not early. I also could have set the first turn point further to the south (to avoid being too early on Leg 2); and the second turn point could have been further north (the weather supported it). It almost certainly would have been possible.
Who knows, in theory perhaps there was even a chance to fly the 1363 km that it would take to break the US National Record (which dates back to 1986 or the 1386 km that it would take to break the current world record (set by Klaus Holighaus in 1993)…
Hindsight is 20:20. All of this is pure speculation and impossible to know.
For sure, whether its 1300km or even longer, everything would have to work perfectly. There’d be no option to ever get stuck. No significant detour. One could only take good climbs. The pilot has to be mentally switched on the entire time. There’s no room for sloppiness. Are these realistic assumptions to make? Wouldn’t there have to be an allowance at least for some contingency? And is all of this possible without taking any safety risks?
I don’t know the answers to these questions. But this flight and the math shows that such a flight might – just might – be possible. Even from Boulder, Colorado. Can it be done? I don’t know.
But it is an inspiring thought. 🙂