This year I flew my first three glider contests. The Region 7 contest in Albert Lea, MN. The 20m Multi-Seat Nationals in Montague, CA. And the 18m Nationals in Nephi, UT. While these contests are still fresh* on my mind, I want to share some things that I think every aspiring contest pilot will want to know well before they attach their glider trailer to head to their first contest site. I learned some of these things thanks to the generous advice and coaching from highly experienced contest pilots, others through personal experience.
(*I wrote this article right after the contests and just saw that it was still in the draft folder.)
This post is intended for anyone who’s thinking about flying their first contest. I hope it helps you have a great experience!
1) Are You Ready to Fly Contests?
That’s a big question. There’s no black and white answer and it depends in part on the type of contest, the site you’re choosing, and what you want to get out of the experience.
I thought of myself as ready only once I had completed my Diamond distance flight in 2019. By that time I had about 300 hours in gliders. But I don’t think that earning a particular badge (Silver, Gold, or Diamond) should be the deciding factor because it makes a huge difference whether you obtain these recognitions in a 1-26 in weak east coast conditions or in one of my club’s Disci flying in Colorado. In Boulder you can easily complete a Gold Distance flight without ever leaving the glide range of the airport, and even on my Diamond Goal flight I barely flew beyond glide range.
I think a better way to think about it is that you should be able to confidently complete pre-declared XC tasks without scaring or endangering yourself. The length of these tasks is less important than the fact that they take you outside of glide range of your home airport and that you’re accustomed to keeping landable fields in glide. Ideally, you should have practiced such flights even when the weather is less than perfect because at contests, tasks will be called on any flyable day.
Another thing you should be good at is decision making, particularly when it comes to landing decisions. A very high percentage of gliding accidents happen when pilots try to prolong a flight when the prudent decision is to call the flight over and land. To make this decision well you also need to have good landing skills. Practice this by treating every landing as a precision landing and take the opportunity to attend soaring camps at other sites or otherwise land away from your home airport whenever you can. Having the confidence that you can land in a short field in cross-wind conditions is critical to actually making the decision when it is the smart thing to do.
Gaggle Flying. That’s another thing you should practice whenever you can, even if it is just with one or two other gliders. You will be sharing the sky with more gliders than you’re used to and you must know how to thermal with others without endangering each other. The main thing is to always keep the nose pointed at the tail of the glider in front of you (or slightly to the outside) and never to cut inside their circle. The more gliders are in the gaggle the wider the circle gets. Yes, this is somewhat inefficient but it is safe and safety wins. You can always look for another thermal if it gets too crowded for comfort. Three contests have not made me a big gaggle person and I doubt that I will ever be one. But gaggles can be of great help especially in blue conditions where multiple gliders can sample a lot more of the sky than a single pilot.
Do you need a crew to fly contests? Having a crew used to be considered a pre-requisite for flying contests. This is no longer the case. Contest organizers will help pair crew-less pilots to help each other and there will be a retrieve office to check that everyone has made it back safely by the end of the day. However, you should recognize that flying without crew influences your decision making. Depending on how you think, it may hold you back (e.g., if you decide to always stay in glide range of airports from where you could obtain an aero-retrieve), or it may expose you to greater safety risks (e.g. if you try to avoid a land-out at all costs even when it is unsafe to attempt a low safe). I have flown without a dedicated crew at all my contests. Instead, I made arrangements with other pilots to retrieve each other should it be necessary.
So, are you ready? Only you can decide. If you can confidently fly beyond glide range, set realistic goals for yourself, choose a beginner-friendly site with plenty of landout options, and regard your first contests primarily as a learning experience you might be there already!
2) Preparing Your Glider
Long before you go on your adventure – about two months in advance is a good target – make sure all your equipment is ready and working reliably. The long lead time will allow you to fix things that need to be addressed without getting into a time crunch at the end. The list below isn’t intended to be comprehensive. However, it contains specific tips for things that may be easy to overlook, whether you fly your own glider or you bring a rented one or a club ship.
a) Flarm. Many contests require Flarm and if they don’t they should. I would think twice about attending a contest that doesn’t. You do have one, right? It can safe your life and that of others. Make sure it works! The firmware must be current and the Flarm antenna (or antennae) must be appropriately installed and positioned. Read the instructions! At least one antenna must be vertical and should be centered on top of your panel as high as possible without touching the closed canopy! A quality antenna makes a difference. There must not be any kinks in the antenna cable. Depending on the antenna, you may need a ground plane. Especially in gliders with a carbon fibre cockpit it is notoriously difficult to get good reception. Test your Flarm while flying with your buddies at home. The Flarm web site offers a range analyzer. Don’t trust it. The best way to know if your Flarm works is to make sure others can see you on their instruments and you can see them from at least a few kilometers away (the more the better).
b) Vario. Make sure your total energy compensation works. If you pull on the stick and your vario beeps happily in response then it doesn’t. You need a good vario to center thermals.
c) Oxygen. If you go to a site where you will fly above 10,000 feet you should have a working O2 system. You’re in a contest and you need your brain to be firing on all cylinders! You can test it at lower altitudes as well.
d) Relief system. Have one and use it regularly. Don’t make your first contest the place to figure it out. In general, try to minimize the number of things you’ll do for the first time when you fly a contest. Enough things will be new to you already.
e) Tow-out gear. You may be used to just pushing your glider onto the runway without a lot of extra equipment. That will not work at the contest site! You need a good tail dolly, a good wing dolly, and a tow-out bar that allows you to attach the glider to your vehicle to tow it out to the runway. All these things should be fully functional and reliable, and you should be proficient in using them.
f) Paperwork. Don’t forget all the necessary paperwork. Contest Registration (in the US you can register online at members.ssa.org), your Glider Registration, Airworthiness Certificate, your pilot’s license, proof of SSA membership, proof of insurance, plus your glider’s Operating Limitations and Program Letter (for “Experimental” gliders.)
g) Batteries. Make sure you have good batteries for your avionics (and everything else). You may need to turn on the flight computer and the radio while you’re on the grid a long time before your actual launch. Don’t run out of power before the end of your flight! I.e., your batteries should last a long time – it’s better to replace them before you leave from home than to scramble at the contest site to find a replacement after the first practice day. It may be hard to find one. Ask me how I know 😉
h) Contest ID. Ideally, your contest ID should be registered. (In the US with the SSA.) If it’s not and someone else shows up with the same ID you may have to add a character to distinguish your glider. That’s not the end of the world but a nuisance nonetheless.
i) Spare Parts and Tools. At home you probably know someone who might just have the right tool or the correct part when you need it. If you’re lucky, that may also be true at the contest site. However, try to avoid relying on luck as much as possible. That’s especially important for items that would ground your glider if they wear out, and especially if they are somewhat specific to your glider such as a correctly sized tire or tube. In the best case you never need them and maybe you can help someone else out of their predicament.
j) Water Ballast. If you’re going to a contest where flying ballasted is allowed, make sure your ballast system is fully functional. E.g., you need a hose and perhaps other equipment (tank? pump?) to fill the tanks; you need to be able to measure how much you put into each wing (e.g. with a flow meter). The dump valves must open and close correctly and must not leak profusely. You should also know when to mix in antifreeze – especially in the tail tank. And you need to bring enough antifreeze for the contest. Check those things many weeks before your contest because some things may take some time to fix – especially leaking dump valves! Also, practice flying ballasted as much as possible in advance. It’s not particularly difficult but it takes some getting used to (your glider will behave differently!) and the first contest day is not a good time to figure it out.
3) Preparing Your Trailer
You need a reliable and fully functioning trailer. Chances are your trailer is mostly parked at the field. Make sure it’s ready for a big road trip.
Some tips:
a) Tires. Trailer tires should be replaced when they are 5 year old even if they have only 50 miles on them. Old tires can still look great and yet they may be about to fall apart. Many glider pilots destroyed their glider on the way to or from a contest because the tires disintegrated. You may have to replace yours! Check the air pressure and make sure it holds. Also check the spare (you have one, don’t you?).
b) Tie downs. There may be more wind than you’re used to. Make sure you have what you need to tie down your trailer AND your glider. At least 3 tie down anchors are required for each. Plus the appropriate straps. Practice at home if you’re not used to leaving trailer or glider outside. Keep in mind that not every anchor system works in every terrain. What will the ground be like at the contest site? You also need a good canopy cover for the glider.
c) Rigging. You need to know how to rig and derig the glider with whatever rigging aids you are using. Practice at home if you don’t do this regularly. This way you’ll also notice if you’re missing some critical tools or equipment.
d) Paperwork. The trailer must be insured and your registration must be current.
e) Hook-ups. Test the connection between the trailer and the tow vehicle. Do you need a plug converter for the electrical connections? Are all lights working correctly? Is the hitch at the correct height? Can you connect the safety chains so that they are off the ground and not too tight? Can the trailer parking break be fully released?
f) Trailering check. Glider stowed for transport? Is the fuselage strap still in good condition? Is the tail boom tied down? Are the gust locks on the ailerons? Are all items in the storage compartment secured? Is the tongue weight appropriate? (An insufficient tongue weight will make the trailer fishtail and could lead to a disaster – consider adding some weight to the front of the trailer if necessary – e.g., a water canister)
4) Select and Study the Contest Site
An essential part of preparing for a contest is getting to know the contest site.
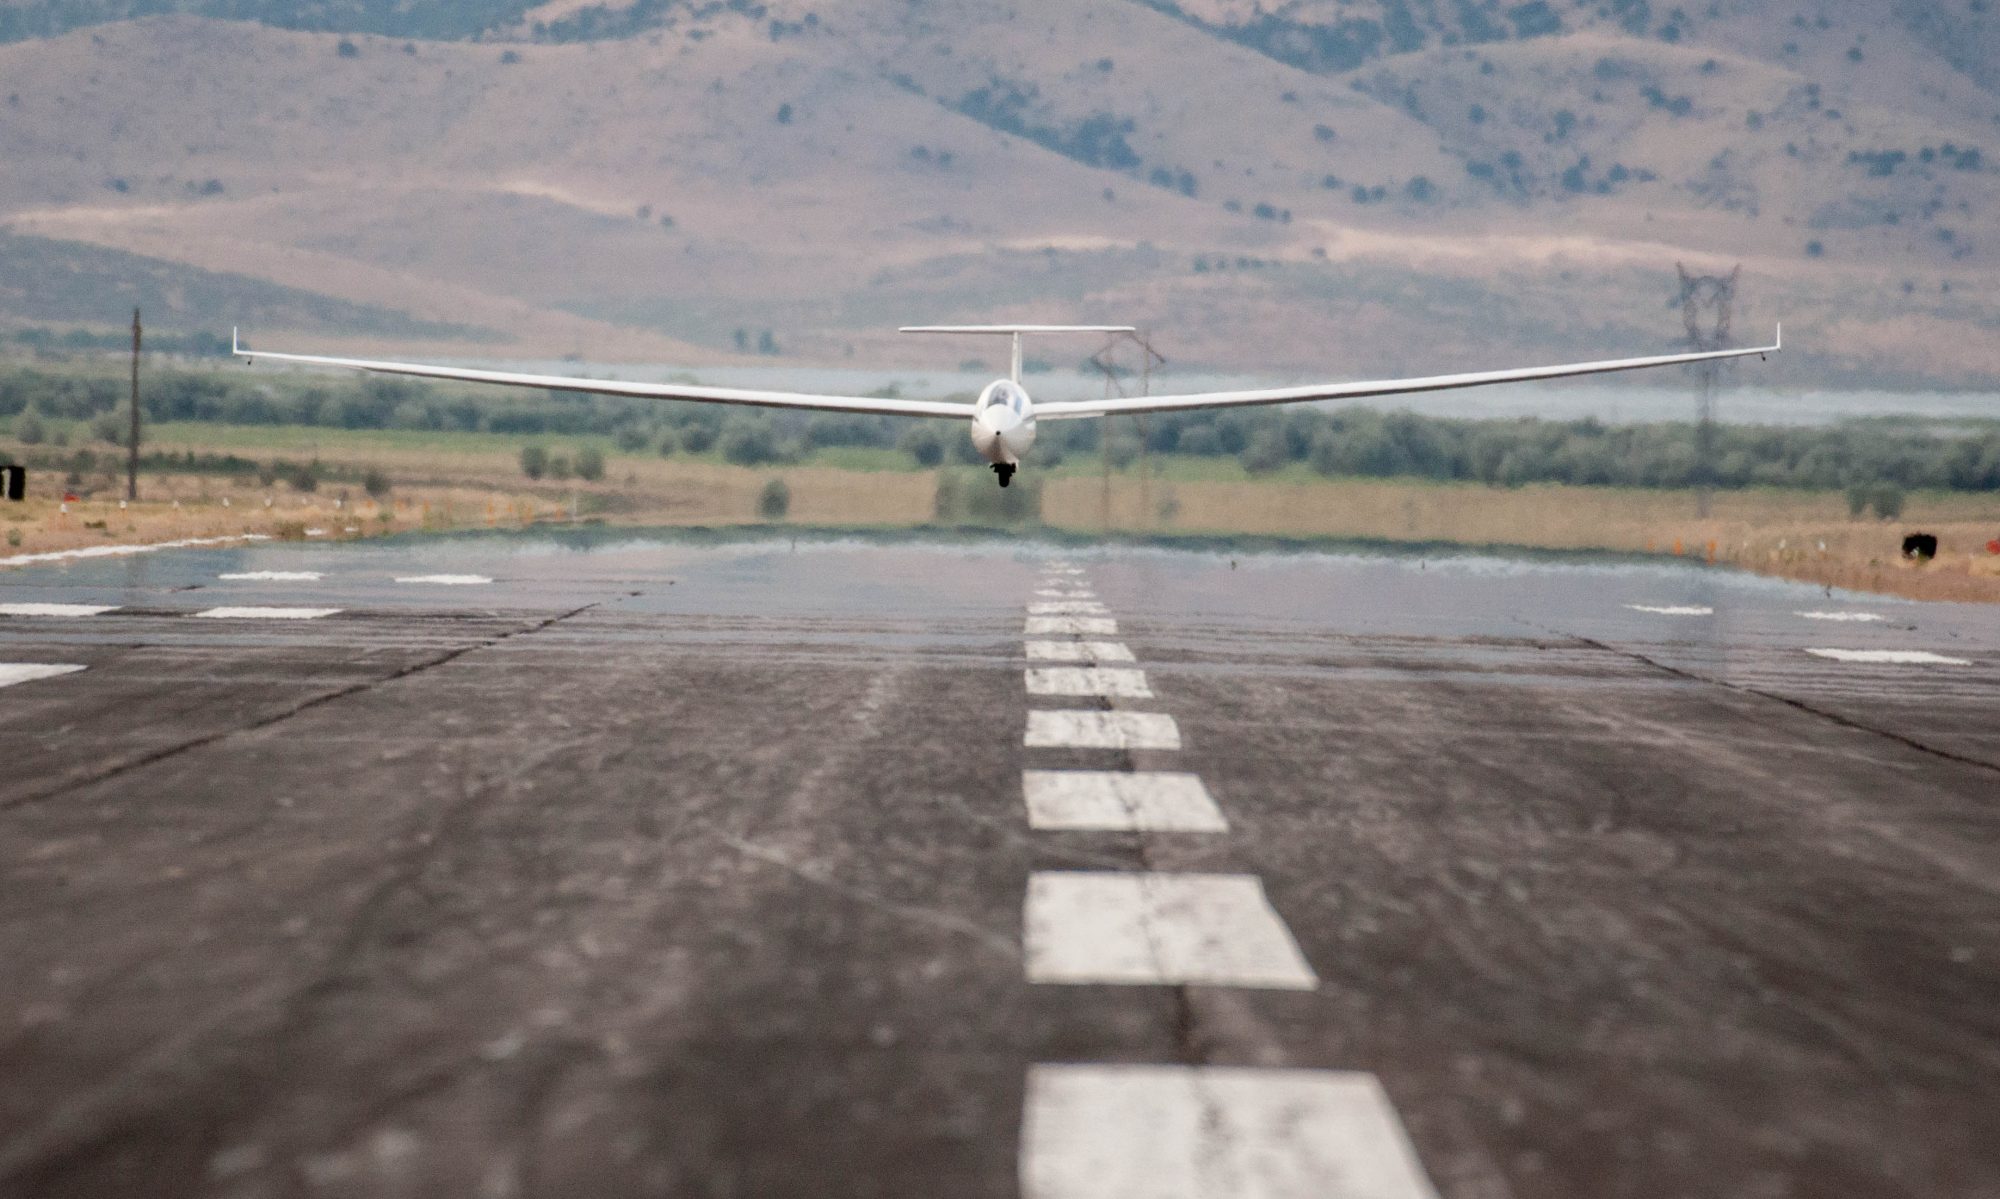
Unless you are quite skilled and have a lot of experience in advanced mountain soaring, then highly technical sites such as Minden or Logan are probably a poor choice for your first contest. Sites with plenty of landing options are definitely preferable for your first contests. I would include Nephi in that bucket provided that you have a decent amount of cross-country mountain flying experience. It has some demanding aspect (e.g. thunderstorms, dust devils, micro-bursts, gust fronts, and the risk of high cross-winds at landing) but the valleys are wide and there is a good number of airports in the contest area. (Here’s a little video featuring a flight in somewhat rowdy Nephi weather. But it’s definitely less intimidating than Boulder.)
In any event, you must study the contest site. This is particularly important for sites with mountains or other areas of unlandable terrain. The best time to do this is in the off-season during the winter. That’s also when you’re probably planning your travel for the following year anyway and when you have time to do some homework. Here are some examples of what I did to prepare for Albert Lea, Montague, and Nephi.
Things you can study well in advance:
a) What’s the typical soaring weather at the time of year at the site where you’re going? Look at the flight traces of past contests at the site at the same time of year. (You can find them on OLC or on the SSA members web site under Contest Results and Reports.) How many days were flyable? What was the thermal strength? What were the typical distances flown? What was the height of the lift? What was the lift band that contestants used? What was the strength and direction of the wind? What is typical?
b) What are the landout conditions at the site at the time of the contest? Where are the airports in the contest area? Are there farm fields that could be used? Is the terrain flat or hilly? What are the crops that farmers plant in this area? How tall will the crops be at the time of the contest? What’s the typical size of fields in the area? Roughly what percent of farmers’ fields will be landable?
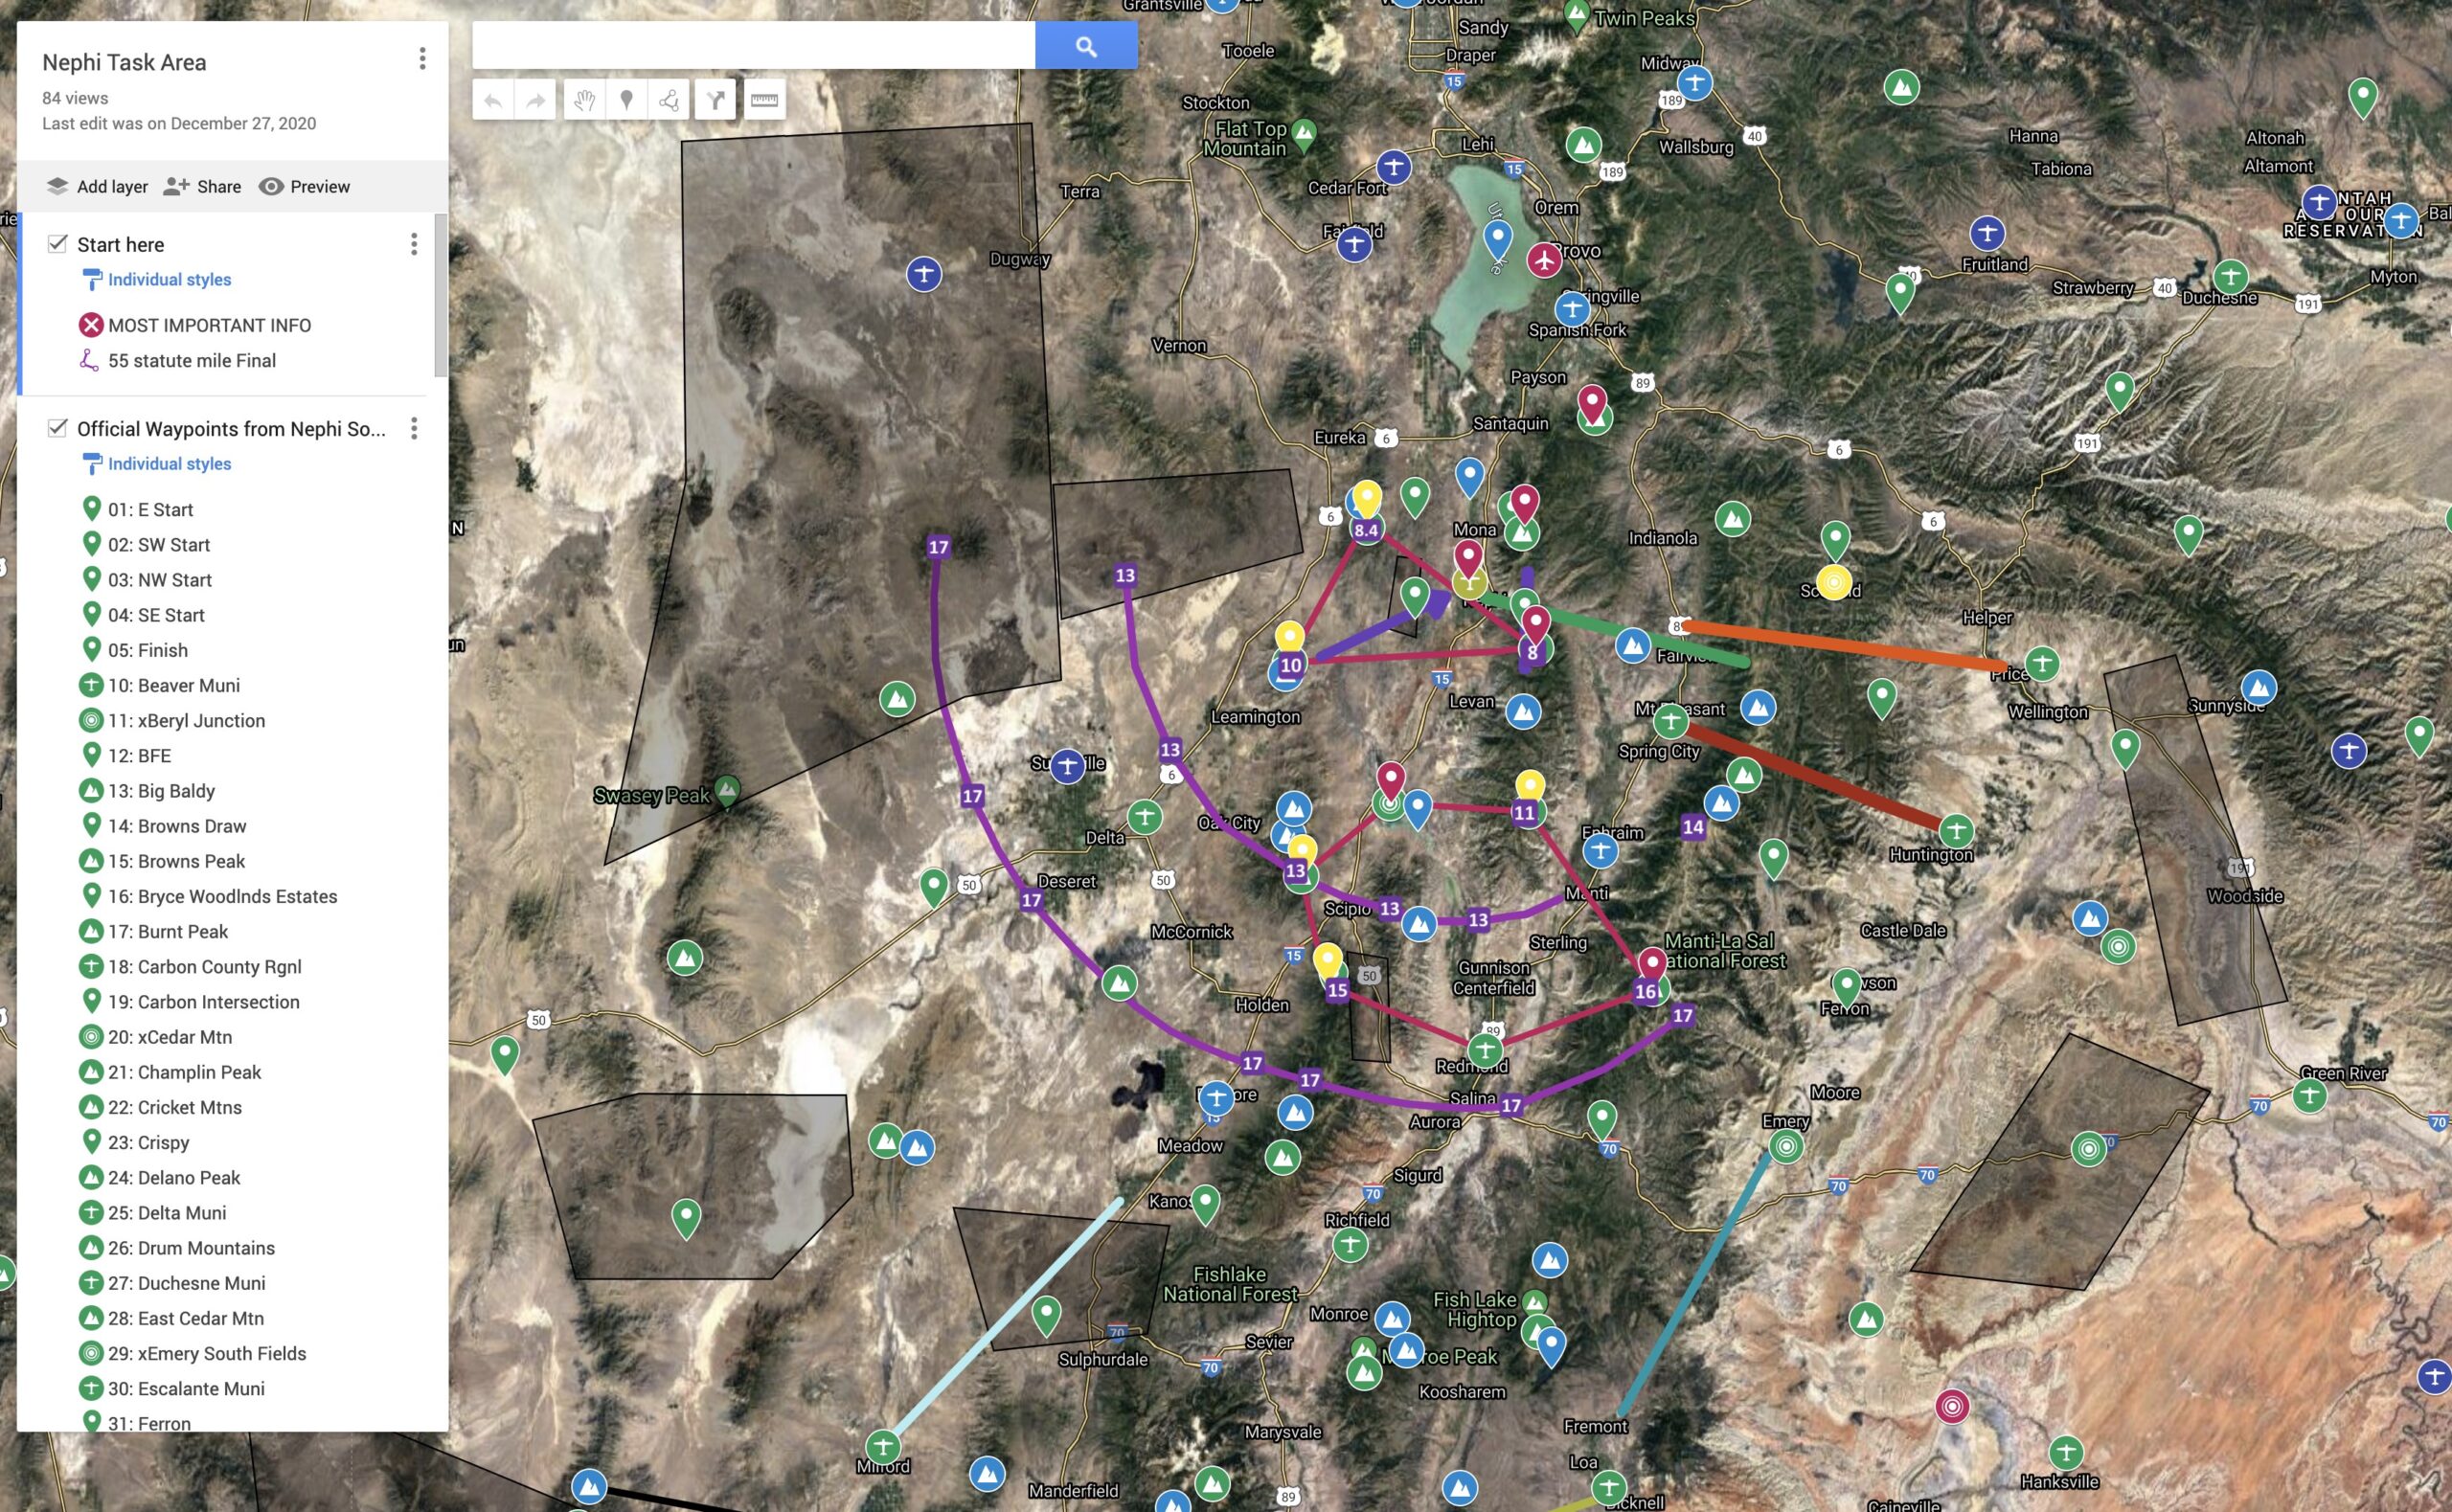
c) Download the waypoint file that is provided by the organizers. Take a close look, especially to find out whether the airports marked in the waypoint file are truly landable with your glider and your experience. There’s nothing worse than relying on an airport as a landout location, only to find that the runway is 15m wide but you are flying an 18m ship and landing there will result in a certain wreckage. From studying waypoint files at several contest sites I can say that they must not be relied upon!
d) If the contest site is in challenging terrain, study it closely so you get to know your turf. Know which areas are truly unlandable and figure out how high you need to be in those areas to keep a safe landing site in glide, especially in adverse conditions. If there are terrain traps (e.g. high terrain that could get between you and a landable area), know where they are!
e) Study flight traces from past contests for typical lift lines (e.g. convergence, ridge lift, etc.) Are they aligned with the wind or do they follow particular terrain features? Are different air masses characteristic for the area (e.g. sea breeze, sheer lines, etc.) Try to learn about typical weather hazards and how to recognize them early. Pilot comments on OLC/WeGlide or blog posts of pilots at past contests can be extremely insightful. Here’s a great example from Dave Nadler at Montague. See if you can find something like it for the site you’re going to.
f) Study the airport and landing areas. At contests, multiple gliders are often landing at the same time. What are the landing options if the main runway is busy? Program all needed contest frequencies into your radio including CTAF, contest frequency, and AWOS. Bring a handheld radio if you have one. It’s nice to be able to monitor two different frequencies at once (e.g. listen to AWOS before landing while also monitoring air traffic).
g) Fly the task area in Condor if you have it. Condor is a great way to familiarize yourself with new terrain. I practiced extensively before flying in Nephi and Montague, both of which are technical mountain sites with several mountain ranges and long transitions over unlandable areas. When I finally travelled to the site in real life, the entire terrain was already familiar to me, which greatly facilitated navigation and allowed me to concentrate on other aspects of competing.
5) Be Familiar With Contest Tasks
OLC (or WeGlide) flying is fun and helps you find lift lines and fly faster. But it is not sufficient preparation for contests because you really need to be familiar with the types of tasks that are typically used at contests. The good thing is that you only need to learn this once and then make sure that you update your knowledge with any rule changes that may have come out since your last contest.
If you’re in the U.S. and your first contest is a regional event, chances are that (only) US rules apply. You can find them on the SSA website. US rules are quite a bit different from FAI rules that govern glider racing in all other parts of the world. At US Regionals, tasks can be one of the following types. (If you fly outside the US, familiarize yourself with the FAI rules and any modifications thereof that may apply specifically at your contest site. If you attend a US Nationals, this will not be your first contest. US Nationals use a hybrid of US and FAI rules and the exact rules may change from year to year so I won’t discuss them here.)
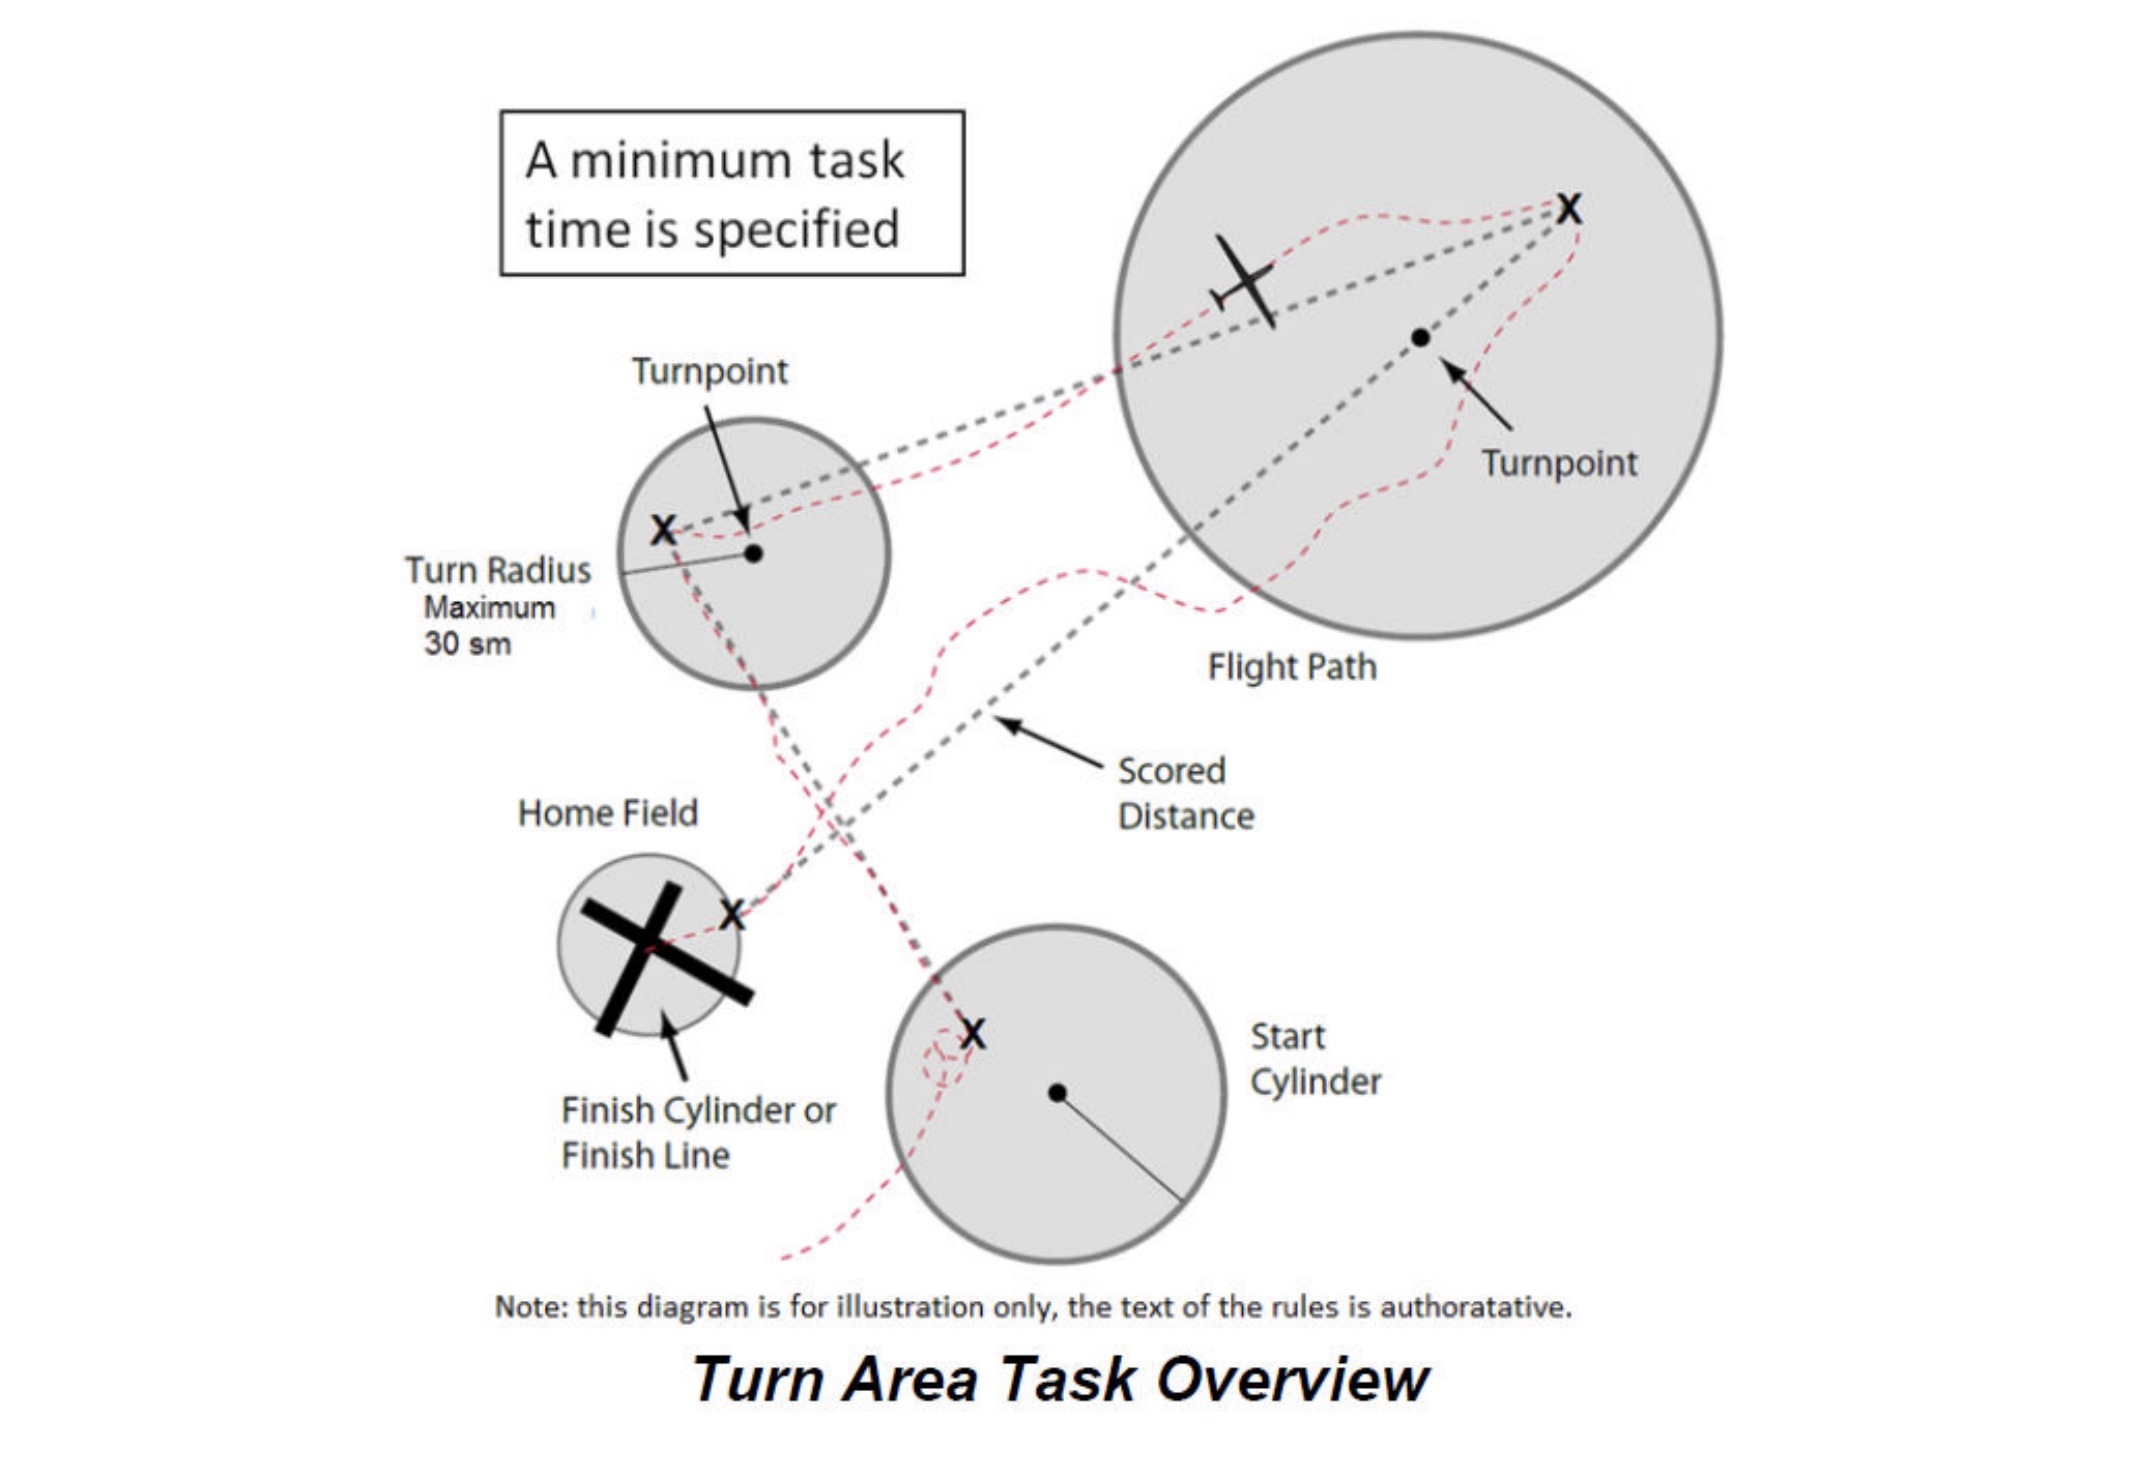
a) Turn Area Task – TAT. At US contests expect the majority of tasks to be Turn Area Tasks (also known as Assigned Area Tasks – AAT). TATs consist of a Start Cylinder (with a maximum start altitude and a radius of 5 statute mile), any number of given Turn Cylinders (which specifically defined radii for each one), and a Finish Cylinder (with a minimum finish altitude and a radius of usually 2 statute miles). TATs also always have a pre-defined minimum task time. The winner is the pilot who achieves the fastest average speed around the task.
This doesn’t sound too hard but there are a lot of things to consider when flying a TAT and practice is essential to figure it all out and achieve a good speed. E.g., pilots who just go to the edge of each turn cylinder are likely to finish well below the minimum time. In this case their average speed will be calculated as if they had flown the minimum time, and this will obviously hurt their score. Pilots who fly deep into each cylinder and finish with a lot of overtime also tend to be at a disadvantage because they are less effective in converting the altitude difference between start and finish into speed than a pilot who finishes just a little bit over minimum time. There are also a lot of other tactical decisions to make: which turn areas to go into deep, and which to only “nick”; how to align the course line to best coincide with energy lines (e.g. convergence, ridge lines or cloud streets); how to decide where to turn based on the wind direction in each turn cylinder; how to make use of the best time of the day to fly the task; how to get an optimal start; how to best manage the final glide; etc. If you’ve never flown a TAT before you might be overwhelmed by all the choices and how to make the right decisions.
My advice is to practice at least 3-5 TATs at home before you get to your first contest. And if you use Condor, practice TAT’s in the off-season on the simulator.
b) Assigned Task (aka Racing Task). This is the most straightforward task type because there is a set course with a number of pre-defined turnpoints, similar to a badge or record task. Whoever flies around the fastest wins the race. Contests Start and Finish are cylinders just like for TATs. Turnpoints are cylinders with a radius of 1 statute mile, and pilots will get credit for the actual distance that they fly into a turn cylinder (this is different from non-US contests where turn cylinders are smaller and no credit is given for flying into them). However, while Assigned Tasks are easy to understand and provide the sense of a “real race”, they are not all that often used at U.S. contests. In the U.S., they tend to be only used at Nationals where pilots have a similar skill level and everyone flies similarly performing gliders (e.g., 15m or 18m class). If glider performance and/or pilot skill varies significantly, Assigned Tasks tend not be used because either the task is so short that the fastest pilots will complete it very quickly leaving a lot of the soaring day unused, or, it is so long, that the slower pilots will inevitably land out. (In either case a number of participants are bound to be unhappy.)
c) Modified Assigned Tasks (MATs). This is a hybrid task form that is only used in the United States and has some similarities to free OLC flying. It is often used when the soaring conditions are weak and/or difficult to predict. Start and Finish are the same as for all types of tasks. Turnpoints are small cylinders with a radius of 1 statute mile just like in the case of Assigned Tasks. There is a minimum task time just like in the case of Turn Area Tasks. However, everything else can be defined by the Contest Director. E.g., in the minimalist case, the contest director may only define a Start and a Finish and leave it to each individual pilot to declare a sequence of turnpoints from the pre-defined list in the published waypoint file. These turnpoints don’t even have to be pre-declared. Instead, pilots may simply choose to fly to certain turnpoints during the race and then submit a declaration form (after the flight) where they note down which turnpoints they actually flew to. (This means, pilots must keep track of their turnpoints during the flight.) This is also called a “Pilot Selected Task”. It is similar to free OLC flying except that turnpoints have to be from a defined list (i.e. you can’t just turn anywhere you want). Also, unlike OLC Plus, which limits the flight to six legs (i.e. 4 turnpoints between start and finish), there is a very generous number of up to 11 turnpoints between start and finish that pilots are allowed to declare. The only limitation is that pilots must not go back and forth between the same two points: there has to be another point in-between. Going around the same triangle several times, however, is permissible. Note, however, that the contest director may make some of the turnpoints mandatory. E.g., a CD may require the first one, two, or three turnpoints to be achieved in order, and then leave the choice of additional turnpoints to each pilot.
If you have never flown a MAT, chances are that you will be confused at first. (I know I was.) However, once you figure it out it isn’t as bad as it sounds. However, you do need to practice this format before you show up at the contest site. You can do so on your next OLC flight. Personally, I am not a fan of MATs because they add randomness to the contest and require pilots to spend a lot of time during flight on their flight computer picking turnpoints. But when the weather is so weak that even a TAT may not be viable they can help ensure that a valid contest day can be achieved.
6) Know Your Flight Computer
Knowing the rules of the tasks is one thing but being able to apply them during a flight is a challenge in its own right. However, being familiar with your flight computer will come in handy on all your future flights so use your first contest as a catalyst to really become familiar with how your computer can help you.
Once you practice a little bit and know a few tricks it is much simpler than in seems at first. Here’s what I recommend:
a) Use the Right Default Settings! When I fly at home my default settings are tailored for badge and record flights. E.g., my default Start and Finish is a straight 0.5 km line perpendicular to the course, and the default for turn points is a 45 degree photo sector. And I use kilometers for distance calculations so I know instantly whether a specific task meets badge and record requirements.
These settings are great for badges and records but they are a big hindrance for racing because they don’t match the racing rules. Therefore, if you use the wrong default settings, there is a lot of manual work required to put the task into the flight computer and the chances of making a mistake are high. If you have to make edits to a task in flight this is even more of a problem: it causes a high workload and is detrimental to safety.
Fortunately there is a better way. Here’s how:
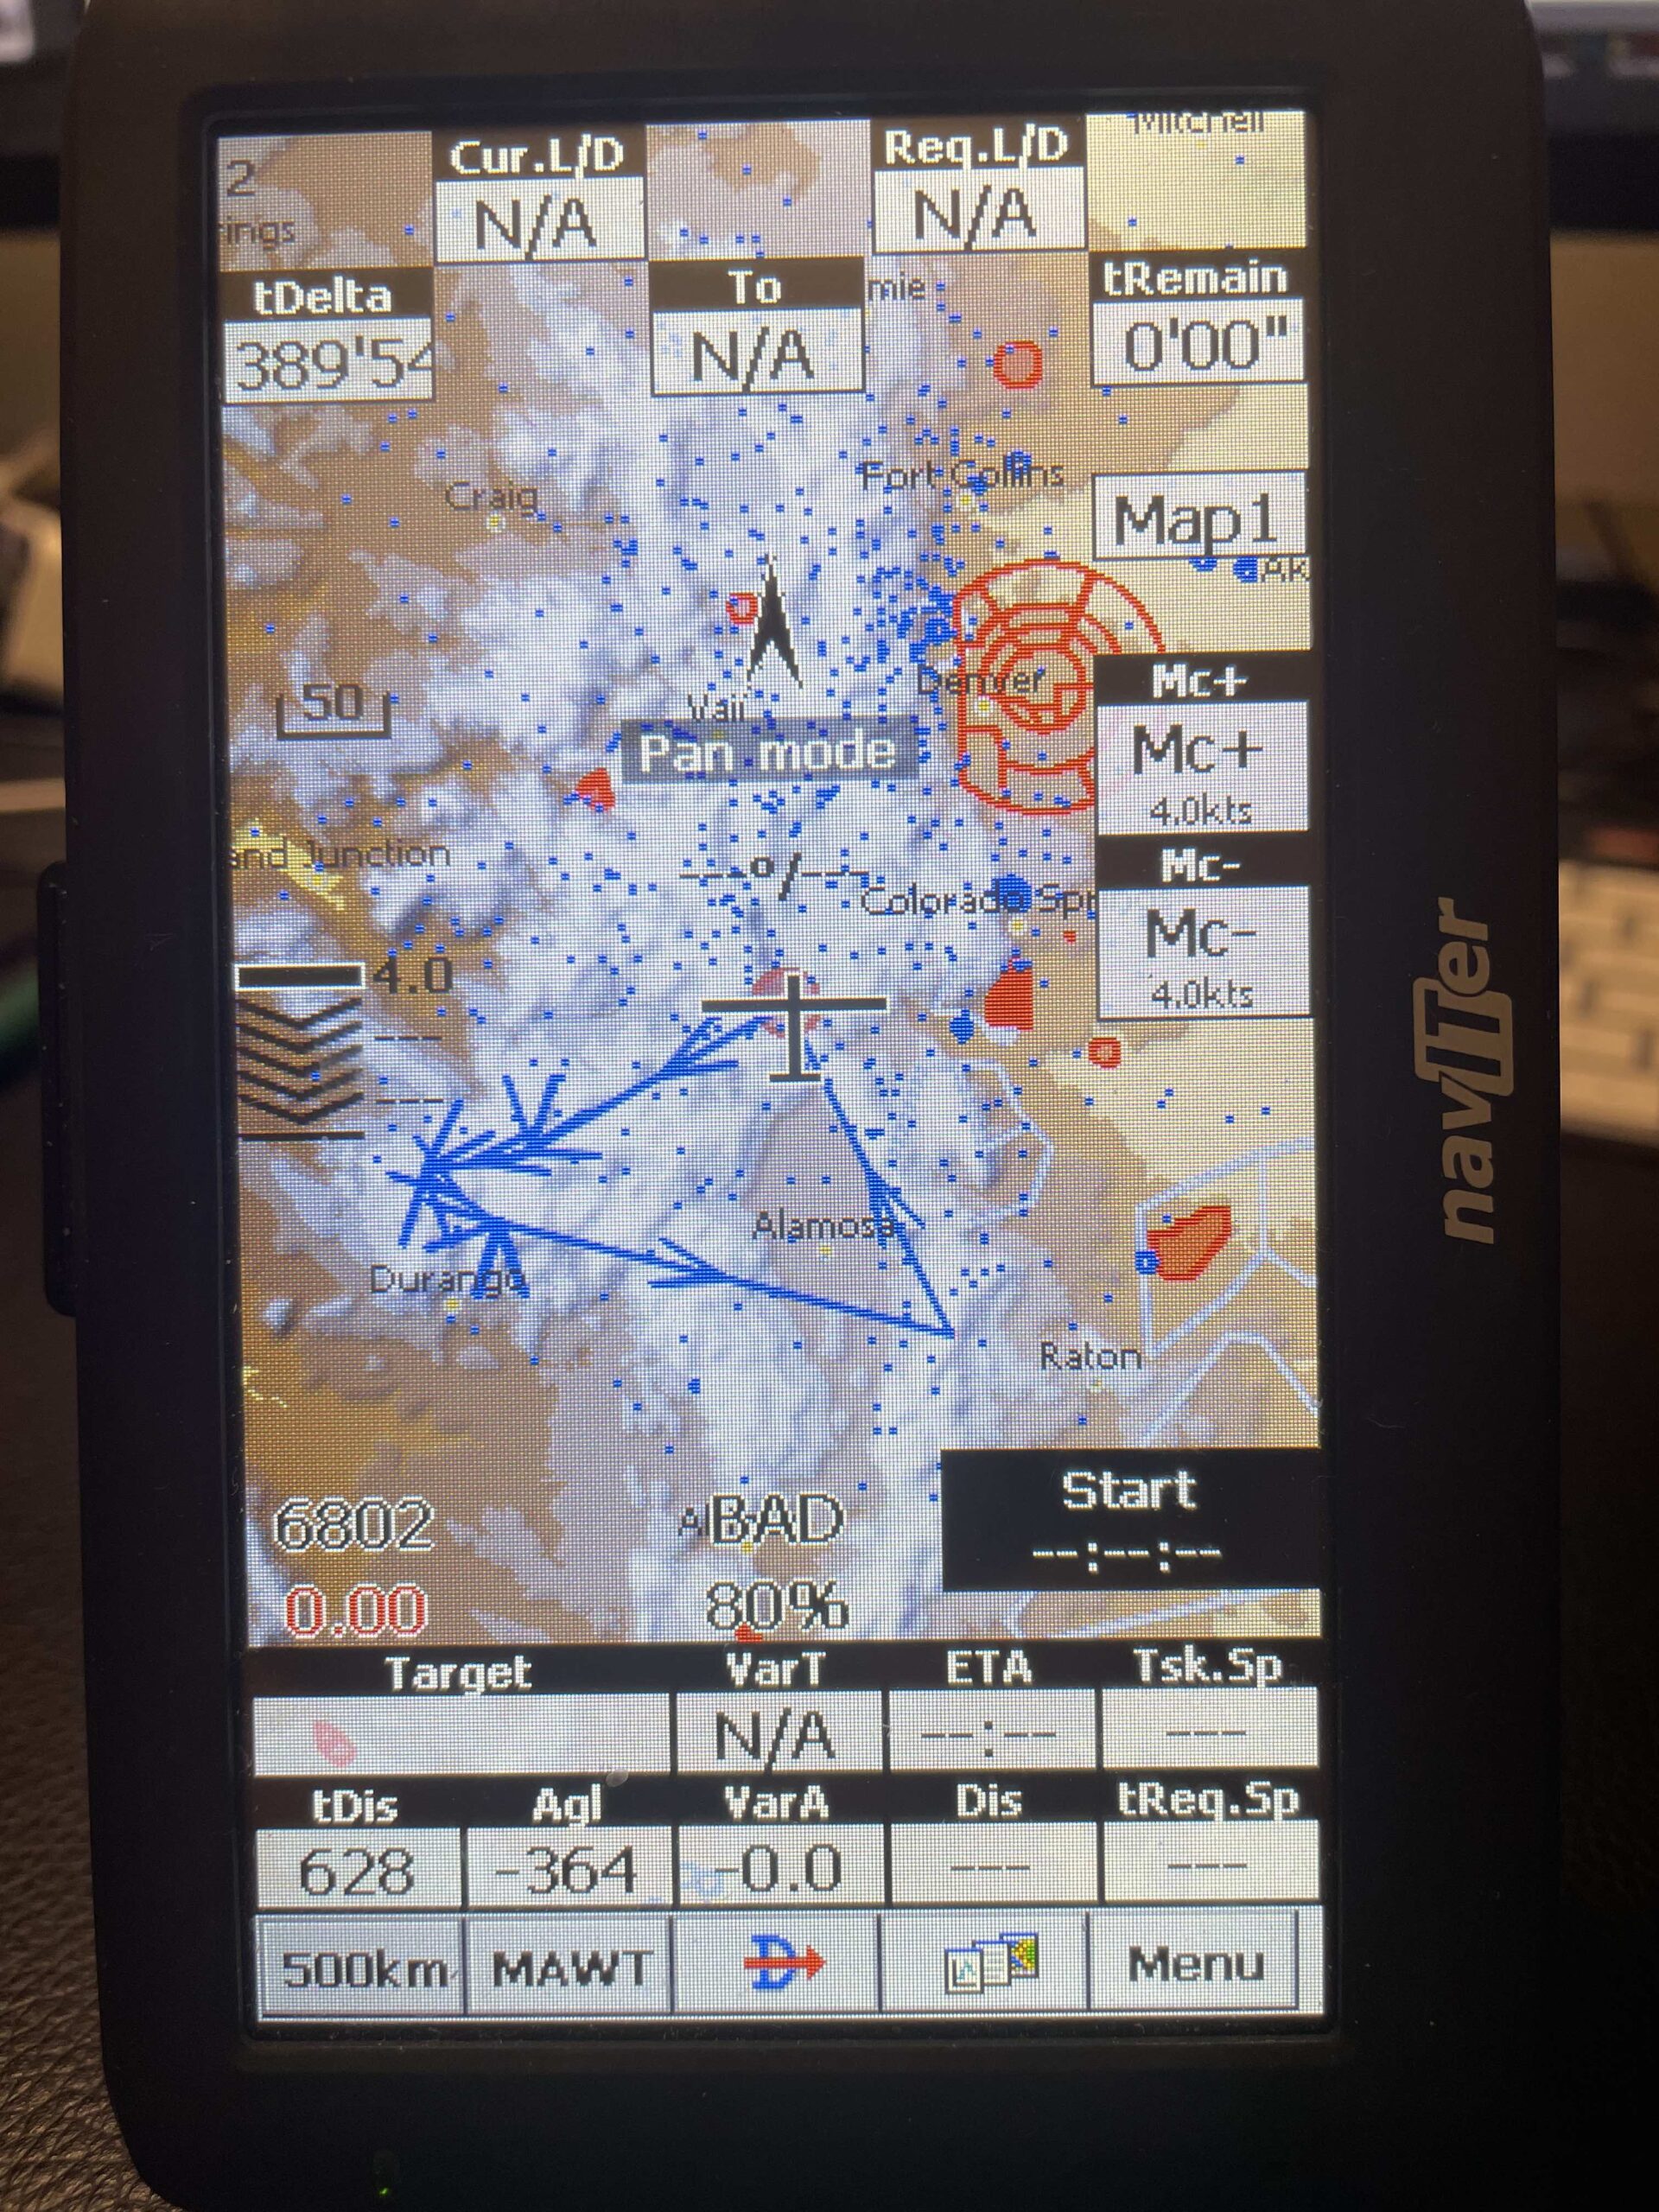
First, the Nav Boxes on your Flight Computer should be optimized for TAT (aka AAT) tasks since that is the most common form of task. And if they work for TATs they will work for other types of tasks as well. It is best to always use the same screen layout because once you’re familiar with it, finding the critical information becomes quite easy. Here is an excellent tutorial for how to do this on an Oudie. If you use a different flight computer, chances are there is a way to customize the screen as well.
Second, make sure that the default units are set to statute miles for distance and feet for altitude.
Third, make sure that the default settings for Tasks are tailored to the contest rules. For US contests the default for start should be a cylinder with a 5 statute mile radius; the default for turn point should be a cylinder with a 1 statute mile radius; and the default for finish should be a cylinder with a 2 statute mile radius (unless the specific contest mandates something else.). Most contests also use a specific minimum finish altitude. An easy way to make your flight computer do the appropriate final glide calculation is to create a duplicate Finish Cylinder where the altitude is set to the minimum finish height. This way the computer will do all the calculations correctly and you don’t have to do mental math during the flight.
Also, make sure you understand how your MC setting impacts the final glide calculations. Not understanding this will not only hurt your contest performance, it can quickly become a safety issue. Read this article if you’re not sure.
Setting the default for turnpoints to 1 statute mile is particularly critical for Modified Assigned Tasks (MATs). You will want to add turnpoints to your task while you’re flying with a minimum level of effort. If you use the wrong default, you will have to manually edit the observation zone setting for each turnpoint. Not good! However, if the default setting is correct, it only takes 2-3 seconds to enter another turnpoint.
b) Practice With Your Flight Computer Before The Contest! The things I just described aren’t very difficult but learning how to do them during your first contest is a very bad idea. There may be 20, 40, or even 60 other gliders in the air around you and your eyes must be outside the cockpit, not on your instruments!
By far the best way to practice is by connecting your flight computer to Condor (if possible) and to fly a few contest tasks on your computer. If there is a Condor scenery for your actual contest task area you can recreate a few tasks from past contests. This way you don’t just learn to use your glide computer, you also become familiar with the geography of the task area. This is particularly useful if the contest is in mountainous terrain. If you are not familiar with Condor you really should be. It is the best soaring simulator and a great practice tool, especially for racing! Check here for more information.
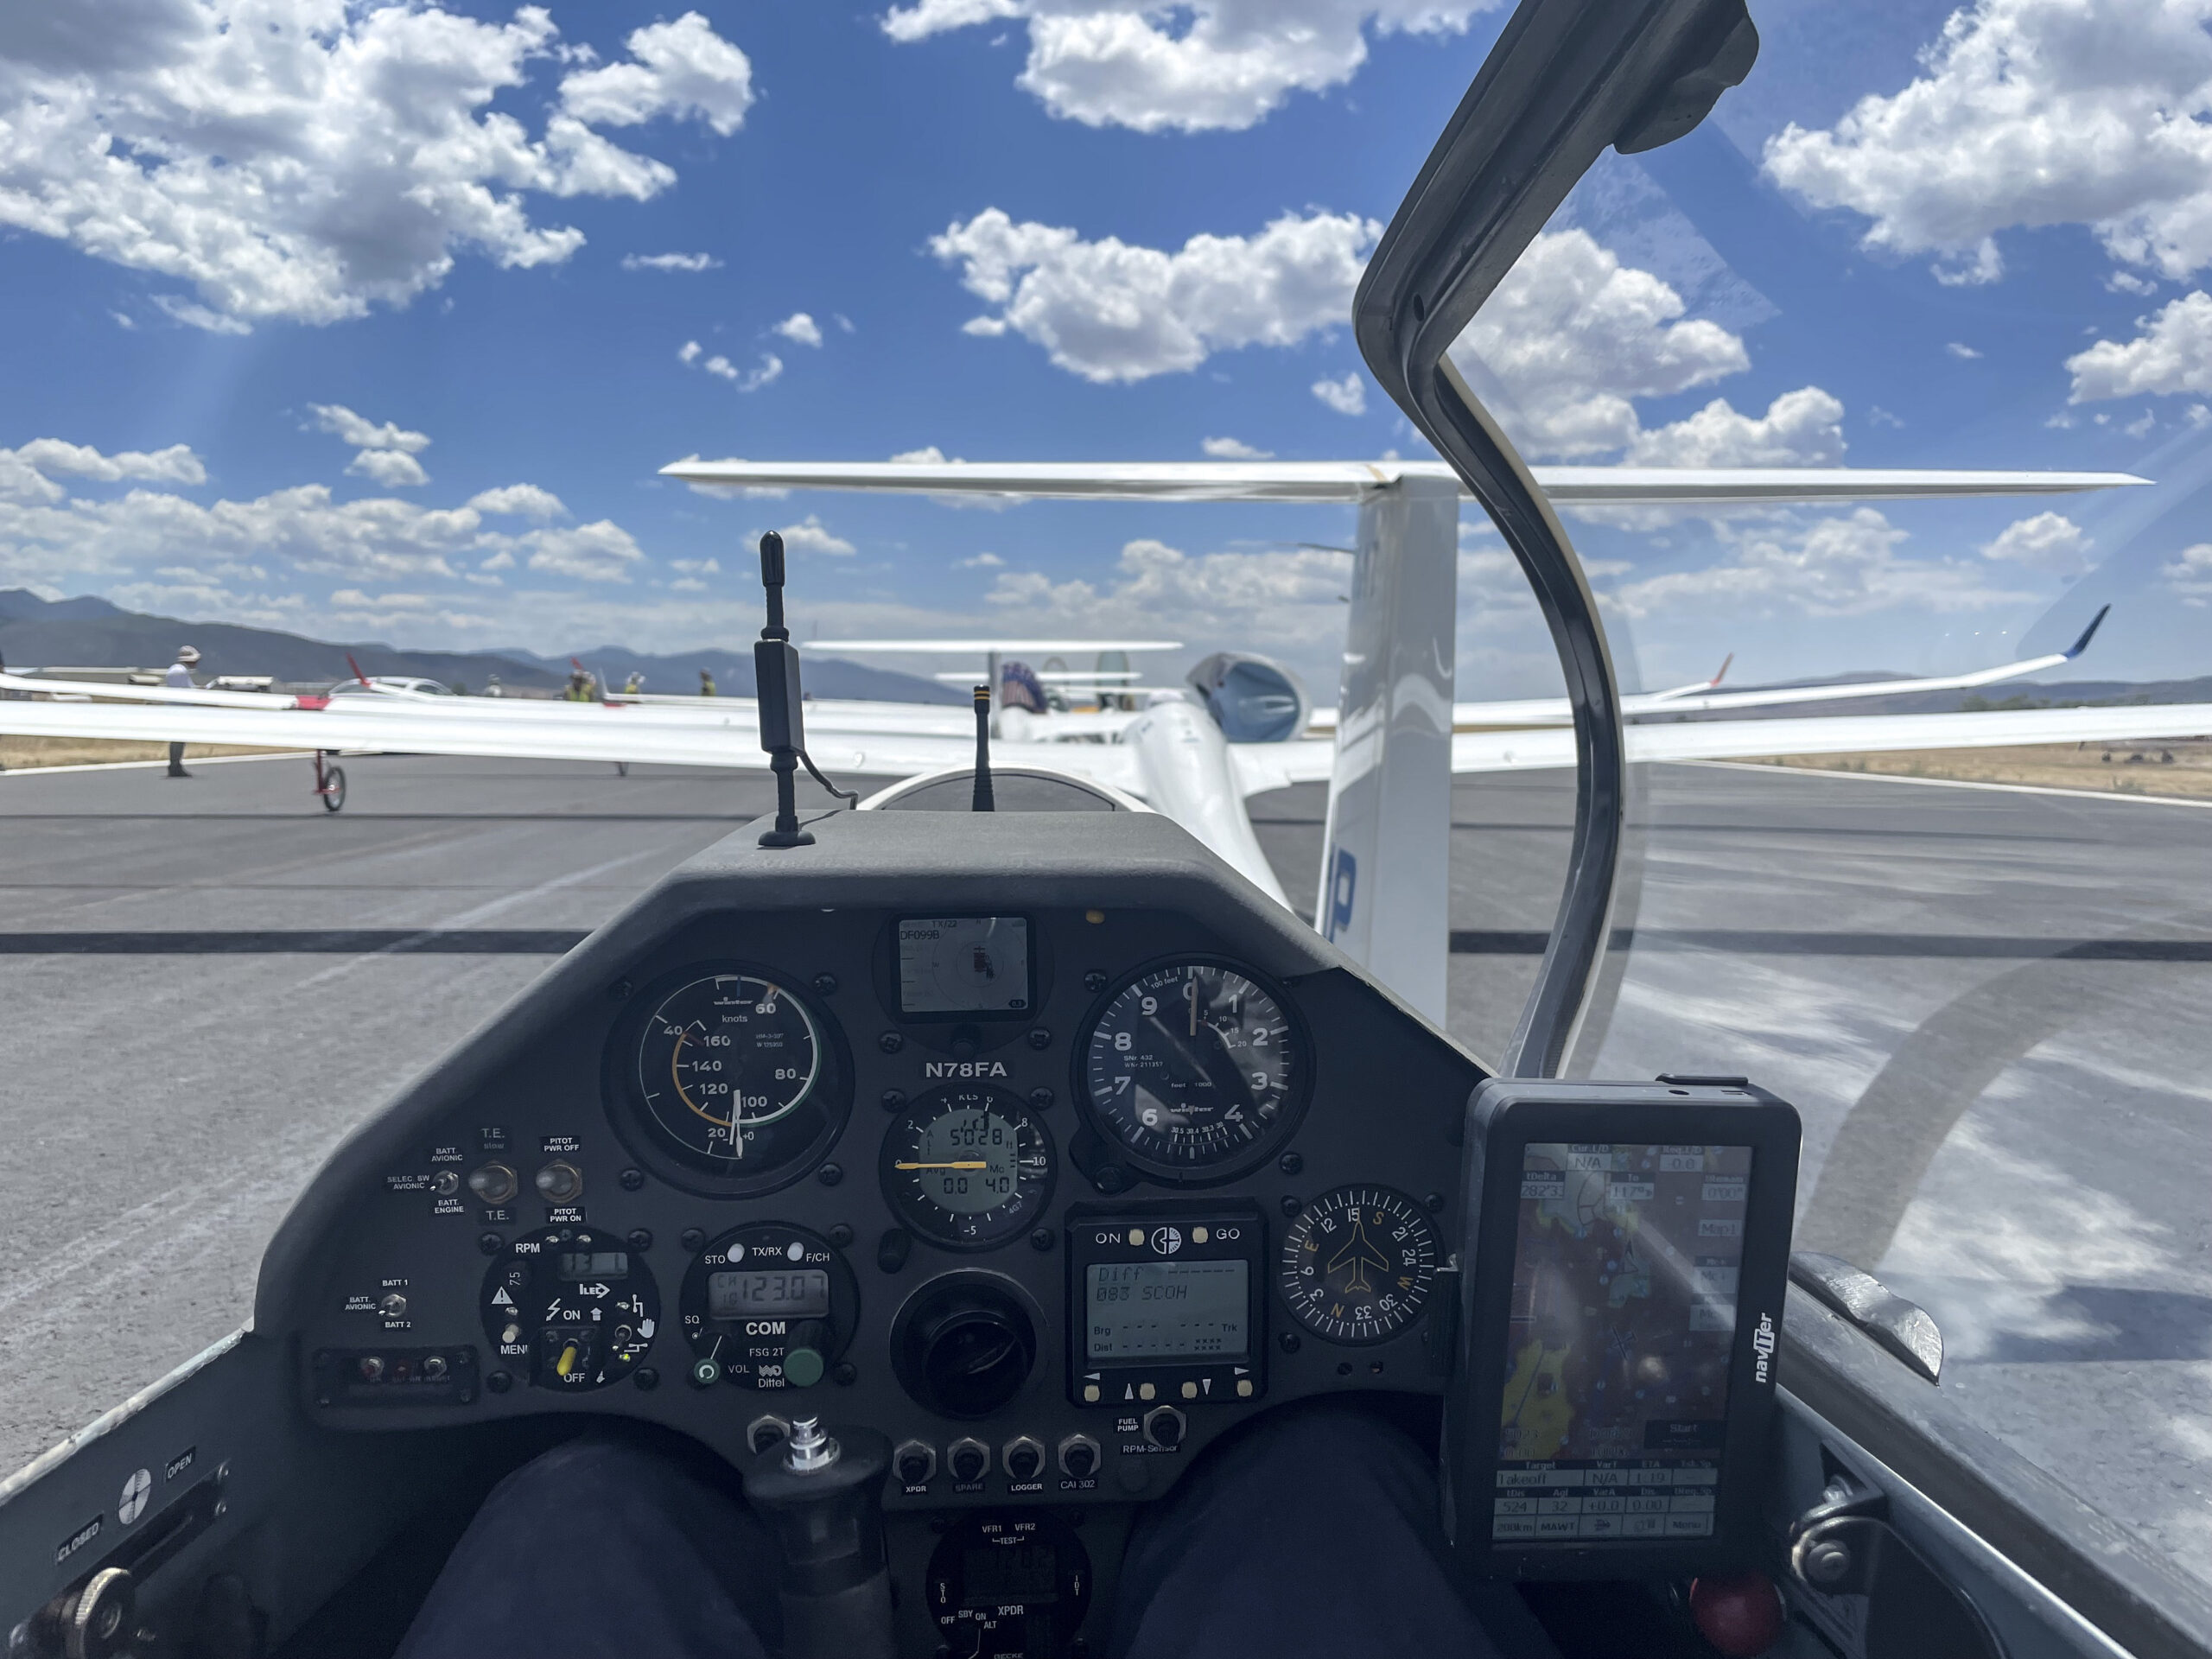
Many (but not all) glide computers will allow you to connect them to Condor. My Oudie IGC is among those that can’t be connected because the Oudie IGC does not accept an external GPS input signal. However, I simply got an old Oudie 1 and set the screen to look exactly like on my Oudie IGC. An Oudie 2 will work as well. You may need a special cable to connect your Oudie to Condor. You can buy one from Cumulus Soaring.
If you don’t use Condor, you must practice with your flight computer on the ground and in the air. Ground practice is difficult but essential to get to know the Nav boxes and what they tell you. Few pilots will have the mental bandwidth to figure it all out while flying. Once you have sufficient familiarity with what the computer is telling you, you must do a few practice tasks in the air – ideally for each of the types of tasks you expect at the contest (i.e., Turn Area Tasks, Assigned Tasks, Modified Assigned Tasks).
7) At the Contest Site
Once you get to the contest site, there isn’t all that much time to catch up on preparations that you omitted. Contests are run according to well-established processes and now you must fit in.
If you’re new to contest flying, you will likely be able to get a mentor assigned to you as this is part of the process as well. Experienced pilots are usually very willing to help. But time is limited and any shortcuts that you took in your preparations will become obvious and can lead to stupid mistakes.
Here are some of the things that are worth knowing in advance:
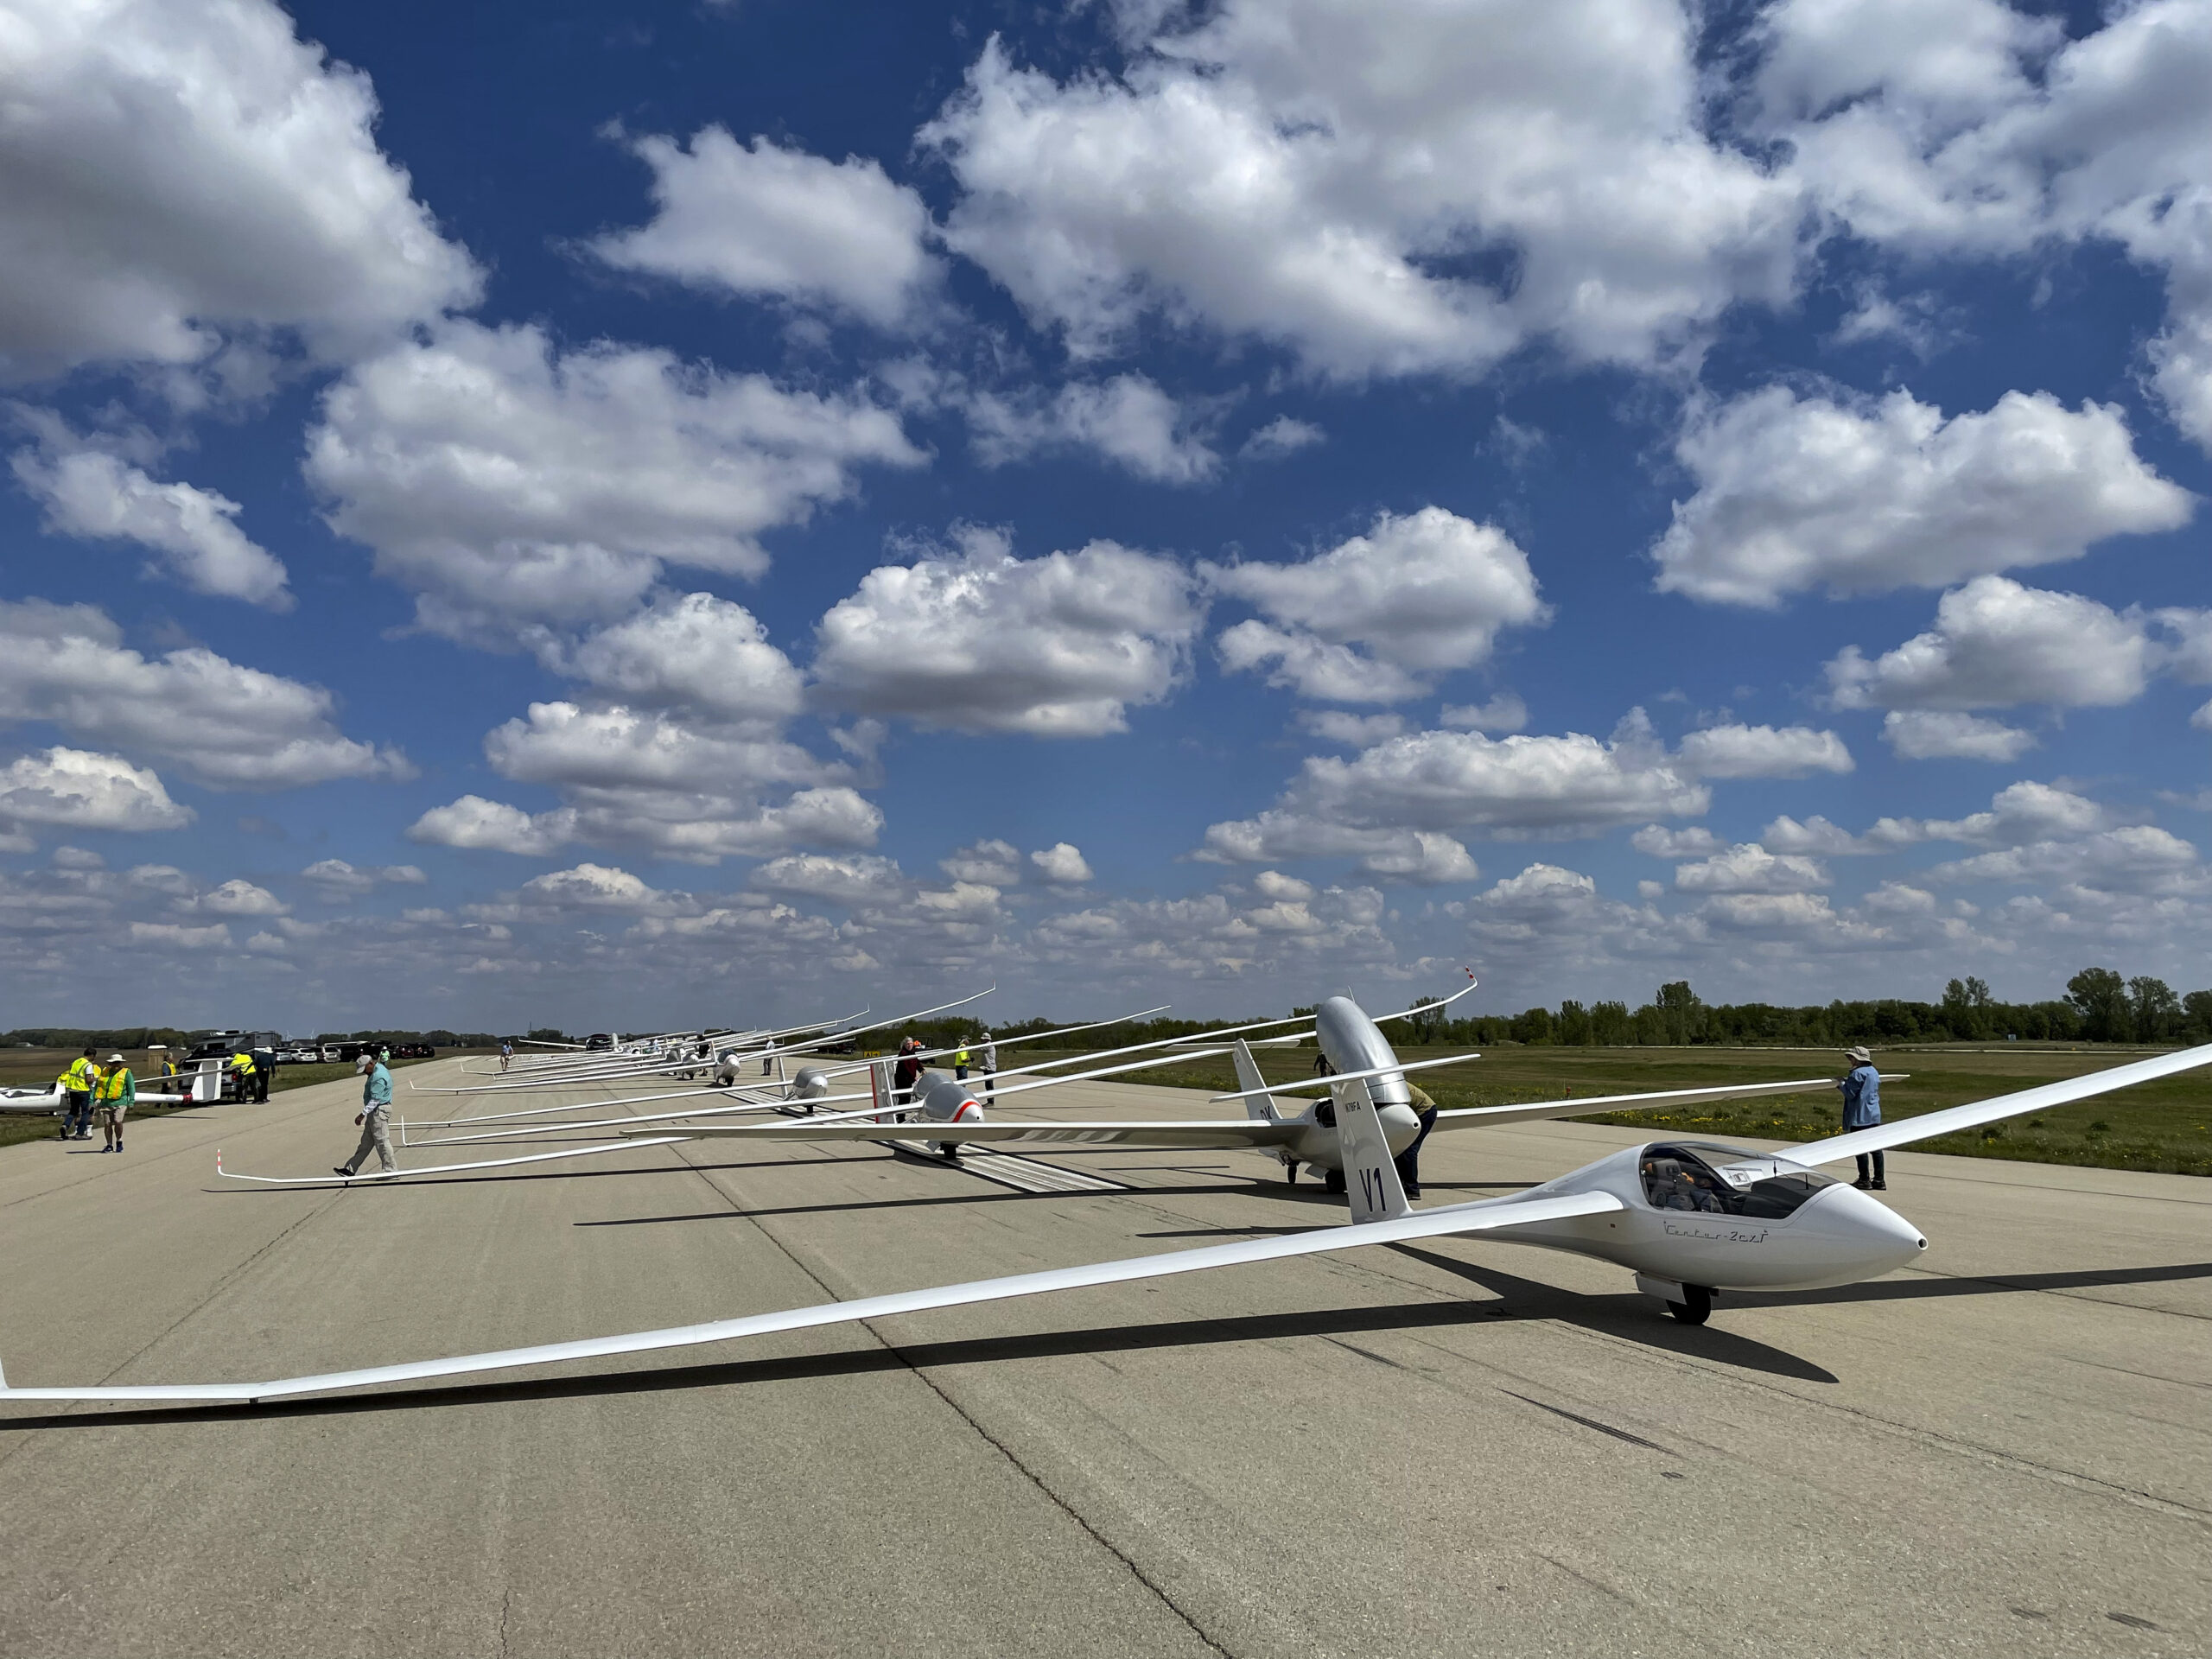
a) Arrive at the contest site before the first practice day. Look around the airfield. Find a good parking spot, rig your glider and tie everything down (weather permitting). Your vehicle and your tow-out equipment (wing dolly, tail dolly, tow out bar) should already be marked with your contest ID.
b) Each day starts with a mandatory pilot meeting. Be there on time. There will be a review of the weather, a safety briefing, and you may (or may not) learn about the task for the day. A grid time will be announced and you will get a grid sheet (on paper or electronically on your smart phone) that includes your location on the grid..
c) It is best if your glider is prepared and ready to go even before the pilots meeting. This way you won’t be in a rush after the meeting concludes. Work with another pilot to complete the daily “critical assembly check” and have that person sign their initials and the date on the wing tape to visually indicate to the contest personnel that your glider has been checked and is ready. At grid time your glider must be out next to the runway in the appropriate spot. Grid locations are marked with the grid numbers.
d) Once you’re out on the grid you should also know the task for the day. If you haven’t already done so, now is the time to program the task into the flight computer and make all final preparations. Instruments should be set, oxygen (if needed) should be turned on, GPS trackers should be on, etc. Your radio should be on and tuned to the right frequency so you can hear contest related announcements.
e) At grid time, gliders are pushed onto the runway in the appropriate order. Once your glider is on the runway, make sure to park your crew vehicle in the appropriate parking spot (usually behind the last glider on the grid). Your tow out equipment should be in your vehicle unless there are other arrangements (e.g. for contests that allow water ballast – in that case you will need your wing wheel until just before launch to keep the wings level).
f) Once the launch starts, speed and efficiency are imperative to ensure a quick launch. Contests usually use multiple tow planes. The goal is to launch the entire fleet in less than one hour. (But this does not always work so be prepared to be patient. Everyone’s trying to do their best.) This means you must be in the cockpit, have completed the takeoff checklist, and be ready to launch well before it is your turn to be hooked up to a tow plane.
g) When your time comes you are expected to be completely ready for launch. Contest staff will remove your wing dolly (if needed and still on), hook you up, the tow plane will take out slack and you will be launched immediately. You will just be assumed to be ready. There’s no rudder waggle or any other signal from you. (If you’re not ready for whatever reason, release immediately and you will be pushed off the runway so the next glider can launch. In this case you will be launched last after everyone else. )
h) Tow pilots follow a prescribed tow route towards the start cylinder and you are expected to release at a contest-specific altitude (usually around 2000 ft AGL). The tow pilot will probably wave you off if you don’t. The idea is that everyone has the same chance of finding lift from the same altitude.
i) If you don’t find lift you may return to land at the airport and request a “relight” (another tow). The relight will happen after the rest of the fleet is launched.
j) After all gliders are launched, the Contest Director (CD) will announce via radio at what time the start gate for your class will open. You will only get a valid contest start if you leave the start cylinder after that time.
k) Sometimes, when necessary due to changing weather conditions, the CD can change a task while pilots are already in the air (but before the start gate opens). Pilots must confirm that they have heard and understood the new task parameters in a roll call led by the CD. To affirm, pilots simply state their contest ID. This works more smoothly than one may think. The hardest part is that pilots must now also reprogram the task in flight. This is the time when your prior practice with the flight computer will truly pay off. If you know your computer and you have the correct default settings, reprogramming will only take a few seconds. If you don’t you will be a hazard to yourself and everyone around.
Once the gate is open there are no more changes. Now it’s up to you to fly the task.
All your preparations will be worth it. You know the task, you know what the computer is telling you. You know the task area and where you can land if you have to. You remember where the typical energy lines are and which areas tend to work better than others. You’re already somewhat familiar with the terrain and the landmarks. You know how high you have to be before transitioning over unlandable terrain.
Now you keep your eyes out of the cockpit and concentrate on what the sky, the sun, the wind, and the terrain are telling you. You keep track of other gliders – are they rising or sinking relative to you? What path are they choosing through the air? Is it better or worse than your’s and why? What adjustments should you make to your flight path? When and where do you want to climb high? When and where do you want to go fast? When is it time to switch gears (up or down)? Where should you deviate and where should you stay right on the course line? This is fun! In fact, this is why you came to fly the contest!
I hope this has been helpful.
Maybe I’ll see you at a contest in the year ahead. 🙂
Outstanding and valuable information. thank you
Thank you Eduardo! Glad you find it helpful! I’m sure there are some differences in Portugal that I’m not aware of.
Nice description from pilots point of view. Thanks for sharing this information with us!!