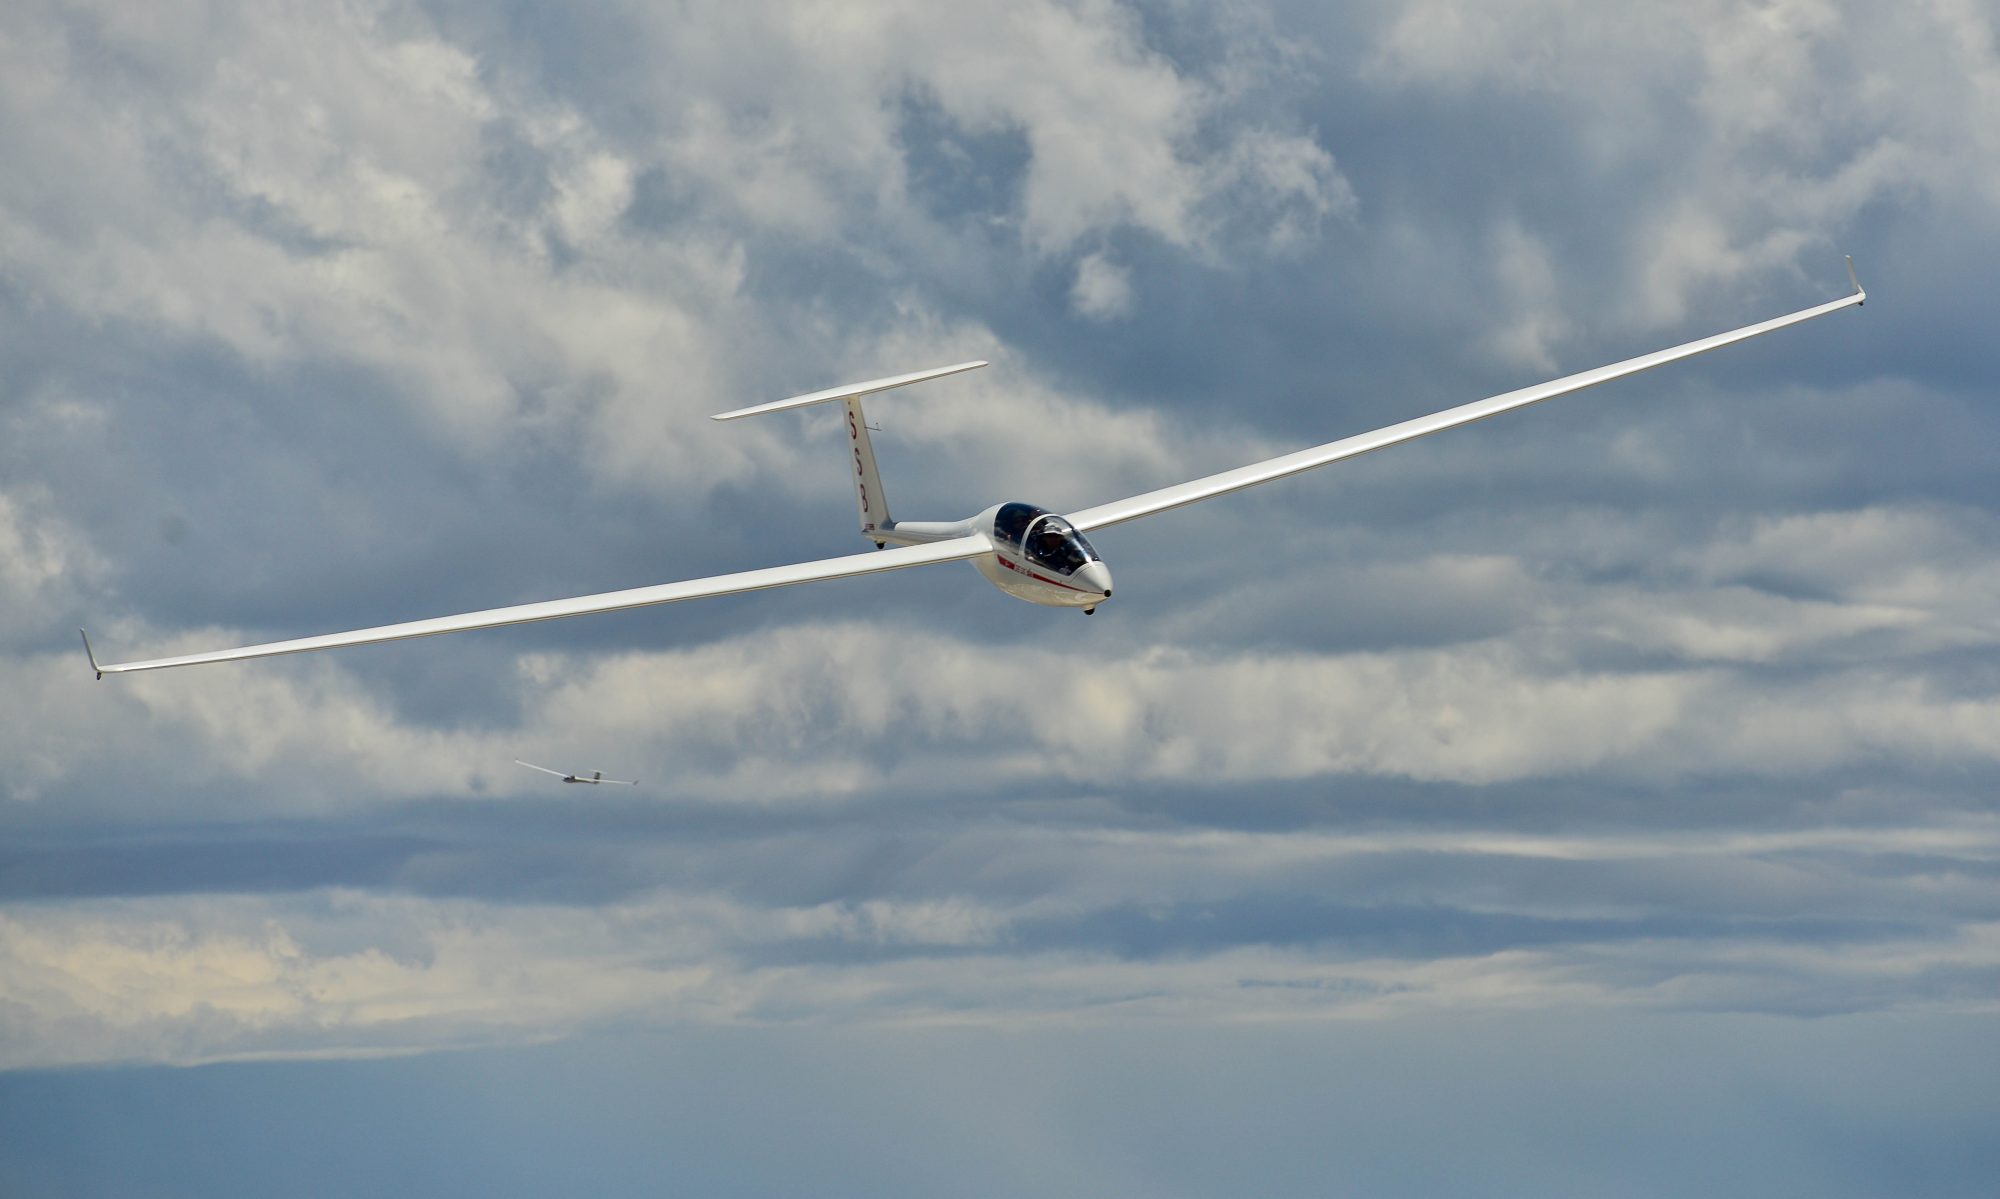
Boulder is still new to me. In fact, whenever I fly at a new location there are usually a lot of things that are new and different. There are local weather and wind patterns to consider, as well as different procedures at the airfield I’m flying from, ranging from unfamiliar radio protocols to different landing pattern procedures. I might also be flying unfamiliar equipment, in this case an ASK 21 with somewhat worse performance than the LS4b that I last flew in Austria.
One thing that’s always different in a new location is the terrain. Unfamiliarity can contribute to disorientation, not a great thing if you’re in a glider and hitting big sink. So, where exactly was the wind coming from? And where is the nearest landable field? These are not questions you want to be asking yourself if you don’t know where you are and you find yourself down low…
So I made it a rule for myself to to stay local during the first few flights at a new location, i.e., within glide range of the airport I’m flying from. But how do I know that I’m still within glide range? It’s always a good idea to carry a map in the plane, but full-size maps tend to be big and cumbersome to work with, especially if you are already in a bit of a pinch. And, most importantly, they actually don’t tell you whether or not you’re within glide range, especially in the particular glider you’re flying with.

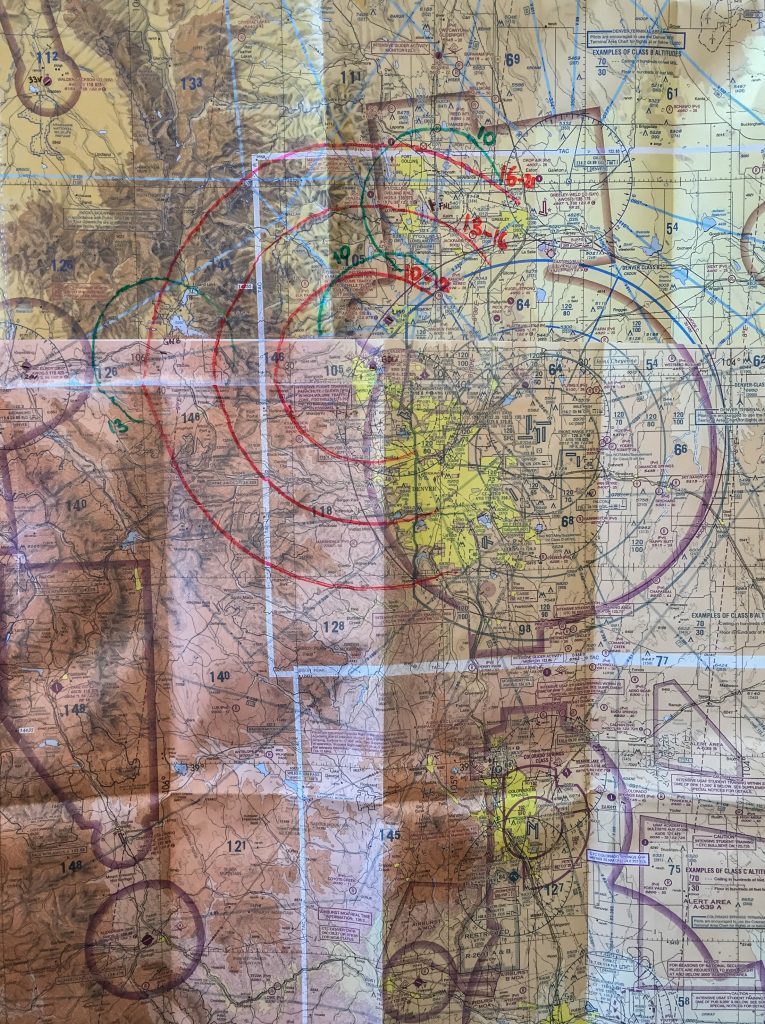
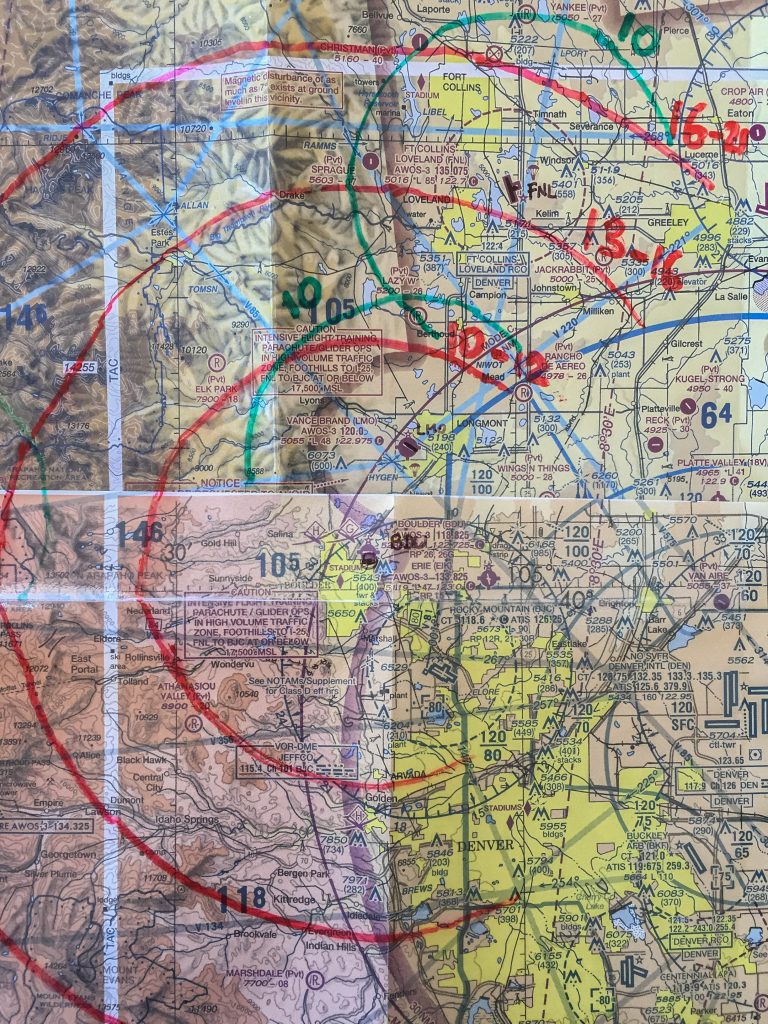
So one thing I do as part of my preparations at a new location is to create my own one-page map with custom-drawn glide range circles. To do this, I take a local flight map, in the case of Boulder that’s the sectional charts of Denver and Cheyenne (Boulder just happens to be on the edge of both of these), I put a transparent plastic sheet over the map and draw various distance rings that show the altitude above sea level (MSL) that I need to get back to the airport at pattern altitude (i.e. usually 1,000 ft AGL).
To be safe, I use a safety factor, essentially a degraded flight ratio, to account for less than perfect “still air” conditions. I actually use two different safety factors to indicate a range of required altitudes for each of the distance rings: a “realistic” one that assumes no head or tail wind and a glider performance that’s about 30% degraded from the best L/D ratio. And a “pessimistic” one that assumes a headwind of 10 kts and a glider performance that’s 50% degraded from best L/D.

I then take a picture of the map with the circle overlays and print it out on photo paper. Actually, I make two printouts, one that covers the immediate vicinity of the airfield about 25-35 miles out and is easier to read (Fig 2), and one that covers a somewhat larger area and also shows when I get within glide range of various nearby airfields (Fig 1). I put these two sheets back to back into a plastic cover and take it with me into the glider. As long as I don’t leave the area shown on these print-outs I won’t even need to take my paper maps.

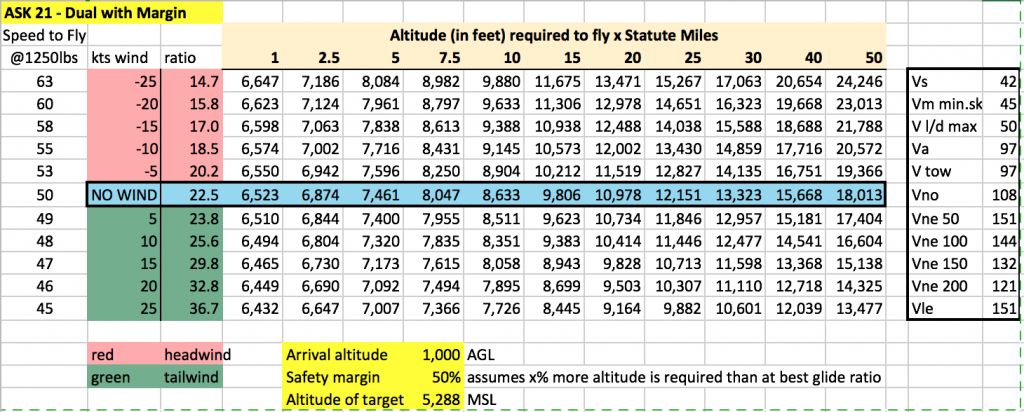
I also create a handy-dandy spreadsheet that shows how far I can glide from any given altitude in different wind conditions. I print the spreadsheet on laminated paper (in a size that fits within my logbook) so I can take it with me and always have it available as a handy reference (see Fig 3).
I’d like to hear about some of the steps you take to familiarize yourself when flying in a new area.

